Advertisement
Quick Links
Advertisement

Related Manuals for Tool Shed TSB10


Summary of Contents for Tool Shed TSB10
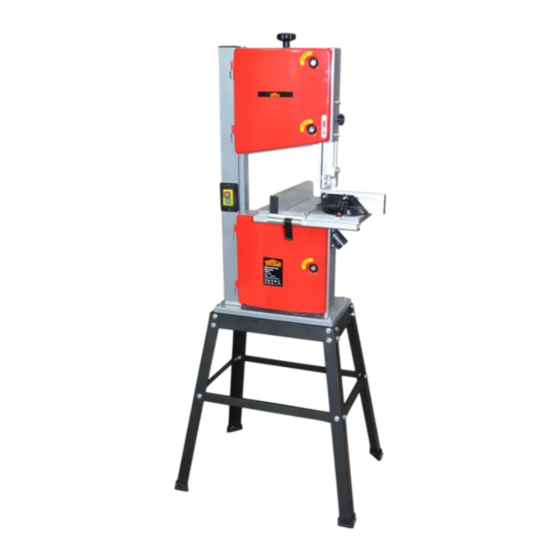
- Page 1 WOOD CUTTING BANDSAW 250MM TSB10 www.thetoolshed.co.nz...
- Page 2 PRODUCT DETAILS PRODUCT Wood Cutting Band Saw 250mm MODEL NO. TSB10 ISTRIBUTED BY NOTE: This manual is only for your reference. Due to the continuous improvement of the ToolShed products, changes may be made at any time without obligation or notice.
-
Page 3: Table Of Contents
OPERATION MANUAL C O N T E N T S: Specifications ............................4 Identification ............................5 Safety Instructions..........................6 Assembly ..............................9 Operation .............................. 12 Maintenance ............................14 Troubleshooting ........................... 16 www.thetoolshed.co.nz... -
Page 4: Specifications
OPERATION MANUAL SPECIFICATIONS Voltage 230v AC 50Hz Power 420W No-Load Idle Speed 1400rpm Blade Length 1783mm Blade Width 6-13mm Blade Speed 660/960 m/min Table Size 350mm x 330mm Sound Pressure (LpA) 77.4 dB(A) K:3dB Sound Power (LwA) 90.4dB(A) K:3dB Weight 35kg www.thetoolshed.co.nz... -
Page 5: Identification
OPERATION MANUAL IDENTIFICATION 1. ON/OFF Button 2. Rip Fence 3. Upper Pulley Wheel Cover 4. Blade Tension Knob 5. Upper Blade Wheel Cover Screw 6. Blade Guide Adjustment Knob 7. Upper Blade Guide Assembly 8. Mitre Gauge 9. Table 10. Dust Extraction Port (x2) 11. -
Page 6: Safety Instructions
OPERATION MANUAL IMPORTANT INFORMATION GENERAL SAFETY GUIDELINES WARNING READ ALL SAFETY WARNINGS AND ALL INSTRUCTIONS. Failure to follow instructions and warnings could lead to serious injury, electric shock, or fire. Save ALL warnings and instructions for future reference. WORK AREA SAFETY Ensure that your work area is kept well-lit and clean. - Page 7 OPERATION MANUAL Avoid body contact with grounded or earthed surfaces. Surfaces such as radiators, ranges, pipes, and refrigerators can increase risk of electric shock due to your body being earthed or grounded. MACHINERY USE AND CARE Use the correct machine for the job. Forcing a machine to do a job it was not designed for increases the risk of accident or injury.
- Page 8 OPERATION MANUAL ADDITIONAL SAFETY FOR WOOD CUTTING BANDSAW Never use damaged or deformed saw blades. Replace the table insert when it is worn or damaged. Do not clean the saw blade whilst it is in motion. Connect a dust extraction device to the band saw when sawing wood. Do not turn the saw on when one of the blade pulley wheel covers is open or if any of the blade guards are not in place.
-
Page 9: Assembly
OPERATION MANUAL ASSEMBLY Note: Make sure that the band saw is disconnected from the mains before assembly. FITTING THE TABLE AND RIP FENCE 1. Fit the table onto the trunnion (15) and secure it using the bolt and wing nut (17). 2. - Page 10 OPERATION MANUAL SETTING UP THE BLADE AND TENSION TRACKING 1. Open the upper and lower pulley wheel covers. 2. Adjust the blade tension using the tension knob (4). Turn the knob clockwise to increase the tension, anticlockwise to decrease the tension. 3.
- Page 11 OPERATION MANUAL SETTING UP THE BLADE GUIDES The blade guides minimize blade movement during sawing. 1. After the blade has been centered on the blade pulley wheels, make sure that the teeth of the blade do not line up with the guide pins (18).
-
Page 12: Operation
OPERATION MANUAL OPERATION START / STOP BUTTON This saw is fitted with a no-volt release switch which prevents the saw from automatically starting again following a power cut or if the mains plug is reconnected to the mains supply after the machine has been stopped by being unplugged with the ON/OFF switch set to ON. - Page 13 OPERATION MANUAL USING THE MITRE GAUGE 1. Make a practice cut with the gauge set to 0 degrees and then check the cut using a try square. 2. If adjustment is necessary, loosen the screw holding the pointer and move the pointer accordingly.
-
Page 14: Maintenance
OPERATION MANUAL CARE AND MAINTENANCE CHANGING THE SAW BLADE 1. Open the upper and lower blade pulley wheel covers. 2. Remove the screw from the end of the saw blade. 3. Turn the blade tension knob (4) anticlockwise until the blade comes loose. 4. - Page 15 OPERATION MANUAL 5. To replace the drive belt, the lower blade pulley wheel must be removed. Find the circlip that holds the blade pulley wheel onto the shaft and remove it using a pair of circlip pliers. 6. Pull the blade pulley wheel off the shaft. 7.
-
Page 16: Troubleshooting
OPERATION MANUAL TROUBLESHOOTING Problem Possible Cause Solution The machine does not start No power supply to the wall Check fuses and cables. when the on/off switch is socket. pushed. Faulty switch. One of the covers is open. Close the cover. The saw blade does not move The blade tension is loose.
Need help?
Do you have a question about the TSB10 and is the answer not in the manual?
Questions and answers