Table of Contents
Advertisement
Quick Links
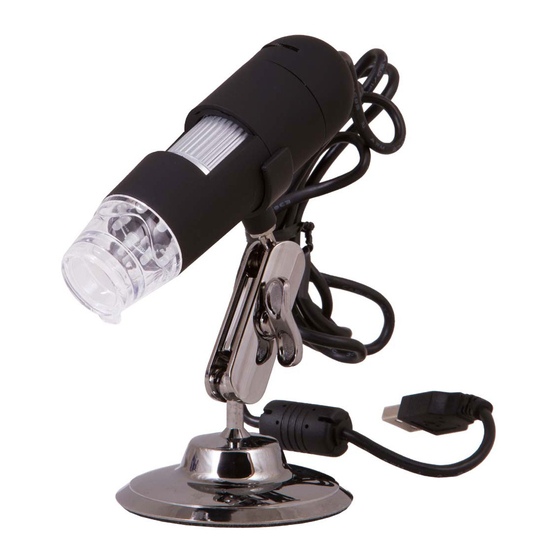
Levenhuk DTX 30, DTX 50
Digital microscope
User Guide
Never, under any circumstances, look directly at the Sun, another bright
source of light or at a laser through this device, as this may cause
PERMANENT RETINAL DAMAGE and may lead to BLINDNESS.
The kit includes
Microscope
Levenhuk DTX installation CD
User Guide
Calibration scale
Software installation
Make sure the microscope is connected to your PC before proceeding with
the setup.
Insert the installation CD into your CD drive. The Main Menu window will
be displayed. Click the install Microscope Driver to install the required
drivers and follow the instructions on screen.
After the drivers are installed, click the MicroCapture software to install the
software. Keep in mind that a system restart will be required during
installation.
The installation CD contains a copy of this User Guide, which you can read
by clicking the corresponding entry in the Main Menu.
Using the microscope
Remove the protective cap from the objective lens. Use the focus wheel to
focus your view. The shutter button allows you to capture images with
default settings (using MicroCapture software to create images is described
in the corresponding section of this User Guide). If you wish to adjust
brightness of the LED illumination, you can use the illumination brightness
adjustment ring at the top of the microscope body.
Advertisement
Table of Contents

Related Manuals for Levenhuk DTX 30


Summary of Contents for Levenhuk DTX 30
- Page 1 Levenhuk DTX 30, DTX 50 Digital microscope User Guide Never, under any circumstances, look directly at the Sun, another bright source of light or at a laser through this device, as this may cause PERMANENT RETINAL DAMAGE and may lead to BLINDNESS.
-
Page 2: Operating The Microscope
Operating the microscope Connect the microscope to your PC with a USB cable and run the MicroCapture application. A pop-up message will warn you if the microscope is not connected to the Image resolution From the Options menu, select Preview Size to set the required image resolution. -
Page 3: Images And Videos
Language From the Options menu, select Language to change the language of the user interface. Skins From the Options menu, select Skin to change the user interface appearance. Full screen mode There are three ways to enter full screen mode: Double-click an image in the main window;... -
Page 4: Working With Images
stop recording you can either click the corresponding icon on the toolbar again or select Stop capturing from the Capture menu. Note: videos are recorded in 640x480. Working with images Preview Left-click the thumbnail of the image you wish to edit and it will open in the main window of the application. -
Page 5: Exiting The Application
Exiting the application To exit the application, choose Exit from the File menu. Tip: You can also change preferences and settings by editing the Settings.ini file. This file may be found in the installation directory. Calibration and measurements Place a ruler on the stage, focus your view and capture an image. Take note of the current magnification by looking at the calibration scale on the microscope body. - Page 6 Press this button to choose the line style Press this button to undo the last action Note: 1. Magnification range of Levenhuk DTX 50 is 20x–400x and 20x–200x for Levenhuk DTX 30. Do not use magnification values that exceed this range.
- Page 7 2. The application calculates values based on the magnification you have entered. The results may not be precise. 3. Measurement functions are only available to MS Windows users. Working with the application for Mac OS users Installing software Browse to the mac folder on the installation CD and copy MicroCapture file to the desktop.
- Page 8 Recording a video Click the corresponding icon on the toolbar or select Video from the Capture menu to start recording a video. Note: during recording, the camcorder icon on the toolbar will turn red. Click the icon again to stop recording. A video thumbnail will appear on the right side of the main window.
-
Page 9: Care And Maintenance
Do not touch the optical surfaces with your fingers. To clean the device exterior, use only special cleaning wipes and special optics cleaning tools from Levenhuk. Abrasive particles, such as sand, should not be wiped off lenses, but instead blown off or brushed away with a soft brush. -
Page 10: Battery Safety Instructions
Specifications Image sensor 1.3 Mpx, interpolated to 2 Mpx (DTX 50) 2 Mpx, interpolated to 5 Mpx (DTX 30) Magnification 20x–400x (DTX 50), 20х–200х (DTX 30) Available image 1600x1200, 1280x1024, 1280x960, 1024x768, resolutions (DTX 50) -
Page 11: System Requirements
English, German, Spanish, Korean, French, Russian Microscope dimensions 125 mm х 33 mm (length x diameter) Levenhuk reserves the right to modify or discontinue any product without prior notice. System requirements Operating system: Windows 2000/XP/VISTA/7, Mac 10.6~10.8 CPU: at least P4 1.8 GHz... - Page 12 Levenhuk product. Any warranties which are implied and which cannot be disclaimed will be limited in duration to a term of six months for accessories from the date of retail purchase.
- Page 13 Levenhuk reserves the right to modify or discontinue any product without prior notice. NOTE: This warranty is valid to USA and Canadian customers who have purchased this product from an authorized Levenhuk dealer in the USA or Canada. Warranty outside the USA or Canada is valid only to customers who purchased from an authorized Levenhuk dealer in the specific country or international distributor.
Need help?
Do you have a question about the DTX 30 and is the answer not in the manual?
Questions and answers