Table of Contents

Related Manuals for Metrohm 790 Personal IC


Summary of Contents for Metrohm 790 Personal IC
- Page 1 CH-9101 Herisau/Switzerland Phone ++41 71 353 85 85 ++41 71 353 89 01 Internet www.metrohm.ch E-Mail info@metrohm.ch 790 Personal IC Program «790 PC Software 1.0» 790 Personal IC POWER 8.790.1003 Instructions for Use 14.08.2000 / dö...
-
Page 2: Table Of Contents
1.4.1 Electrical safety ..................12 1.4.2 General precautionary rules ..............12 2 Installation ......................Overview.........................13 2.1.1 Flow chart ....................13 2.1.2 Connections in the 790 Personal IC............13 Setting up the instrument..................15 2.2.1 Packaging .....................15 2.2.2 Check ....................15 2.2.3 Location....................15 Attaching the accessories...................15 2.3.1 Connection of detector block..............15... - Page 3 4.3.1 System window ..................74 4.3.2 System file handling................74 4.3.3 System functions................... 75 Start/stop hardware and record baseline ........75 Start/stop determinations.............. 75 Print system parameters ............... 76 4.3.4 PC icon....................77 4.3.5 Watch window..................77 790 Personal IC...
- Page 4 Open chromatogram..............125 Save chromatogram..............126 Close chromatogram ..............126 Delete chromatogram ..............126 Export chromatogram ..............127 4.5.3 Graphical representation..............128 Appearance.................128 Other graphical functions............132 4.5.4 Peak editor ..................133 Switching on/off the peak editor ..........133 Peak editor functions ..............133 Moving the cursor ...............134 790 Personal IC...
- Page 5 Merge chromatograms ............... 148 4.7.3 Batch reprocessing queue editor ............149 Open batch reprocessing queue editor window ......149 Batch reprocessing queue editor functions ....... 150 Print batch reprocessing queue ..........150 Close batch reprocessing queue editor ........150 790 Personal IC...
- Page 6 6.1.10 Safety specifications ................174 6.1.11 Electromagnetic compatibility (EMC)..........174 6.1.12 Ambient temperature................174 6.1.13 Housing ....................175 Standard equipment ...................176 Optional accessories ..................179 6.3.1 Accessories for 790 Personal IC............179 6.3.2 Separating columns and precolumns..........181 6.3.3 Additional devices and cables ............185 Warranty and conformity...................186 6.4.1 Warranty ....................186...
- Page 7 Table of contents List of figures Fig. 1: Front of the 790 Personal IC................3 Fig. 2: Rear of the 790 Personal IC ................4 Fig. 3: Interior of the 2.790.0010 Personal IC.............6 Fig. 4: Interior of the 2.790.0020 Personal IC.............8 Fig. 5: Connecting diagram for 2.790.0010 Personal IC without suppressor..14...
- Page 8 Pump head ........6,8,159 Coupling ......... 38,39 Connection capillary ......6,8 Pump tubing for H ....38,39 Connection capillary ......6,8 Pump tubing for H O ...... 38,39 Inlet capillary for Stopper ..........38 detector block......6,8,36,39 Coupling ......... 38,39 Detector block ......6,8,36,39 790 Personal IC...
- Page 9 Zircon piston........159 Ceramic holder ........161 Spring retainer ........159 Seal.............161 Spring ..........159 Screw nut..........165 Piston cartridge ........159 Connection piece .......165 Piston guide sleeve ......159 Suppressor rotor.........165 Sapphire supporting ring ....159 Suppressor holder ......165 Piston guide sleeve ......159 VIII 790 Personal IC...
-
Page 10: Introduction
• 2.790.0010 Personal IC without suppressor module • 2.790.0020 Personal IC with suppressor module The extremely compact housing of the 790 Personal IC contains every- thing needed to carry out ion chromatography at a high quality level: • Injection valve – for individual injections or for use with a sample changer such as the Metrohm 766 IC Sample Processor •... - Page 11 1 Introduction The operation of the 790 Personal IC takes place via a PC connected to the RS232 interface with the help of the control and evaluation pro- gram «790 Personal IC». This PC program can be used to open pre- pared systems for recording and evaluating chromatograms and change them if need be.
-
Page 12: Parts And Controls
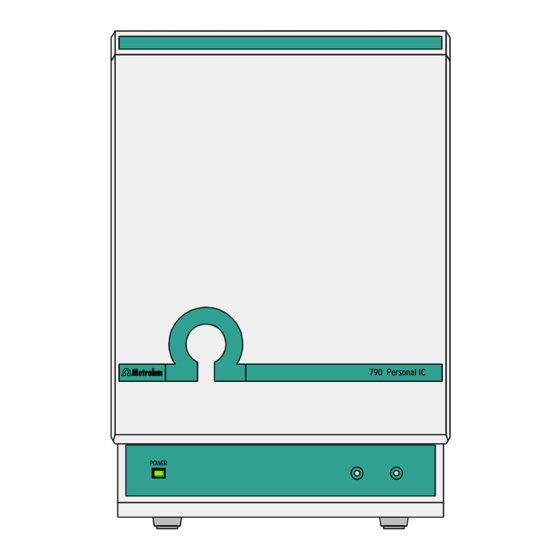
1.2 Parts and controls Parts and controls 790 Personal IC POWER Fig. 1: Front of the 790 Personal IC Door to interior Feedthrough for syringe tubing for connection of the 6.2816.020 syringe used for aspirating the sample Mains pilot lamp... -
Page 13: Fig. 2: Rear Of The 790 Personal Ic
= 50-60 Hz S = 100 VA Remote Fuse 100-120V: 1,0A(T) 220-240V: 0,5A(T) RS 232 Detector Block Made by Metrohm Herisau Switzerland Fig. 2: Rear of the 790 Personal IC 790 Personal IC... - Page 14 I/O lines for connection of a compartment sample changer (750, 766) Transport security screws Serial number to secure the pump head when the instrument is transported Mains switch to switch instrument on and off: I = ON 0 = OFF 790 Personal IC...
-
Page 15: Fig. 3: Interior Of The 2.790.0010 Personal Ic
1 Introduction POWER 28 27 Fig. 3: Interior of the 2.790.0010 Personal IC (with permanently attached accessories and 1.733.0110 Detector block) 790 Personal IC... - Page 16 PTFE tubing for connection of the in pump head, fixed mounting syringe, length L = 35 cm PEEK coupling (6.2744.040) Inlet capillary for detector block PEEK capillary, fixed mounting Connection capillary Detector block (1.732.0110) PEEK capillary, length L = 13 cm 790 Personal IC...
-
Page 17: Fig. 4: Interior Of The 2.790.0020 Personal Ic
1 Introduction POWER 28 27 45 44 Fig. 4: Interior of the 2.790.0020 Personal IC (with permanently attached accessories and 1.733.0110 Detector block) 790 Personal IC... - Page 18 Pump drive PEEK capillary, roller head with contact rollers length L = 13 cm Connection capillary Mounting pin PTFE capillary for connection of the for attaching the tubing cartridges 6.2816.020 syringe, length L = 70 cm Purge valve 790 Personal IC...
-
Page 19: Information On The Instructions For Use
Information on the Instructions for Use Please read through these Instructions for Use carefully before you put the 790 Personal IC into operation. The Instructions for Use contain information and warnings to which the user must pay attention in order to assure safe operation of the instrument. -
Page 20: Notation And Pictograms
Caution This symbol marks important information. First read the associ- ated directions before you con- tinue. Comment This symbol marks additional information and tips. 790 Personal IC... -
Page 21: Safety Notes
Safety notes 1.4.1 Electrical safety While electrical safety in the handling of the 790 Personal IC is assured in the context of the specifications IEC 1010-1 (protection class 1, de- gree of protection IP20), the following points should be noted: •... -
Page 22: Installation
2.10 sect. 2.10 2.1.2 Connections in the 790 Personal IC The two following illustrations show the internal connections in the 790 Personal IC in schematic form. The meanings of the various numbered components are given in the detailed illustrations and descriptions in sections 2.2 –... -
Page 23: Fig. 5: Connecting Diagram For 2.790.0010 Personal Ic Without Suppressor
Eluent Sample Fig. 5: Connecting diagram for 2.790.0010 Personal IC without suppressor 76 26 26 37 21 22 Detector Column 28 27 6.1834.010 6.2821.090 Waste Eluent Sample Fig. 6: Connecting diagram for 2.790.0020 Personal IC with suppressor 790 Personal IC... -
Page 24: Setting Up The Instrument
2.3.1 Connection of detector block The metal-free 1.732.0110 Detector block belongs to the scope of delivery of the 790 Personal IC; it must be inserted in the instrument and connected up. Proceed as follows: Note the cell constant • The cell constant c = XX,X /cm is printed on the rear of the detector block. -
Page 25: Connection Of Syringe And Aspirating Tubing
7 7 7 7 of the rear panel 9 9 9 9 . • Replace rear panel 9 9 9 9 and screw to the 790 Personal IC using the four knurled screws 8 8 8 8 . -
Page 26: Connection Of Peek Capillaries
(to avoid dead volume). Tighten compression fitting Tighten compression fitting 46 46 or 47 47 by hand (never use tools). Compression fitting (6.2744.010) Compression fitting (6.2744.070) Capillary Fig. 7: Connectors for capillaries 6.1831.010 PEEK capillary or 6.1822.010 PTFE microcapillary 790 Personal IC... -
Page 27: Filter Unit Peek
Connector with filter (6.2821.110) Part of 6.2821.100 Filter unit Compression fitting (6.2744.010) Housing for filter unit Part of 6.2821.100 Filter unit Capillary Connector without filter 6.1831.010 PEEK capillary or Part of 6.2821.100 Filter unit 6.1822.010 PTFE microcapillary 790 Personal IC... -
Page 28: Mains Connection
2.4.1 Setting the mains voltage Before switching on the 790 Personal IC for the first time, check that the mains voltage set on the instrument (see Fig. 9) matches the local mains voltage. If this is not the case, you must reset the mains voltage... -
Page 29: Fuses
IC (see Fig. 9). 2.4.4 On/off switching of the instrument The 790 Personal IC is switched on and off using mains switch 11 When the instrument is switched on, the mains pilot lamp 2 2 2 2 lights up. 790 Personal IC... -
Page 30: Connection To The Pc
Connection to the PC 2.5.1 Connecting cable Always switch off 790 Personal IC and PC before you connect the two instruments with the 6.2134.100 Cable. Connect the RS232 interface 14 14 at the 790 Personal IC to one of the se- rial COM ports at the PC using the 6.2134.100 Cable (9 pin/9 pin). -
Page 31: Basic Settings
2.5.3 Basic settings When the program is started for the first time several basic settings must be made for the 790 Personal IC. Proceed as follows: Start program • Double-click the software icon to start the program. The program window with the opening picture is opened and the Log In window appears on the screen: •... - Page 32 COM1 menu item to open a window listing all available COM Change ports at the PC. • Select the desired COM port to which the 790 Personal IC has been connected and click on . The window is <OK> closed.
- Page 33 Hardware Hardware settings • In the field enter the cell constant which is Cell constant printed on the 1.732.0110 Detector block (see section 2.3.1). • Click on to close the window and save the settings. <OK> 790 Personal IC...
-
Page 34: High-Pressure Pump
6.2620.150 Pulsation dampener MF is recommended. It has to be installed between the high-pressure pump and the injection valve of the 790 Personal IC as follows (see Fig. 10): Install pulsation dampener • Position the pulsation dampener 52 52 in the interior of the 790 Personal IC on the base. -
Page 35: Fig. 10: Connection Of The Pulsation Dampener (Option)
L = 24 cm Injection valve Pulsation dampener (6.2620.150) Connection capillary Connection to injection valve PEEK capillary, length L = 13 cm Filter unit PEEK (6.2821.100) Connection to purge valve Connection capillary PEEK capillary, length L = 13 cm 790 Personal IC... -
Page 36: Connecting The Eluent Bottle
= 2.5 m) into one of the openings 5 5 5 5 or 7 7 7 7 in the interior of the 790 Personal IC. Pull the aspirating tubing sufficiently far into the interior of the 790 Personal IC and push at least 5 mm of it onto aspirating capil- lary 32 32 (see Fig. - Page 37 2 Installation Set flow rate to 2 mL/min • Double-click the 790 icon in the system window to open the window for manual control of the 790 Personal IC (see be- low). • Set the flow rate to in the field.
- Page 38 <Off> IC pump pressure pump. Reduce flow rate • Reset the original flow rate under (e.g. Flow 0.5 mL/min • Click to send this value to the 790 Personal IC. <Send to unit> 790 Personal IC...
-
Page 39: Precolumns And Separating Columns
The use of easily exchangeable precolumns protects the separating columns and prolongs their lifetime. The precolumns available from Metrohm (see section 6.3.2) are either real precolumns or precolumn cartridges, which are used together with the 6.2821.040 Cartridge head or the 6.2828.010 Precolumn cartridge holder. -
Page 40: Fig. 11: Installation Of Precolumn Cartridges With Cartridge Head
• Screw column connection capillary 20 20 to Manufit housing 55 The precolumn cartridge built into the cartridge head can only be rinsed together with the separating column (see section 2.7.7/8). This increases the rinsing time by approx. 20 min. 790 Personal IC... -
Page 41: Precolumn Glass Cartridges With Cartridge Holder
• If necessary, modify to the value suited for the Flow rate inserted separating column and click on <Send to unit> send this value to the 790 Personal IC. • Switch on high-pressure pump ( ) by clicking IC pump <On>... -
Page 42: Ic Anion Precolumn Supersep
• If necessary, modify to the value suited for the Flow rate inserted separating column and click on <Send to unit> send this value to the 790 Personal IC. • Switch on high-pressure pump ( ) by clicking IC pump <On>... -
Page 43: General Information On Separating Columns
(check manufacturer's specifications). The IC separating columns and precolumns currently available from Metrohm are listed in section 6.3.2. A test chromatogram and an infor- mation leaflet is provided with each column. You will find additional in- formation concerning these columns in the 8.732.2003 Metrohm Mono- graph «Ion chromatography»... -
Page 44: Installation Of The Separating Column Without Suppressor
• If necessary, modify to the value suited for the Flow rate inserted separating column and click on <Send to unit> send this value to the 790 Personal IC. • Switch on high-pressure pump ( ) by clicking IC pump <On>... -
Page 45: Installation Of The Separating Column With Suppressor
• If necessary, modify to the value suited for the Flow rate inserted separating column and click on <Send to unit> send this value to the 790 Personal IC. • Switch on high-pressure pump ( ) by clicking IC pump <On>... -
Page 46: Suppressor Module
2.8.2 Preparation of the peristaltic pump Before start-up the accessories for the 2-channel peristaltic pump built into the 790 Personal IC must be mounted according to Fig. 14. Pro- ceed as follows: Attach pump tubings • Loosen both tubing cartridges 40... -
Page 47: Fig. 14: Installing Pump Tubings
Pump tubing (6.1826.060) for H Contact pressure lever Pump tubing (6.1826.060) for H Snap-action lever Stopper (white-yellow) PEEK compression fitting Coupling (6.2744.110) (6.2744.010) Aspirating tubing for H Suppressor inlet capillary for H Aspirating tubing for H Suppressor inlet capillary for H 790 Personal IC... -
Page 48: Fig. 15: Installation Of Column With Suppressor
Aspirating tubing for H 6.1803.020 PTFE tubing Filter unit PEEK (6.2821.100) Coupling (6.2744.030) Inlet capillary to detector block Pump tubing (6.1826.060) for H (fixed mounting) Detector block (1.733.0110) Pump tubing (6.1826.060) for H Suppressor module Coupling (6.2744.110) 790 Personal IC... -
Page 49: Connection Of Supply Bottles
• Insert the free end of aspirating tubing 72 72 into one of the openings 5 5 5 5 of the 790 Personal IC (see Fig. 2) and pull it suf- ficiently far into the interior. • Mount a coupling 73 73 (6.2744.030) to the inlet end of the rear... -
Page 50: Connection Of The Suppressor Module
• Insert the free end of aspirating tubing 71 71 into one of the openings 5 5 5 5 of the 790 Personal IC (see Fig. 2) and pull it suf- ficiently far into the interior. • Mount a coupling 73 73 (6.2744.030) to the inlet end of the front... -
Page 51: Fig. 16: Connections At Suppressor Module
82 marked with "Waste" of the suppressor module 39 39 from below through one of the openings 6 6 6 6 out of the inner compartment of the 790 Personal IC. • Lead outlet capillary 82 82 to a sufficiently large waste container and fix it in place. -
Page 52: Putting Into Operation
Proceed as fol- lows: Open system • Start the «790 Personal IC» PC program, if it has not already been started (see section 2.5.3). • Select in the main window. Select the sys-... -
Page 53: Putting Into Operation With Suppressor (Anion System)
At the same time, the suppressor module must be conditioned. Proceed as follows: Open system "Prep MSM.smt" • Start the «790 Personal IC» PC program, if it has not already been started (see section 2.5.3). • Select in the main window. - Page 54 This is why the tubing cartridges should be raised completely by loosening snap-action lever on the right-hand side if the pump is to remain switched off for a considerable length of time (the set contact pressure remains unchanged). 790 Personal IC...
-
Page 55: Connection Of External Devices
22 of the 790 Personal IC. • Pull the free end of transfer tubing 8 8 8 8 through the feedthrough 4 4 4 4 on the 790 Personal IC and screw it onto connection "1" of injection valve 22 22 using a 6.2744.010 PEEK compression fit-... -
Page 56: Connection Of The 766 Ic Sample Processor
790 Per- sonal IC. Sample changing and filling the sample loop are started by a remote signal produced by the 790 Personal IC (790 Personal IC as "Master"). - Page 57 • Pull the free end of PEEK capillary tubing 18 18 through the feedthrough 4 4 4 4 of the 790 Personal IC and screw it onto con- nection "1" of injection valve 22 22 with the help of a 6.2744.010 PEEK compression fitting.
- Page 58 2.10 Connection of external devices Run conditions In order that the joint operation of 790 – 766 functions properly the program must be started first on the 766 IC Sample Proces- sor, then the "Sample Queue" on 790 Personal IC. 790 Personal IC...
- Page 59 2 Installation 790 Personal IC...
-
Page 60: Operating Tutorial
3.1 Requirements Operating tutorial This section introduces you to the operation of the 790 Personal IC by means of a brief operating tutorial which describes the basic operat- ing steps needed for the recording of an ion chromatogram using one of the system files supplied. -
Page 61: Preparations
2. In what follows, the most important points for the installation are described once again (for details, see the sections mentioned). Install 790 Personal IC ⇒ Setting up instrument section 2.2 ⇒ Installing and connecting detector block section 2.3.1... -
Page 62: Calibration
In the description of the calibration procedure, it is assumed that the PC and 790 Personal IC are not in operation and that the system must first be conditioned again. If this is not the case (e.g. if you start the tutorial immediately after conditioning) then you can skip steps 1 to 5. - Page 63 In the present example the integration only starts after a delay period Delay = 2.2 min ⇒ Select the desired sensitivity using the cursor keys < > or < >. In the chromatogram window the following display is seen, for example: 790 Personal IC...
- Page 64 File / Open / Chromatogram dow. Select the chromatogram file just recorded and *.chw click on . The chromatogram window is opened where <OK> the found peaks are numbered and the baselines are drawn 790 Personal IC...
- Page 65 <Apply> Integration parameters and the chromatogram is reintegrated. ⇒ Repeat this procedure for all other integration parameters until the result satisfies your expectations. Click on <Apply> each parameter change. ⇒ Close the window with Integration parameters <OK> 790 Personal IC...
- Page 66 > to the middle of the peak and reading off the corresponding retention time in the status line. Enter this value (rounded off if necessary) into column. The optimized table could, for example, Time then appear as follows: 790 Personal IC...
- Page 67 3 Operating tutorial 15 Start calibration ⇒ Click the button in the component window. <Concentrations> ⇒ Click on . The following window appears: <Calibrate> ⇒ Confirm with Level 1 <OK> ⇒ Click on in the window. <OK> Concentrations 790 Personal IC...
- Page 68 Changes in *.chw. Modified: Calibration. Save changes? ⇒ Click on . A window appears with the message <Yes> *.chw already exists. Overwrite? ⇒ Click on . A window appears with the message <Yes> Method Cation1.mtw was modified. Save changes? ⇒ Click on <Yes> 790 Personal IC...
-
Page 69: Sample Determination
Fill sample loop ⇒ Immerse the aspirating tubing 23 23 in the vessel containing the drinking water sample. ⇒ Using the syringe fixed to the syringe tubing 25 25, siphon in ca. 1 mL drinking water. 790 Personal IC... - Page 70 File / Open / Chromatogram dow. Select the chromatogram file just recorded and *.chw click on . The chromatogram window is opened where <OK> the found peaks are numbered and the baselines are drawn 790 Personal IC...
- Page 71 Print File window. The standard printing window is opened where printer, printing range and number of copies can be selected. After confirmation with the results including the chroma- <OK> togram are printed out. 790 Personal IC...
-
Page 72: Operation
Operation This section describes the most important points concerning the operation of the 790 Personal IC. For further details, please refer to the on-line help in the PC program, which can provide you with the required information rapidly and conveniently from any place in the program. -
Page 73: Glossary
The calibration method that is mainly used in ion chromatography is the external standard calibration (absolute calibration); calibrations with an internal standard (relative calibration) or tabulated calibrations are also possible. 790 Personal IC... -
Page 74: Overview Of Program Windows
4.1.3 Overview of program windows The «790 Personal IC» program consists of different windows whose functionality is linked together. The different windows are: Main program window for file administration, 790 PERSONAL IC... -
Page 75: Main Window Elements
4 Operation 4.1.4 Main window elements The elements of the main window are the menu bar, 790 PERSONAL IC the tool bar and the status bar, indicating prompts and logged-in user. Menu bar Toolbar Status bar Prompts, information Logged-in user 4.1.5... -
Page 76: Overview Of File Types
View whole chromatogram Help Lock system Opened system 4.1.6 Overview of file types The following file types are produced by the «790 Personal IC» soft- ware: Batch reprocessing file *.bar This binary file contains data of the batch reprocessing queue. The file is stored automatically in the *.bar... -
Page 77: Context Sensitive Menus
[ Shift ] + [ down ] Reduces a distance between channels of a chromatogram. [ 0 (Zero) ] Adjusts a zero on the last point of a chroma- togram (running chromatogram) or its lowest level (finished run). 790 Personal IC... -
Page 78: Help
Green texts can be clicked to jump to a different Help topic. Violet texts identify the dialog item, parameter or button in the corresponding window. Blue texts identify titles and important information. 790 Personal IC... -
Page 79: Instrument And Software Settings
Save fonts configuration 4.2.2 Security system The «790 Personal IC» program has a security system based on the list of users. Every user has his unique password and one of the following access levels: Restricted access to program functions. Allows... -
Page 80: Global Settings
790 PERSONAL IC / Options / Lock system 4.2.3 Global settings 790 PERSONAL IC / Options / Global preferences This window is used for global program settings. This window is only accessible for users with Administrator access level. - Page 81 Chromatogram units Unit for flow rate: Flow µ µ µ µ L/min mL/min Unit for pressure: Pressure Switch on/off printing via print spooler. Switch Print via print spooler off this option if you use a GDI printer. 790 Personal IC...
-
Page 82: Com Port
Default colors for chromatographic windows <Default colors> (details see section 4.5.3). 4.2.4 COM port 790 PERSONAL IC / Options / 790 Personal IC:COM1 This menu item opens the window for COM port (serial RS232 in- Links terface) selection and settings. -
Page 83: Systems
790 PERSONAL IC / File / Open / System and the selection of the desired system file. It contains icons for PC, Watch window (screen) and 790 Personal IC, and two buttons to start and stop a determination. Start/Stop buttons... -
Page 84: System Functions
4.3.3 System functions Start/stop hardware and record baseline SYSTEM / Control / Startup hardware (Measure Baseline) Starting the hardware at the 790 Personal IC includes sending of Sys- , starting of the high-pressure pump and (if present) tem startup values starting of the peristaltic pump. -
Page 85: Print System Parameters
The system report includes the name of the method linked to the system, the con- figuration settings for the 790 Personal IC, the system startup values and the time program (incl. -
Page 86: Pc Icon
Open WATCH WINDOW tivity and pressure: The colors of the watch window fields can be changed by clicking the fields with the right mouse button and selecting the menu item Choose color / ... 790 Personal IC... -
Page 87: Instrument Icon
Injection valve in Injection valve in "INJECT" position "FILL" position The instrument icon for the 790 Personal IC is one of the components of the window. If the system is connected, the 790 icon con- SYSTEM tains two buttons for manual control of the injection valve: Switch injection valve to "INJECT"... -
Page 88: Instrument Control For Connected System
For a connected system, the tab is displayed. It allows manual Control control of the 790 Personal IC functions and setting of startup values to be sent to the instrument. This tab shows the current measurement val- ues for conductivity and pressure. -
Page 89: Time Program
Stop peristaltic pump. <Off> The system startup values are sent and applied System startup values to the 790 Personal IC each time the system is connected, a determination is started, or the values are sent manually with <Send to unit>... - Page 90 Additional steps after this flag are not allowed. The flag RESET is used to reset the parameters to the system startup values. 790 Personal IC...
-
Page 91: Configuration
Switch on or off the peristaltic pump. Configuration tab in the system settings window contains configura- Configuration tion settings for the 790 Personal IC. Selection of instrument version: 790 unit version 790 Personal IC without suppressor 790.0010 790 Personal IC with suppressor 790.0020... - Page 92 Alarm stops for which the 790 Personal IC is stopped immediately. At an alarm stop, high-pressure pump and peristaltic pump are stopped immediately; the running determination and the active sample queue are also stopped.
-
Page 93: System State Window
SYSTEM STATE opened. It shows status and error messages for this system. Messages concerning the 790 Personal IC hardware are followed by [790 Personal , messages concerning the loaded system are [790 Personal IC 2] followed by (name of subfolder containing the system file). -
Page 94: Error Messages
The sample queue is processed using the Executing *.smt [*.que] *.que system file *.smt 790 Personal IC hardware is shutdown. SHUTDOWN Error messages Bad connection between PC and 790 Personal Detection of hard- IC or instrument switched off (check connecting ware failed cable or switch on instrument). -
Page 95: Methods
) at the end of the name indicates that the method has been changed since the last saving. 790 PERSONAL IC / File / Save / Method Save the method of the current chromatogram in a method file ( *.mtw in the directory. -
Page 96: General
Name of the detector (read-only). Detector Number of the current run starting from the very first one. All runs are automatically numbered by the system. 790 Personal IC... -
Page 97: Sample
Amount Concentration of the internal standard compo- Internal standard amount nent for relative concentration calculations. Date and time of sample collection (the default Date/time when... values are equal to the date and time when the chromatogram starts). 790 Personal IC... -
Page 98: Column
. It is calculated by the system in accor- ear flow dance with the settings defined on Method setup / Math Precolumn Internal diameter of the precolumn in mm. Length of the precolumn in mm (set length to 0 Length if no precolumn is used). 790 Personal IC... -
Page 99: Eluent
Comment of passport for entry of free-text user comments into the Comment chromatogram description. Use this feature to enter any additional in- formation about the chromatogram not included in other sections of the method. 790 Personal IC... -
Page 100: Method Log
New comment logged-in user are automatically added. Clear all GLP messages and add a new GLP <Clear> comment. Text can be entered in the New com- window, date/time and logged-in user are ment automatically added. 790 Personal IC... -
Page 101: Data Log
All this entries are stamped automatically with date and time of the entry and cannot be cleared. Add a new GLP comment. Text can be entered <Add new> in the window, date/time and New comment logged-in user are automatically added. 790 Personal IC... -
Page 102: Method Setup
4.4 Methods 4.4.3 Method setup 790 PERSONAL IC / Method / Method setup This menu item opens the window that includes the most Method setup common parameters for data acquisition and evaluation of the method and consists of the following tabs: General information on determination. -
Page 103: Math
Asymmetry is set. Formula set Custom formulae Selection of calculation formula for the calcu- Formula lation parameter selected for . With Parameter the following settings are rameter = Formula set possible: Formula setting by customer. Custom formulae 790 Personal IC... - Page 104 The index scale is constructed on the basis of Internal the current chromatogram. All components used for index scale calibration should be pre- sent in the current sample. The index scale is constructed based on an- External other standard chromatogram. 790 Personal IC...
-
Page 105: Integration
Setup Integration events. Events The «790 Personal IC» software includes a built-in automatic integration algorithm to detect peaks on the chromatographic curve and to evalu- ate them using calculated baselines. The integration procedure is tuned by the integration parameters on the... -
Page 106: Setup
(which is estimated using a special algorithm) and the result is compared with the threshold Slope value. Reasonable range of parameter is Slope 0.5...25. Entry range: 0.1… … … … 400 790 Personal IC... -
Page 107: Events
Edit the selected event. <Modify> Delete the selected event. <Delete> Accept integration parameters and perform re- <Apply> integration. If an integration event is added or modified, the Edit integration event window is opened where the following parameters can be set: 790 Personal IC... - Page 108 Enable valley-to-valley Disable valley-to-valley Disable perpendicular drop peak separation. All Enable valley-to-valley peaks are considered to be baseline-separa- ted. The bottom of the valley becomes the baseline point. Enable perpendicular drop peak separation Disable valley-to-valley (default setting). 790 Personal IC...
-
Page 109: Calibration And Quantification
(standards). For each calibrated component a calibration curve is constructed as a result. With the 790 Personal IC three different procedures can be used for the construction of the calibration curve. By far the most important method for ion chromatography is the external standard calibration (abso- lute calibration) that is described in detail in this section. -
Page 110: Notations
Q vs. response R) and outputs the calibration function W(R) used for prediction of the component quantity Q = W(R Subscript values used: Stands for j-th calibration level run. Stands for standard component. Stands for component number. 790 Personal IC... -
Page 111: External Standard Calibration
V': ) / V' Component table 790 PERSONAL IC / Method / Calibration / Components If the component table is opened, the chromatogram window is split into two parts. The upper one shows the chromatogram, the compo- nent table appears in the bottom part of the screen. When moving into the component table, a special cursor in the upper part of the window jumps to the peak corresponding to the current component. - Page 112 Minimum (Maximum) concentration value for min C (max C) the component. Components whose concentra- tion leaves the range are marked in min C… … … … max C the peak table by the sign " ". 790 Personal IC...
-
Page 113: Peak Identification
Reject all changes and close the <Cancel> Component ta- The standard methods supplied with the «790 Personal IC» program all contain a component table with pre-defined components with entries for the names and retention times. If the output of all peaks is required in the result report then a so- called universal component can be defined in the component table for this purpose;... - Page 114 Information on the component with the worst Worst case... (largest) deviation of actual and expected retention time. Deviation is given as a part of component’s identification window. Average relative deviation Relative deviation averaged for all components. 790 Personal IC...
-
Page 115: Concentration Table
4 Operation Concentration table 790 PERSONAL IC / Method / Calibration / Concentrations Selecting this menu item or clicking on in the compo- <Concentrations> nent table opens the window with the concentration table Concentrations containing concentrations of all components for all... - Page 116 Delete the current calibration level (where cur- <Delete> sor is situated) from the concentration table. Calibrate the current chromatogram with the <Calibrate> selected calibration level. The following window appears: Calibration level to be used for recalibration. Level 790 Personal IC...
-
Page 117: Calibration Curve
4 Operation Calibration curve 790 PERSONAL IC / Method / Calibration / Graphs Selecting this menu item or clicking on in the component ta- <Graphs> ble opens the window. Component In this window the results of the calibration are shown for each compo- nent together with the calibration curve. - Page 118 Tabulated calibration plified method of external standard calibration. If this checkbox is marked then the correspond- Local ing parameter is valid for the current compo- nent only. Otherwise, this parameter is global (i.e. default for all other components). 790 Personal IC...
-
Page 119: Update Calibration
Internal standard calibration Tabu- method (details see on-line lated calibration help). Update calibration 790 PERSONAL IC / Method / Calibration / Update Selection of this menu item opens the window. Update Replace the expected retention times of the Retention time components with the retention times of the cor- responding peaks obtained in the current run. -
Page 120: Load And Save Calibration Data
This run Load and save calibration data 790 PERSONAL IC / Method / Calibration / Load from method Load the calibration from the method. This option is used to update the calibration for the current run by the one taken from the method used for acquisition. -
Page 121: Report Output
4 Operation 4.4.6 Report output Report options 790 PERSONAL IC / Method / Report options 790 PERSONAL IC / Process / Make report window is divided into several regions that combine Report options parameters for report output on their functionality and includes several different areas. - Page 122 PEAK TABLE Quantification method: Custom Retention Height Area Conc. Name uS/cm uS/cm*sec 4.15 0.06 0.688 0.057 fluoride 5.13 5.10 70.561 9.092 chloride 7.84 1.53 37.506 8.743 nitrate 13.59 1.09 38.682 6.584 sulfate _____________________________________________ 16.01 7.77 147.437 24.477 790 Personal IC...
- Page 123 Method Log Data Log METHOD GLP LOG 13/04/2000 08:32:49 W. Terzer 04/05/2000 10:45:23 790 Personal IC 1.0 Apr 27 2000 14:05:01 DATA GLP LOG Analysing data of channel :Cond Time constant, ms: 100.00 Sigma: 0.0 Rejection difference: 1.0...
- Page 124 K1 = 2.73542 K0 = 0 Base: Area Ref.channel: Cond ISTD: Formula: Y=K2·X^2+K1·X Weight: Level Height Area Conc. Vol/Dil Retention Used File 0.6004 7.311 5.013 Yes k4101634.chw 3.092 37.74 5.013 Yes k4101653.chw 14.64 169.9 5.013 Yes k4101712.chw 790 Personal IC...
- Page 125 Coef µS/cm). Estimated baseline noise value of the channel Noise in ADC conversion units (bits). Not used for 790 Personal IC. Shift Report destination The following output devices can be selected simultaneously in any combination as targets for report output: Output report (without curves) to screen.
- Page 126 Relative concentration This quantification method uses the internal standard method to calculate the relative con- centrations of the components. For this proce- dure, a must be selected Standard component 790 Personal IC...
- Page 127 Determines the order of the components in the Printing order peak table. Lists run results for all peaks detected. Uniden- By peaks tified peaks (corresponding to the universal component) are included, but missing compo- nents are not listed. 790 Personal IC...
- Page 128 ANSI or ASCII format. So add an extension like to the file name. If the *.txt chromatogram plot checkbox is checked, the plot is saved in a separate file in the WMF *.wmf format under the same name. 790 Personal IC...
- Page 129 ) to the void time of the system t (t - t = (t ) / t Total for this column is equal to the capacity factor of the last peak of the chromatogram. 790 Personal IC...
- Page 130 Peak asymmetry A is calculated at of the asymmetry peak height as a ratio of width after the top of the peak w to the width before the top w Coefficient k of the calibration curve. response factor 790 Personal IC...
- Page 131 The types of components are designated by a type one-letter code: Reference component (used for peak identifica- tion). Standard component. Calibration standard in the case it is different from the quantification standard. 790 Personal IC...
- Page 132 (horse) in this case. The complete component type may look like: BBD : !R Number of the group for the component. group Not used for 790 Personal IC. spectral ratio Name of the component. name File name of chromatogram. This column is file name very useful for processing of exported data.
-
Page 133: Chromatograms
A chromatogram can be scaled with the help of keyboard or mouse functions or through the window opened with Chromatogram axes . Some of the win- PERSONAL IC / View / Appearance / Chromatogram axes dow control functions are collected in the menu. Window 790 Personal IC... -
Page 134: Chromatogram File Handling
4.5 Chromatograms 4.5.2 Chromatogram file handling Open chromatogram 790 PERSONAL IC / File / Open / Chromatogram Load an existing chromatogram file ( ) from the directory and *.chw Data open the chromatogram window. The following window appears: Filename (common wildcards as Filename possible). -
Page 135: Save Chromatogram
Delete selected chromatograms and move <Delete> them to the Windows wastebasket. Save chromatogram 790 PERSONAL IC / File / Save / Chromatogram Save the selected chromatogram in a chromatogram file ( ) in the *.chw working directory. If this chromatogram has been already stored in this directory, the message appears. -
Page 136: Export Chromatogram
Export the selected chromatogram in the AIA format (Analytical Instru- ment Association) as CDF file ( *.cdf 790 PERSONAL IC / File / Export / Raw data to txt Export chromatographic raw data into an ASCII text file ( ). The fol- *.txt... -
Page 137: Graphical Representation
4 Operation 4.5.3 Graphical representation Appearance 790 PERSONAL IC / View / Appearance This menu item opens the window. It determines the ap- Appearance pearance of the chromatogram and consists of four tabs: Scaling of chromatogram axes. Chromatogram axes Settings for peak labels and baseline Labels drawing. - Page 138 Labels Appearance and baseline drawing. Peak labels No peak labels. None Peak number. Peak number Retention time. Retention time Name of the component. Component name Component name + Quantity Name and quantity of the component. 790 Personal IC...
- Page 139 If is selected, total all chromatograms are added and the resulting addition curve is shown. Select all chromatograms in the selection win- <Show all> dow. Deselect all chromatograms in the selection <Hide all> window. 790 Personal IC...
- Page 140 Set colors in the selected chromatogram win- <Load defaults> dow to the set defaults colors. Save color settings in the selected chroma- <Save defaults> togram window as default colors. 790 Personal IC...
-
Page 141: Other Graphical Functions
4 Operation Other graphical functions 790 PERSONAL IC / View / X full scale By selecting this menu item or pressing [ Ctrl ] + [ Home ] the X axis is scaled so that the chromatogram perfectly fits the window horizontally. -
Page 142: Peak Editor
[ Delete ] 790 PERSONAL IC / Peak / Delete peak Delete selected peak. 790 PERSONAL IC / Peak / Select nearest point Move the cursor to the nearest start, top, end, or valley point and select the peak. 790 PERSONAL IC / Peak / Select start point Move the cursor to the beginning of the nearest peak and select the peak. -
Page 143: Moving The Cursor
4 Operation 790 PERSONAL IC / Peak / Select end point Move the cursor to the end of the nearest peak and select the peak. 790 PERSONAL IC / Peak / Select valley point Move the cursor to the valley of the two nearest peaks. -
Page 144: Printing
4.5 Chromatograms 4.5.5 Printing Page layout for printing 790 PERSONAL IC / File / Page layout The selection of this menu item or clicking on in the <Page...> Report op- window opens the window for page layout parameters. tions Page layout Selection of length units. -
Page 145: Printer Settings
4 Operation Printer settings 790 PERSONAL IC / File / Printer setup By selecting this menu item the window is opened where PRINT SETUP printer, paper size and format can be defined. Print preview 790 PERSONAL IC / File / Preview... -
Page 146: Subtraction Of A Chromatogram
4.5 Chromatograms Subtraction of a chromatogram 790 PERSONAL IC / Process / More / Subtract This menu item opens the window allowing the Subtract chromatogram subtraction of any opened chromatogram from the active, selected chromatogram. Select the chromatogram that should be subtracted, click on <Subtract>... -
Page 147: Sample Queue
Save a copy of the current sample queue into a new sample queue file ) in the working directory. *.que Delete sample queue SAMPLE QUEUE OVERVIEW / File / Delete Close the sample queue overview window and delete the sample queue file ( *.que 790 Personal IC... -
Page 148: Sample Queue Control
Indication whether the sample has been started Started or not: sample not started sample started number of injections done 2… … … … n 790 Personal IC... -
Page 149: Start Sample Queue
Started row. If processing the sample queue is interrupted with then it can <Pause> be continued again with (with a running chromatogram only <Start> when data acquisition is finished). 790 Personal IC... -
Page 150: Pause Sample Queue
This function is only available if the sample queue has been interrupted by pressing the button. <Pause> 4.6.3 Sample queue editor Open queue editor window SAMPLE QUEUE OVERVIEW / Control / Edit This menu item opens the window for editing the sample Queue editor queue table. 790 Personal IC... - Page 151 Indication whether the sample determination Done has been done or not: determination not yet done determination or injection done 1… … … … n First sample description. Sample Info 1 Second sample description. Sample Info 2 790 Personal IC...
-
Page 152: Sample Queue Editor Functions
Save the modified sample queue table and close the sample queue editor window. QUEUE EDITOR / File / Exit Close the sample queue editor window. An inquiry appears asking whether or not the sample queue should be saved. 790 Personal IC... -
Page 153: Batch Reprocessing
*.bar Data 4.7.1 Batch reprocessing queue file handling Open batch reprocessing queue 790 PERSONAL IC / File / Open / Batch reprocessing Load an existing batch reprocessing file ( ) from the directory *.bar Data and open the window. -
Page 154: Perform Batch Reprocessing
4.7 Batch reprocessing 4.7.2 Perform batch reprocessing Reprocess options window 790 PERSONAL IC / File / Open / Batch reprocessing 790 PERSONAL IC / File / Open / Last batch These two menu items are used to open the window, in... - Page 155 If this option is switched off, the calibra- tion curve stored in the first chromatogram re- mains active. Each further calibration chroma- togram in the batch reprocessing queue adds a new point to this calibration curve. 790 Personal IC...
- Page 156 <Edit report options> Open the window for modification Report options of the report settings. Start reprocessing. <Reprocess> Combine all chromatograms of the batch re- <Merge> processing queue into a single multi-channel chromatogram. Close the window. <Close> Reprocess 790 Personal IC...
-
Page 157: Merge Chromatograms
[ Shift ] + [ ↑ ] and decreased by pressing [ Shift ] + [ ↓ ]. The chromatogram axes, labels and colors can be set in the Appearance window. The multi-channel chromatogram can be saved with File / Save / Chroma- togram 790 Personal IC... -
Page 158: Batch Reprocessing Queue Editor
Calibration level (see section 4.4.5) for the sam- Calibration level ple: Level stays for normal analysis, levels and greater for calibration runs. Correct filling of this column enables to calculate calibration coefficients automatically. 790 Personal IC... -
Page 159: Batch Reprocessing Queue Editor Functions
QUEUE EDITOR / File / Save & Exit Save the modified batch reprocessing queue and close the QUEUE EDI- window. QUEUE EDITOR / File / Exit Close the batch reprocessing window without saving the QUEUE EDITOR modified batch reprocessing table. 790 Personal IC... -
Page 160: Notes - Maintenance - Faults
To avoid contamination by abrasive particles arising from piston seals of the high-pressure pump, it is advantageous to install an in-line filter between the pump and the injection valve. In the 790 Personal IC a 6.2821.100 Filter unit PEEK is already mounted for this purpose (see section 2.6.2). -
Page 161: High-Pressure Pump
Pulsation dampener The 6.2620.150 Pulsation dampener MF belongs to the standard ac- cessories of the 790 Personal IC; its installation is described in sec- tion 2.6.2. It is used to reduce interfering pulsation in highly sensitive measurements and also protects the column material against pressure shocks caused by the injection. -
Page 162: Eluents
2.9.2. If the pump is to remain switched off for a lengthy period of time the tubing cartridges 40 40 should be raised completely by loosening the snap-action lever 43 43 on the right-hand side (the set contact pressure remains unchanged). 790 Personal IC... -
Page 163: Suppressor Module
(see section 2.8.2). Operation The Metrohm Suppressor Module MSM comprises a total of 3 sup- pressor units which are in turn used for suppression, regenerated with sulfuric acid and rinsed with water. To record every new chromatogram under comparable conditions, work is normally carried out with freshly regenerated suppressor. -
Page 164: Maintenance And Servicing
1.4.1. Maintenance by Metrohm service Maintenance of the 790 Personal IC is best done as part of an annual service performed by specialists from the Metrohm company. If work is frequently performed with caustic and corrosive chemicals, it may be necessary to shorten the interval between servicing. -
Page 165: Recycling
• with the 6.1010.000 IC Cation column METROSEP Cation 1-2. 5.2.4 Shutdown If the 790 Personal IC is shut down for a considerable length of time, the entire IC system (without column and suppressor) must be rinsed free from salt with methanol/water (1:4) to avoid crystallization of elu- ent salts with the corresponding subsequent damage. - Page 166 • Switch on high-pressure pump and rinse column with eluent for ca. 10 min, then switch off pump. Connect column to detector block • Screw outlet end of separating column 63 63 to inlet capillary 37 or suppressor inlet capillary 78 790 Personal IC...
-
Page 167: Maintenance Work At The Pump Head
96 is screwed into the piston seal 92 92 the latter is completely destroyed! If you use only aqueous eluents, the 6.2741.000 Piston seal can be replaced by the 6.2741.010 PE Piston seal available as an option. 790 Personal IC... -
Page 168: Fig. 17: Components Of The Pump Head
Screw holder for valve Spring (6.2824.060) for auxiliary piston Piston cartridge (4.709.0760) Special tool (6.2617.010) to remove the piston seal 92 Piston guide sleeve (4.709.4380) Special tool (6.2617.010) to install the piston seal 92 Sapphire supporting ring (6.2824.030) 790 Personal IC... - Page 169 If by mistake an inlet valve 93 93 is installed instead of the outlet valve 94 , an extreme pressure buildup occurs within the working cylinder, which is not detected by the pressure transducer and will destroy the piston seal 92 92 ! 790 Personal IC...
- Page 170 Sapphire sphere Ceramic holder for sapphire sphere The large recess must point in the direction of the sapphire sphere Seal The larger opening must point outwards Fig. 19: Components of inlet valve 93 and outlet valve 94 790 Personal IC...
-
Page 171: Regeneration Of The Suppressor Module
Regenerate suppressor • Connect the inlet capillary 81 81 marked "H " to the inlet capillary 18 18 using coupling 26 26 (see Fig. 10 and Fig. 15). This connects the suppressor module directly to the high-pressure 790 Personal IC... -
Page 172: Cleaning The Suppressor
63 63 (see Fig. 15). • Disconnect output capillary 79 79 from inlet capillary 37 • Disconnect inlet capillaries 80 80 and 81 81 from the filter units 28 (supply from peristaltic pump). 790 Personal IC... - Page 173 (do not use tools). Connect and condition the suppressor • Reconnect the suppressor to the IC system. • Before switching the suppressor to the next position for the first time, rinse all 3 suppressor units with solution for 5 min. 790 Personal IC...
-
Page 174: Replacing The Suppressor
• Pull out connection piece 106 106 and suppressor rotor 107 107 from suppressor holder 108 108 (the connection piece and the rotor normally stick together). • Loosen connection piece 106 106 from suppressor rotor 107 107. 790 Personal IC... - Page 175 (do not use tools). Connect and condition the suppressor • Reconnect the suppressor to the IC system. • Before switching the suppressor to the next position for the first time, rinse all 3 suppressor units with solution for 5 min. 790 Personal IC...
-
Page 176: Exchanging The Pump Tubing
• Press contact pressure lever 41 41 upwards until the solution just starts to be drawn in. Then press contact pressure lever upwards until it clicks once more to obtain optimal contact pressure. • Switch off peristaltic pump. 790 Personal IC... -
Page 177: Faults And Malfunctions
5.3.2 Malfunctions and their rectification If difficulties appear with the 790 Personal IC during analyses, their causes are best investigated in the order separating column → → → → high- pressure pump → → → → eluent → → → → connections. Several of the malfunc- tions which may appear are listed in the following table with details of possible causes and countermeasures. - Page 178 • Contamination of the • Replace the 6.2821.110 filter in the 6.2821.100 Filter (see section 2.3.5) Filter unit PEEK • Counterpressure at • Clean or replace suppres- suppressor module too sor (see section high 5.2.6 … 5.2.8) 790 Personal IC...
-
Page 179: Diagnostic Tests / Validation / Glp
Metrohm Ion Chromatography Systems by using Standard Op- erating Procedures (SOP)» an example of such a standard operating procedure is available from Metrohm; it can be adapted and used with the 790 Personal IC. Further information on the subjects of QA, GLP and validation can also be found in the brochure «Quality management with Metrohm»,... -
Page 180: Appendix
± 2.5°C Heating time ≥ 30 min Temperature stability ≤ 0.01°C at constant ambient temperature Connection for detector block Dsub 15 pin (female) 6.1.3 Injection valve Actuator switching duration 100…150 ms Pressure resistance 25 MPa (250 bar) 790 Personal IC... -
Page 181: High-Pressure Pump
24 U/min at 60 Hz Flow range 0.5…0.6 mL/min with 6.1826.060 Pump tubing Maximum error ± 5 % Maximum pressure 0.4 MPa (4 bar) Pumpable liquids Clear liquids with no solid contents Pump tubing material PP (polypropylene) 790 Personal IC... -
Page 182: Suppressor Module
Default settings 9600 baud, 8 bit, 1 stop bit, no parity, XON/XOFF Pin assignment 6.1.8 Remote interface Connector Dsub 25 pin (female) Pin 3 Circuit diagram for Remote output line 3 Potentials Pin 15 Pin 14 Pin 25 790 Personal IC... -
Page 183: Mains Connection
IEC801-2/IEC1000-4-2 (class 3), IEC801-3/ IEC1000-4-3 (class 2), IEC801-4/IEC1000-4-4 (class 4), IEC801-5/IEC1000-4-5 (class 2/3), IEC801-6/IEC1000-4-6 (class 2), EN50082-1, EN61000-3-2/IEC1000-3-2, EN61000-3-3/ IEC1000-3-3, EN61000-4-11/IEC1000-4-11, IEC61326 6.1.12 Ambient temperature Nominal operating range +5…+45°C (at 20…80 % atmospheric humidity) Storage –20…+70°C Transport –40…+70°C 790 Personal IC... -
Page 184: Housing
Material of cover Polyurethane rigid foam (PUR) with fire protection for fire class UL94VO, CFC-free Material of base Steel, enameled Width 255 mm Height 385 mm Depth 343 mm Weight (incl. accessories) 2.790.0010: 14.7 kg 2.790.0020: 16.0 kg 790 Personal IC... -
Page 185: Standard Equipment
Standard equipment Subject to changes ! All dimensions are given in mm. The 790 Personal IC is available in two versions: • 2.790.0010 Personal IC without suppressor module • 2.790.0020 Personal IC with suppressor module These instruments include the following parts: Quant. - Page 186 " For connection of ⁄ capillaries 6.2744.110 PEEK coupling Connection between 6.2821.100 Filter unit PEEK and 6.1826.060 Pump tubing " 6.2744.120 Coupling – Luer ⁄ ⁄ ⁄ ⁄ Connection between 6.2744.010 PEEK compression fitting and 6.2816.020 Syringe 790 Personal IC...
- Page 187 Spare part: 6.2821.110 Filter 25.5 6.6035.003 Software CD «790 PC Software 1.0» Y.107.0150 Cable strap 8.732.2003 Metrohm Monograph «Ion chromatography» (English) 8.732.2013 «IC Application Notes» (English) 8.790.1003 Instructions for Use (English) for 790 Personal IC 8.790.8007 Registration card (German/English) for PC program «Metrodata 790 PC Software 1.0»...
-
Page 188: Optional Accessories
6.3 Optional accessories Optional accessories 6.3.1 Accessories for 790 Personal IC Order No. Description 6.1825.XXX Sample loop, made of PEEK For injection valve; incl. two 6.2744.010 PEEK compression fittings 6.1825.230: Volume = 10 µL 6.1825.210: Volume = 20 µL 6.1825.220: Volume = 100 µL... - Page 189 Inlet valve (metal-free) ∅8 Spare part for 6.2824.100 Pump head 6.2824.100 Pump head (metal-free) Complete, with fixations screws 6.5324.000 Bottle rack Complete, incl. supply vessels for eluent (2 L), regeneration solution (1 L) rinsing solution (1 L) 790 Personal IC...
-
Page 190: Separating Columns And Precolumns
IC anion column Star-Ion A300 For the determination of anions with chemical suppression. Column dimensions: 100 × 4.6 mm 6.1005.200 IC anion column Organic Acids For the determination of organic acids. Column dimensions: 250 × 7.5 mm 790 Personal IC... - Page 191 To prolong the service life of the 6.1007.000 IC cation column Nucleosil 5SA. Column dimensions: 20 × 4.0 mm Installation using 6.2821.040 Cartridge head. 6.1008.010 IC cation column Hyperrez Monovalent For the determination of monovalent cations without chemical suppression. Column dimensions: 50 × 4.6 mm 790 Personal IC...
- Page 192 With Luer connection. 6.1012.020: set of 50 6.1012.120: set of 10 6.1012.X30 Sample pretreatment cartridge IC-OH – Cation exchanger in OH form. For highly 15.5 acidic samples. With Luer connection. 6.1012.030: set of 50 6.1012.130: set of 10 790 Personal IC...
- Page 193 To hold the 6.1006.0020 Column cartridge METROSEP Anion Dual 1. 6.2828.010 Precolumn cartridge holder To hold the 6.1006.0030 Precolumn cartridge METROSEP Anion Dual 1. 6.2828.020 Glass cartridge holder To hold the 6.1006.0040 Column cartridge METROSEP Anion Dual 1. 790 Personal IC...
-
Page 194: Additional Devices And Cables
11 mL; incl. accessories. Accessories: 6.2743.050 PP sample vessels, set of 2000 6.2743.060 Polyethylene stoppers, transparent, set of 1000 6.2125.010 Cable Connecting cable 790 Personal IC (RS232 interface) – PC 9 pol. neg. Adapter cable 25-pin to 9-pin. 25 pol. 0.3 m 6.2125.020... -
Page 195: Warranty And Conformity
Lack of an official damage report releases Metrohm from any liability to pay compensation. If any instruments and parts have to be returned, the original packaging should be used if at all possible. -
Page 196: Eu Declaration Of Conformity
6.4 Warranty and conformity 6.4.2 EU Declaration of conformity EU Declaration of Conformity The METROHM AG company, Herisau, Switzerland hereby certifies, that the instrument: 790 Personal IC meets the requirements of EC Directives 89/336/EEC and 73/23/EEC. Source of the specifications: EN 50081-1 Electromagnetic compatibility, basic specification;... -
Page 197: Certificate Of Conformity And System Validation
The features of the system software are documented in the instruc- tion manual. Metrohm Ltd. is holder of the SQS-certificate of the quality system ISO 9001 for quality assurance in design/development, production, installation and servicing. Herisau, June 27, 2000 Dr. -
Page 198: Index
........... 94 Asymmetry File..........111 Devices.......... 185 ..........130 File type........... 67 At start for 790 Personal IC ......179 Formula ......... 108 Autosampler 750 High-pressure pump ..... 179 General information....... 100 Connection ........46 Optional accessories..... 179 Method .......... 109 Ordering designation..... - Page 199 6 Appendix Figure........17,18,33 ......72 of detector block ......15 Chromatogram units Ordering designation..... 179 of eluent bottle......... 27 Cleaning the suppressor ....163 of waste container ......16 Capillary tubing cutter ..........126 Close to the PC.......... 21 (6.2621.080) ......
- Page 200 6.5 Index End fitting 64 ....... 111 Detector name........87 Copy to clipboard Figure ..........33 ........... 108 Determination Corr. Installation ........32 Definition.......... 64 ..... 101 Corrected retention time Example........... 51 Error messages......85,168 Correlation coefficient......108 Run number........87 Table of messages......
- Page 201 ......see Separating column ........78,82 Instructions for Use (8.790.1003) . 10,178 Hardware? Icons Hazard ..........11 Instrument control ....... 80 790 Personal IC ......74,78 Heating time ........171 Instrument description......1 Main window........66 ..........120 Instrument icon........78 height PC..........
- Page 202 ........147 appearance ...... 72 Opening chromatograms Mains frequency ........ 174 Monograph Opening the 790 Personal IC ....12 "Ion chromatography" ....10,151 Mains pilot lamp 2 2 2 2 Operating temperature...... 171 Figure ..........3 ......114 More items to report...
- Page 203 6 Appendix Operating tutorial......... 51 ......... 133 Unit ..........72 Peak editor Operation..........63 ......... 129 ........72,79,90 Peak labels Pressure Optional accessories......179 ........129 ........79,80 Peak number Pressure max ......103 ........113,117 ........79,80 Ordinary components Peak table Pressure min .......
- Page 204 6.5 Index Remote interface 16 Ordering designation..... 176 Connection to the PC ...... 21 Set contact pressure ....... 45 Connect 750 Autosampler....46 Figure ..........5 Working life ......153,167 Connect 766 Technical data....... 173 IC Sample Processor ...... 47 ..........
- Page 205 6 Appendix Scaling chromatogram axes....128 .......... 129,130 Figure ..........31 Set all Installation ........30 Scaling of X axis ........ 132 ......... 99 Set peak end Ordering designation ....184 Scaling of Y axis ........ 132 ........99 Set peak start ..........
- Page 206 6.5 Index Definition........64,74 Unit for X axis ........128 File handling ........74 ..........116 Units File type ........... 67 ........... 116 Zero Universal component ....104,111 Open..........74 Zircon piston 85 ........134 Unselect peak Print system parameters....76 Cleaning ........
- Page 207 6 Appendix 791 Personal IC...
Need help?
Do you have a question about the 790 Personal IC and is the answer not in the manual?
Questions and answers