Table of Contents
Advertisement
Quick Links
Advertisement
Table of Contents

Subscribe to Our Youtube Channel
Related Manuals for ARMODD Squarz 9 Pro


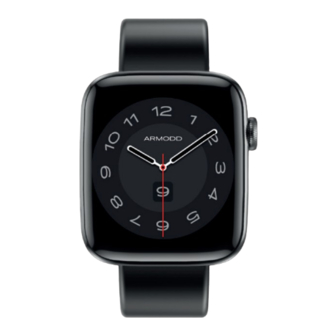
Summary of Contents for ARMODD Squarz 9 Pro
- Page 9 obr.S "' 0608 06:08 ..( - ) -11' 0 01-28 SUN X" � •- ·- •- 144 ►li l+I � BTcall -• � � � ,. o 40 ·, �� • 7068 •86 obr.6 obr. 7 Obrázky uvedeny pro os Android. Pro iOS se vzhled aplikace může lišit.
- Page 10 Ovládání hodinek Dlouhým stiskem bočního tlačítka hodinky zapnete/vypnete. Krátkým stiskem bočního tlačítka zapnete display nebo se vrátíte zpět do menu. Prejetfm prstem po displeji zleva doprava zobrazíte volbu volánr, zprávy a poslednr používané funkce (obr.6). Přejetím po displeji zprava doleva zobrazíte Oblíbené funkce a kliknutím na+ je můžete prid ávat anebo dlouhým stiskem na vybranou funkci odebírat.
- Page 11 Nastavení vlastního ciferníku Pro úspěšné nastavení ciferníku je nutné, aby byly hodinky i telefon dostatečně nabité. Kllkněte v apllkaci na prvni fádek nabidky (obr.3) a pak na první ciferník v galerii (obr.4). Klikněte opět na ciferník (obr.S) a zvolte si, zda pofrdfte nový snrmek nebo si vyberete obrázek z vašeho telefonu.
- Page 19 úřadech, popřípadě můžete výrobek odevzdat přímo prodejci. Prohlášení o shodě Tímto SMARTOMAT s.r.o. prohlašuje, že typ zařízení ARMODD Squarz 9 Pro je v souladu se směrnicí 2014/53/EU. Úplné znění EU prohlášení o shodě je k dispozici na těchto internetových stránkách: www.armodd.cz Kmitočtové...
- Page 27 f-utivatel'omdelin(w..-.-1.y,� obr.s � 0608 06:08 01-28 SUN ,¼'' � � ►li� � BTc�I · � � • • �� 7068 • • obr. 6 obr.7 Obrázky uvedené pre os Android. Pre iOS sa vzhrad aplikácie mOže líšiť.
- Page 28 Ovládanie hodiniek Dlhým stlačením bočného tlačidla hodinky zapnete/vypnete. Krátkym stlačením bočného tlačidla zapnete display alebo sa vrátite spaťdo menu. Prejdenfm prstom po displeji zl' a va doprava zobrazrte vofbu volania, správy a posledně používané funkcie (obr.7). Prejdením po displeji sprava dol'ava zobrazíte Obl' ú bené funkcie a kliknutím na+ ich mOžete pridávaťalebo dlhým stlačením na vybranú...
- Page 29 Nastaveni• vlastného cifernika Na úspešné nastavenie ciferníka je nutné, aby boli hodinky aj telefón dostatočne nabité. Kllknite v aplikácil na prvý riadok ponuky (obr.3) a potom na prvý ciferník v galérii (obr.4). Kliknite opaťna ciferník (obr.S) a zvolte si, či zaobstaráte snímku alebo si vyberiete obrázek z vášho telefónu.
- Page 45 do-.jl)Ol4czejlUsll ____ Rysunki odnoszqsi� do ustawietí w Androidzie. W przypadku iOS wyglqd aplikacji moi:e si� rói:nié. ·'"' obr. 5 0608 06:08 ( - ) --.._-110 01-28 SUN ,¼" i'.iil •'- ·- · •- !+I ►li � BTcoll �'• -� '-11 •...
- Page 46 Sterowanie zegarkiem Zegarek wlqcza sie i wylqcza poprzez dlugie przytrzymanie przycisku bocznego. Krótkie przycišniecie przycisku bocznego uruchamia ekran lub cofa do menu. Przejechanie palcem po ekranie od lewej do prawej otwiera menu rozmów, wiadomošci i ostatních ui:ywanych funkcji (rys. 7). Przejechanie po ekranie od prawej do lewej wyšwietla ulubione funkcje a kliknii::;:cie w + umoi:liwia ich doda...
- Page 47 aplikacji. Klikajc1.c w aplikacjl w pierwszy rzqd menu (rys. 3), moina sobie z galerii wybraé najbardziej odpowiedniq dia siebie tarcze i przeniešč do zegarka. Ustawienie wlasnej tarczy W celu poprawnego wyboru tarczy nalei:y w pierwszej kolejnoSci dostatecznie naladowaé zegarek i telefon. Klikajqc w aplikacji w pierwszy rzqd menu (rys.
- Page 63 5.ábra 0608 06:08 � � 01-28 SUN X" � •· � ►li � BTcall 1i?,. ·-; · • � • • - - � 4 0 '- · • " � • Jlj?068 • 7. ébra 6. ábra A képek az Android op. rendszerbOI származnak. iOS alatt az alkalmazás némileg másképp nézhet ki.
- Page 64 Az óra kezelése Az oldalsó gomb hosszú megnyomásával kapcsolhatja be/ki az órát. Az oldalsó gomb réivid megnyomasával kapcsolja be a kijelz6t vagy lép vissza a menQbe. Ha az ujját balról jobbra elhúzza a kijelz6n, megjelenfti a hfvás, az Uzenet és az utolsó használt funkció menUjét (7.ábra).
- Page 65 Saját számlap beállitása A számlap sikeres beállításához arra van szOkség, hogy az óra és a telefon is eléggé fel legyen tčltve. Kattintson az alkalmazásban a menu els6 sorára (3. ábra), majd a galériában az els6 számlapra (4. ábra). Kattintson újra a számlapra (5. ábra), és készftsen egy ůj fényképet, vagy válasszon képet a telefonjából.
-
Page 75: Table Of Contents
Table of contents Product description Charging and switching On Pairing the watch with a mobile phone Language settings Watch controls Change the watch face Watch face settings Messages Display activation by twisting the wrist Function menu lmportant notifications, recommendations and FAQs 88 ■... -
Page 78: Charging And Switching On
Charging and switching On 1. The watch must be fully charged before first use. Use the charging cable supplied with the watch. Always charge for at least 2 hours and do not move the watch while it is being charged. 2. -
Page 81: Language Settings
Custcmwatdllac:epush The images here depict the Android OS. The appearance in iOS maydiffer. Fig. 5 0608 06:08 � � 01-28 SUN � -· •- � l+I ►li � BTcoll �I • • · 4 0 , 1il'� '-'-'-· 7068 • •... -
Page 82: Watch Controls
Watch controls Press and hold to turn the watch on/off. Press the side button briefly to activate the display or return to the menu. Swipe from left to right to show a list of calls, messages and the most recent functions used (Fig. 7). Swipe from right to left to show "Favourite functions", and by tapping on"+", you can add them or remove them by keeping your finger on a selected function. -
Page 83: Messages
Watch face settings Successfully setting up the watch face requires that the watch and the mobile phone be charged sufficiently. ln the app, tap on the first row of choices (Fig. 3) and then on the first watch face in the gallery (Fig. 4). Tap again on the watch face (Fig. - Page 99 �-tesDrOckende<Wifuche_ Abbildungen sind fi.ir Android. Bei iOS kann das Aussehen der App variieren. ·'"' Abb.5 0608 06:08 ( - ) --.._-110 01-28 SUN ,¼" i'.iil •'- ·- · •- !+I ►li � BTcoll �'• -� '-11 • 7068 • Abb.7 Abb.
- Page 101 ln Einstellungen - Hintergrund iindern Sie kónnen zusatzliche HintergrOnde dlrekt aus der App hinzufOgen. Tippen Sie in der App auf die erste Menozei le (Abb. 3) und wahlen Sie den gewOnschten Hintergrund aus der Galerie aus, das auf dle Uhr Obertragen werden soli.
- Page 117 lmagini afi$ate pentru os Android. Pentru iOS, aspectul aplicatiei poate fi diferit. ·'"' fig.5 0608 06:08 ( - ) --.._-110 01-28 SUN ,¼" i'.iil •'- ·- · •- !+I ►li � BTcoll �'• -� '-11 • 7068 • fig.7 fig.6 Setarea limbii ln ceas, dati click pe pictograma Se�ri (Settings), apel pe Limbi (Languages) !;ii setati limba dorltě.
- Page 118 Operarea ceasului Ceasul poate fi pornit/7nchis prin apásarea lungá a butonului lateral. Prin apasarea scurta a butonului lateral pornitl dlsplayul sau reveniti la meniu. Trageti cu degetul de la stanga Tnspre dreapta ecranului pentru a afi!;ia optiunea de apelare, mesaje !;il ultimele functii folosite (fig.7).
- Page 119 aplicatie, dati click pe primul rand al menlului (fig.3) �i selectati din galerie cadranul dorit, care se va transfera tn ceas. Personalizarea cadranului ceasului Pentru setarea cu succes a cadranului, ceasul �i telefonu I trebuie sa fie suficient Tncarcate. in aplicatie, dati click pe primul rand al meniului (fig.3), apoi pe prima terna pentru cadran din galerie (fig.4).
- Page 122 Player de muzică Dati click pentru a accesa meniul de redare. Ceasul trebuie sě fie imperecheat cu telefonu!. Dati click pentru a comuta lntre optiunile play/stop, melodia anterioara sau urmatoare. le!;iire audio din ceas - permiteti BT call. le�ire audio din telefon - nu activati BT call (fig.7).
- Page 135 Custcm-...tct,fac:epush Navedene slike veljajo za OS Android. Za iOS se videz aplikacije lahko razlikuje. ·'"' slika 5 0608 06:08 ( - ) --.._-110 01-28 SUN ,¼" i'.iil •'- ·- · •- !+I ►li � BTcoll �'• -� '-11 • 7068 •...
Need help?
Do you have a question about the Squarz 9 Pro and is the answer not in the manual?
Questions and answers