Table of Contents
Advertisement
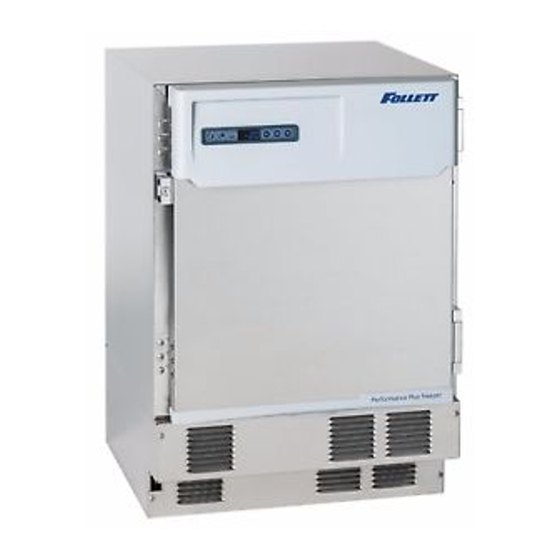
FZR4P and FZR5P and FZR5PLP-T
Performance Plus
Undercounter Freezers
Installation, Operation and Service Manual
Serial numbers L28496 to L31321
FZR4P
FZR5P
01041755cvr
FZR4P-T
FZR5P-T
FZR5PLP-T
Following installation, please forward this manual
01041755cvr
to the appropriate operations person.
801 Church Lane • Easton, PA 18040, USA
Order parts online:
Toll free (877) 612-5086 • +1 (610) 252-7301
www.follettice.com/healthcare
www.follettice.com/healthcare
01191550R02
Advertisement
Table of Contents

Related Manuals for Follett Performance Plus FZR4P


Summary of Contents for Follett Performance Plus FZR4P
- Page 1 FZR4P and FZR5P and FZR5PLP-T Performance Plus Undercounter Freezers Installation, Operation and Service Manual Serial numbers L28496 to L31321 FZR4P FZR5P 01041755cvr FZR4P-T FZR5P-T FZR5PLP-T Following installation, please forward this manual 01041755cvr to the appropriate operations person. 801 Church Lane • Easton, PA 18040, USA Order parts online: Toll free (877) 612-5086 •...
-
Page 2: Table Of Contents
Changing Temperature Display from C to F ......................12 Sleep Function ..............................12 Temp Log ................................13 Alarming Functions ..............................13 Follett Keypad Lock .............................15 Controller Operation - Performance Plus Touchscreen ..................17 Use and care of the LCD Performance Plus Touchscreen .................17 Cleaning ..................................28 Annual Cleaning ..............................28... -
Page 3: Welcome To Follett
Before you Begin After uncrating and removing all packing material, inspect the equipment for concealed shipping damage. If damage is found, notify the shipper immediately and contact Follett Corporation so that we can help in the filing of a claim, if necessary. -
Page 4: Electrical Specifications
§ Full load: 6.7A § Minimum circuit ampacity: 15A § Connect to dedicated circuit, fuse or breaker § Maximum size of branch circuit overcurrent device: 15A § Follett recommends circuit be protected by GFCI Refrigeration Specifications Maximum Design Pressures (psi) Refrigerant... -
Page 5: Installation
Installation Installing Levelers Fig. 1 1. Remove levelers from plastic bag packed inside freezer (Fig. 1). 2. Tip freezer back and screw levelers in all the way to stop (they will extend 1/8" below base of FZR). 3. Adjust levelers as needed to level FZR in both directions. To access levelers, remove the lower front panel. -
Page 6: Installing Shelves
Installing Shelves Fig. 3 1. Remove shelves packed as an accessory (Fig. 3). 2. Place top notch of shelf bracket into pilaster, then bottom notch. 3. Press down on top of shelf to lock the shelf into the pilaster. Installing Drawer Fig. -
Page 7: Reversing The Door Swing - Optional
Reversing the Door Swing – Optional Fig. 6 Tools needed: § #2 Phillips head screwdriver § Flat-head screwdriver § Awl § Gloves § Safety glasses 1. Turn power OFF (and, if applicable, disconnect the battery backup) prior to reversing door swing. 2. - Page 8 6. Disconnect the door communication harness from the P10 Fig. 9 terminal on the control board. 7. Locate the wire tie securing the door harness to the underside of the cabinet and cut. 8. Locate the ground screw in the front right-hand corner that secures the communication harness ground wire and remove.
- Page 9 15. With flat-head screwdriver, simultaneously push down and pry Fig. 12 the top of the spring out of the top of the hinge (Fig. 12). 16. Remove screws and latch from refrigerator cabinet and the lock Fig. 13 from the door (Fig. 13). FZR4P, FZR5P and FZR5PLP-T Undercounter Freezers...
-
Page 10: Installing Glycerine Solution In Product Simulation Bottle
17. Support door and remove screws attaching hinge to refrigerator Fig. 14 cabinet and remove the door (Fig. 14). 18. Remove the hinge from the door. 19. Remove hinge screws from opposite side of cabinet and transfer to riv-nuts now left exposed from hinge removal on both the cabinet and door side. -
Page 11: Operation
Operation The temperature control board and probe indicate when the refrigeration system is required to turn on and off. The refrigeration system removes heat from the cabinet interior and rejects it to the surrounding room air. When the cabinet interior temperature rises above the controller cut-in temperature, the controller turns the refrigeration system on. -
Page 12: Controller Operation - Performance Plus
Controller Operation - Performance Plus In normal operation, the controller displays cabinet temperatures in degrees C or user-selected degrees F. F temperatures are displayed to the nearest degree and C temperatures are displayed to one decimal point. The controller is pre-programmed with a –28 C (–18 to F) set point. COMP displays when the compressor is running. -
Page 13: Temp Log
Temp Log High and low log display 1. Press the UP arrow to display the highest temperature the freezer has recorded since last reset or power cycle. 2. Press the DOWN arrow to display the lowest temperature that the freezer has recorded since last reset or power cycle. - Page 14 Alarm Codes When the unit senses an alarm, the display will flash the following codes. Value Description Temperature is above the High Alarm#1 set point. Temperature is below the low Alarm #1 set point. Temperature is above the High Alarm #2 set point. Temperature is below the Low Alarm #2 set point.
-
Page 15: Follett Keypad Lock
Controller Parameter Reset to restore factory parameters. Reset Follett Keypad Lock Default user passcode for first-time users User Code 01 is factory set by default to 1 2 3 4 5 6. Note: In order to continue using 1 2 3 4 5 6 as a default, user-selectable programming codes must be stored in slots 02 to 40. - Page 16 To Enter or Change a User Code 1. Press 3 6 5, the , followed by the Master Code, followed by ENTER. 5 Chirps will be heard. 2. Enter the user ID (a two digit code from 00 to 40), followed by ENTER. 3 chirps will be heard. 3.
-
Page 17: Controller Operation - Performance Plus Touchscreen
Controller Operation - Performance Plus Touchscreen Use and care of the LCD Performance Plus Touchscreen The LCD touchscreen utilizes capacitive touch technology. This will allow you to engage the functionality by touching the screen with your fingers, even while you are wearing latex or cotton gloves. Functionality will not engage by touching with an inanimate object, such as a pen or stylus. - Page 18 High and low temperature display Fig. 18 From the home screen touch the temperature display in the upper right corner. The high/low temperatures will appear below the temperature display. To the left of the high/ low temperature a time and date stamp will be displayed.
- Page 19 System Information Fig. 23 § Touch the System Info icon to display the model number, unit serial number and software version. Touch the checkbox icon in the lower right corner of the box to clear. Alarm or Alert Notifications Fig. 24 §...
- Page 20 Start-up alarm delay Fig. 25 The Performance Plus unit has a 120 minute time delay between when the unit is energized to when the temperature alarms become active. This delay can be changed in parameters in the controller under Alarm Startup Delay.
- Page 21 Fig. 27 Information Logs § All available graphs, data logs and event logs are accessed through the Information Logs function. The home screen in the Information Logs section displays the product (P3) temperature graph with one week’s data. Date and time information is displayed on the horizontal axis.
- Page 22 – Master User Code 01 is factory set by default to 1 2 3 4 5 6. – User Codes 01 to 40 are available for user-programming. – Each time a button is pressed, a chirp will be heard. – See Page 12 for detailed Follett Keypad Lock instructions. FZR4P, FZR5P and FZR5PLP-T Undercounter Freezers...
- Page 23 Changing and Adding the User Codes Fig. 33 1. Touch Settings icon. 38.4 F Sleep Function Display Setup (cont) 1. Touch Advanced Settings, enter your 4-digit user access Sleep Timer code (factory default is 1 1 1 1) in the keypad that appears, and Screen Saver Function temperature touch the checkmark icon...
- Page 24 Advanced Setting - Touchscreen Parameter Default Value Range Description Set Time and Date Time 7:45 0- 12 Holds Hour AM/PM AM, PM Holds AM/PM Month 1- 12 Month 1- 31 Year 2013 2010- 2099 Year System Information Serial Number E12345 —...
- Page 25 Parameter Default Value Range Description Alarm 1 Low –46 C (–50 F) - 50 - User Set Point Low temperature to activate Alarm 1. Temp Alarm 1 Probe Alarm (P3) Control (P1), Defrost (P2), Probe for Alarm 1. Alarm (P3) Alarm 1 Reset 0- 10 Temperature difference to reset Alarm 1.
- Page 26 Parameter Default Value Range Description Power Alarm Yes, No Defines if relay should open/close on power alarm. Relay Power Alarm 5 minutes 0 - 120 minutes Delay before sounding the power alarm. Timer Battery Level Battery Level Data Storage Yes, No Overwrite circular data? Data Full Alarm Yes, No...
- Page 27 Parameter Default Value Range Description Door Heater Door Heater Yes, No Controls door heater output Door Heater Off 0-100 Off time for door heater if dht=on (mins) Door Heater On 0-100 On time for door heater if dht=on (mins) Error control Probe Error NO, BPr, R1 relay, R2 relay Action to take when probe error detected...
-
Page 28: Cleaning
5. Adjust latch and or striker as necessary for proper door closure. Slide-out Compressor Tray Fig. 37 Follett’s slide-out compressor tray allows technicians to partially slide the condensing unit from the freezer back without cutting refrigerant lines. 1. Remove rear panel (Fig. 37.1). -
Page 29: Removing Drawers
Removing Drawers Fig. 38 1. Pull drawer forward to stop (Fig. 38.1). 2. Lift drawer front to free front rollers from sides (Fig. 38.2). 3. Still lifted, pull drawer forward to free back rollers from sides (Fig. 38.3). Removing Slides 1. -
Page 30: Controller Replacement
Controller Replacement 1. Open the door and prop the door open, so it doesn’t close. For Fig. 40 KP units, enter default code of 1 2 3 4 5 6. 2. Turn power switch to the OFF position and unplug the unit from the power supply. -
Page 31: Wiring Diagram
Wiring Diagram FZR SERIES ONLY DEFROST RELAY COMPRESSOR RELAY BLUE FZR4P, FZR5P and FZR5PLP-T Undercounter Freezers... -
Page 32: Refrigeration System
This change can adversely affect the performance of your freezer. Therefore, Follett recommends that if hoses are ever connected to the refrigeration system for service, the refrigerant should be recovered, the system evacuated, and recharged by weighing in the correct refrigerant charge. -
Page 33: Compressor Information
Refrigeration System Diagram COMPRESSOR 10oz. Charge Low Psi High Psi Vapor Vapor Low Psi High Psi Liquid Liquid DRYER CONDENSING UNIT EVAPORATOR/DEFROST UNIT HIGH PRESSURE VAPOR HIGH PRESSURE LIQUID LOW PRESSURE LIQUID LOW PRESSURE VAPOR Compressor Information Compressor NF7CLX Run load amps (RLA) Lock rotor amps (LRA) Ohms start winding to common Ohms run winding to common... -
Page 34: Troubleshooting
Recover, evaluate and weigh in correct charge. Plugged capillary tube. Replace capillary tube and filter drier. Inefficient compressor. Consult technical services. If problems persist after following this basic troubleshooting guide, call Follett’s technical service group at (877) 612-5086. FZR4P, FZR5P and FZR5PLP-T Undercounter Freezers... -
Page 35: Accessories
§ Reference instruction 01057579 (packed with digital data logger) Stacking Kit Legacy to Performance Plus (P/N 01067172) § Reference instruction 01067180 Note: new kickplates may need to be ordered, please contact Follett for more information. Stacking Kit Countertop to Performance Plus (includes one straight kick plate) (P/N 01100759) §... -
Page 36: Replacement Parts
Replacement Parts Evaporator Reference # Description Part # Door heater REF5P/FZR5P 01049477 Not shown Not shown Door heater REF4P/FZR4P 01049469 Condensate pan 01012061 Not shown Thermal break cover REFP/FZRP (set of 6) 01053875 Shelf support 01192186 Evaporator cover REF4P/FZR4P 01192137 Evaporator cover REF5P/FZR5P 01192145 Drain pan heater assembly... -
Page 37: Condensing Unit
Condensing Unit Reference # Description Part # FZR Compressor (includes start components) 01280312 Condensor coil (includes coil, fan and base) 01280320 Condenser fan motor with blade 01363753 Not shown Compressor start components 01053891 Not shown Filter drier 01038223 FZR4P, FZR5P and FZR5PLP-T Undercounter Freezers... - Page 38 0104175518 FZR4P, FZR5P and FZR5PLP-T Undercounter Freezers...
-
Page 39: Hardware
Hardware Reference # Description Part # Façade, basic controller with hardware - Serial numbers after K29694 01192152 Façade, basic controller with hardware - Serial numbers before K29695 01053586 Not shown Façade, basic controller with key pad & hardware - Serial numbers after K29694 01192160 Not shown Façade, basic controller with key pad &... -
Page 40: Hardware And Electrical Components
Warranty Registration and Equipment Evaluation Thank you for purchasing Follett ® equipment. We hope you find that our equipment meets or exceeds your expectations, as our goal is to deliver high value products and services that earn your complete satisfaction! Please review the enclosed installation and operations manual.
Need help?
Do you have a question about the Performance Plus FZR4P and is the answer not in the manual?
Questions and answers