
Related Manuals for Marmitek IR Control 11 XTRA


Summary of Contents for Marmitek IR Control 11 XTRA
-
Page 1: Table Of Contents
R Control 10/11 XTR ™ IR Control 10/11 XTRA USER MANUAL GEBRAUCHSANLEITUNG GUIDE UTILISATEUR MODO DE EMPLEO MANUALE D’ISTRUZIONI GEBRUIKSAANWIJZING ™ 20581/ 20130806 • IR CONTROL 10/11 XTRA ALL RIGHTS RESERVED MARMITEK ©... -
Page 3: User Manual
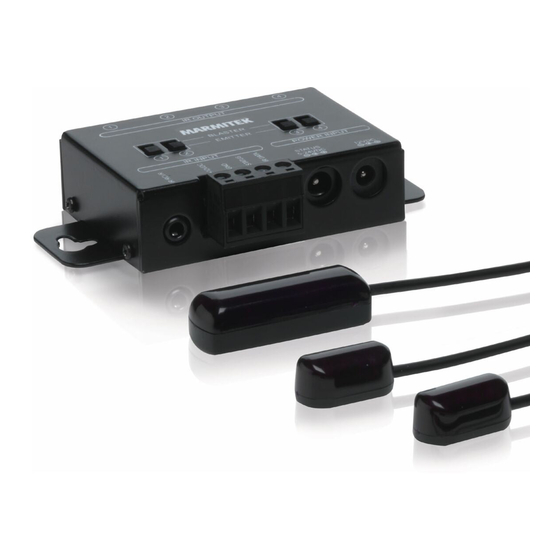
1 x IR Receiver The IR Control 10 XTRA™- contains an surface mount IR Receiver The IR Control 11 XTRA™- contains a panel mount IR Receiver 2 x IR Extension cable with one IR blaster LED 1 x IR Extension cable with two IR emitter LEDs... - Page 4 IR Module. The IR Control 10 XTRA™- contains an surface mount IR Receiver The IR Control 11 XTRA™- contains a panel mount IR Receiver (2) IR Module The IR Module receives infrared commands from the IR Receiver, processes them and sends them onto all connected IR Extender Cables.
- Page 5 4. CONNECTIONS The IR Module is the main component that connects IR Receivers, the power adapter and IR Extender Cables to one another. All of the IR Module connections are now explained so that you can get the most out of all of the options available.
- Page 6 IR Receiver's front if desired. 5.2 Placing the IR extension cable with one blaster LED Marmitek recommends the use of IR blaster LEDs because they can operate multiple A/V devices at the same time and they are very easy to install.
- Page 7 Place the IR blaster LED in the cabinet of the A/V devices you want to operate. With a correct placement one blaster LED can operate all A/V devices placed in the same compartment. some situations necessary to place a second blaster LED if not all A/V devices can be operated with one blaster LED.
- Page 8 If the IR Control 10/11 XTRA is not reacting in a correct way, try experimenting with the placement of the IR receiver and/or IR extension cables (emitter or blaster). Placing it somewhere else could give a better result. © MARMITEK...
- Page 9 6. ADVANCED INSTALLATION 6.1 Connecting multiple IR receivers If you want to operate your A/V equipment from multiple rooms, you can connect up to 6 IR receivers in parallel to the IR module. Cut therefore the standard connector of the IR receiver and connect it to the SCREW TERMINAL of the IR module (see paragraph 4.1).
- Page 10 Relocate the IR LED so that less infrared light is received via the IR window. Do you have other questions that have not been resolved by the above information? Please go to www.marmitek.com © MARMITEK...
- Page 11 8. TECHNICAL DATA IR receiver Frequency range: 30-60 KHz IR reception range: ± 10 meters IR reception angle: 90º (+45º/-45º from centre) Cable length: 3 meters, extendable up to 300 meters IR reception indication: YES, purple indication LED Status indication: YES, green indication LED Receiver dimensions: Surface mount: 40 x 13 x 11mm...
- Page 12 The LEDs of the IR extension cables with 2 emitter LEDs have to be stuck to the A/V device(s) you want to operate. See datasheets of the IR emitter LEDs on www.marmitek.com. Environmental Information for Customers in the European Union...
-
Page 13: Gebrauchsanleitung
1x IR Modul 1x IR Empfänger IR Control 10 XTRA™ – enthält einen Aufbau IR Empfänger IR Control 11 XTRA™ – enthält einen Einbau IR Empfänger 1x AVR Verbindungskabel 2x IR Verlängerungskabel mit einem IR Blaster LED 1x IR Verlängerungskabel mit zwei IR Emitter LED’s... - Page 14 IR Modul weiter. IR Control 10 XTRA™ – enthält einen Aufbau IR Empfänger IR Control 11 XTRA™ – enthält einen Einbau IR Empfänger (2) IR Modul Das IR Modul empfängt die Infrarot-Befehle vom IR Empfänger, verarbeitet diese und gibt sie an alle angeschlossene IR-Verlängerungskabel weiter.
- Page 15 4. ANSCHLÜSSE Das IR Modul ist der Hauptbestandteil der IR Empfänger, Netzteil und IR Verlängerungskabel miteinander verbindet. Um alle Möglichkeiten optimal nutzen zu können, werden nachstehend sämtliche Anschlüsse des IR Moduls erläutert. 4.1 IR Input IR RCVR: Regulärer IR Eingang (3.5mm Buchse) für enthaltenen IR Empfänger SCHRAUBTERMINAL:...
- Page 16 Vorderseite Empfängers. 5.2 Anbringung des IR Verlängerungskabels mit einem Blaster Marmitek empfiehlt die Verwendung von IR Blaster LEDs weil diese mehrere AV Geräte zugleich bedienen können und Installation kinderleicht ist. Verwenden Sie das enthaltene IR Verlängerungskabel mit Emitter LEDs © MARMITEK...
- Page 17 nur als Problemlösung, wenn ein oder mehr Geräte nicht bedient werden können (sehen Sie Kapitel 5.3). Kleben Sie die IR Blaster LED in den Schrank des A/V Geräts, das Sie bedienen möchten. Bei richtiger Anbringung kann einziges Blaster sämtliche A/V Geräte, die sich selben Feld befinden,...
- Page 18 Sie können nunmehr Ihre A/V Geräte über die IR Control 10/11 XTRA durch geschlossene Schranktüren hindurch bedienen! Experimentieren Sie mit der Anbringung des IR Empfängers oder IR Verlängerungskabels (Emitter oder Blaster), wenn die IR Control 10/11 XTRA nicht richtig reagiert. Eine andere Anbringung kann zu einem besseren Endergebnis führen. © MARMITEK...
- Page 19 6. VERFEINERTE INSTALLATION 6.1 Mehrere IR Empfänger anschließen Wenn Sie Ihre A/V Geräte aus mehreren Räumen bedienen möchten, können Sie bis zu 6 IR Empfänger parallel zum IR Modul schalten. Trennen Sie dazu den regulären Anschluss des IR Empfängers und schließen Sie diesen an den SCHRAUBTERMINAL des IR Moduls an (sehen Sie Abschnitt 4.1).
- Page 20 Infrarotstrahlung und werden auf Grund dessen nicht oder nur schlecht funktionieren. Versetzen Sie die IR LED, sodass weniger Infrarotlicht über das IR Fenster einstrahlt. Sie haben noch Fragen, die im Obigen nicht beantwortet wurden? Schauen Sie dann unter www.marmitek.com © MARMITEK...
- Page 21 8. TECHNISCHE DATEN IR Empfänger Frequenzbereich: 30-60 KHz IR Empfänger Reichweite: ± 10 Meter IR Empfang Winkel: 90º (+45º/-45º ab Mitte) Kabellänge: 3 Meter, bis auf 300 Meter zu verlängern IR Empfänger Anzeige: Ja, lila Anzeige LED Statusanzeige: Ja, grüne Anzeige LED Maße Empfängerkubus: 40 x 13 x 11mm IR Modul...
- Page 22 IRC3060S - Aufbau Art.-Nr. 08142 IRC3060S - Einbau Art.-Nr. 08143 Sehen Sie die Datenblätter des IR Empfängers auf www.marmitek.com. IR Verlängerungskabel mit einem Blaster LED (Art.-Nr. 08144) Ein IR Blaster strahlt weit mehr Infrarotlicht aus (sogar bis zu 2 Meter) wodurch dieser leichter mehrere Geräte bedienen kann.
-
Page 23: Guide Utilisateur
Marmitek se dégage de toute responsabilité en cas d'usage inapproprié du produit ou d'utilisation non conforme à l'usage auquel le produit est destiné. Marmitek se dégage de toute responsabilité en cas de dommage conséquent, autre que la responsabilité civile du fait des produits. - Page 24 Le Récepteur IR reçoit des ordres infrarouges de votre télécommande et les transmet vers le IR Module. Le IR Control 10 XTRA™ – est doté d'un Récepteur IR à poser Le IR Control 11 XTRA™ – est doté d'un Récepteur IR encastrable (2) Le Module IR Le Module IR reçoit les ordres infrarouges du récepteur IR, les traite et les...
- Page 25 4. CONNEXIONS Le Module IR est la partie principale qui relie les récepteurs IR, l’adaptateur secteur et les câble d'extension IR entre eux. Afin de pouvoir utiliser toutes les possibilités de façon optimale toutes les connexions du Module IR sont expliquées ci-dessous.
- Page 26 Récepteur IR. 5.2 Installation du câble d'extension IR avec une LED blaster Marmitek conseille l'utilisation de LEDs blaster IR, parce qu'ils permettent de commander simultanément plusieurs appareils A/V et en plus ils sont faciles à installer. N'utilisez le câble d'extension IR avec LEDs émetteur fourni que pour résoudre un problème si un ou plusieurs appareils ne...
- Page 27 Placez la LED blaster IR dans le meuble des appareils A/V que vous souhaitez commander. Si une LED blaster est installée correctement elle peut commander tous les appareils qui se trouvent dans le même compartiment. Dans certains cas, s'il n'est pas possible de commander tous les appareils A/V avec une seule LED blaster, il est nécessaire de placer une deuxième LED...
- Page 28 IR Control 10/11 XTRA™ à travers les portes fermées d'un meuble ! Si le IR Control 10/11 XTRA ne réagit pas correctement, expérimentez alors avec la position du Récepteur IR et/ou des Câble d'extension IR (émetteur ou blaster). Une autre position peut donner un meilleur résultat final. © MARMITEK...
- Page 29 6. INSTALLATION AVANCÉE 6.1 Connexion de plusieurs Récepteurs IR Si vous souhaitez commander les appareils A/V à partir de différentes pièces, vous pouvez connecter en parallèle au maximum 6 Récepteurs IR au Module IR. Coupez alors le connecteur standard du Récepteur IR et connectez-le au BORNIER À...
- Page 30 Déplacez la LED IR de telle sorte que la fenêtre IR reçoive moins de lumière infrarouge. Les informations ci-dessus n'ont pas répondu à vos questions ? Veuillez consulter le site internet www.marmitek.com. © MARMITEK...
- Page 31 8. CARACTÉRISTIQUES TECHNIQUES Récepteur IR Plage de fréquence 30-60 KHz Portée de réception IR : ± 10 mètres Portée de réception IR : ± 10 mètres 90º (+45º/-45º depuis le centre) Longueur du câble : 3 mètres, peut être rallongé jusqu'à 300 mètres Indicateur réception IR : OUI, voyant LED violet Indicateur statut :...
- Page 32 Les câbles d'extension IR avec 2 LEDs émetteur doivent être collés sur l'appareil A/V que vous souhaitez commander. Voir les fiches de données de la LED émetteur IR sur le site internet www.marmitek.com. Informations environnementales pour les clients de l’Union européenne La directive européenne 2002/96/CE exige que l’équipement sur lequel est apposé...
-
Page 33: Modo De Empleo
1x Receptor IR El IR Control 10 XTRA™ – tiene un Receptor IR de superficie El IR Control 11 XTRA™– tiene un Receptor IR de superficie 2x Cable de extensión IR con blaster IR LED 1x Cable de extensión IR con dos emisores IR LED 1x Cable de conexión AVR... - Page 34 IR Module. El IR Control 10 XTRA™ – tiene un Receptor IR de superficie El IR Control 11 XTRA™ – tiene un Receptor IR de superficie (2) El IR Module El IR Module recibe los comandos infrarrojos del Receptor IR, los elabora y los transmite a todos los Cables de Extension IR conectados.
- Page 35 4. CONEXIONES El IR Module es la parte principal para conectar los Receptores IR, el adaptador de alimentación y los Cables de Extensión IR. Para disfrutar óptimamente de todas las posibilidades de este módulo, todas las conexiones se explican más abajo. 4.1 Entrada IR IR RCVR: entrada IR estándar (jack 3.5mm)
- Page 36 Receptor IR. 5.2 Colocación del cable de extensión IR con un blaster LED Marmitek aconseja el uso del Led del blaster IR porque este puede accionar varios dispositivos A/V al mismo tiempo y gracias a ello la instalación es muy sencilla.
- Page 37 Coloca el LED del blaster IR en el armario del dispositivo A/V que quieras accionar. Mediante colocación decuada un LED del blaster puede accionar todos los dispositivos A/V que están en qel mismo compartimiento. En algunas situaciones es necesario colocar un segundo Led blaster cuando no todos los dispositivos A/V pueden accionarse con un LED blaster Si colocas el LED blaster en uno de los dispositivos A/V en el centro...
- Page 38 Si el IR Control 10/11 XTRA no reacciona de una manera adecuada, pruebe entonces con la colocación del Receptor IR y/ o el cable de extensión IR (emisor o blaster). Otra colocación puede dar un mejor resultado final. © MARMITEK...
- Page 39 6. INSTALACIÓN AVANZADA 6.1 Conectar varios Receptores IR Si quieres poder accionar el dispositivo A/V desde varias habitaciones puedes conectar hasta un máximo de 6 Receptores IR en paralelo en el Módulo IR. Además, corta el conector estándar del Receptor IR y conecta este a la TERMINAL DE TORNILLO del Módulo IR (véase apartado 4.1).
- Page 40 Algunas ventanillas IR de set-top boxes o de boxes de satélite son muy sensibles. Estos dispositivos pueden recibir demasiada radiación infrarroja, lo que influye en el funcionamiento. Cambia el lugar del LED IR de manera que entra menos luz infrarroja en la ventanilla IR. ¿Tiene más preguntas? Vistia www.marmitek.com © MARMITEK...
- Page 41 8. DATOS TECNICOS Receptor IR Rango alcance: 30-60 KHz Recepción IR alcance: ± 10 Metros Ángulo de recepción IR: 90º (+45º/-45º desde el centro) Longitud de cable: 3 metros, prolongable hasta llegar a 300 metros Indicación recepción IR: SÍ, LED indicación morada Indicación estado: SÍ, LED indicación verde Dimensiones del receptor: de superficie: 40 x 13 x 11mm...
- Page 42 Los cables de extensión IR con 2 emisores LED deben conectarse a un dispositivo A/V que quieras accionar. Véanse las hojas de datos de los LED del emisor IR en www.marmitek.com. Información medioambiental para clientes de la Unión Europea La Directiva 2002/96/CE de la UE exige que los equipos que lleven este símbolo en el propio aparato y/o en su embalaje no deben eliminarse junto con otros residuos urbanos no seleccionados.
-
Page 43: Manuale D'istruzioni
1. INTRODUZIONE Congratulazioni con il vostro acquisto dell’ IR Control 10/11 XTRA™. Con Marmitek IR Control 10/11 XTRA™ potete ampliare i segnali infrarossi (IR) dei vostri telecomandi e controllare apparecchi audio/video anche se collocati in un mobile chiuso o fuori vista. - Page 44 Il ricevitore IR riceve i comandi a infrarossi dal vostro telecomando e li trasmette all’IR Module. L’IR Control 10 XTRA™ – contiene un ricevitore IR esterno L‘IR Control 11 XTRA™– contiene un ricevitore IR interno (2) IR Module L’IR Module riceve i comandi a infrarossi dal ricevitore IR, li elabora e li trasmette a tutti i cavi di prolunga IR collegati.
- Page 45 4. COLLEGAMENTI L’IR Module è il componente principale che collega tra di loro i ricevitori IR, l’adattatore di alimentazione ed i cavi di prolunga IR. Per approfittare ottimamente di tutte le possibilità si spiegano tutti i collegamenti del modulo IR qui sotto. 4.1 Ingresso IR IR RCVR: ingresso IR standard (connettore jack...
- Page 46 (nero o bianco) sul lato anteriore del ricevitore IR. 5.2 Collocamento della prolunga IR tramite un LED blaster Marmitek raccomanda l’uso dei LED blaster visto che questo tipo di LED è in grado di comandare contemporaneamente più apparecchi A/V e perché è...
- Page 47 Collocare il LED blaster IR nell’armadio delle apparecchiature A/V che si desidera comandare. Se collocato bene, un solo LED blaster può comandare tutti gli apparecchi A/V che si trovano nello stesso vano. alcune situazioni è necessario collocare secondo LED blaster se non è possibile di comandare tutte le apparecchiature A/V con un solo LED blaster.
- Page 48 XTRA™ attraverso le ante chiuse! Nel caso che l’IR Control 10/11 XTRA non reagisca in modo giusto, si deve sperimentare il posizionamento del ricevitore IR e/o dei cavi di prolunga IR (emittente o blaster). Un altro posizionamento può dare risultati migliori. © MARMITEK...
- Page 49 6. INSTALLAZIONE AVANZATA 6.1 Collegare più ricevitori IR Quando si desidera comandare le apparecchiature A/V da più stanze, è possibile collegare in parallelo fino al max. 6 ricevitori IR. A tale scopo tagliare il connettore standard dal ricevitore IR e collegarlo al MORSETTO A VITE del modulo IR (vedere il paragrafo 4.1).
- Page 50 Spostare il LED IR in modo tale da ricevere meno luce infrarossa attraverso la finestra IR. Avete ancora domande che non sono state risposte qui sopra? Vi preghiamo di visitare il nostro sito www.marmitek.com © MARMITEK...
- Page 51 8. CARATTERISTICHE TECNICHE Ricevitore IR Portata di frequenza: 30-60 KHz Portata di ricezione IR: ± 10 metri Angolo di ricezione IR: 90º (+45º/-45º dal centro) Lunghezza del cavo: 3 metri, aumentabile fino ai 300 metri Indicazione ricezione IR: si, LED di segnalazione viola Indicazione di stato: si, LED di segnalazione verde Dimensioni:...
- Page 52 IRC3060S – esterno no. articolo 08142 IRC3060P – interno no. articolo 08143 Vedere i fogli dati del ricevitore IR sul sito www.marmitek.com. Prolunga IR con un LED blaster (No. articolo 08144) Un LED blaster emette molto più luce a infrarossi (fino a 2 metri) in modo da poter comandare facilmente più...
-
Page 53: Gebruiksaanwijzing
1 x IR Ontvanger De IR Control 10 XTRA™ – bevat een opbouw IR Ontvanger De IR Control 11 XTRA™– bevat een inbouw IR Ontvanger 2 x IR Verlengkabel met één IR blaster LED 1 x IR Verlengkabel met twee IR emitter LED’s... - Page 54 IR Module. De IR Control 10 XTRA™ – bevat een opbouw IR Ontvanger De IR Control 11 XTRA™– bevat een inbouw IR Ontvanger (2) IR Module De IR Module ontvangt de infrarood commando’s van de IR ontvanger, verwerkt deze en stuurt ze door naar alle aangesloten IR verlengkabels.
- Page 55 4. AANSLUITINGEN De IR Module is het hoofdonderdeel dat IR ontvangers, voedingsadapter en IR verlengkabels met elkaar verbindt. Om alle mogelijkheden optimaal te kunnen benutten worden hieronder alle aansluitingen van de IR Module uitgelegd. 4.1 IR Input IR RCVR: standaard IR ingang (3.5mm jack) voor de meegeleverde IR Ontvanger...
- Page 56 (zwart of wit) op de voorzijde van de IR Ontvanger. 5.2 Plaatsing van de IR verlengkabel met één blaster LED Marmitek adviseert het gebruik van IR blaster LED’s omdat deze meerdere A/V apparaten gelijkertijd kan bedienen en de installatie hiervan zeer eenvoudig is.
- Page 57 Plaats de IR blaster LED in het kastje van de A/V apparatuur die u wilt bedienen. Bij een juiste plaatsing kan één blaster LED alle A/V apparatuur bedienen die in hetzelfde compartiment staan. In sommige situaties is het nodig een tweede blaster LED te plaatsen als niet alle A/V apparatuur met één blaster LED bediend kan worden.
- Page 58 Indien de IR Control 10/11 XTRA niet op juiste manier reageert experimenteer dan met de plaatsing van de IR Ontvanger en/ of IR Verlengkabels (emitter of blaster). Een andere plaatsing kan een beter eindresultaat opleveren. © MARMITEK...
- Page 59 6. GEAVANCEERDE INSTALLATIE 6.1 Meerdere IR Ontvangers aansluiten Wilt u de A/V apparatuur vanuit meerdere ruimtes kunnen bedienen kunt u tot maximaal 6 IR Ontvangers in parallel aansluiten op de IR Module. Knip daarbij de standaard connector van de IR Ontvanger en sluit deze aan op de SCHROEFTERMINAL van de IR Module (zie paragraaf 4.1).
- Page 60 Deze apparaten ontvangen dan te veel infrarood straling en zullen daardoor niet of slecht werken. Verplaats de IR LED zodat er minder infraroodlicht via het IR venster ontvangen wordt. Heeft u vragen die hierboven niet beantwoord worden? Kijk dan op www.marmitek.com. © MARMITEK...
- Page 61 8. TECHNISCHE GEGEVENS IR ontvanger Frequentie bereik: 30-60 KHz IR ontvangst bereik: ± 10 Meter IR ontvangst hoek: 90º (+45º/-45º vanaf center) Kabellengte: 3 meter, verlengbaar tot 300 meter IR ontvangst indicatie: JA, paarse indicatie LED Status indicatie: JA, groene indicatie LED Afmeting: Opbouw: 40 x 13 x 11mm Inbouw: 14 x 52mm, Ø...
- Page 62 Plaatsing van de IR blaster is ten opzichte van de IR LED’s veel minder nauwkeurig. Zie datasheets van de IR Blaster LED op www.marmitek.com. IR verlengkabel met twee emitter LED’s (Artnr. 08145) De IR verlengkabels met 2 emitter LED’s moeten op het A/V apparaat geplakt worden dat u wilt bedienen.
- Page 63 IR CONTROL 10/11 XTRA™...
- Page 64 DECLARATION OF CONFORMITY Hereby, Marmitek BV, declares that this IR Control 10/11 XTRA™ is in compliance with the essential requirements and other relevant provisions of the following Directives: Directive 2004/108/ec of the european parliament and of the council of 15 December 2004 on the...
- Page 65 Con ciò, Marmitek BV, dichiara che il IR Control 10/11 XTRA™ è conforme ai requisiti essenziali ed alter disposizioni relative alla Direttiva: Direttiva 2004/108/ce del parlamento europeo e del consiglio del 15 dicembre 2004 concernente il ravvicinamento delle legislazioni degli Stati membri relative alla compatibilità...
- Page 66 © MARMITEK...
- Page 67 IR CONTROL 10/11 XTRA™...
- Page 68 back_124x176mm.pdf 2-10-2012 11:00:05...
Need help?
Do you have a question about the IR Control 11 XTRA and is the answer not in the manual?
Questions and answers