Advertisement
Instructions Date: 05/2022
Version: 00001
www.HeaterSports.com
Model No. HRBC99
Serial No.
Serial number found on warning
label sewn onto netting.
ACTIVATE YOUR WARRANTY
To register and activate your 1
year parts & labor warranty, call
1-800-492-9334
CUSTOMER CARE
For customer service inquiries,
please call our toll free line at
1-800-492-9334.
CAUTION
Read all precautions and instruc-
tions in this manual before using
this product. Keep this manual
for future reference.
OWNER'S MANUAL
HomeRun
DO NOT RETURN TO STORE, CALL 1-800-492-9334
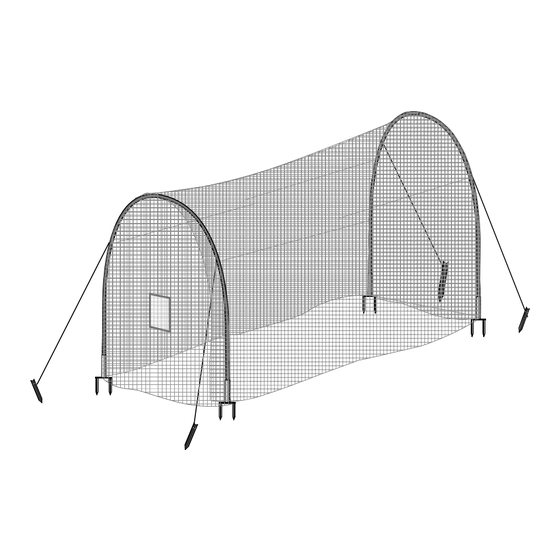
12' Batting Cage
®
Advertisement
Table of Contents

Related Manuals for Heater Sports HomeRun 12


Summary of Contents for Heater Sports HomeRun 12
- Page 1 Instructions Date: 05/2022 Version: 00001 OWNER'S MANUAL HomeRun 12' Batting Cage ® www.HeaterSports.com Model No. HRBC99 Serial No. Serial number found on warning label sewn onto netting. ACTIVATE YOUR WARRANTY To register and activate your 1 year parts & labor warranty, call 1-800-492-9334 CUSTOMER CARE For customer service inquiries,...
- Page 2 READ BEFORE ASSEMBLING If YOU ExpERIENCE ISSUES WITH THIS CAGE, DO NOT RETURN TO THE RETAIL STORE where purchased - call Toll Free: (800) 492-9334 WARNING WARNING > DO NOT LEAvE cAGE ASSEMBLED DURING ANY > If personally pitching inside, a protective screen WIND, RAIN, OR SNOW.
- Page 3 PARTS LIST *Replacement Parts Available by Calling Heater Sports at 1-800-492-9334 Stake Insert Roll of Black Tape Qty: 4 (Pre-Assembled Qty: 1 In Stake) Netting With Pitching Machine Harness Qty: 1 Black Guide Ropes Qty: 2 Bundles of 2 (4 Total)
- Page 4 STAKE ASSEMBLY sTep 1: Using a rubber mallet or hammer, pound Ground Stakes into ground as outlined below. Arch 1 12 feet 12 feet 12 feet Arch 2 12 feet Page 4...
- Page 5 ARcH ASSEMBLY sTep 1: Slide each pole section together as shown. Make sure the poles slide in as far as possible, then tape each fiberglass rod joint to ensure the poles don't slide out of the fitting. REpEAT 2x fOR EACH ARCH ASSEMBLY & LAY NExT TO INSERTED GROUND STAKES. Roll of Tape Slide Fittings Together, Then Tape Joints To...
- Page 6 sTep 2: Tie 4 Black Guide Ropes to each metal fiberglass rod fitting as shown below. There will be some fittings with no rope. Then, attach White Support Rope & Stake (4x) to fittings shown below. IMporTaNT: attach rope to the actual Fiberglass rod fitting, not the smaller metal arch welded on the fitting. Tie Knot To Tie Knot To Fitting Here...
- Page 7 NET ASSEMBLY sTep 1: Unfold the Batting cage Net and spread the net over the length of the cage frame. Ensure cage warning label tag is facing outside of cage. Page 7...
- Page 8 sTep 2: Starting with one of the arches, grab one side and ask someone else grab the other end. Together, carefully raise the poles and insert into the ground stakes (See Fig. 1). Repeat this for the remaining arch so the cage stands upright. Next, spread the netting evenly over the frame so there is equal parts netting touching all sides of the ground surrounding the cage.
Need help?
Do you have a question about the HomeRun 12 and is the answer not in the manual?
Questions and answers