Table of Contents
Advertisement
Quick Links
Advertisement
Table of Contents

Subscribe to Our Youtube Channel
Related Manuals for Trumpf TruTool F 125


Summary of Contents for Trumpf TruTool F 125
- Page 1 Operator's manual TruTool F 125 (1A2) English...
-
Page 3: Table Of Contents
Contents Safety ..................4 General safety information...........4 Specific safety information...........4 Description .................5 Intended use ................6 Technical data of the TruTool F 125........7 Setting work ...............8 Installing the exhaust hose ..........8 Adjusting the hammer............9 Operation ................11 Operating the TruTool F 125 ..........11 Maintenance ..............12... -
Page 4: Safety
Always move the machine during work away from your body. Damage to property due to improper handling. Machine will be damaged or destroyed. Have servicing and inspections of hand-held compressed-air Caution tools carried out by a qualified technician. Only use original accessories provided by TRUMPF. Safety E604EN_01.DOC... -
Page 5: Description
48 Flanged plate 52 Safety lever hammer opening 49 Carrier plate 347 Sleeve 46 Knurled screw for loosening or 50 Hammer Down locking the adjustment mecha- nism for the hammer opening Seam locker TruTool F 125 Fig. 52430 Description E604EN_01.DOC... -
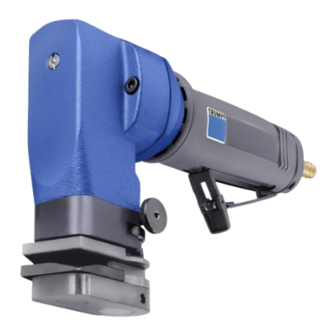
Page 6: Intended Use
Only use the machine for work and materials described in "Intended use." Warning The TRUMPF seam locker TruTool F 125 is a compressed air hand-held device used for the following applications: • Closing pre-bent standing seams and angular seam on correspondingly pre-machined workpieces, e.g. -
Page 7: Technical Data Of The Trutool F 125
Technical data of the TruTool F 125 Other countries Values Values Max. material thickness of steel 1.25 mm 0.049 in 400 N/mm² Max. folding thickness 5 mm 0.2 in Max. lock seam elevation 40 mm 1.5 in Working speed 5-6 m/min... -
Page 8: Setting Work
Setting work Installing the exhaust hose The exhaust hose reduces noise emissions and guides the exhaust air away from the operator. Adapter Hose clip Teflon tape Exhaust hose Sleeve Spring ring Compressed-air hose Exhaust hose Fig. 52422 1. Put the exhaust hose (6) and the hose clip (5) over the compressed-air hose (4). -
Page 9: Adjusting The Hammer
Adjusting the hammer The clearance between the upper and lower hammer must be adjusted depending on the material thickness and/or seam thickness. Knurled nut 49 Carrier plate 46 Knurled screw 50 Hammer Down 47 Hammer Up Standing seam Fig. 11400 Setting the hammer for 1. - Page 10 46 Knurled screw 49 Carrier plate 47 Hammer Up 50 Hammer Down Angled standing seam Fig. 11401 Setting the hammer for 1. Loosen small knurled screw (46). angle seam 2. Set maximum hammer opening with the large knurled nut (43). 3.
-
Page 11: Operation
Warning Never touch the tool while the machine is running. Always move the machine during work away from your body. Operating the TruTool F 125 Switching on 1. Swivel the safety lever. 2. Press the lever against the motor housing. -
Page 12: Maintenance
Maintenance Risk of injury due to uncontrolled machine movements. Remove the compressed-air hose from the machine when changing tools and before performing any maintenance work on the machine. Warning Risk of injury due to repair work not being carried out properly. -
Page 13: Changing Plastic Buffers
Changing plastic buffers The plastic buffer is for damping the hammer. The plastic buffer can wear with time and the lock seam is then not closed properly. (see Fig. 11400, p. 9) 1. Loosen small knurled screw (46). 2. Loosen knurled nut (43). 3. -
Page 14: Supplying With Power And Guaranteeing Lubrication
Supplying with power and guaranteeing lubrication Damage to property due to improper handling. Failure of the compressed-air motor. Do not exceed the maximum operating pressure. Caution Regularly lubricate the compressed-air motor. Install an oil mist lubrication device into the compressed-air line. Supplying compressed air Prerequisite •... -
Page 15: Replacing Fins
Hold a piece of paper in front of the exhaust air vent in the Checking the oil supply motor housing when the machine is running. The oil supply is sufficient when oil spots appear. When there is no oil mist lubrication device available: Fill the air inlet bore hole with 0.5-1 ccm of oil every two hours. -
Page 16: Cleaning The Strainer
Cleaning the strainer Dirty strainers decrease machine performance. Muffler Air inlet with strainer Housing ring Air inlet Fig. 52402 1. Remove the air inlet with strainer. 2. Clean the strainer or replace the complete air inlet. 3. Reinstall the air inlet. Changing mufflers Change the muffler pads as needed (see Fig. -
Page 17: Original Accessories And Wearing Parts
– Desired delivery type (e.g. air mail, courier, express mail, – ordinary freight, parcel post). 4. Send the order to your TRUMPF representative. Refer to the address list at the end of the document for TRUMPF service addresses. Disposal To dispose of the machine, completely disassemble it, degrease it and send it, according to the different types of material, for recycling. - Page 18 Disposal E604EN_01.DOC...
Need help?
Do you have a question about the TruTool F 125 and is the answer not in the manual?
Questions and answers