
Subscribe to Our Youtube Channel
Related Manuals for Reolink Go PT Ultra


Summary of Contents for Reolink Go PT Ultra
- Page 1 A p r i l 2 02 3 Q S G 1 _ A _ E N Reolink Go PT Ultra Quick Start Guide @ R e o l i n kTe c h h t t p s ://re o l i n k . c o m...
- Page 2 Content What's in the Box What’s in the Box · · · · · · · · · · · · · · · · · · · · · · · · · · · · · · · · · · · · · · · · · · · · · · · · · · · · · · · · · · · · · · · · · · · · · · · · · · · · ·2 Camera Introduction ·...
-
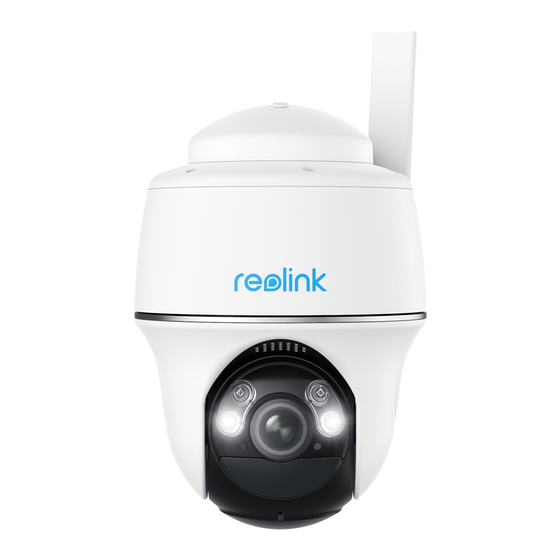
Page 3: Camera Introduction
Camera Introduction Set up the Camera Activate SIM Card for the Camera Lens • Choose a Nano SIM card that supports WCDMA and FDD LTE. • Some SIM cards have a PIN code. You may use your smartphone to disable the PIN first. IR LEDs ... - Page 4 Register the SIM Card Nano SIM Nano SIM Nano SIM Nano SIM Nano SIM Nano SIM Nano SIM Nano SIM MicroSD MicroSD MicroSD MicroSD MicroSD MicroSD MicroSD MicroSD Nano SIM Nano SIM Nano SIM Nano SIM Nano SIM Nano SIM MicroSD MicroSD MicroSD...
- Page 5 NOTE: You may also run into the following situations: Voice Prompt Camera Status Solutions Step 1 Scan to download the Reolink App from the App Store or Google Play store. 1. Check if the SIM card is facing “SIM card cannot be Camera cannot recognize the reverse direction.
-
Page 6: Charge The Camera
Orange LED: charging Green LED: Fully charged Set up the Camera on PC (Optional) Step 1 Download and install the Reolink Client: Go to https://reolink.com > Support > App&Client. For better weatherproof performance, please always cover the charging port with the rubber Step 2 Launch the Reolink Client, click the “... - Page 7 Install the Camera Mount the Camera to Wall • For outdoor use, the camera MUST be installed upside down for better waterproof performance and better PIR motion sensor’s efficiency. • Install the camera 2-3 meters (7-10 ft) above the ground. This height maximizes the detection range of the PIR motion sensor.
- Page 8 Mount the Camera to Ceiling Install the mount base to the ceiling. Align the camera with the bracket and turn the camera unit clockwise to lock it in position. Align the white hole on the camera top with the white hollow screw on the bracket. Use a wrench and a hex head screw provided to secure the camera into place.
-
Page 9: Safety Instructions Of Battery Usage (For Battery-Powered Cameras)
2. Charge the rechargeable battery with a standard and high-quality DC 5V battery charger or Reolink solar panel. Do not charge the battery with solar panels from any other brands. 3. Charge the battery when temperatures are between 0°C and 45°C and always use the battery when temperatures are between -10°C and 55°C. -
Page 10: Notification Of Compliance
If these won’t work, please contact Reolink • Reset the camera and try again. Support. Reolink declares that this product is in compli- Camera is not Powering On ance with Radio Equipment Regulations 2017 If these won’t work, please contact Reolink... - Page 11 : If you need any technical help, please visit our Reolink Official Store or a Reolink authorized (1) L' appareil ne doit pas produire de official support site and contact our support reseller. Learn more: FCC Radiation Exposure statement brouillage;...
Need help?
Do you have a question about the Go PT Ultra and is the answer not in the manual?
Questions and answers