Reolink Go User Manual
4g battery-powered camera
Hide thumbs
Also See for Reolink Go:
- User manual ,
- Operational instruction (43 pages) ,
- Quick start manual (9 pages)

Related Manuals for Reolink Reolink Go


Summary of Contents for Reolink Reolink Go
- Page 1 Reolink 4G Battery-powered Camera Sept 2021 QSG1_A User Manual Reolink 4G Battery-Powered Camera User Manual...
-
Page 2: Table Of Contents
Activate the SIM Card for the Camera ................10 3. Install the SIM Card ........................10 Reolink Go/Reolink Go Plus ....................10 Reolink Go PT/Reolink Go PT Plus ..................12 Connect to the Mobile Carrier Network ................13 4. Charge the Battery ........................16 Reolink Go/Reolink Go Plus .................... - Page 3 Reolink 4G Battery-Powered Camera Reboot and Restore ......................... 88 Firmware Upgrade ........................88 Smart Homes ..........................90 11. Instructions of Battery Usage ....................100 12. FAQs and Troubleshooting ..................... 101 FAQs ............................. 101 Troubleshooting ........................103 Note: This user manual takes a camera model that supports most features as an example.
-
Page 4: Camera Introduction
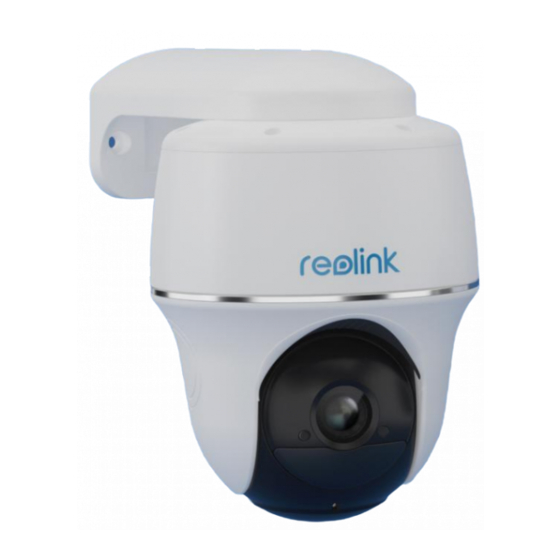
Device Overview Reolink Go/Reolink Go Plus Reolink Go/Go Plus, a 100% wire-free mobile HD security camera, operates on 4G-LTE and 3G networks. An ideal video monitoring solution with no cords, no wiring hassles, when in areas with limited or no WiFi access, no electrical power... - Page 5 Reolink 4G Battery-Powered Camera Reolink Go PT/Reolink Go PT Plus Reolink Go PT/Reolink Go PT Plus is a 100% wire-free outdoor surveillance camera that runs on 4G LTE and 3G networks. No WiFi needed. No wiring hassles. With an ultra-wide viewing angle of 355° pan & 140° tilt, it can be a perfect security solution for large areas warehouses, woods, etc.
-
Page 6: Status Light
Reolink 4G Battery-Powered Camera Status Light Note: If the camera connects the network successfully,there will be no status LED light up during idle mode. Status Light Camera Status Camera cannot recognize the SIM Red LED solid light up then starts to... -
Page 7: Set Up The Camera
Reolink 4G Battery-Powered Camera 2. Set up the camera What’s in the Box Note: The package content may vary and update with different version and platforms, please take the below information only for a reference. And the actual package content are subject to the latest information on the product selling page. - Page 8 Reolink 4G Battery-Powered Camera Reolink Go Plus Reset Needle *1 Reolink Go Plus *1 Mount *1 Pack of Screws *1 Surveillance Sticker *1 Mounting Template *1 USB Cable *1 Quick Start Guide *1 Camouflage Skin *1 User Manual...
- Page 9 Reolink 4G Battery-Powered Camera Reolink Go PT Reolink Go PT *1 Reset Needle *1 Bracket *1 Mounting Template *1 Surveillance Sticker *1 Quick Start Guide *1 Pack of Screws *1 USB Cable *1 User Manual...
- Page 10 Reolink 4G Battery-Powered Camera Reolink Go PT Plus Reolink Go PT Plus *1 Reset Needle *1 Bracket *1 Mounting Template *1 Surveillance Sticker *1 Quick Start Guide *1 Pack of Screws *1 USB Cable *1 Note: There is no SIM card in the box, you need to buy one from the mobile operator yourself.
-
Page 11: Activate The Sim Card For The Camera
• Do not insert the IoT or M2M SIM card into your smartphone. 3. Install the SIM Card Reolink Go/Reolink Go Plus 1. Remove the back cover by rotating counterclockwise and insert the SIM card into the slot. 2. Insert the battery into the camera and tighten the back cover to power on the camera. - Page 12 Reolink 4G Battery-Powered Camera 3. A red LED will be on and solid for a couple of seconds, then it will go out. 4. “Network connection succeeded”. A blue LED will flash for a few seconds and then go solid before going out, which means the camera has been successfully connected to the network.
-
Page 13: Reolink Go Pt/Reolink Go Pt Plus
Reolink 4G Battery-Powered Camera Reolink Go PT/Reolink Go PT Plus 1. Rotate the camera lens, and remove the rubber cover. 2. Insert the SIM card. User Manual... -
Page 14: Connect To The Mobile Carrier Network
Reolink 4G Battery-Powered Camera 3. With these done, press the rubber cover firmly for better waterproof performance. Notes: • The SIM card slot is above the SD card slot. When inserting the SIM card in, remember that the gold contacts shall face down and you need to push the trimmed corner inside the camera. - Page 15 Reolink 4G Battery-Powered Camera 2. Wait a few seconds and a red light will be on and solid for a couple of seconds. Then, it will go out. 3. A blue LED will flash for a few seconds and then go solid before going out. You will hear a voice prompt "Network connection succeeded”, which means the...
- Page 16 Reolink 4G Battery-Powered Camera Note: You may also run into the following situations: Voice Prompts Camera Status Solutions 1. Check if the SIM card is facing the reverse Camera cannot “SIM card cannot be direction. recognize this SIM recognized” 2. Check if the SIM card is card.
-
Page 17: Charge The Battery
Note: A 5V/2A or 9V/2A USB charger can be used, and the battery can also be charged separately. 2. Charge the battery with the Reolink Solar Panel. Note: For better weatherproof performance, please always cover the USB charging port with the rubber plug after charging the battery. -
Page 18: Reolink Go Pt/Reolink Go Pt Plus
Fully charged Orange LED Charging Note: The Solar Panel is NOT included in the package, you can buy one on Reolink’s official online store. Reolink Go PT/Reolink Go PT Plus 1. Charge the battery with a power adapter. 2. Charge the battery with the Reolink Solar Panel. -
Page 19: Initialize The Camera
Charging Notes: • The battery is a built-in one. Please do not remove it from the camera. • The Solar Panel is NOT included in the package, you can buy one on Reolink’s official online store. Initialize the Camera 1. Download and launch the Reolink App or Client software, and follow the onscreen instructions to finish initial setup. - Page 20 Reolink 4G Battery-Powered Camera Note: You may tap to enable flash light when setting up in a dark environment. 4. You may initialize your camera: Create device password and Name your device. Forgetting this password could be troublesome in the future, please remember it for your convenience.
-
Page 21: Install The Camera
5. Initialization finished. Tap Use now and start to preview now. 5. Install the Camera Mount the Camera Reolink Go/Reolink Go Plus 1. Drill holes in accordance with the mounting hole template and screw the security mount to the wall. If you are mounting the camera on any hard surface, insert plastic anchors into the holes first. - Page 22 Reolink 4G Battery-Powered Camera 2. Install the camera on the security mount. 3. To get the best field of view, loosen the adjustment knob on security mount and turn the camera. 4. Stiffen the adjustment knob to lock the camera.
- Page 23 Reolink 4G Battery-Powered Camera Attach the Camera to a Tree 1. Thread the provided strap to the mounting plate. 2. Attach the plate to the security mount with the smaller screws. 3. Fasten the security mount to a tree. User Manual...
- Page 24 4. Install the camera and adjust the camera angles as instructed in step 2 & 4 in the previous installation guide. Reolink Go PT/Reolink Go PT Plus 1. Drill holes in accordance with the mounting hole template and screw the security mount to the wall.
- Page 25 Reolink 4G Battery-Powered Camera 3. Screw the camera to the security mount and adjust to the proper direction. Note: For better LTE signal, it is recommended to install the antenna upward or horizontally. Mount the Camera to the Ceiling Loosen the screw on security mount and separate the ceiling bracket from the...
-
Page 26: Install The Solar Panel
Step 1. Please select a position with the maximum sunlight exposure throughout the year for your solar panel. For Reolink Solar Panel, it only needs a few hours of direct sunlight exposure to sufficiently power your camera daily. The amount of energy that the Solar Panel can generate is affected by weather conditions, seasonal changes, geographic locations, etc. - Page 27 Step 4. Loosen the adjusting control on the bracket and adjust the angle of the Solar Panel to make it receive direct sunlight exposure, then tighten the adjusting control to fix the Solar Panel. Step 5. Connect the Solar Panel to a Reolink camera with the micro USB cable. User Manual...
-
Page 28: View Your Camera
Reolink 4G Battery-Powered Camera Notes: Make sure that there is no covering on the Solar Panel. The energy harvesting efficiency drops drastically even when a small portion of the Solar Panel is shaded by other objects. Please don’t install the Solar Panel completely horizontally. Otherwise, your solar panel might accumulate dust and other debris easily. - Page 29 Reolink 4G Battery-Powered Camera Icon Meaning Settings: Provide access to a camera’s settings such as system information, detection alarm and camera recording. More options of live view: Channel Selection, Day and Night, Immersive. Network signal: 3G or 4G Siren: Trigger audio alarm.
- Page 30 Reolink 4G Battery-Powered Camera Use Immersive Mode The immersive mode has a larger viewing area with less interference and focuses on previewing. It is suitable for viewing 2 or 3 cameras on one screen. Note: One screen can accommodate up to three cameras. You could slip the screen to preview other cameras.
- Page 31 Reolink 4G Battery-Powered Camera Multiple Views If you have several cameras added in your Reolink App, you can view multiple streams at the same screen on Reolink App. Full-Screen View icon to enter into the full-screen mode. User Manual...
- Page 32 Reolink 4G Battery-Powered Camera to exit the full screen. Two-Way Audio 1. Tap to enter into the two-way audio page. 2. Tap to talk. User Manual...
- Page 33 Reolink 4G Battery-Powered Camera PTZ (Only for Reolink Go PT/GO PT Plus) 1. Tap to enter into the PTZ page. 2. Choose the direction you want the camera to pan and tilt. User Manual...
-
Page 34: Display Settings
Reolink 4G Battery-Powered Camera Display Settings Flip , then the image will be turned upside down. Quality 1. Tap Quality to enter into the Quality page. 2. Tap Clear mode or Fluent mode to enter into the settings page for Clear mode or Fluent mode. - Page 35 Reolink 4G Battery-Powered Camera 3. Tap Save to save the settings. Anti-flicker Use this feature if some devices such as TV screens and lights are flickering. - 50Hz: Used for Australia and the UK. - 60Hz: Used for the USA and Canada.
- Page 36 Reolink 4G Battery-Powered Camera Day and Night Tap Day and Night to enter into the settings page. Note: It is the same as the settings on the Live View part. Camera Name You can set the position of the camera name on the screen.
- Page 37 Reolink 4G Battery-Powered Camera Date You can set the position of the date on the screen. Watermark to disable the watermark shown on the screen. User Manual...
- Page 38 Reolink 4G Battery-Powered Camera Privacy Mask You can use your finger to press and drag a black rectangle(up to 3 rectangles) on the screen to block out a specific area. Infrared Lights By default, the infrared lights on the cameras are set to Auto. They will be automatically turned on in dim environment.
-
Page 39: Alarm And Detection
Turn on/off PIR On the Devices page of the Reolink App, choose the camera and then directly tap on PIR button to quickly turn on or off the PIR motion detection. User Manual... - Page 40 Reolink 4G Battery-Powered Camera Set up PIR Motion Detection Sensitivity 1. Tap on 2. Choose PIR Motion Sensor, and tap to enable PIR Motion Sensor. User Manual...
- Page 41 Reduce false alarms: If you have received frequently false alarms, please enable Reduce false alarms option. Set up PIR Motion Detection Schedule This option is for models except Reolink Go plus and Reolink Go PT plus. 1. Tap on . Then choose PIR Motion Sensor.
-
Page 42: Set Up Motion Alerts
Reolink 4G Battery-Powered Camera 2. Tap to enable PIR Motion Sensor. Then tap Schedule to set up the schedule and decide when the PIR motion detection works. Set up Motion Alerts Push Notification When the camera detects a motion, it will send a push notification, which pops up on your mobile phone. - Page 43 Reolink 4G Battery-Powered Camera 2. Tap on Push Notifications to enable this function. 3. Set a push Schedule if you need. For camera models Reolink Go PT plus and Reolink Go plus, you can also select Person, Vehicle or Others.
- Page 44 Reolink 4G Battery-Powered Camera 4. Set your phone to allow Reolink App to send push notifications. Go to your phone Settings, find Notifications and among the App list find the Reolink App. Make sure the Reolink App can send notifications.
- Page 45 3. Tap Schedule to set up a schedule when you’d like to receive the email alerts, and tap Save. This is only applicable for Reolink Go PT Plus and Reolink Go Plus. You can also choose the Detection Type: Person, Vehicle or Others.
- Page 46 Reolink 4G Battery-Powered Camera Tap Email Content to choose for the camera to send email with Text or Picture. For model Reolink Go Plus and Reolink Go PT Plus, you can choose Text, Picture, Text with Picture or Text with Video.
- Page 47 Reolink 4G Battery-Powered Camera Alarm Siren You can set up the camera siren to make an alert sound when a motion is detected. Set up Siren . Tap on Siren and enable Siren. 1. Tap on Tap on Custom Alarm Sound, if you want to use a custom sound. Tap Custom sounds, then tap Change custom sounds to record an up-to-5-second sound.
- Page 48 Tap Schedule to set up a schedule when you want the siren to work, then tap Save. This is only applicable for Reolink Go PT Plus and Reolink Go Plus. You can also choose the Detection Type: Person, Vehicle or Others.
-
Page 49: Set Up Motion Recording
2. Tap Schedule to set up a schedule when you want the camera to save motion recordings, then tap Save. This is only applicable for Reolink Go PT Plus and Reolink Go Plus and you can also choose the Detection Type: Person, Vehicle or Others. -
Page 50: Improve Your Motion Detection
Reolink Go model. Improve Your Motion Detection Reolink battery-powered cameras have a PIR sensor on each side of the camera and the camera detects the temperature differences between two sides to detect motions. So it’s more sensitive when a person or car is passing in front of the camera from side to side, compared to coming towards the camera. - Page 51 Reolink 4G Battery-Powered Camera Ideal Viewing Distance: 2-10 meters (7-33ft) Tip 2: Install cameras according to the detecting field of PIR motion sensors. 1. The detecting distance of PIR motion sensors is 9 meters, and the detecting angle is 120˚ horizontally. Motions out of this range can’t be detected.
- Page 52 Reolink 4G Battery-Powered Camera Tips for Reducing False Alarms Do not install the camera facing bright lights, including sunshine, bright lamp lights, etc. Do not place the camera too close to a place where many vehicles move frequently; 15 meters (55ft) away from the vehicle is the recommended distance based on our numerous tests.
-
Page 53: Recording And Playback
8. Recording and Playback Set up Recording Reolink battery-powered cameras only support motion recordings but not continuous recordings. And recordings can be saved into micro SD cards. For details of the setup steps, please refer to chapter Alarm and Detection on the part of Set up Motion Recordings. -
Page 54: Playback And Download Recordings
Reolink 4G Battery-Powered Camera Playback and Download Recordings 1. Open live view of the camera. Then tap on Playback on the bottom. 2. Select a date to search the recordings. Slide through the timeline to find the recordings you want to replay, tap on the selected recording and it’ll automatically start to play. - Page 55 4. Tap show alarm icon on the bottom to show the alarm recordings only. This is only applicable for the Reolink Go PT Plus and Reolink Go Plus, and you can select motion recording type of Person,Vehicle or Others to replay.
- Page 56 Reolink 4G Battery-Powered Camera Download Recordings 1. Open live view of the camera. Tap on Playback on the bottom. 2. Select a date to search the recordings. Slide through the timeline to find the recordings you want to replay, tap on the selected recording and then tap on the...
-
Page 57: Time Lapse
It is a means of recording at regular intervals, and reproducing the slow changing process of the scene with obviously changing images. Set up Time Lapse This option is available for all 4G cameras except the Reolink Go model (with old User Manual... - Page 58 Reolink 4G Battery-Powered Camera hardware). . Then tap on Time Lapse. 1. Tap on 2. Tap Try Now or Create New Time Lapse Capture. User Manual...
- Page 59 Reolink 4G Battery-Powered Camera 3. Select a scene from the list or tap on Customize to create a customized time lapse capture. 4. Customize the settings of Capture Starts at, Duration, Interval, Quality and File Type, then tap on Start. The camera will automatically start to capture at the set time.
- Page 60 Reolink 4G Battery-Powered Camera 5. Later when the time lapse video is created, you can tap on View on the Time Lapse page to play back or download it. It usually takes several seconds or minutes for the time lapse video to cache before playback starts. You can also tap on the trash icon to manually delete the time lapse video.
-
Page 61: Cloud Recording
Reolink Cloud Recording allows the camera to upload and save motion alarm recordings to the cloud server, asides from saving recordings to SD card. You can access your cloud video history via Reolink App or web page anytime, from anywhere. Reolink provides free basic plan that supports uploading one camera’s video to cloud, as well as paid plans for multiple cameras. - Page 62 Register an Account and Set up to Upload Cloud Recording Register an Account 1. Open up Reolink App, and tap on Cloud, then tap Cloud Storage. 2. Tap Sign up, then enter your email address and password. Tick terms and conditions, and then tap on Sign up to register an account.
- Page 63 Reolink 4G Battery-Powered Camera 4. Then you can use the registered account to Log in Reolink App. Subscribe to a Cloud Plan and Bind the Camera to Cloud 1. Tap Cloud Storage then tap Subscribe. Choose to buy the free basic plan or a paid plan.
- Page 64 Reolink 4G Battery-Powered Camera 2. After buying a plan, tap Bind cameras, and it’ll search all the cameras that support Cloud. Choose the camera you want to bind to Cloud and tap Add. Note: If your camera firmware is outdated, it’ll show Upgrade. Tap Upgrade to update the firmware to the latest first, then tap Add to bind the camera.
- Page 65 Reolink 4G Battery-Powered Camera 2. Tap your camera. Here you can tap to turn off or turn on Cloud Recording. 3. Tap Delete, and it’ll unbind this camera from Cloud plan. User Manual...
- Page 66 Reolink 4G Battery-Powered Camera Change Uploaded Video Resolution Tap Video Resolution, and choose Fluent or Clear to change the resolution of uploaded videos. Upgrade the Cloud Recording Plan 1. Tap Cloud Storage, then tap the three dots on the right hand corner of your plan card.
- Page 67 Reolink 4G Battery-Powered Camera 3. Choose the plan you want to upgrade to, then tap Continue to checkout. Once upgraded, all cameras currently bound will be updated to the new plan. Play back and Download the Cloud Recording Via Reolink App 1.
- Page 68 Reolink 4G Battery-Powered Camera 2. Select the device and date to find the recordings you want to play back, then tap the video to play back. 3. Tap to start downloading the recording. User Manual...
-
Page 69: Use The Reolink App
Tap on Delete icon to delete the selected videos. 9. Use the Reolink App Share Your Devices with Others to enter the Device 1. Launch Reolink App on your phone, then tap Settings page. 2. Tap Share Camera to get the camera’s QR code. User Manual... - Page 70 Reolink 4G Battery-Powered Camera 3. Launch the Reolink App in another smart phone and tap button to scan the QR code. Or you can manually input the camera’s UID to add the device. The camera UID consists of 16 digits that start with 9527000xxxxxxxxx.
-
Page 71: Scene Modes
Reolink 4G Battery-Powered Camera After entering the UID, please tap Next to enter the camera password to log in. Scene Modes The Scene Modes settings is designed for different usage scenarios. You could control all your cameras under different modes as you need. For instance, you could disable all cameras alarm under home mode when you're home, but enable all the alarms under outside mode when you are away. - Page 72 Reolink 4G Battery-Powered Camera 2. Tap it to name the scene and select a scene. Name the scene Select a scene icon Select devices Customize the alarm settings 3. Select devices for this scene and customize the alarm settings. If you want to receive push, email, audio alarm under this scene mode that you can enable the alarm settings with push, email, audio, alarm.
- Page 73 Reolink 4G Battery-Powered Camera 4. Tap Save in the upper right corner to save the settings. Note: If the selected cameras are successfully activated, the prompt of xxx mode setup succeeded will be displayed as the picture shown below. If you want to make some changes to a certain scene, long-press the scene button to edit or delete the scene, the camera you selected will stay in this mode until you change to another mode.
-
Page 74: Add Or Delete A Camera
Reolink 4G Battery-Powered Camera Add or Delete a Camera Add Camera by Scan the Camera QR Code 1. Tap and scan the QR code on the camera body. Note: You may tap to enable flash light when setting up in a dark environment. - Page 75 Reolink 4G Battery-Powered Camera Add Camera by Entering the Camera’s UID or IP 1. Select Input UID/IP, please note that you are unable to add the battery powered camera with IP address. Note: The camera UID consists of 16 digits that start with 9527000xxxxxxx.
-
Page 76: Register Account
Register Account A Reolink account can be used to place orders on the Reolink website, check order history, and log in to Reolink cloud or smart home like Google Home or Alexa. -
Page 77: App Settings
Reolink 4G Battery-Powered Camera After that you will receive a verify email. Once finished to verify the email, you can log in your Reolink Account. App Settings Launch the Reolink App. Tap and you can adjust the device order, change sound settings, App password, clean cache, etc. - Page 78 Reolink 4G Battery-Powered Camera Adjust Device Order: Adjust order for a quicker access to the devices you want. Tap Adjust Device Order and drag the device to the position as you want. Message Sound Settings: Like the push notification sounds, tap and you can choose the notification sound you like.
- Page 79 Reolink 4G Battery-Powered Camera User Manual...
-
Page 80: Camera Settings
Clear Cache: Clean the Reolink App cache. Cache is the temporary data generated when you use the app. Clearing cache will not affect the normal use of Reolink App. Auto Live View: When you launch the Reolink App, the App will start the live stream automatically. - Page 81 Reolink 4G Battery-Powered Camera Install the Micro SD card 1. Switch off the camera before installing the micro SD card. 2. Insert the micro SD card into the micro SD card slot. Note: Please use your fingernail (or use the provided reset needle) to push the SD card in until it's locked or you hear a "Tap".
- Page 82 Reolink 4G Battery-Powered Camera Remove the Micro SD Card 1. Please switch off the camera before removing the SD card. 2. Find the micro SD card slot and please use something sharp such as the reset pin or a paperclip or your fingernail to push the SD card to make it pop out.
- Page 83 Reolink 4G Battery-Powered Camera Check the Micro SD Card Status 1. Launch the Reolink App and tap Settings , then tap the camera to enter Device Info page. 2. Tap Storage, and you can see the SD card used space/total storage space.Tap Format to format the SD card.
-
Page 84: Device Information
Device Information From device information page, you can check the basic information about your camera include Model No, UID, and firmware version. and then go to Device Info. 1. Launch the Reolink App, then tap Device name Camera Name Model Camera model No. -
Page 85: Battery Information
Reolink 4G Battery-Powered Camera Battery Information User can check the battery status and level here. > Battery. Launch the Reolink App and tap The camera battery level will be displayed as pictures below. low battery level below 15% fully charged... -
Page 86: Device Password
When setting up admin and password is blank (no password). the camera, it’ll ask for a password before you can access the camera. Change Device Password 1. Launch Reolink App and tap Settings > Advanced > Change Device Password. User Manual... - Page 87 Reolink 4G Battery-Powered Camera 2. Enter the old password and new password, then tap on Save. Note: The confirm password should be the same as the new password. Tap Save to save the changes. User Manual...
-
Page 88: Date And Time
Reolink 4G Battery-Powered Camera Date and Time Sync Camera Time With Your Smart Phone 1. Launch Reolink App and tap > Advanced > Date and Time. 2. Then tap Synchronize phone time. User Manual... -
Page 89: Reboot And Restore
Reolink 4G Battery-Powered Camera Reboot and Restore > Advanced> Reboot or Restore. Here you Launch the Reolink App and tap can choose to reboot the camera or restore the camera to default. Note: Restoring will remove all the camera settings including camera password, camera name,PIR settings, etc. - Page 90 Reolink 4G Battery-Powered Camera 2.If Auto upgrade turned on, the camera will upgrade to the latest firmware automatically. If the Auto upgrade is off, you can choose to upgrade manually.If you see the image below that means the camera’s firmware is already the latest one, there is no newer firmware to upgrade.
-
Page 91: Smart Homes
Reolink 4G Battery-Powered Camera Smart Homes Note: For Reolink 4G battery-powered cameras, only Reolink Go Plus or Reolink Go PT Plus can work with Google home or Alexa. Google Home 1. Launch the Reolink App to tap to log in your Reolink account and go to Cloud >... - Page 92 Reolink 4G Battery-Powered Camera 2. Tap Enable to add the device to Google Home in the Smart Home page. Note: Only when it turns to disable that means the smart home feature is enabled. Launch the Google Home, sign in your account and then Get Started to create a home.
- Page 93 Reolink 4G Battery-Powered Camera 5. After the Chromecast found, please check the code shown on your TV and tap Yes to continue. 6. Connect the Wi-Fi network you would like to use with your Chromecast, then you can customize a room name, which will be added to your room list.
- Page 94 Reolink 4G Battery-Powered Camera button to enter the account page, and then tap Settings > 7. Now tap the Assistant > Home Control. button and search Reolink in the search bar. 8. Tap the User Manual...
- Page 95 Reolink 4G Battery-Powered Camera 9. Enter your Reolink account and password to log in first, then tap Allow. 10. Assign the room for the camera you enabled in the cloud account via Reolink App. User Manual...
- Page 96 Amazon Alexa To connect your camera to Alexa, make sure you have 3 devices at hand: a Reolink camera, an Amazon Alexa device (Amazon Echo show ,Amazon Echo Dot) and your mobile phone; and 2 apps on your phone: the Reolink App and Amazon Alexa App.
- Page 97 Reolink 4G Battery-Powered Camera 2. Tap Enable to add the device to Amazon Alexa in the Smart Home page. Note: Only when it turns to disable that means the smart home feature is enabled. 3. Launch the Amazon Alexa App, sign in to your Alexa account and then tap on Devices in the bottom right corner.
- Page 98 Search icon at the top right corner and search Reolink Smart Home. 5. Tap Enable to Use, type in your Reolink account, and then tap Log in. After logging in successfully, tap Allow, the App will remind that Reolink Smart Home has been successfully linked.
- Page 99 Reolink 4G Battery-Powered Camera 6. Tap on Discover Devices or say the voice command "Alexa, discover devices". Alexa will scan and show the devices bound to your Reolink account. User Manual...
- Page 100 Close to finish the setup. 8. Done! Now you've added the Reolink camera to Amazon Alexa successfully. Turn on the Amazon device and say “Alexa, show [name of the camera]” to view the live feed and say “Alexa, stop [name of the camera]”...
-
Page 101: Instructions Of Battery Usage
It’s designed to record motion events and remotely view live streaming only when you need it. 1. The battery is built-in. Do not remove it from the camera. (Battery of Reolink Go or Reolink Go Plus is removable.) 2. -
Page 102: Faqs And Troubleshooting
EU countries. Q: How much data does the camera consume per month? A: Reolink Go provides you with 1080p (2.0 Megapixel) high-resolution superior images. You can access it for live feed or recordings whenever you want. You'll get around 60min of full-resolution live feed (or recordings) per 1GB of data. - Page 103 Q: How long can the solar panel power extension cable be connected? A: The cable length of Reolink Solar Panel is 4 meters. If it is not long enough, you may consider purchasing our solar panel extension cable (4.5 meters/15 feet). You can add up to 2 solar panel extension cables to the Solar Panel so that the total distance can reach up to 13 meters (43 feet).
-
Page 104: Troubleshooting
If you hear the camera prompt “Network connection failed” with blue LED flashes when setting up, please try the following: 1. If your camera is Reolink Go PT or Reolink Go PT Plus, make sure the antenna is screwed tightly.
Need help?
Do you have a question about the Reolink Go and is the answer not in the manual?
Questions and answers