Plus M-5 Service Manual
Copy board
Hide thumbs
Also See for M-5:
- User manual (97 pages) ,
- Quick reference manual (7 pages) ,
- Brochure & specs (2 pages)
Table of Contents
Advertisement
Quick Links
Advertisement
Table of Contents

Subscribe to Our Youtube Channel
Related Manuals for Plus M-5


Summary of Contents for Plus M-5
- Page 1 COPY BOARD SERVICE MANUAL...
-
Page 2: Table Of Contents
7-5. CARTON PACKING SECTION ........31 4. DISASSEMBLY AND ASSEMBLY ....... 9 7-6. SCREWS AND WASHERS SECTION ....... 33 4-1. Tools Required ............9 7-7. M-5-T (OS) ..............34 4-2. Caution ..............9 8.REVISION HISTORY ............. 36 4-3. Disassembly and Assembly Procedures ....9... -
Page 3: Compliance Of Safe Repair
1. COMPLIANCE OF SAFE REPAIR Be sure to read this Service Manual before providing services. In the PLUS Copyboard, full consideration is taken to ensure the safety for a fire, electric shock, injury, harmful radiation, and substance. Therefore, observe the notice described in this Service Manual so that the safety is kept when providing services. Moreover, be sure to observe the notice described in the Instruction Manual. -
Page 4: Specifications
2. SPECIFICATIONS 2-1. Product Specifications MODEL NAME Wall type (Horizontally installed as standard.) Installation system Option: Stand installed vertically and horizontally, and partition installed horizontally DIMENSIONS W1175 ✕ H708 ✕ D93mm (not including protrusion) Dimensions (Main set only) Weight (Main set) 12.5Kg W1018 ✕... -
Page 5: Location Of Main Set
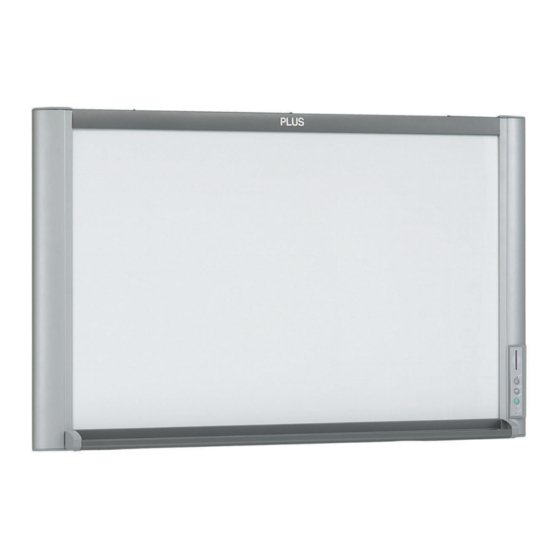
SPECIFICATIONS 2-2. Location of Main Set FRONT AND TOP 1. Copyboard 2. Sheet 3. Control panel (see page 20) 4. DC Input jack (see page 20) 5. USB connector (type B) (see page 20) 6. Screw holes for mounting the marker tray 7. -
Page 6: Control Panel Of Main Unit, Location Of Terminal
SPECIFICATIONS 2-3. Operation Panel of Main Unit, Location of Terminal The connectors are located on the bottom side of the copyboard. When set vertically The connectors are located on the left side of the copyboard. 6 CLEAR button 1 POWER button The Clear button is used to delete all image Turns on and off the power. -
Page 7: Scanning Area
SPECIFICATIONS 2-4. Scanning area Effective scanning area Area not scannable Scanning is not possible on the edges of 20mm 20mm sheet. Write or draw with in the effective scanning area. 23.5mm 978mm * The effective vertical scanning area is with in the ruled lines. 578mm Effective scanning area 23.5mm... - Page 8 SPECIFICATIONS LED display State Blinking period Situation of occurrence Until the quantity of During check of CCFL-ON light quantity. When the Power key is pressed light is stabilized Until the quantity of When the Memory key is pressed During check of CCFL-ON light quantity. light is stabilized in the Standby state When a JOB exists and during...
-
Page 9: Trouble Shooting
• Out-of-adjustment of CCD Unit. • Dust adheres to the mirror of the CCFL Unit. • The brightness adjustment of M-5 setup utility is too thick or thin. • The written character is too thin. • Markers other than black and red markers are used. -
Page 10: Error Log List
TROUBLE SHOOTING 3-2. Error Log List When an error occurs during normal processing, an “M5.ERR” file is created and the contents of an error are left based on the additional write system. The “M5.ERR” file is created in CF during CF insertion. It is created in internal flash during CF non-insertion. -
Page 11: Disassembly And Assembly
4. DISASSEMBLY AND ASSEMBLY 4-1. Tools Required • Phillips screwdriver No. 2 • Cutting pliers • Electrostatic elimination wrist band 4-2.Caution • See “1. Compliance of Safety Repair and Safety Inspection” before disassembling and assembling. • Put on gloves so that you do not cut your hand at the sharp edge of a frame during disassembly and assem- bly. -
Page 12: Adjustment
DISASSEMBLY AND ASSEMBLY 4-4.Disassembly and Assembly Frame Cap A Portion The disassembly and assembly procedures described here are one example. During actual operation, disas- semble and assemble the required parts referring to “4-3. Disassembly and Assembly Procedures”. Frame Cap C 1) Remove the Frame Cap. - Page 13 DISASSEMBLY AND ASSEMBLY 4) Remove the Side Frame L Section. (See Figure 4.) 1. Remove the “S-1” screw shown in Figure 4. (Tightening torque: 10.0kgfcm) 2. Disconnect the harness connected to the Main Side Frame L Section Board Assy. 3. Remove the Side Frame L Section. Fig.
- Page 14 DISASSEMBLY AND ASSEMBLY 7) Remove the Sheet Frame Section. (See Figures 7 and 8.) 1. Disconnect the Motor Harness from the Sheet Motor Assy. (See Figure 8.) 2. Remove the “S-5” screw shown in Figure 7. (Tight- Board Frame Section ening torque: 4.5kgfcm) 3.
- Page 15 DISASSEMBLY AND ASSEMBLY 10) Remove the CCD Unit. (See Figure 12.) 1. Disconnect the CCD Harness from the CCD Unit. 2. Remove the “S-7” screw shown in Figure 12 and then remove the CCD Unit. (Tightening torque: 4.5kgfcm) CCD Unit Notes: •...
-
Page 16: Ccd Unit Adjustment
5. ADJUSTMENT 5-1. CCD Unit Adjustment Adjustment is required in the following case. (Calibration is also required. See 5-2. Calibration method.) • When a CCD Unit is replaced • When adjustment gets out of order due to the failure during shipping (shock during transportation such as vibration) •... - Page 17 ADJUSTMENT 4) Focus adjustment screw of lens unit (See Figure 1.) Fix screw A temporarily so that the distance between the lens unit and holder is 1.7 mm. Fig. 1 5) Write test patterns on the sheet surface. (See Figures 2 and 3.) (Clean the plate surface sufficiently.
- Page 18 ADJUSTMENT 6) Put the set into the adjustment mode. • Turn ON the power. • Insert CF in which a command in the adjustment mode was put. The set is put into the CCD adjustment mode, so confirm that CCFL lights. 7) Adjustment of oscilloscope (See Figures 4 and 5.) •...
- Page 19 ADJUSTMENT 8) Right and left swing adjustment of CCD Unit (See Figures 6 to 9.) • As shown in Figures 6 and 7, insert a scale of 19 mm from the external and center positions of a CCFL unit. • Loosen screw B shown in Figure 8, move sheet metal C, and fix screw B when the waveform falls to the intermediate level as shown in Figure 9.
- Page 20 ADJUSTMENT 9) Torsion adjustment of CCD Unit (See Figures 10 and 11.) • Move a sheet so that the test patterns (vertical lines) written in step 5) are displayed on an oscilloscope. • Loosen screws D shown in Figure 10, move the CCD board, and fix screws D when the upper and lower vertical lines equally go down as shown in Figure 11.
- Page 21 ADJUSTMENT 11) Adjustment made according to the outside air temperature • Adjust VR on the CCD board using a ceramic adjustment screwdriver according to the outside air tempera- ture. (Adjust portion F (the width of a waveform) shown in Figure 14.) Notes: Confirm that five minutes or more passed after CCFL lights and that the outside air temperature is also stabilized when performing this adjustment.
-
Page 22: Calibration
ADJUSTMENT 5-2. Calibration Method Calibration is required in the following case. • When a CCD Unit is adjusted • When the Main Board Assy is replaced • When a CCFL Unit is replaced • Slight deterioration in picture quality Preparation Clean the sheet surface sufficiently. - Page 23 ADJUSTMENT 2) Start calibration. • Press the Power key and turn off the Power. • Disconnect the probe of an oscilloscope (only when CCD Unit adjustment is performed). • Install a Back Panel to prevent the external light. • Insert a CF card in which a calibration start JOB file was put. The contents of the data below are saved in CF as “M5.JOB”.
-
Page 24: Quick Calibration
ADJUSTMENT 4) Confirmation of print • Write a proper pattern (such as a character or symbol) fully in the scanning area using a black/red marker. • Confirm that the written pattern can be read normally. When abnormality (such as a dark line or rubbing) is found as a confirmation result; •... -
Page 25: Tension Adjustment Of Timing Belt
ADJUSTMENT 5-4. Tension Adjustment of Timing Belt The tension of a timing belt must be adjusted when the Sheet Motor Assy is replaced and removed. Tool required • Spring balance Adjustment (See the illustration shown below.) • Fix the Sheet Motor Assy tentatively and measure the tension of a timing belt using a spring balance. •... -
Page 26: Cable And Cable Connection
6. CABLE AND CABLE CONNECTION CCFL Inverter Unit CCD Unit CN3 CN2 AC Adapter Sheet Motor Assy 24... -
Page 27: Parts List
7. PARTS LIST 7-1. FRAME COVER SECTION 25... - Page 28 PARTS LIST 7-1. FRAME COVER SECTION PARTS NAME PARTS No. Q’ ty REMARK Back Panel 718203100 Side Frame R 718203400 Side Frame L Unit 718080010 Side Frame Plate 718202500 Frame Cap A 718203900 Frame Cap B 718204000 Frame Cap C 718204100 Main Board Assy 718500000...
-
Page 29: Board Frame Section
PARTS LIST 7-2. BOARD FRAME SECTION 7-2. BOARD FRAME SECTION PARTS NAME PARTS No. Q’ ty REMARK Board Frame Unit 718080050 CCD Unit 718080060 CCD Harness 718500700 CCFL Inverter Unit 718080070 CCFL Harness 718500800 27... -
Page 30: Sheet Frame Section
PARTS LIST 7-3. SHEET FRAME SECTION 7-3. SHEET FRAME SECTION PARTS NAME PARTS No. Q’ ty REMARK Sheet Frame Unit 718080080 Sheet Assy 718201900 Sheet Motor Assy 718501200 Motor Harness 718500600 Vibration Proof Rubber 718209300 28... -
Page 31: Accessories Section
PARTS LIST 7-4. ACCESSORIES SECTION 29... - Page 32 PARTS LIST 7-4. ACCESSORIES SECTION PARTS NAME PARTS No. Q’ ty REMARK User’s Manual (CD-ROM) 718207800 User’s Manual (OS) 718212700 Marker Set (OS) 718207700 No Parts Supply Dry Eraser 714173000 No Parts Supply AC Adapter 718501300 USB Cable (3m) 718500900 Power Code (EU) 3m 718501500 Power Code (UK) 3m...
-
Page 33: Carton Packing Section
PARTS LIST 7-5. CARTON PACKING SECTION 31... - Page 34 PARTS LIST 7-5. CARTON PACKING SECTION PARTS NAME PARTS No. Q’ ty REMARK Carton 718204900 Corner Packing 718204700 Packing for Marker Tray 718204800 Upper Packing 718205000 Accessory Box 718205100 32...
-
Page 35: Screws And Washers Section
PARTS LIST 7-6. SCREWS AND WASHERS SECTION 7-6. SCREWS & WASHERS SECTION PARTS NAME PARTS No Q’ ty SURFACE M4-12 Cross Recessed Flat Head 951341280 MFZnI-C-B M3-6 Cross Recessed Binding Head 951230610 MFZnI-C ø 3-5 P-Tight Cross Recessed Binding Head 953230510 MFZnI-C ø... -
Page 36: M-5-T (Os)
PARTS LIST 7-7. M-5-T (OS) S-10 S-11 S-10 S-11 S-10 S-11 S-10 S-11 34... - Page 37 PARTS LIST 7-7. M-5-T (OS) PARTS NAME PARTS No. Q’ ty REMARK Foot Pipe A Assy 718206300 Lengthen Pipe Assy 718206400 Pipe Frame Cap 714112600 Rail Assy 718206600 Front Caster 714660400 Foot Pipe B (OS) 718207900 Foot Plate 718206900 Stands Hanger Upper R...
-
Page 38: Revision History
8. REVISION HISTORY Revision History Revision page Date 36...
Need help?
Do you have a question about the M-5 and is the answer not in the manual?
Questions and answers