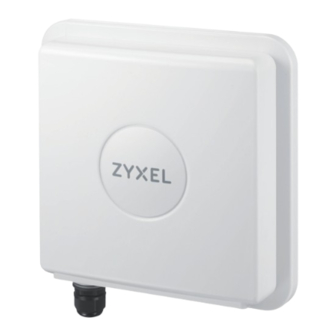
ZyXEL Communications LTE7461-M602 Quick Start Manual
4g lte-a outdoor router
Hide thumbs
Also See for LTE7461-M602:
- User manual (109 pages) ,
- User manual (361 pages) ,
- User manual (179 pages)
Table of Contents
Advertisement
Quick Links
LTE7461-M602
4G LTE-A Outdoor Router
Quick Start Guide
Location Examples
Location Examples
Location Examples
Location Examples
Pole Mounting
Pole Mounting
Pole Mounting
Place the LTE7461 in an open area free
of obstacles, and adjust the angle to
Smartphone
Pole Mounting
point it towards the base station to
have the strongest possible LTE signal.
Step 1
SIM Card Installation
1
RESET
L A N (P o E )
1
Make sure the LTE7461 is turned off. There should be no Ethernet cable connected providing
power using PoE. Unscrew the SIM card slot cover and remove it.
Step 2
Cable Connections
1
1-4
Follow steps 1 to 4 in the drawing to connect an 8-pin Cat 5e Ethernet cable to the LTE7461's LAN port.
1/4
Power Outlet
PC
Gateway
Notebook
Gateway
Smartphone
Laptop
SIM
2
Package Contents
Package Contents
Package Contents
LTE7461-M602
LTE7461-M602
LTE7461-M602
Power
Power
Power
Cord
Cord
Cord
Mounting Kit
x4
x4
x4
x4
x4
M6 Spring
M6 Spring
Hex Nuts
Hex Nuts
M6 Spring
M6 Washers
Washers
Washers
Washers
& Washers
& Washers
x2
Flat Brackets
M Bracket
See the User's Guide at www.zyxel.com for more information,
including customer support and safety warnings.
US Importer
Zyxel Communications, Inc
1130 North Miller Street Anaheim, CA 92806-2001
http://www.us.zyxel.com
Copyright © 2019 Zyxel Communications Corp. All Rights Reserved.
Wall Mounting
Wall Mounting
Power Outlet
Cat 5e (not supplied)
Cat 5e (not supplied)
Cat 5e (not supplied)
Power Outlet
Power Injector
Power Outlet
Power Injector
Power Outlet
Power Injector
Power Injector
Power Injector
Power Injector
2
L A N (P o E )
2
Insert your SIM card provided by an LTE ISP (Internet Service Provider).
3
GbE
GbE
GbE
Grounding
Grounding
Grounding
Gigabit
Gigabit
Gigabit
Cable
Cable
Cable
Wire
Wire
Wire
PoEInjector
PoEInjector
PoE Injector
x4
x4
x4
x4
x4
x4
x4
x4
x4
x4
x4
Nylon Wall
Nylon Wall
Tapping
Tapping
M6 Hex
M6 Hex
Hex Nuts
M6 Hex
M6 Hex
Plugs
Plugs
Screw
Screw
Bolts x90L
Bolts x90L
Bolts x90L
Bolts x12L
M4x25 mm
M4x25 mm
Pre-assembled Kit
Wall Mounting
Cat 5e (not supplied)
Cat 5e (not supplied)
Cat 5e (not supplied)
Cat 5e (not supplied)
Power Outlet
Power Outlet
Power Injector
Gateway
PC
PC
RESET
SIM
4
x2
PG 19
PG 19
Cable
M Bracket
Safety
Safety
Flat Brackets
Quick Start
Quick Start
Thread
Thread
Gland
Warnings
Warnings
Guide
Guide
x4
x4
x2
x4
x4
x4
M6 Hex
M6 Hex
M Bracket
Safety
Flat Brackets
Quick Start
Nylon Wall
Tapping Screw
Bolts x12L
Bolts x12L
Warnings
Guide
Plugs
M4x25 mm
Wall Mounting
Notebook
Smartphone
Advertisement
Table of Contents

Summary of Contents for ZyXEL Communications LTE7461-M602
- Page 1 US Importer Quick Start Guide Zyxel Communications, Inc 1130 North Miller Street Anaheim, CA 92806-2001 http://www.us.zyxel.com Copyright © 2019 Zyxel Communications Corp. All Rights Reserved. Location Examples Location Examples Location Examples Location Examples Wall Mounting...
- Page 2 WiFi network using the WIFI SSID and WIFI Key on the injector label, or on your smartphone Screw the SIM card slot cover back into place. simply scan the QR code to connect. Configuring Your LTE7461 (Optional) https://192.168.1.1 https://192.168.1.1 LTE7461-M602 User Name admin User Name: admin Password...
- Page 3 Step 5 Pole / Wall Mounting: Connect Pre-assembled Bracket Four M6 Spring Washers Four M6 Washers Four Hex Nuts Use the wrench to tighten the nuts in the final step. Make sure the LTE7461 is turned off. Disconnect the PoE injector from the power outlet. Use A, B and C to attach the bracket to the LTE7461.
- Page 4 Pole Mounting (Optional) Four M6 Hex Bolts x90L Four M6 Hex Bolts x12 L One M Bracket Four M6 Washers Four M6 Spring Washers Two Flat Brackets Use A, F and C to attach the brackets to the pole. Use B, D and E to attach the LTE7461 with the port facing down to C on the pole. Do not tighten the bolts too much.


Need help?
Do you have a question about the LTE7461-M602 and is the answer not in the manual?
Questions and answers