
Subscribe to Our Youtube Channel
Related Manuals for Riello Burners RL 34/1 MZ


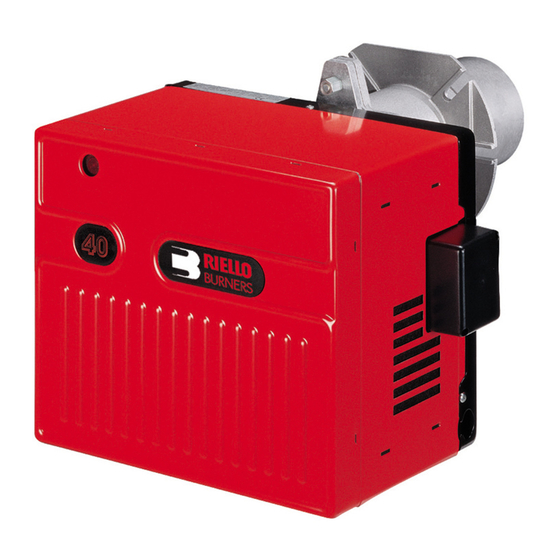
Summary of Contents for Riello Burners RL 34/1 MZ
- Page 1 Installation, use and maintenance instructions Gas oil/ Kerosene burners Two stage operation CODE MODEL TYPE 3470510 - 3470511 RL 34/1 MZ 975 T 2916426 (6) - 04/2011...
-
Page 3: Table Of Contents
Contents Declaration....................................3 Information and general warnings............................4 Information about the instruction manual ........................4 Guarantee and responsibility............................5 Guidance for the use of bio fuel blends up to 10%...................... 5 Safety and prevention................................7 Introduction.................................. 7 Safety warnings................................7 Basic safety rules ................................ - Page 4 Contents Maintenance programme ............................26 Opening the burner ..............................27 Closing the burner..............................27 Burner start-up cycle diagnostics ..........................28 Resetting the control box and using diagnostics......................28 Appendix - Accessories (optional) ............................31 Appendix - Electrical panel layout............................32 6426...
-
Page 5: Declaration
Address: Via Pilade Riello, 7 37045 Legnago (VR) Product: Gas oil/ kerosene burners Model: RL 34/1 MZ These products are in compliance with the following Technical Standards: EN 267 EN 292 and according to the European Directives: 2006/42/EC Machine Directive... -
Page 6: Information And General Warnings
Information and general warnings Information and general warnings Information about the instruction manual 2.1.1 Introduction 2.1.3 Danger: live components The instruction manual supplied with the burner: This symbol indicates operations which, if not car- is an integral and essential part of the product and must not ried out correctly, lead to electric shocks with le- be separated from it;... -
Page 7: Guarantee And Responsibility
Riello for further advice. the burner. If any Riello burners are used with fuel with a bio content >10% In particular, the rights to the guarantee and the responsibility will then the components within the hydraulic circuit maybe affected no longer be valid, in the event of damage to things or injury to and are not covered under warranty. - Page 8 Information and general warnings 2.3.1 Information and general instructions 2.3.2 Product Disclaimer Statement CAREFULLY READ THE FOLLOWING DISCLAIMER. YOU To ensure consistency, the supplier of the fuel must be able to ACCEPT AND AGREE TO BE BOUND BY THIS DISCLAIMER demonstrate compliance with a recognised Quality Control and BY PURCHASING RIELLO BIO COMPATIBLE BURNERS management system to ensure high standards are maintained...
-
Page 9: Safety And Prevention
Safety and prevention Safety and prevention Introduction The burners have been designed and built in compliance with the type and pressure of the fuel, the voltage and frequency of the current regulations and directives, applying the known technical electrical power supply, the minimum and maximum deliveries for rules of safety and envisaging all the potential danger situations. -
Page 10: Technical Description Of The Burner
220/230/50-60 220-230V / 50-60Hz 110/50/60 110V / 50-60Hz 3/400/50 230/50/60 BASIC DESIGNATION EXTENDED DESIGNATION Models available Blast tube Designation Electrical supply Code length mm RL 34/1 MZ TC (216) Single phase 3470510 RL 34/1 MZ TL (351) Single phase 3470511 6426... -
Page 11: Technical Data
Technical description of the burner Technical data Model RL 34/1 MZ Type 975 T 107 - 390 100 - 406 Power Mcal/h 92 - 342 86 - 349 Output kg/h 9 - 33.6 8 - 34 Kerosene, Gas oil and Blends of gas oil and bio fuel (FAME in accordance... -
Page 12: Overall Dimensions
Bear in mind that inspection of the combustion head requires the burner to be opened and the rear part withdrawn on the slide bars. D3937 Fig. 1 RL 34/1 MZ 216 - 351 780 - 915 Tab. B Blast tube: short-long... -
Page 13: Test Boiler
Technical description of the burner Test boiler Example Output 35 kg/hour: The firing rate was set in relation to special test boilers in accord- ance with the methods defined in EN 267 standards. diameter = 50 cm; length = 1.5 m. Fig. -
Page 14: Packaging - Weight
The burners are shipped in cardboard boxes with the maxi- mum dimensions shown in Tab. C. • The weight of the burner complete with packaging is indicat- ed in Tab. C. Fig. 5 RL 34/1 MZ 1000 Tab. C Standard equipment 2 - Hoses 2 - Gaskets for hoses... -
Page 15: Installation
Installation Installation Notes on safety for the installation After carefully cleaning all around the area where the burner will The installation of the burner must be carried out be installed, and arranging the correct lighting of the environ- by qualified personnel, as indicated in this manual ment, proceed with the installation operations. -
Page 16: Installer/Servicer Notes For The Use Of Gas Oil With Bio Blends Up To 10
Boiler plate Drill the combustion chamber locking plate as shown in Fig. 8. The position of the threaded holes can be marked using the ther- mal screen supplied with the burner. D455 Fig. 8 RL 34/1 MZ Tab. D 6426... -
Page 17: Blast Tube Length
The range of lengths available, L, is as follows: blast tube. For boilers having a water-cooled front the refractory fettling 8)- Blast tube 7)(Fig. 9) RL 34/1 MZ 9)(Fig. 9) is not required unless it is expressly requested by the • short boiler manufacturer. -
Page 18: Nozzle Installation
The burner’s operating delivery consists of the sum of the two nozzles deliveries. 5.9.2 Nozzles recommended Model Gas oil and Kerosene RL 34/1 MZ Danfoss 60° S - B - H Delavan 60° A D458 Fig. 11 Table nozzles - gas oil... -
Page 19: Combustion Head Adjustment
Installation The firing nozzle is the one lying beneath the firing electrodes (Fig. 12). Make sure that the electrodes are positioned as shown in Fig. 12. Finally remount the burner 4)(Fig. 13) to the slide bars 3) and slide it up to the flange 5), keeping it slightly raised to prevent the flame stability disk from pressing against the blast tube. -
Page 20: Fan Gate Adjustment
Installation Note Notches no. If the pressure in the chamber is equal to 0 mbar, the air must be adjusted with reference to the hatched line on the diagram (Fig. 16). Once the regulation of the head has been concluded, refit the burner 4)(Fig. -
Page 21: Hydraulic System
Hydraulic system Hydraulic system Gas oil supply Where gas oil containing bio diesel is in use, it is recommended to avoid over oxygenation of the blended fuels. WARNING Where at all possible avoid the use of two pipe systems where the circulated fuel is returned to the tank. -
Page 22: Hydraulic System Layout
Hydraulic system 6.1.3 Single-pipe circuit In order to obtain single-pipe working it is necessary to unscrew the return hose, remove the by-pass screw 6)(Fig. 20) and then screw the plug 7)(Fig. 20). The distance “P” must not exceed 10 meters in order to avoid subjecting the pump's seal to excessive strain;... -
Page 23: Pump
Hydraulic system Pass the hoses through the holes on the left-hand plate 5)(Fig. 21), removing the thin diaphragm that closes the two holes or as per the following instructions: unscrew the screws 1), now divide the insert piece into its two parts 2) and 3) and remove the thin diaphragm blocking the two passages 4). -
Page 24: Electrical System
Electrical system Electrical system Notes on safety for the electrical wiring The electrical wiring must be carried out with the electrical supply disconnected. Electrical wiring must be carried out by qualified personnel and in compliance with the regulations currently in force in the country of destination. -
Page 25: Start-Up, Calibration And Operation Of The Burner
Start-up, calibration and operation of the burner Start-up, calibration and operation of the burner Notes on safety for the first start-up The first start-up of the burner must be carried out Check the correct working of the adjustment, com- by qualified personnel, as indicated in this manual mand and safety devices. -
Page 26: Burner Operation
Start-up, calibration and operation of the burner Burner operation 8.3.1 Burner starting Starting phases with progressive time intervals shown in sec- onds: • control device TL closes. After about 3s: 0 s : the control box starting cycle begins. • 2 s : the fan motor starts. -
Page 27: Final Checks
Start-up, calibration and operation of the burner Final checks Obscure the photocell and switch on the control devices: the burner should start and then lockout about 5 s after opening of the 1 nozzle operation valve. Illuminate the photocell and switch on the control devices: the burner should start and then go into lockout after about 10 s. -
Page 28: Maintenance
Maintenance Maintenance Notes on safety for the maintenance The periodic maintenance is essential for the good operation, Before carrying out any maintenance, cleaning or checking oper- safety, yield and duration of the burner. ations: It allows you to reduce consumption and polluting emissions and to keep the product in a reliable state over time. -
Page 29: Opening The Burner
Maintenance Fuel tank If water or contamination is present within the fuel tank, it is es- sential that this is removed before the equipment is to be used. This is extremely important when gas oil containing Bio diesel is in use. If in doubt about how to achieve this then please contact the fuel or oil tank supplier. -
Page 30: Burner Start-Up Cycle Diagnostics
Maintenance Burner start-up cycle diagnostics During start-up, indication is according to the Tab. K: Sequences Colour code Pre-purging Ignition phase Operation, flame ok Operating with weak flame signal Electrical supply lower than ~ 170V Lock-out Extraneous light Key: Yellow Green Tab. - Page 31 Maintenance SIGNAL FAULT POSSIBLE CAUSE SOLUTION No blink The burner does 1 - No electrical power supply ... . . Close all switches - Check fuses not start 2 - A limit or safety control device is open ..Adjust or replace 3 - Control box lock-out .
- Page 32 Maintenance SIGNAL FAULT POSSIBLE CAUSE SOLUTION Pump unprimes 44 - Return pipe not immersed in fuel ..Bring to same height as suction pipe after prolonged 45 - Air enters suction piping....Tighten connectors pause Pump leaks fuel 46 - Leakage from sealing organ.
-
Page 33: A Appendix - Accessories (Optional)
Degassing units are provided in two versions: Burner Code Burner Code RL 34/1 MZ 3002719 RL 34/1 MZ (without filter) 20034277 RL 34/1 MZ (with filter) 20034281 GROUND FAULT INTERRUPTER KIT Degassing unit characteristics A “Ground fault interrupter kit” is available as a safety device for electrical system fault. -
Page 34: B Appendix - Electrical Panel Layout
Appendix - Electrical panel layout Appendix - Electrical panel layout Contents Indication of references Functional diagram Electrical connections set by installer Indication of references / 1 . A 1 Sheet no. Co-ordinates 6426... - Page 35 Appendix - Electrical panel layout 6426...
- Page 36 Appendix - Electrical panel layout 6426...
- Page 37 Appendix - Electrical panel layout WIRING DIAGRAM KEY Electrical control box Components on burners Components on boiler Capacitor Photocell Remote lockout signalling Hour counter Manual burner arrest switch Fan motor Single phase knife switch Remote burner reset button (accessory) Ignition transformer Extreme thermostat/pressure switch Safety thermostat/pressure switch Ignition solenoid...
- Page 40 RIELLO S.p.A. I-37045 Legnago (VR) Tel.: +39.0442.630111 http:// www.rielloburners.com Subject to modifications...
Need help?
Do you have a question about the RL 34/1 MZ and is the answer not in the manual?
Questions and answers