Advertisement
Precautions and notices
- Do not operate the device while driving. Using this product does not change the requirement for a driver to take full responsibility for his or her behavior. This responsibility includes observing all traffic rules and regulations in order to avoid accidents, personal injury or property damage.
- A window mount is needed when using your Mio in a car. Make sure that your Mio is placed in an appropriate place, so as not to obstruct the driver's view or deployment of airbags.
- Make sure that no object is blocking the camera lens and no reflective material appears near the lens. Please keep the lens clean.
- If the car's windscreen is tinted with a coating, it may impact the recording quality.
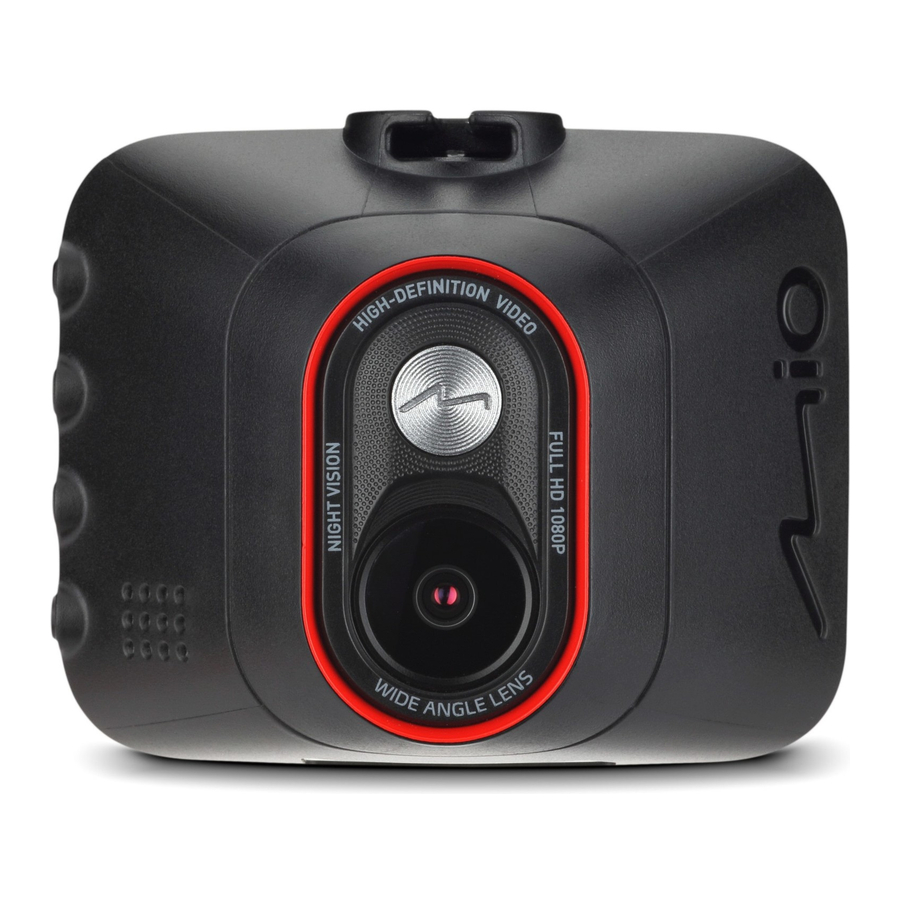
Getting to know your Device

| Name | Description | ||||
 | Mini-USB connector | Connects to the charger. | |||
 | Device mount socket | For the device mount. | |||
 | Camera lens | Make sure that no object is blocking the camera lens and no reflective material appears near the lens. | |||
 | Status indicator |
| |||
 | LCD screen | Displays the output of your device. | |||
 | Microphone | Records sounds. | |||
 | Menu key |
| |||
 | OK key | Acts as the ENTER button. | |||
 | Up key |
| |||
 | Down key |
| |||
 | Shutdown button | Turns off the device. | |||
 | Speaker | Outputs sound alerts. | |||
 | Memory card slot | Data is recorded to a MicroSD card. | |||
Using a memory card
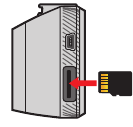
You have to insert a memory card before you can start recording. Your device supports Class 10 (or higher) memory cards with up to 64 GB capacity.
Hold the card (MicroSD) by the edges and gently insert it into the slot as shown in the illustration.
To remove a card, gently push the top edge of the card inwards to release it, and pull it out of the slot.

- Do not apply pressure to the centre of the memory card.
- The memory card slot is not hot-swappable. Insert the memory card before powering on your Mio. DO NOT remove the memory card during recording. Turn the device off before removing the memory card.
- You should use separate MicroSD cards for recording and for regular data storage.
- MiTAC does not guarantee the product's compatibility with MicroSD cards from all manufacturers.
Formatting a card
Before you start recording, please format the MicroSD card to avoid malfunction caused by files not created by your Mio.
To format a memory card (all data will be erased):
- Press
![]() .
. - Select Format and press
![]() .
. - Select Execute and press
![]() .
.
 .
. .
.Using your Device in a vehicle

Select an appropriate location for mounting the device in a vehicle. Never place the device where the driver's field of vision is blocked.

Use cable clips to secure the power cord so that it does not interfere with driving. To ensure the highest quality recordings, you are advised to place your Mio near the rear view mirror.
To ensure the optimal recording angle, pay attention to the following:
- Make sure that your car is parked on a level ground.
- When adjusting the angle of mounting, make sure that the camera's view is parallel with the level ground, and the ground/sky ratio is close to 6/4.
Turning your Device on and off
Once the vehicle engine is started, your Mio automatically powers on.
When you power on your Mio for the first time, follow the on-screen prompts to complete the following:
- Select your preferred language.
- Set up the correct date and time for your recordings. Press
![]() to adjust the value of the selected field, and press
to adjust the value of the selected field, and press ![]() to change to the next setting field.
to change to the next setting field.
 to adjust the value of the selected field, and press
 If the screen turns off after the enabled set timer (recording is still in progress), press any of the keys to turn on the screen again.
Occasionally, you may need to perform a hardware reset when your Mio stops responding or if it appears to be "frozen" or unresponsive. To shut down your Mio, insert a small rod (such as a straightened paperclip) into the shutdown button of your Mio.
Recording in driving mode
Continuous recording
The system will automatically begin continuous recording shortly after start-up.
When recording is in progress, you can manually stop recording by pressing  . Press
  to return to the recording screen; the system will start recording automatically.
The recording may be divided into several video clips; recording will not stop between video clips. When your memory card fills up with continuous recordings, it will automatically record over the oldest existing files in this category.

- Recording indicator
- Time display
- Microphone status
- Opens the Menu screen.
- Takes a photo.
- Manually starts an event recording.
Event recording
By default, if an event happens, such as a sudden impact, high speed driving, an aggressive turn or an accidental crash during continuous recording, the G sensor will prompt your Mio to start recording the event.
If you want to manually start an event recording while continuous recording is in progress, press the Event button (  ). A lock icon (
 ![]() ) will appear on the screen.
) will appear on the screen.
When recording is in progress, you can manually stop recording by pressing  . Press to return to the recording screen; the system will start recording automatically.
If there are more than 10 event recordings, the system will unlock and change the oldest event recording to a continuous recording.
Capture mode
Your Mio allows you to take a photo: press  .
.
Playback mode
To select a video or photo for playback:
- Press
![]() > File Playback.
> File Playback. - Press
![]() to select the desired file from the list and then press
to select the desired file from the list and then press ![]() .
. - When viewing a photo, you can press
![]() to delete the file.
to delete the file. - When viewing a video, you can:
 > File Playback.
 to select the desired file from the list and then press
  to delete the file.
- Press
![]() to start / stop playback.
to start / stop playback. - Press
![]() to change the fast-backward / fast-forward speed.
to change the fast-backward / fast-forward speed. - Press
![]() to delete the file. (This is not applicable to event recordings.)
to delete the file. (This is not applicable to event recordings.)
 to start / stop playback.
 to change the fast-backward / fast-forward speed.
 to delete the file. (This is not applicable to event recordings.)
 It is recommended to play the videos on your computer or media player for optimal viewing experiences.
Deleted files cannot be recovered. Make sure to back up your files before deletion.
Customising the settings
To customise the system settings, press  .
.
| Item | Description |
| File Playback | Plays the recorded videos and photos. |
| Sound Recording | Sets if you want to include sounds in the recordings. |
| Video Recording |
|
| System |
|
| Format | Formats a memory card. (All data will be erased.) |
Caring for your device
Taking good care of your device will ensure trouble-free operation and reduce the risk of damage.

Documents / ResourcesDownload manual
Here you can download full pdf version of manual, it may contain additional safety instructions, warranty information, FCC rules, etc.
Advertisement


Need help?
Do you have a question about the MiVue C312 and is the answer not in the manual?
Questions and answers