Table of Contents
Advertisement
Advertisement
Table of Contents

Related Manuals for Mio MiVue C540 Series


Summary of Contents for Mio MiVue C540 Series
- Page 1 User Manual MiVue C540 Series ™...
- Page 2 The screenshots in this manual may differ between different operating systems and software versions. You can download the latest User Manual of your product from Mio™ website (www.mio.com). Specifications and documents are subject to change without notice. MiTAC does not warrant this document is error-free.
-
Page 3: Table Of Contents
Table of Contents Getting to know your dash cam ................4 Using your dash cam in a vehicle ................. 5 Precautions and notices .................. 5 Mounting the dash cam ................... 5 MiVue rear camera ..................8 Using a memory card ................... 8 Formatting a card .................... - Page 4 Sound Recording................... 15 Parking mode ....................15 Video Recording .................... 16 System ......................16 Format ......................17 MiVue Manager ....................17 Installing MiVue Manager ................17 Playing the recording files ................17 For more information ..................20 Caring for your device ................... 20 Safety precautions..................
-
Page 5: Getting To Know Your Dash Cam
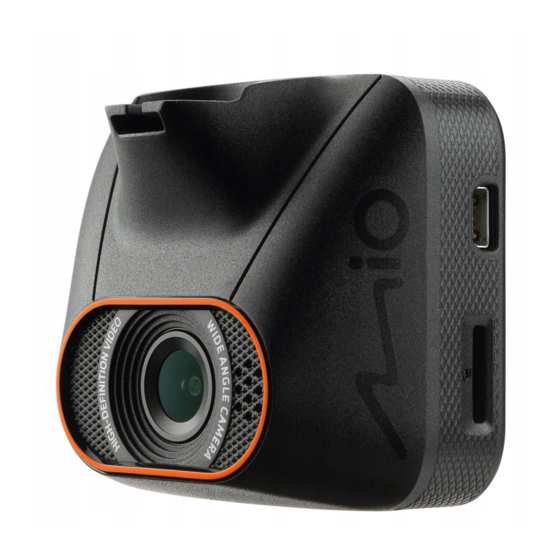
Getting to know your dash cam Note: The screenshots and other presentations shown in this manual may differ from the ones generated by the actual product. Device mount socket LCD screen Mini-USB connector Camera lens Memory card slot Speaker Microphone Power button ( ) / Function keys System indicator... -
Page 6: Using Your Dash Cam In A Vehicle
Using your dash cam in a vehicle Precautions and notices Do not operate the device while driving. Using this product does not change the requirement for a driver to take full responsibility for his or her behavior. This responsibility includes observing all traffic rules and regulations in order to avoid accidents, personal injury or property damage. - Page 7 2. The provided mount may vary by models: Suction cup mount Attach the mount to the windscreen ( ), and press the tab ( ) to lock the suction cup in place. Adhesive tape mount Attach the static cling film to the windscreen ( ), and then install the mount over the static cling film (...
- Page 8 Note: When attaching the static cling film to the windscreen, you may need a smoothing tool (such as a plastic card) to remove out any air bubbles from the centre outward. The provided static cling film is reusable if it is not damaged. When you need to move your dash cam and mount assembly, simply move the assembly by detaching the film from the windscreen and then reposition it. If the adhesion of the adhesive tape does not perform well, replace the tape with a new one. 3. When adjusting the angle of mounting, make sure that the camera’s view is parallel with the level ground and the ground/sky ratio is close to 6/4. 4.
-
Page 9: Mivue Rear Camera
MiVue rear camera Depending on your model, your device may support a rear camera (may be sold separately). Mounting pad Camera lens Adjustment bolt Micro-USB connector Follow the illustration to connect the rear camera to the dash cam. Rear camera cable Y cable Car charger Using a memory card... -
Page 10: Formatting A Card
You must insert a memory card (not supplied) before you can start recording. The dash cam supports the Class 10 memory cards with 8 GB – 128 GB capacity. You should use separate MicroSD cards for recording and for regular data storage. Hold the card (MicroSD) by the edges and gently insert it into the slot as shown in the illustration. -
Page 11: System Icons
System icons Various system icons on the status bar at the top of the screen provide the status information of your device. The displayed icons will vary depending on your device model and state. Recording indicator Time display Microphone status Function keys The device provides 4 function keys to control the corresponding icons displayed on the LCD screen. -
Page 12: Switching Screens
Switching screens Once you connect the rear camera and start recording, the icon will appear on the screen. You can switch the front and rear camera images by pressing Setting the date and time To make sure that the date and time of your recordings are correct, check the settings before you begin recording. -
Page 13: Event Recording
Parking mode Your dash cam supports the parking recording function. You must use an additional power source to record the video during the Parking mode, such as a Mio uninterruptible power cable which is sold separately. For more information on using a Mio power cable, see the provided documentation in its package. -
Page 14: Camera Mode
In the Parking mode, parking recordings could be triggered only when movements or vibrations are detected. The parking recording will save moments before and moments after the event. When your memory card fills up with parking recordings, it will automatically record over the oldest existing files in this category. Note: You can press >... -
Page 15: System Settings
To select a video or photo for playback: 1. Press > File Playback. 2. Select the desired type. 3. Press to select the desired file from the list, and then press to start playback. 4. During playback, you can: Press to return to the list. -
Page 16: File Playback
Note: Not all setting items and options are available for all models. To customise the system settings, press File Playback Plays the recorded videos and photos. Activate Parking Mode When the Parking mode detection is enabled, press to enter the Parking mode manually. -
Page 17: Video Recording
Video Recording Video Clip Length: Sets the length of each video clip for a continuous recording. WDR: Enables the Wide Dynamic Range (WDR) function to improve the dash cam's image quality under high-contrast lighting conditions. EV: Sets the exposure level to adjust the brightness of the image. Frequency: Sets the frequency for the camera to avoid problems caused by artificial light sources that are not constant. -
Page 18: Format
Note: Not all features are available for every model. Installing MiVue Manager Download MiVue Manager from the Support page of Mio website (www.mio.com/ support) and follow the on-screen prompts to install it. Make sure to download the correct software version (Windows or Mac) according to your computer's operating system. - Page 19 4. The playback controls are described as follows: Skips to the previous / next file on the list. Starts or pauses the playback. Changes the playback speed to 1/4x, 1/2x, 1x (default), 1.5x, or 2x. Mutes or unmutes the volume. Adjusts the volume level.
- Page 20 Selects the folder that stores the recording files. Previews and prints the current video image. Saves the selected files to the specified location on your computer. Captures and saves the current video image to the specified location on your computer. Opens the Settings Menu.
-
Page 21: For More Information
For more information Caring for your device Taking good care of your device will ensure trouble-free operation and reduce the risk of damage. Keep your device away from excessive moisture and extreme temperatures. Avoid exposing your device to direct sunlight or strong ultraviolet light for extended periods of time. -
Page 22: Safety Precautions
Safety precautions About charging Use only the charger supplied with your device. Use of another type of charger may result in malfunction and/or danger. This product is intended to be supplied by a LISTED Power Unit marked with “LPS”, “Limited Power Source” and output rated + 5 V dc / 1.0 A. About the charger Do not use the charger in a high moisture environment. -
Page 23: Regulatory Information
The battery must be recycled or disposed of properly. Use the battery only in the specified equipment. Regulatory information For regulatory identification purposes, MiVue C540 Series is assigned a model number of N578D. Products with the CE marking comply with the Radio Equipment Directive (RED) (2014/53/EU) - issued by the Commission of the European Community. -
Page 24: Declaration Of Conformity
EN 303 413 V1.1.1(2017-06) The manufacturer cannot be held responsible for modifications made by the User and the consequences thereof, which may alter the conformity of the product with the CE Marking. Declaration of conformity Hereby, MiTAC declares that this N578D is in compliance with the essential requirements and other relevant provisions of Directive 2014/53/EU.
Need help?
Do you have a question about the MiVue C540 Series and is the answer not in the manual?
Questions and answers