
Related Manuals for Viking Range VEDO5302T


Summary of Contents for Viking Range VEDO5302T
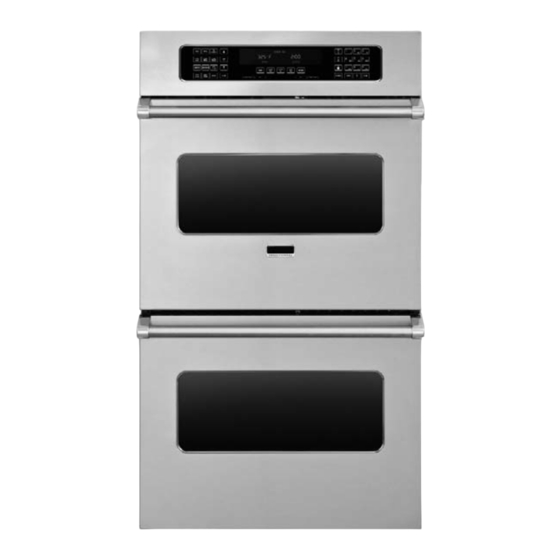
- Page 1 Use & Care Professional Built-In Electric Touch Control Single and Double Ovens VESO5302T / VEDO5302T CVESO5302T / CVEDO5302T...
- Page 2 1-888-(845-4641). We appreciate your choosing a Viking Range, LLC product and hope that you will again select our products for your other major appliance needs. For more information about the complete selection of products, contact your dealer or go to vikingrange.com in the US or brigade.ca in Canada.
-
Page 3: Table Of Contents
Table of Contents Getting Started Important Safety Instrutions ____________________________________________________________________________________________________ 4 Product Controls Built-In Electric Oven Features __________________________________________________________________________________________________ 5 Oven Control Panel ________________________________________________________________________________________________________________6 Touch Pad Functions ______________________________________________________________________________________________________________ 7 Programming Modes Clocks and Timers Setting the Clock ________________________________________________________________________________________________________ 10 Setting the Timer ________________________________________________________________________________________________________ 10 Cook Time and Stop Time ____________________________________________________________________________________________________ 10 Oven Settings Brightness ________________________________________________________________________________________________________________ 12... -
Page 4: Important Safety Instrutions
Important Safety Instructions • Use this appliance only for its intended use as described in this manual. Never use your appliance for warming or heating the room. This is based on safety considerations. • Your unit should be installed by a qualified technician. The appliance must be installed and electrically grounded according to local codes. -
Page 5: Built-In Electric Oven Features
Built-In Electric Oven Features Oven Control Panel Oven Function and Temperature Electronic Key Controls Pad Entry Model/Serial Broil Element Number Plate (under control Interior panel) Oven Light Meat Probe Jack Oven Racks (3/upper oven; TruConvec™ 3/lower oven) Element (behind baffle) Bake Element Interior Oven Light Lower Oven... -
Page 6: Oven Control Panel
Oven Control Panel... -
Page 7: Touch Pad Functions
Touch Pad Functions Temperature Control Both ovens share the temperature control. To use this feature, select the upper or lower oven, and then set the desired temperature. The controls can be set at any temperature from 150° F (65.6° C) to 550° F (287.8° C). Electronic Keypad Entry Both ovens share the electronic keypad entry. - Page 8 Touch Pad Functions Convection Broil Using this function, the top element operates at full power. This function is exactly the same as regular broiling with the additional benefit of air circulation by the motorized fan in the rear of the oven. Smoke is reduced since the airflow also reduces peak temperatures on the food.
-
Page 9: Clocks And Timers
Touch Pad Functions Proof* This function uses a low temperature to create an optimal environment for the yeast to rise in many types of dough. Recipes* This setting accesses, programs, and saves cooking cycles from favorite recipes. Interior Oven Light Controls The upper and lower ovens have interior oven lights controlled by the right touch pad. -
Page 10: Setting The Clock
Clocks and Timers Setting the Clock The time-of-day must be set before any other program can be used. When your oven is first connected to the power in your home, the timer display will show 12:00. To Program the Time-Of-Day: 1. -
Page 11: Cook Time And Stop Time
Clocks and Timers Cook Time and Stop Time With this oven, you can choose what times you need to start and stop cooking your food. The Cook Time and Stop Time functions allow you to program your preferences. Here’s how it works: It is 2:00 PM and you would like to have your dinner ready at 6:00 PM. -
Page 12: Oven Settings
Oven Settings These functions allow you to customize controls to suit your specific tastes. Brightness This mode offers users the ability to decrease or increase the intensity of the brightness of the electronic display panel. Users may choose between four levels of brightness: 25%, 50%, 75%, and 100%. To customize brightness level: 1. -
Page 13: Tone Volume
Oven Settings Duration Description of Number Used in… (measured Tone of Tones in seconds) 1 Minute Left Min/Sec or Cook Timer Cooking mode or timer starts without Autostart pressing Set or Enter End of Hold Cook Time/Stop Time Timer Expired Min/Sec or Cook Timer Failure RTD error/Latch error... -
Page 14: Timeouts
Oven Settings Timeouts Your oven is programmed with 4 preset timeouts that allow the user varying amounts of time to key in entries to the oven control display. The amount of time allowed the user to respond to a programming prompt is called a timeout. If the user fails to make an entry during the timeout period, the oven will default to its previous mode. -
Page 15: Sabbath Mode
Oven Settings Sabbath Mode This mode offers users belonging to religions with “no work” restrictions to program their ovens to comply with the Sabbath requirement. When the oven door is opened in Sabbath mode, the oven light stays off while the convection fan and heating elements remain on. -
Page 16: Recipe Function
Recipe Function (Premiere Model Only) Entering Recipe Name This function programs and saves up to 100 cooking cycles from favorite recipes. Recipe names are entered on the numeric keypad on the right side of the keyboard. When a key “Amy’s Oatmeal Cookies” with several letters is pressed for the first time, the first letter is entered. -
Page 17: Warming Modes
Warming Modes Dehydrate This oven is designed not only to cook, but also to dehydrate fruits and vegetables. Here are some tips for using your oven’s dehydrate feature: 1. Prepare the food as recommended. 2. Choose and press “UPPER OVEN” or “LOWER OVEN.” 3. -
Page 18: Bake Modes
Bake Modes During Bake Preheat The display will alternate between showing the set baking temperature and the actual preheat temperature every 5 seconds. When the set baking temperature is reached, one long beep will sound and the display will show “BAKE.” Open oven door and put food in oven. - Page 19 Bake Modes TruConvec™ This function is ideal for foods that require gentle cooking, single-rack baking, multiple-rack baking, roasting, and preparation of complete meals. This setting is also recommended when preparing large quantities of baked goods at one time. To use TruConvec™, take the following steps: 1.
-
Page 20: Broil Modes
Broil Modes Conventional broiling is most successful for cuts of meat one to two inches thick, and is also suitable for flat pieces of meat. High Broil With this setting, heat radiates at full power from both broil elements, located in the top of the oven cavity. The distance between the foods and the broil elements determines broiling speed. -
Page 21: Roast Modes
Roast Modes Convection Roast Use this function when roasting tender cuts of meat or poultry of any size. To use Convection Roast, follow these steps: 1. Arrange the oven racks in the desired positions before heating the oven. 2. Select “UPPER OVEN” or “LOWER OVEN.” 3. -
Page 22: Meat Probe
Meat Probe (Available on Premiere Models) Probe The meat probe takes the guesswork out of roasting by cooking foods to the ideal Cable internal temperature. . Your oven’s built-in probe will help you prepare meats exactly as you want them. Meat Probe Use and Care •... -
Page 23: Cooking Tips
Cooking Tips Rack Positions Each oven is equipped with tilt-proof racks and at least one TruGlide rack. (See chart below for number of TruGlide racks found in each oven.) With the TruGlide rack, the bottom section remains in the oven and the top section smoothly glides outward when pulled. -
Page 24: Pan Placement Tips
Cooking Tips Pan Placement Tips • When using large (15" x 13") flat pans or trays that cover most of the rack, rack positions 2 or 3 produce the best results. • When baking on more than one rack, we recommend using one of the convection modes and the 2nd and 4th position or the 3rd and 5th position for more even baking. -
Page 25: Conventional Baking Chart
Conventional Baking Chart Single Rack Time Food Pan Size Position Temp (minutes) BREADS Biscuits Cookie Sheet 3 or 4 400° F (204.4° C) 8 - 10 Yeast Loaf Loaf Pan 3 or 4 375° F (190.6° C) 30 - 35 Yeast Rolls Cookie Sheet 3 or 4... -
Page 26: Convection Baking Chart
Convection Baking Chart Single Rack Time Food Pan Size Position Temp (minutes) BREADS Biscuits Cookie Sheet 2 & 4 375° F (190.6 C) 7 - 9 Yeast Loaf Loaf Pan 2 & 4 350° F (176.7° C) 20 - 25 Yeast Rolls Cookie Sheet 2 &... -
Page 27: Solving Baking Problems
Solving Baking Problems Baking problems can occur for many reasons. It is important to remember that the temperature setting and cooking times you are accustomed to using with your previous oven may vary slightly from those required with your new oven. You may find that you need to make some adjustments. -
Page 28: Broiling Tips
Broiling Tips • Always use a broiler pan and grid for broiling. They are designed to provide drainage of excess liquid and fat away from the cooking surface to help prevent splatter, smoke, and fire. • To keep meat from curling, slit fatty edges. •... -
Page 29: Roasting Tips
Roasting Tips • Always use the broiler pan and grid supplied with each oven, because the hot air must be allowed to circulate around the item being roasted. • Do not cover what is being roasted; convection roasting seals in juices quickly for a moist, tender product. Poultry will have a light, crispy skin and meats will be browned, not dry or burned. -
Page 30: Convection Roasting Chart
Convection Roasting Chart Internal Time Food Weight Temp (min/lb) Temp BEEF Rib Roast Rare 4 - 6 lbs 325° F (162.8° C) 140° F (60.0° C) Medium 4 - 6 lbs 325° F (162.8° C) 155° F (68.3° C) Well done 4 - 6 lbs 325°... -
Page 31: Cleaning And Maintenance
Cleaning and Maintenance Any piece of equipment works better and lasts longer when maintained properly and kept clean. Cooking equipment is no exception. Your new oven must be kept clean and maintained properly in order to give you the years of cooking enjoyment for which it is designed. -
Page 32: Self-Clean Cycle
Cleaning and Maintenance WARNING Burn or Electrical Shock Hazard Make sure all controls are OFF and oven is COOL before cleaning. Failure to do so can result in burns or electrical shock. Self-Clean Cycle Cleaning the Interior Oven Your Viking oven features an automatic, self-cleaning cycle. During this cycle, the oven reaches elevated temperatures in order to burn off soil and deposits. -
Page 33: Replacing Light
Replacing Light CAUTION DISCONNECT THE ELECTRIC POWER AT THE MAIN FUSE OR CIRCUIT BREAKER BEFORE REPLACING BULB. Replacing Interior Halogen Oven Lights Do not touch bulb with bare hands. Clean off any signs of oil from the bulb and handle with a soft cloth. glass light cover 1. -
Page 34: Error Handling
Clearly describe the problem that you are having. If you are unable to obtain the name of an authorized service agency, or if you continue to have service problems, contact Viking Range, LLC at 1-888-(845-4641), or write to: VIKING RANGE, LLC... -
Page 35: Warranty
To obtain warranty service, contact an authorized Viking Range, LLC service agent, or Viking Range, LLC, 111 Front Street, Greenwood, Mississippi 38930, (888) 845-4641. Provide model and serial number and date of original purchase or closing date for a new construction. For the name of your nearest authorized Viking Range, LLC service agency, call Viking Range, LLC. - Page 36 Viking Range, LLC 111 Front Street Greenwood, Mississippi 38930 USA (662) 455-1200 For product information call 1-888-(845-4641) or visit our web site at vikingrange.com in the US or brigade.ca in Canada F20813D EN (040116)
Need help?
Do you have a question about the VEDO5302T and is the answer not in the manual?
Questions and answers