D-Link DSL-224 User Manual
Wireless n300 vdsl2 modem router
Hide thumbs
Also See for DSL-224:
- Quick installation manual (41 pages) ,
- Setup manual (3 pages) ,
- Quick installation manual (37 pages)
Table of Contents
Advertisement
Quick Links
Advertisement
Table of Contents

Subscribe to Our Youtube Channel
Related Manuals for D-Link DSL-224


Summary of Contents for D-Link DSL-224
- Page 1 DSL-224 User Manual Hardware Version: T1...
-
Page 2: Table Of Contents
Installation Notes ......................4 Information you will need from your VDSL2(ADSL/ADSL2+) service provider .... 6 Information you will need about your DSL-224 Router ..........7 Information you will need about your LAN or computer ..........8 Hardware Description and Installation ................. 9 LED Indicators .................... -
Page 3: Safety Precaution
Introduction The DSL-224 supports multiple line modes. With four 10/100 base-T Ethernet interfaces at the user end, the device provides high-speed VDSL2(ADSL/ADSL2+) broadband connection to the Internet or Intranet for high-end users like net bars and office users. The DSL-224 supports both DSL uplink access and Ethernet uplink access. -
Page 4: System Requirements
Browser Requirements: Microsoft Internet Explorer® v7, Mozilla® Firefox v9.0, Google® Chrome 16.0, or Safari® v4 or higher version. Windows ® Users: Make sure you have the latest version of Java installed. Visit www.java.com download the latest version. D-Link DSL-224 User Manual... -
Page 5: Features
Resetting to the factory defaults through Reset button or Web Diagnostic test • • Web interface Telnet CLI • • IP/MAC/URL Filter Application layer service • • Port binding • • Auto upgrade Digital Living Network Alliance (DLNA) • Wireless network • D-Link DSL-224 User Manual... -
Page 6: Installation
Operating Systems The DSL-224 uses an HTML-based web interface for setup and management. The web configuration manager may be accessed using any operating system capable of running web browser software, including Windows 98 SE, Windows ME, Windows 2000, Windows XP, Windows Vista, Windows 7, Windows 8, and Windows10. - Page 7 LAN side of the bridge, such as a PC, a server, a gateway device, such as a router, or similar firewall hardware. The IP address can be assigned in a number of ways. Your network service provider will give you instructions about any additional connection software or NIC configuration that may be required. D-Link DSL-224 User Manual...
-
Page 8: Information You Will Need From Your Vdsl2(Adsl/Adsl2+) Service Provider
The default DSL modulation used for the Router automatically detects all types of VDSL2(ADSL/ADSL2+) modulation. Security Protocol This is the method your VDSL2(ADSL/ADSL2+) service provider will use to verify your Username and Password when you log on to their network. Your Router supports the PAP and CHAP protocols. D-Link DSL-224 User Manual... -
Page 9: Information You Will Need About Your Dsl-224 Router
IP address used for DHCP service on the LAN when DHCP is enabled. LAN Subnet Mask for the DSL-224 This is the subnet mask used by the DSL-224 and will be used throughout your LAN. The default subnet mask is 255.255.255.0. D-Link DSL-224 User Manual... -
Page 10: Information You Will Need About Your Lan Or Computer
Your DSL-224 VDSL2(ADSL/ADSL2+) Router is configured, by default, to be a DHCP server. This means that it can assign an IP address, subnet mask and a default gateway address to computers on your LAN. The default range of IP addresses the DSL-224 will assign are from 10.0.0.1 to 10.0.0.254. -
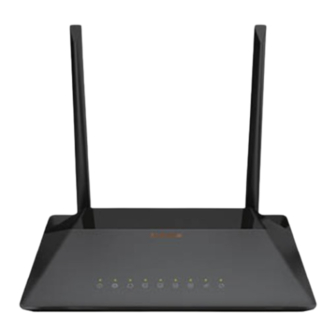
Page 11: Hardware Description And Installation
The WLAN function is enabled, but no data is being transmitted over the WLAN. The WLAN function is disabled. Blinking WPS is successfully triggered. Solid on for 5 Green seconds Connection is successfully established between the router and the client through WPS. then turns off D-Link DSL-224 User Manual... - Page 12 Power switch, which is used to power on or power off the device. 12V DC IN (power) Interface for connecting the power adapter. Reset (On the bottom side) Press and hold the button for 15~20 seconds to restore the factory defaults. D-Link DSL-224 User Manual...
-
Page 13: Best Location For Wireless Operation
However, the numbers of walls, ceilings, or other objects that the wireless signals must pass through limit signal range. Typical ranges vary depending on types of materials and background RF noise in your home or business. Connecting the Router The following figure shows the connection of the Router, PC, and telephones. D-Link DSL-224 User Manual... - Page 14 Step 2 Connect the LAN port of the router to the network interface card (NIC) of the PC through an Ethernet cable (MDI/MDIX). Step 3 Plug the power adapter to the wall outlet and then connect the other end of it to the Power (12V DC IN) port of the route. D-Link DSL-224 User Manual...
-
Page 15: Tcp/Ip Configuration On A Pc
On the General tab, select the Internet Protocol (TCP/IP) component and click Properties. The Internet Protocol (TCP/IP) Properties window appears. Step 4 Select the Obtain an IP address automatically button. Step 5 Select the Obtain DNS server address automatically button. Click OK to save the settings. D-Link DSL-224 User Manual... -
Page 16: Web Configuration
Open the Internet Explorer (IE) browser, and then go to http://192.168.1.1/. Step 2 The Login page is shown as the below appears . Enter the username and password. And then click OK. The default username and password are admin and admin. D-Link DSL-224 User Manual... -
Page 17: Setup
Section 3 – Web Configuration SETUP Wizard Wizard enables fast and accurate configuration of Internet connection and other important parameters. The following sections describe these various configuration parameters. When subscribing to a broadband service, you should be aware of the method, by which you are connected to the Internet. The connection type of your physical WAN device can be Ethernet, DSL, or both. - Page 18 Section 3 – Web Configuration Click Setup Wizard. The page is shown as the figure appears as below. There are 5 steps to configure the device. Click Next to continue.
- Page 19 Section 3 – Web Configuration Step 1 Change device login password, input the current password and new password, and then click Next. If you do not change the Login password, click Skip to continue or click Cancel to return to the home page.
- Page 20 Section 3 – Web Configuration Step 2 Please set the time and date, and then click Next.
- Page 21 Section 3 – Web Configuration Step 3 Set internet connection, it will show as the below appears.
- Page 22 Section 3 – Web Configuration Step 4 Configure wireless network...
-
Page 23: Local Network
Section 3 – Web Configuration Step 5 Completed and apply Local Network You can configure the LAN IP address according to the actual application. The preset IP address is 10.0.0.2. You can use the default settings and DHCP service to manage the IP settings for the private network. The IP address of the device is the base address used for DHCP. To use the device for DHCP on your LAN, the IP address pool used for DHCP must be compatible with the IP address of the device. - Page 24 Section 3 – Web Configuration LAN Interface Choose SETUP > Local Network> LAN Interface. The page is shown as the figure appears on the right. In this page, you can set the LAN IP address, working mode, and MAC address control. Step 1 In the IP Address textbox, enter the IP address of LAN interface.
- Page 25 Section 3 – Web Configuration LAN IPv6 Interface Choose SETUP > Local Network > LAN IPv6 Interface. The page shown in the right figure appears. This page allows you to configure IPv6 LAN. User can set LAN RA server work mode and LAN DHCPv6 server work mode. The following table describes the parameters of this page.
- Page 26 Section 3 – Web Configuration DHCP Server Choose SETUP > Local Network > DHCP Server. This page allows you to configure the DHCP server. There are 3 types of DHCP Modes: DHCP Server, DHCP Relay, and None. To configure the DHCP Server, do as follow: DHCP Server DHCP Server: If you are using 224 as a DHCP server, select DHCP Server.
-
Page 27: Internet Setup
Section 3 – Web Configuration DHCP Reserved Choose SETUP > Local Network > DHCP Reserved. The page shown in the right figure appears. This page allows you to reserve IP address for PC specified in this page. Internet Setup Channel Config Choose SETUP >... - Page 28 Section 3 – Web Configuration Adding a PVC in PPPoE mode, do as follow: Step 1 Choose the channel type ATM or PTM Step 2 Input VPI/VCP value and select Encapsulation mode provided by your ISP. The VPI/VCP value of the new PVC must be different from the PVCs which exist in Current ATM VC Table.
- Page 29 Section 3 – Web Configuration Adding a PVC in DHCP mode, do as follow: Step 1 Set the Default Route Selection to Auto. Step 2 Input VPI/VCP value and select Encapsulation mode provided by your ISP. The VPI/VCP value of the new PVC must be different from the PVCs which exist in Current ATM VC Table.
- Page 30 Section 3 – Web Configuration The following table describes the parameters and buttons of this page: Field Description Protocol It displays the protocol type used for this WAN connection. ATM VCC The ATM virtual circuit connection assigned for this PPP interface (VPI/VCI).
- Page 31 Section 3 – Web Configuration VPN LITE Choose SETUP > Internet Setup > VPN Lite. The page is shown in the below figure. This page is used to setup VPN Lite. Please input the correct username, password, IP address and subnet mask that your ISP provided to you.
- Page 32 Section 3 – Web Configuration ATM Settings Choose SETUP > Internet Setup > ATM Settings. The page is shown as the figure appears on the right. In this page, you can configure the parameters of the ATM, including QoS, PCR, CDVT, SCR, and MBS. After setting, click Apply Changes to save the settings.
- Page 33 Section 3 – Web Configuration ADSL Settings Choose SETUP > Internet Setup > ADSL Settings. The page shown in the right figure appears. In this page, you can select the DSL modulation. Mostly, you need to remain this factory default settings. The router supports these modulations: G.Lite, G.Dmt, T1.413, ADSL2, ADSL2+, and VDSL2.
- Page 34 Section 3 – Web Configuration PVC Auto Search Choose SETUP > Internet Setup > PVC Auto Search. The page shown in the right figure appears. This page is used to configure PVC auto detect function, you can add or delete auto-pvc.
-
Page 35: Wireless Setup
Section 3 – Web Configuration Wireless Setup Wireless Basics Choose SETUP > Wireless Setup> Wireless Basics. The page is shown as the figure appears on the right. In this page, you can configure the wireless settings for your router. The following table describes the parameters of this page: Field Description Choose the adapted band of the modem from the... - Page 36 Section 3 – Web Configuration Show Active Click it to view the information of the wireless clients that Clients are connected to the modem. Channel Width You can select 20MHZ, 40MHZ or 20/40MHZ. Only when choose 40MHZ for Channel Width, you can Control set this parameter.
- Page 37 Section 3 – Web Configuration Mode pre-shared key in the Pre-Shared Key field. Select Enterprise (RADIUS), enter the port, IP address, and password of the Radius server. You need to enter the username and password provided by the Radius server when the wireless client connects the modem.
- Page 38 Note: If you want to change the PIN, click Regenerate PIN button in this page. The wireless SSID must select d-link. - Based on the PIN of the client to be connected. 1) Do not select Disable WPS. 2) Find the PIN of the client to be connected. Input this PIN in the Client PIN...
-
Page 39: Time And Date
Section 3 – Web Configuration Time and Date Choose SETUP > Time and Date. The page is shown as the figure appears on the below. In the Time and Date page, you can configure, update, and maintain the correct time on the internal system clock. You can set the time zone that you are in and the network time protocol (NTP) server. -
Page 40: Advanced
Choose the transmission rate of the wireless data from Data Rate the dropdown list. Long Preamble: It means this card always use long preamble. Preamble Type Short Preamble: It means this card can support short D-Link DSL-224 User Manual... - Page 41 Section 3 – Web Configuration preamble capability. Select whether the modem broadcasts SSID or not. You can select Enable or Disable. Select Enable, the SSID can be detected. Broadcast SSID Select Disable to hide SSID, the wireless clients cannot find the SSID.
- Page 42 Section 3 – Web Configuration MBSSID - Choose ADVANCED >Advanced Wireless > MBSSID. - This page allows you to configure the Virtual Access Points (VAP). Here you will be able to enable/disable the Virtual Access Points (VAP) and set the SSID with the Authentication type.
-
Page 43: Access Control List
Section 3 – Web Configuration Access Control List Access Control List Choose ADVANCED >Access Control List. The page shown as the figure appears on the right. In this page, you can permit the data packets from LAN or WAN to access the router in IPv4 protocol. You can configure the IP address for Access Control List (ACL). - Page 44 Section 3 – Web Configuration Reset Click it to refresh this page. Set direction of the data packets to WAN, the page shown in the right figure appears. The following table describes the parameters and buttons of this page: Field Description Select the router interface.
-
Page 45: Port Triggering
Section 3 – Web Configuration Port Triggering Choose ADVANCED > Port Triggering. The page shown as the figure appears on the right. Click the Usual Application Name drop-down menu to choose the application you want to setup for port triggering. When you have chosen an application the default Trigger settings will populate the table below. -
Page 46: Port Forwarding
Section 3 – Web Configuration Port Forwarding Choose ADVANCED > Port Forwarding. The page shown as the figure appears on the right. Port Forwarding allows you to direct incoming traffic from the WAN side (identified by Protocol and WAN port) to the internal server with a private IP address on the LAN side. -
Page 47: Parent Control
Section 3 – Web Configuration Parent Control URL Block Choose ADVANCED > Parent Control > URL Block. The page is shown as the figure appears on the right. This page is used to configure the blocked URL in specified time. Here you can add/delete filtered URL Firstly. You should enable URL Blocking Capability. - Page 48 Section 3 – Web Configuration Online Time Limit Choose ADVANCED > Parent Control > Online Time Limit . The page is shown as the figure appears on the right. Note: To use this feature, the time of router must be correct. Please set the system time in SETUP >...
-
Page 49: Filtering Options
Section 3 – Web Configuration Filtering Options IP/Port Filter Choose ADVANCED > Filter Options > IP/Port Filter to go to the right page. The page shown as the figure appears on the right. The IP/Port Filter in this page is based on IPv4 protocol. - Page 50 Section 3 – Web Configuration IPv6/Port Filter Choose ADVANCED > Filter Options > IPv6/Port Filter to go to the right page. The page shown as the figure appears on the right. The IP/Port Filter in this page is based on IPv6 protocol. For the parameter descriptions in this page, please refer to ADVANCED >...
- Page 51 Section 3 – Web Configuration MAC Filter Choose ADVANCED > Filter Options > MAC Filter to go to the right page. Entries in the table are used to restrict certain types of data packets from your local network to Internet through the gateway. These filters are helpful in securing or restricting your local network.
-
Page 52: Dos Settings
Section 3 – Web Configuration DoS Settings Choose ADVANCED > DoS Settings. A "denial-of-service" (DoS) attack is characterized by an explicit attempt by hackers to prevent legitimate users of a service from using that service。... -
Page 53: Dns
Section 3 – Web Configuration Domain Name System (DNS) is an Internet service that translates the domain name into IP address. Because the domain name is alphabetic, it is easier to remember. The Internet, however, is based on IP addresses. Every time you use a domain name, DNS translates the name into the corresponding IP address. -
Page 54: Dynamic Dns
Section 3 – Web Configuration Dynamic DNS The device supports dynamic domain name service (DDNS). The dynamic DNS service allows a dynamic public IP address to be associated with a static host name in any of the many domains, and allows access to a specified host from various locations on the Internet. -
Page 55: Network Tools
Section 3 – Web Configuration Network Tools Port Mapping Choose ADVANCED > Network Tools> Port Mapping, the page shown in the figure appears on the right. In this page, you can bind the WAN interface and the LAN interface to the same group. The procedure for manipulating a mapping group is as follows: Step 1 Select Enable to enable this function. - Page 56 Section 3 – Web Configuration IGMP Proxy Choose ADVANCED > Network Tools> IGMP Proxy, the page shown in the figure appears on the right. IGMP proxy enables the system to issue IGMP host messages on behalf of hosts that the system discovered through standard IGMP interfaces.
- Page 57 Section 3 – Web Configuration SNMP Choose ADVANCED > Network Tools > SNMP. The page shown in the figure appears on the right. You can configure the SNMP parameters. The following table describes the parameters of this page: Field Description Select it to enable SNMP function.
- Page 58 Choose ADVANCED > Network Tools > Client Limit. The page shown in the figure appears on the right. This page is used to configure the capability of forcing how many devices can access to the Internet. D-Link DSL-224 User Manual...
-
Page 59: Routing
Section 3 – Web Configuration Routing Static Route Choose ADVANCED > Routing > Static Route. The page shown in the figure appears on the right. This page is used to configure the routing information. You can add or delete IP routes. The following table describes the parameters and buttons of this page: Field Description... - Page 60 Section 3 – Web Configuration Choose ADVANCED > Routing > RIP. The page shown in the figure appears on the right. If you are using this device as a RIP-enabled router to communicate with others using Routing Information Protocol (RIP), enable RIP. This page is used to select the interfaces on your devices that use RIP, and the version of the protocol used.
-
Page 61: Nat
Section 3 – Web Configuration NAT ALG Choose ADVANCED > NAT > NAT ALG. The page shown in the figure appears on the right. Choose the NAT ALG and Pass-Through options, and then click Apply Changes. NAT Exclude IP Choose ADVANCED > NAT > NAT Exclude IP. The page shown in the figure appears on the right. - Page 62 Section 3 – Web Configuration NAT Forwarding Choose ADVANCED > NAT > NAT Forwarding. The page shown in the figure appears on the right. Under 1483MER or 1483Routed mode, if NAPT (Network Address Port Translation) is enabled, the Local IP Address is configured as 10.0.0.1 and the Remote IP Address is configured as 202.32.0.2, the PC with the LAN IP10.0.0.1 will use 202.32.0.2 when it is connected to the Internet via the router without NAPT control.
- Page 63 Section 3 – Web Configuration NAT IP Mapping NAT is short for Network Address Translation. The Network Address Translation Settings window allows you to share one WAN IP address for multiple computers on your LAN. Choose ADVANCED > NAT > NAT IP Mapping. The page shown in the figure appears on the right.
-
Page 64: Maintenance
Section 3 – Web Configuration MAINTENANCE System Choose MAINTENANCE > System. The page shown in the figure appears on the right. In this page, you can reset your router, backup settings, and update the settings of the router. D-Link DSL-224 User Manual... -
Page 65: Firmware Update
Section 3 – Web Configuration Firmware Update Choose MAINTENANCE > Firmware Update. The page shown in the figure appears on the right. In this page, you can upgrade the firmware of your router. To update your router, do as follow: Step 1 Obtain an updated firmware image file from your ISP. -
Page 66: Password
Section 3 – Web Configuration Password Choose MAINTENANCE > Password. The page shown in the figure appears on the right. In this page, you can change the username, password, and idle logout time. Diagnostics Choose MAINTENANCE > Diagnostics. The Diagnostics section is used to diagnose the basic running and connection status of the router, including the diagnostics of the Ping, Ping6, Traceroute, ADSL, and Diag Test. -
Page 67: System Log
Section 3 – Web Configuration System Log Choose MAINTENANCE > System Log. The page shown in the figure appears on the right. This page is used to display the system event log table. By checking Error or Notice (or both) will set the log flag. By clicking >>|, it will display the newest log information below. -
Page 68: Troubleshooting
Troubleshooting This chapter provides solutions to problems that might occur during the installation and operation of the DSL-224. Read the following descriptions if you are having problems. (The examples below are illustrated in Windows® XP. If you have a different operating system, the screenshots on your computer will look similar to the following examples.) - Page 69 Section 4 – Troubleshooting indicators should be on as well. Step 4 Please ensure that the settings in the Web-based configuration manager, e.g. ISP username and password, are the same as the settings that have been provided by your ISP. 4.
-
Page 70: Check Your Ip Address
Check Your IP Address After you install your new D-Link adapter, by default, the TCP/IP settings should be set to obtain an IP address from a DHCP server (i.e. wireless router) automatically. To verify your IP address, please follow the steps below. -
Page 71: Statically Assigning An Ip Address
Set the Primary DNS to be the same as the LAN IP address of your router (10.0.0.2). The Secondary DNS is not needed or you may enter a DNS server from your ISP. Step 5 Click on the OK button twice to save your settings. D-Link DSL-224 User Manual... -
Page 72: Technical Specifications
RARP Protocol ICMP RFC1994 CHAP RFC1058 RIP v1 RFC2131 DHCP Client / RFC1213 SNMP v1 & v2c DHCP Server RFC1334 PAP RFC2364 PPP over ATM RFC1389 RIP v2 RFC2516 PPP over RFC1577 Classical IP over Ethernet D-Link DSL-224 User Manual... -
Page 73: Packing List
Appendix B – Networking Basics Packing List 1 x DSL-224 1 x External splitter 1 x Power adapter 1 x Telephone cables (RJ-11) 1 x Ethernet cable (RJ-45) 1 x Quick installation guide 1 x Warranty guide 1 x CD...
Need help?
Do you have a question about the DSL-224 and is the answer not in the manual?
Questions and answers