Advertisement
- 1 Install antenna mount and Battery anti-slip mat
- 2 Specification
- 3 Features
- 4 Advanced function description
- 5 Start FPV Flight
- 6 Charger the Lipo Battery
- 7 Flight and Radio Stick Controls
- 8 Flight controller connection diagram
- 9 Binding procedure
- 10 Receiver configuration
- 11 VTX Bands and Channels setup
- 12 Goggles and VTX Receiver channel setting
- 13 Mixer type, ESC/MOTOR protocol and Sensor alignment
- 14 GPS and GPS Rescue settings
- 15 Radio channels/Switch and Betaflight mode setting
- 16 ESC Check and Flash firmware
- 17 Flight controller firmware update
- 18 Documents / Resources
Install antenna mount and Battery anti-slip mat
Screw the antenna fixing mount and put the antenna sleeve into the fixing mount.
Then use some hot melt glue to fix the antenna sleeve.

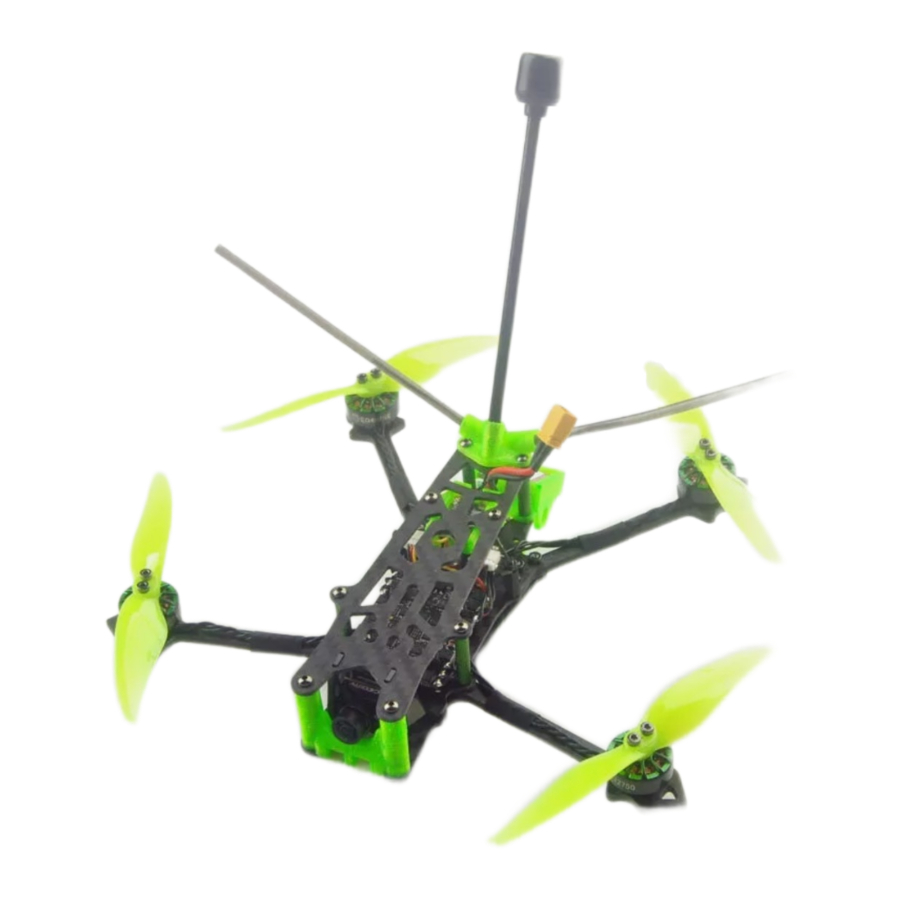
Specification
| Brand Name: Eachine |
| Item Name: Novice-IV 3-4S 4inch LR drone RTF |
| Wheelbase: 170mm |
| Size: 180mm*130mm*40mm(without propellers, batteries, antenna) |
| Weight: 125g (without battery) |
Features
| The lightest 4inch LR FPV drone |
| New AIO Flight controller with 25A ESC |
| Efficiency 1404 KV2750 brushless motor |
| Long flight time around 20minutes with stock battery Sub 250gram |
| Around 31minutes flight time with 4s 18650 3000mah |
| Very stable and easy to control |
| With M8N GPS Rescue system |
| With Buzzer and LED drone tracker finder |
| Distance Range more than 1KM in an Open area without interference |

Advanced function description
DT-B90 Buzzer&LED Finder how to work?
- DT-B90 Finder can power itself to beep and LED light to flash even the quad battery has been ejected.
- Press the button for 2 or 3 seconds to turn on it before flying
- You can use AUX4(SF Switch) channel to activate the Buzzer
- You need to Press the button for 2 or 3 seconds to turn off it after disconnect the main battery.
Eachine M8N GPS rescue how to work?
- Before Armed, GPS must search for more than 6 satellites to lock the home position.
- After armed, observe the OSD data during the flight, and the rescue function can work normally only if the distance exceeds 100 meters. Otherwise, the quad will crash. If the remote controller suddenly loses signal, the GPS rescue function will work automatically and return to the home position, but the drone won't land automatically. You need to slightly control the stick to gain control of the drone when the remote control signal is restored and then control the drone to land.
- In order to avoid mistake operation, we didn't enable Aux Channel to activate the GPS rescue function by default. You can set it by yourself from the mode tab of Betaflight configurator.
Start FPV Flight
Install the antenna to the radio and the goggle first. And then powering on your Radio and goggle. NOVICE-IV comes already bound to your radio and on the right video channel matched with your goggles. Power the battery is plugged in, set NOVICE-IV on a stable surface so it can calibrate. Calibration takes a few seconds then NOVICE-IV is ready to fly. Please fly in open areas and away from the crowd and buildings.
- Install the battery to the radio(shows on picture A), and turn on the "power switch", Press any key to skip if any alarm(show on the Picture B) appear on the screen

- Connect the battery to the NOVICE-IV Drone, and make sure to fixed the battery properly with the Lipo strap.

- Turn on the EV800DM Goggles, check the video and the status of the oSD info, Make sure GPS must search for more than 6 satellites to lock the home position.

- Keep the throttle stick lowest point and then toggle the SE Switch to Arm the NOVICE-IV drone, you will find "ARMED" notice on the screen of the goggles. Happy flight and keep it safe.

- Toggle the SB switch to change the flight mode(Default is Air mode).We highly recommend to use Angle mode for the beginners. The motors will auto-spin when armed if the flight mode is AIR MODE.


Charger the Lipo Battery
Charging Function After insert adapters, chargers "drop" sound, the display shows;
Insert the battery charger "drip - drip" twice to start charging. Display cycles through each section
total battery voltage and the battery voltage;
After the battery is fully charged, the charger automatically stops charging, the display shows "FULL" And flashing, buzzer once every five seconds. Voltage Display Function Insert the battery (without connecting adapter),
Flight and Radio Stick Controls
Always use caution when flying and operate in an open and controllable area.
Please learn the flight controls first before powering on the aircraft to fly. The left stick controls throttle and yaw direction of NOVICE-IV. The right stick controls pitch and roll of the aircraft.

Left Stick Diagram

Right Stick Diagram

The bellowing content are regard to advanced tutorial. The Novice-IV drone comes out already finished all the settings and bound with the radio. Need these content after you re-flashed the firmware or doing some troubleshoot.
Flight controller connection diagram


Binding procedure
- Press and hold the BIND button on the receiver then plug the USB to connect the power. After approximately 3 seconds, the Red LED on the receiver would be solid, this indicate the receiver is in bind mode.
- Select Frsky D8 protocol from the Multi mode and then press [BIND] option, the red LED on the receiver should blinking fast, this indicate bind is successful.
Unplug the USB and then plug again, the red LED is solid means the connection with the radio is established.


Receiver configuration
Please enable Serial RX for UART6 from port tab, then set Receiver mode to be Serial-based receiver from the Configuration tab of the Betaflight Configurator, then select SBUS protocol for the Serial Receiver Provider. 
VTX Bands and Channels setup

Frequency and channel frequency table:
| CH | ||||||||
| FR | CH1 | CH2 | CH3 | CH4 | CH5 | CH6 | CH7 | CH8 |
| BandA(1) | 5865M | 5845M | 5825M | 5805M | 5785M | 5765M | 5745M | 5725M |
| BandB(2) | 5733M | 5752M | 5771M | 5790M | 5809M | 5828M | 5847M | 5866M |
| BandE(3) | 5705M | 5685M | 5665M | 5665M | 5885M | 5905M | 5905M | 5905M |
| BandF(4) | 5740M | 5760M | 5780M | 5800M | 5820M | 5840M | 5860M | 5880M |
| BandR(5) | 5658M | 5695M | 5732M | 5769M | 5806M | 5843M | 5880M | 5917M |
There are 3 ways to switch the vtx channels:
- Short press the switch button to choose the VTX channel, press and holding the button to hoose the VTX Band (Can't save, it will lost the channel while power off) C
- Go to Betaflight CLI,type the command:
Set vtx_band=3
Set vtx_channel=1
save
Notes: The vtx_freq should match the vtx_band and vtx_channle as the VTX Channel list shows.
For example, if you set vtx_freq=5732, you should set vtx_band=5 and VTX_channel=3 - Enable Smartaudio for UART1, then move the stick of the transmitter (THR MID+ YAW LEFT+ PITCH UP) to enter OSD Menu, Enter to Features, then enter to VTX SA to set VTX Band and channel


Goggles and VTX Receiver channel setting

Buttons and ports
- CH+/Bamd+
Short press this button select CH 1-8 cycles ![]() POWER and RETURN
POWER and RETURN
Long press to boot/shut down. short press during working as return- SRC/MENU
Short press to select from video sources V-in/RF A/RF B/Diversity Long press to call out MENU - SEARCH
Press to automatically search for the signals; - CHARGING PORT
DC 5-18V wide range recharging port/power backup port, typically@5V/2A; - RESET
Reset hole. Shut down device when necessary; - TF CARD SLOT
Support up to 32G,typical@C10; - VIDEO IN/AUDIO OUT PORT
Video input@AV in mode; Audio output@RF mode; - Pic/Rec
Short press to take a screen shoot and save picture
Long Press to start recording a video, then a short press to save video.
 POWER and RETURN
In MENU operatins, press  to shift down to select settings; press
  as+settings; press
  as-settings.
Charging indicator LED:charging-red; full charged-green.
| Band | CH1 | CH2 | CH3 | CH4 | CH5 | CH6 | CH7 | CH8 |
| A | 5865 | 5845 | 5825 | 5805 | 5785 | 5765 | 5745 | 5725 |
| B | 5733 | 5752 | 5771 | 5790 | 5809 | 5828 | 5847 | 5866 |
| E | 5705 | 5685 | 5665 | 5645 | 5885 | 5905 | 5925 | 5945 |
| F | 5740 | 5760 | 5780 | 5800 | 5820 | 5840 | 5860 | 5880 |
| R | 5658 | 5695 | 5732 | 5769 | 5806 | 5843 | 5880 | 5917 |
Mixer type, ESC/MOTOR protocol and Sensor alignment

GPS and GPS Rescue settings

Radio channels/Switch and Betaflight mode setting


ESC Check and Flash firmware
- Download New release Blhelisuite from: https://www.mediafire.com/folder/dx6kfaasyo24l/BLHeliSuite
- Connect the NOVICE-IV flight controller to computer

- Open the Device Manager of your computer, find the Ports, please make sure the Com port Serial Number is under 255, otherwise it will can't connect to the BLHELISUITE. You can change the port serial number like the bellowing step:

- Open the BLHELISUITE, Select SILABS BLHeli Bootloader (Cleanflight) from the third tab on the top side. Then Select the right Serial com port and Click connect. You can also Flash the new release BLHeli_s firmware via the BLHEILISUITE, the firmware Target is "F-H-40"


Flight controller firmware update
- Install latest STM32 Virtual COM Port Driver http://www.st.com/web/en/catalog/tools/PF257938
- Install STM BOOTLOAD Driver (STM Device in DFU MODE)
- Open Betaflight configurator and choose firmware target "BETAFLIGHTF4", then select the firmware version.
- There are 2 ways to get in DFU Mode:
- Press and hold the boot button then plug USB to computer
- loading betaflight firmware and hit "flash", then it will getting into DFU Mode automatically.
- Open Zadig tools to replace the drivers from STM32 Bootloader to WINUSB Driver.

- Reconnect the flight controller to the computer after replace driver done, and open Betaflight Configurator, loading firmware and flash.


Documents / Resources
References
Download manual
Here you can download full pdf version of manual, it may contain additional safety instructions, warranty information, FCC rules, etc.
Download Eachine Novice IV - 4 Inch 3-4S Sub 250g FPV Racing Drone Manual
Advertisement


Need help?
Do you have a question about the Novice IV and is the answer not in the manual?
Questions and answers