Advertisement
- 1 Important safety information
- 2 The plant is made of lithium polymer battery(LiPo)
- 3 Remote control and aircraft battery installation and charging instructions
- 4 Aircraft installation
- 5 Remote control function name
- 6 Remote control
- 7 Directional definition and mode selection of headless mode
- 8 A key return
- 9 Speed selection
- 10 The remote control controls the recording
- 11 Aircraft settings reset
- 12 Problem guide
- 13 Download APP connection
- 14 Product main accessories name
- 15 Documents / Resources
Important safety information
Please read the instructions carefully before use (Please read carefully for details and warnings) Save this manual for future reference
- The product is not a toy, but the mechanical, electronic, aerodynamics, high-frequency transmission and other professional knowledge into one of the fine Dense equipment, the need for proper assembly and commissioning to avoid accidents. The product holder must use a safe way. Operation control: improper operation, may cause serious personal injury or property damage. We are not responsible for this, Because we can not control the assembly, use, operation process.
- This product is suitable for people with operating model experience, the age of not less than 14 years of age.
- The flight site must be a local legal remote control model flight site.
- Once the product is sold, we will not be responsible for any safety and safety arising from operation and use, control, etc.
- If any using, operating and measuring problems, please contact with local distributors, for we have assigned those distributors to provide technical support and after sales service.
Safety Precautions:
Remote control model aircraft is a high-risk goods, must be away from the crowd when flying. Artificial assembly or body damage, electronic control. Improper equipment, and operation are not familiar with, are likely to cause damage to the aircraft or personal injury and other unpredictable accidents. please. Pilots must pay attention to safety, and need to understand due to their own negligence caused by accidental responsibility.
- Away from obstacles and crowds
The flight of the remote control flight has an uncertain flight speed and state, there is a potential risk. Fly away from the flight. People, high-rise buildings, high-voltage wires, etc., while avoiding wind and rain, thunderstorms and other bad weather flight to ensure that pilots, The surrounding population and the safety of the property. - Away from the damp environment
The interior of the aircraft is made up of many sophisticated electronic components and mechanical parts, so it is necessary to prevent the aircraft from wet or Into the body, so as to avoid mechanical, electronic components failure caused by accidents! - Safe operation
Please operate the remote control aircraft according to your own status and flight skills. Fatigue, poor spirit or improper operation will increase. Probability of accidental risk. - Keep away from high-speed rotating parts
When the propeller in the high-speed flight, the pilot, the surrounding crowd and objects away from the rotating parts, so as to avoid danger and damage. - Keep away from heat
Remote control aircraft is composed of metal, fiber, plastic, electronic components and other materials, so as far as possible away from heat, to prevent day. Drying, to avoid deformation caused by high temperature or even damage.
The plant is made of lithium polymer battery(LiPo)
Lithium batteries are different from the general battery, which consists of a thin layer of thin paper wrapped with its chemical endoplasm. This can be great. To reduce its weight, but it makes it more vulnerable in the face of rough or inappropriate operations. Like the same. There is a battery, as inappropriate operation will cause a fire explosion.
- Do not put the battery in the model for charging, which may cause the battery to fire and damage you of the aircraft.
- If you plan to use this product for one week or more, keep the battery 50% Increase the battery life. Keep the battery 50% of the battery, just use the battery when fully charged Half of the time to charge.
- Please use the original professional charger to charge the battery.
- Do not charge the carpet to prevent fire.
- Lithium battery in the storage for more than three months after the need to charge to maintain the voltage to ensure that it should have of life.
Remote control and aircraft battery installation and charging instructions
Remote control battery installation:

As shown in the figure according to the electrode box electrode instructions (+ / -) Place the battery correctly (as shown).
The aircraft battery is charged
- Connect the USB cable to the computer to charge:
USB charging end connected to the aircraft battery plug, the other end can be connected to the computer USB port to charge the battery, charging lights, full when the lights off.
![]()
- Connecting the aircraft power supply:
Put the charged battery into the battery holder of the aircraft, and then place the battery plug at the power supply on the vehicle Into the socket for power connection, connected to open the aircraft power, then the aircraft lights.


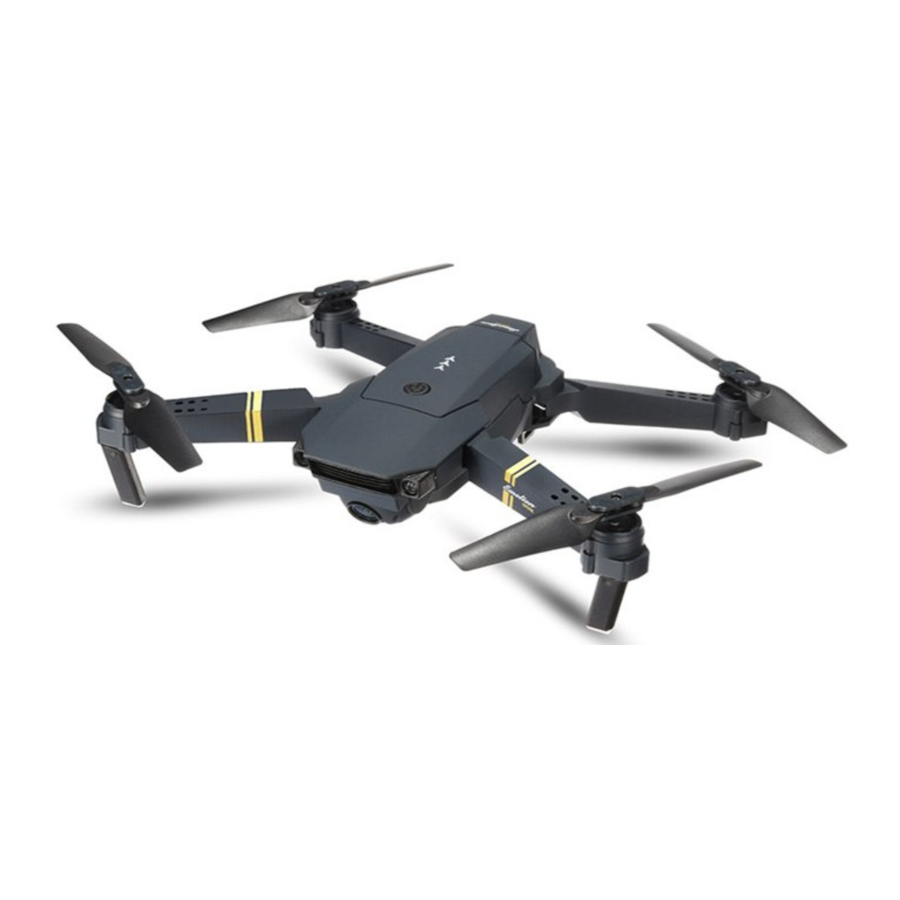
Aircraft installation
- Folding function display

When folding, please fold the back Show arms, and then folded in front of the arm, Expand the opposite!
- Aircraft fan installation

Please follow the correct direction to install the propeller, propeller A on the sign. Installed to the upper left corner of the aircraft and the lower right corner of the arm, with the phase. With the propeller on the sign B mounted to the upper right corner of the aircraft and the l ower left. Corner of the arm, the installation of the fan folder when the alignment of the cone assembly Square accessories, installed in B place after the locking screw!
- Aircraft protection rack installation The protective frame at the aircraft arm position (pictured)Install fastening.
![]()


Remote control function name

Remote control
- Mobile phone rack
Pull out the remote control lower bracket, clamp the phone.

- 2.4G frequency
![]()
Open the aircraft power switch, the aircraft placed in the flat Ground, then the aircraft indicator light flashes, open the remote control power. Source switch, the throttle joystick pushed to the highest after the pull to the lowest, Buzzer prompt "tick" sound! The aircraft indicator light is on, right Frequency to complete, then you can take off!
- A key to start and a key landing

![information]() Tip: This product is determined by the barometer. In a variety of environmental temperature and other factors, The aircraft will automatically start when flying or low voltage. Appear high and low changes are normal!
Tip: This product is determined by the barometer. In a variety of environmental temperature and other factors, The aircraft will automatically start when flying or low voltage. Appear high and low changes are normal!
- Flight control
- Throttle (left lever)
- Push the left lever upwards
The aircraft rises
![]()
- Push the left lever down
The aircraft descends
![]()
- Push the left lever upwards
- Forward and backward (right lever) (with camera front side)
- Push the right lever upwards
The aircraft is advancing
![]()
- Push the right lever down
The aircraft is backwards
![]()
- Push the right lever upwards
- Left and right side fly
- Push the right lever to the left
The plane flew to the left
![]()
- Push the right lever to the right
The plane flew to the right
![]()
- Push the right lever to the left
- Turn left and right (with camera front side)
- Turn the left lever to the left
![]()
- Turn the left lever to the right
![]()
- Turn the left lever to the left
- Throttle (left lever)
- Fine-tuning control (with camera front side)
- Forward and backward fine tuning

![]()
- Take off the body when the offset, according to the former micro Adjustment is correct
- Take off when the body forward offset, after the micro Adjustment is correct
-
About fine tuning
![]()
-
![]()
- Forward and backward fine tuning


- Take off the body when the right shift, according to the left micro Adjustment is correct
- Take off the body when the left shift, according to the right micro Adjustment is correct
Directional definition and mode selection of headless mode
When converting to headless mode, the aircraft will give up its front and rear azimuths, and reposition the front and rear with the remote control as a reference point. Such as: when the right lever to push forward, the aircraft will fly away from the remote control; when the right lever to pull back, the aircraft will fly to the remote control. (With camera front side)

- The direction of the aircraft before departure: the direction of the aircraft forward in front of you,(With the camera side for the front) remote control to the end of the direct flight and then press a key. Take off, that is, to complete the flight head mode direction definition.
![]()
- When flying by the headless mode of the remote control issued a "flute, flute" twice, the aircraft lights Light flashing into the headless mode. And then press the remote control issued a "flute" sound Exit the headless mode.
![]()


A key return
Press a key return, the aircraft will give up their own front and rear left and right direction, automatically defined by the headless mode of backward direction of flight, when the control of the right lever when the stop this function

 Note: This feature can only be done automatically and the flight can not be reached automatically.
Speed selection
Speed file is to advance, back and left and right side of the flight is divided into third gear speed, the remote control is turned on by default when the slow power, press the remote control button issued a "flute" "flute" twice as midfielder, "flute" "" Flute "press three times for the fast file," flute "soon return to slow file.

(Recommended beginners with slow operation)
The remote control controls the recording
Video, camera keys (and mobile phone APP on the video, take pictures of a key, when using the remote control to control the aircraft through the remote control on the video, like the camera can also start WIFI film video or camera) prompt:
- WIFI aerial version of the phone after 20 seconds after the phone can find WIFI connection and remote control to start the video or take pictures
- When there is no connection to the APP must be guaranteed WIFI flight card on the SD card storage space remote control camera on the camera button has a role.
![]()

Aircraft settings reset
- The reset setting is a horizontal reset of the six-axis gyroscope on the aircraft, and the micro adjustment of the remote control.
- The operation before the aircraft in the horizontal position, Push the stick as the picture, 2 seconds after the remote control issued (flute) sound, the aircraft quickly flashing lights a few times that the reset set successfully.
![]()
- This function is generally not used, only for aircraft maintenance adjustment or aircraft when a serious offset

* Emergency landing

- During the flying time if need urgent stop, press the button(as picture shown),the drone will stop working.(Please do notattemp this operation while the drone regular flying in high altitude)
- When the drone lean over 45 degrees, it will stop for protect the engine.
- When use the App control the drone, slide the throttle down, and press the one key take off button, it will emergency landing.
![]()

Problem guide
| Ask questions | The original for | Approach |
| Connect the flying saucer batteries and flyThe indicator light on the dish continues Flicker, operation no response | Remote control and UFO is not successful | Please re-perform the remote control and the flying saucer |
| Connect the flying saucer battery. There's nothing wrong with the orbiter should. |
|
|
| Push the throttle lever. The motor does not turn and flies The indicator light on the disc starts flashing | UFO lithium battery power shortage | Charge the battery or replace another fully charged battery |
| The flying saucer main rotor continuesTurn but cannot take off |
|
|
| The flying saucer vibrates badly | Main rotor deformation |
|
| The flying saucer will still go on or on After moving | The gyroscope is not at all right | The remote control can be automatically corrected mode, or restart the re-frequency |
| The flying saucer fell behind and lost flat On the fly. | The gyroscope is not at all right | The remote control can be automatically corrected mode, or restart the re-frequency |
Download APP connection
Download real-time aerial photography software "JY UFO", so that the aircraft during the flight FPV real-time transmission.
- For the Apple IOS system APP "JY UFO" (Please scan this twodimensional code to install this software)
![]()


- Used for foreign Andrews system APP "JY UFO" (Please scan this two -dimensional code to install this software)
![play.google.com]()
- For the domestic Andrews system APP "JY UFO" (Please scan this two -dimensional code to install this software)
![]()


Before use, please open the aircraft power switch, the aircraft on the flat ground, open the phone WiFi link interface, Connect WiFi name to (WiFiUFO - ###) as shown in Figure 1.

figure 1
WiFi connected later, open the APP, enter the main interface, as shown in Figure 2, Click "Play" to enter the user interface, as shown in Figure 3, click "" to enter ordinay control interface, click "" "Altitude hold " key to become"Black", enter the "Altitude hold " interface.

figure 2

figure 3
When the video connection is successful, you can see the WIFI camera through the phone screen Transfer the image.
Key function description

1. Accelerator
2/3. Left / right rotation
4/5. Left and right side fly
6/7. Forward, backward
8/9. Forward / backward trim
10/11. Left / right spin fine tuning
12/13.Left / right side fine tuning
14. Take pictures
15. Video recording
16.Media Library
17. Speed: 30% / 60% / 100%
18. Set high
19. Gravity sensing mode
20.Show / hide virtual joystick
21. Show / hide settings
22. The lens is reversed
23. 3D display
24. Headless mode
25. Gyro calibration
26.Custom route
27. 360 ° roll
28. A key stop
29. A key to take off
30. A key drop
31. A key to unlock
32. Voice command control Control of aircraft commands:
Move forward, back, fly on the right, fly on the left
- The gravity sensor mode: click on the icon to enter the gravity sensor mode, after the success of the icon shows the yellow, so that you can shake the phone to control the aircraft forward, back, left fly, the right side of the fly. Click the icon again to return to the bar model!
![]()
- Take pictures: the aircraft flying to the air, control the direction to the need to take pictures of the location, click the camera icon, each shot a picture! After shooting to control the direction of the remote bar to change the camera target! Each time taking pictures for 0.5-1 seconds,
![]()
![warning]() Note: Before operating this function, you must skillfully operate the four-axis aircraft.
Note: Before operating this function, you must skillfully operate the four-axis aircraft.
- Unlock the four-axis aircraft
Open the four-axis aircraft power switch, click on the high icon in Figure 1, and then click on the button in Figure 2 to unlock the icon, this time the aircraft propeller low-speed rotation.
![]()
figure 1
![]()
figure 2


Note: The camera lens of the four-axis aircraft indicates the front of the aircraft
Push the left joystick (throttle), the main motor speed increases, the four-axis aircraft rise. Push down the left joystick (throttle), the main motor speed down, four-axis aircraft down.

Left push the left joystick (throttle), turn left the four-axis aircraft, push the left joystick to the right (throttle), turn right at the four-axisaircraft.

Push the right joystick up (rudder), the four-axis aircraft to moveforward; push down the right joystick (rudder), the four-axis aircraft to the back.

Push the right joystick to the right (rudder), the right side of the four-axis aircraft, and the right lever (rudder) to the left, the left side of the four-axis aircraft.

Note: Push the left joystick (throttle) to take off. When thefour-axis aircraft is turned in the air or laterally, use the fine adjustment function to correct the action.
If the four-axis aircraft take the clockwise rotation, adjust the right-hand fine-tune key until it returns to normal.

If the four-axis aircraft take off directly counter clockwise rotation, then adjust the left rotation fine-tuning key,

If the four-axis aircraft drifts directly to the left when taking off, press the right side to fine-tune the key until it returns to normal.

If the four-axis aircraft drifts directly to the right when taking off, press the left side to fine-tune the key until it returns to normal.

If the four-axis aircraft is moved backwards forward, press the forward trim key until it returns to normal.

If the four-axis aircraft moves forward directly forward, press the back-tune key until it returns to normal

Note: When the four-axis aircraft is less than 30 cm from the ground, it will be affected by the eddy currents generated by the ground, and will become unstable, which is the "ground effect", the more the four-axis aircraft, the greater the ground effect force.
Product main accessories name

Product main accessories name
| Number | Name | Quantity | Number | Name | Quantity |
| 01 | Main body cover | 1 | 08 | PCB board | 1 |
| 02 | Main body under cover | 1 | 09 | Motor | 4 |
| 03 | Leaves | 4 | 10 | Gear | 4 |
| 04 | Front left axis | 1 | 11 | Battery | 1 |
| 05 | Front right axis | 1 | 12 | USB charger | 1 |
| 06 | Behind left axis | 1 | 13 | Camera board | 1 |
| 07 | Behind right axis | 1 |

Documents / Resources
References
Download manual
Here you can download full pdf version of manual, it may contain additional safety instructions, warranty information, FCC rules, etc.
Advertisement


Need help?
Do you have a question about the E58 and is the answer not in the manual?
Questions and answers