Subscribe to Our Youtube Channel
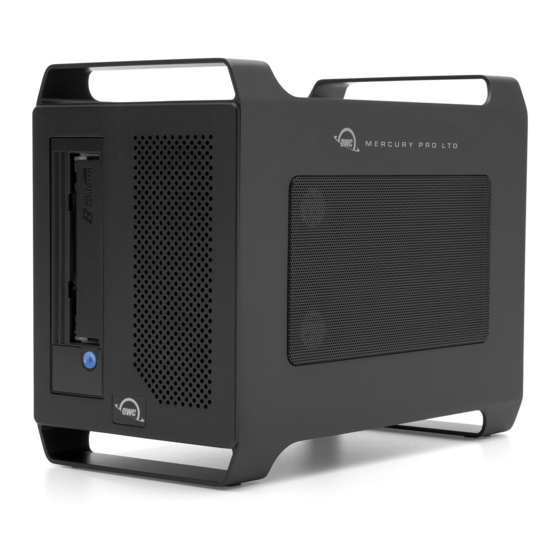
Summary of Contents for OWC Mercury Pro LTO
- Page 1 Mercury Pro LTO Assembly Manual & User Guide Thunderbolt 3 Longevity DisplayPort 1.4...
-
Page 2: Table Of Contents
2.4 Activating myLTO Software ............ 12 2.5 Notes For Uninstalling myLTO ..........13 Support Resources 3.1 IBM Support Resources for LTO 8 Ultrium Drive ....14 3.2 Troubleshooting ..............14 3.3 Contacting Technical Support ..........14 Contents OWC Mercury Pro LTO... -
Page 3: Introduction
The images and descriptions may vary slightly between this manual and the unit shipped. Functions and features may change depending on the firmware version. The latest product details and warranty information can be found on the product web page. OWC’s Limited Warranty is not transferable and subject to limitations. - Page 4 - Never expose your device to rain or use it near water or in damp or wet conditions. Never place objects containing liquids on the drive, as they may spill into its openings. Doing so increases the risk of electrical shock, short-circuiting, fire or personal injury. Introduction OWC Mercury Pro LTO...
-
Page 5: Front View
- Please do not power off the Mercury Pro LTO or disconnect the Thunderbolt 3 cable from the host during use. Doing so will likely result in data loss and/or damage to the tape. -
Page 6: Rear View
- When the computer goes into Sleep mode, the LTO drive and any SATA or SAS drive that is installed, will stay powered on as long as the power switch is in the ON position. For this reason, the Mercury LTO Pro may not be totally silent during Sleep. Introduction OWC Mercury Pro LTO... - Page 7 Notes and Recommendations – Data Protection - Please do not power off the Mercury Pro LTO or disconnect the Thunderbolt 3 cable from the host during use. Doing so will likely result in data loss and/or damage to the tape.
- Page 8 If mixing Thunderbolt 3 with Thunderbolt 2 and/or Thunderbolt devices, use the device order shown below, if possible. Computer > Thunderbolt 3 devices > Thunderbolt 2 devices > Thunderbolt devices Introduction OWC Mercury Pro LTO...
-
Page 9: Device Setup
2.1 Installing a SATA or SAS drive (optional) The OWC Mercury Pro LTO provides an internal storage bay for additional backup use or other purposes. The storage bay uses a standard ThunderBay drive tray, which accepts both 3.5-inch and 2.5-inch SATA or SAS drive form factors. - Page 10 11. Turn over the enclosure and carefully set it on the work surface so that the case screw holes face up, then re-affix the four screws that you removed in Step 1. This concludes the SATA / SAS drive installation process. Device Setup OWC Mercury Pro LTO...
-
Page 11: Installing The Mylto Application And Sas Driver
The included software helps to streamline the process of backing up your data to tape and to managing the tape system as a whole. - Step 1 – Download the ‘Mercury Pro LTO ...’ .dmg file here. - Page 12 System Integrity Protection (SIP) active by default, during the install progress, a macOS dialog box will appear (similar to the one shown left), noting that an OWC system extension was blocked. It is important to immediately click ‘Open Security Preferences’...
-
Page 13: Inserting Lto Media
Mercury LTO. It does not matter whether you insert the cartridge first and then launch myLTO or launch the app first, as the volumes do not mount automatically. Device Setup OWC Mercury Pro LTO... -
Page 14: Activating Mylto Software
- Step 4 – This will open the Security & Privacy panel. Click the lock icon and supply your administrator credentials, then click the ‘Allow’ button. Afterward you can close System Preferences and begin using myLTO. Device Setup OWC Mercury Pro LTO... -
Page 15: Notes For Uninstalling Mylto
- Step 1 – Quit the myLTO application if it’s already running (make sure no data transfers are occurring). - Step 2 – Open the ‘OWC Mercury Pro LTO...’ .dmg file that you downloaded earlier. Open the ‘Uninstaller’ folder. A window should open that looks similar to the one to the left. -
Page 16: Support Resources
3.2 Troubleshooting If you’re having trouble connecting your Mercury Pro LTO to the Mac, first check that the power cable is connected to the back of the device and a working power source, and that the device will power on (does not need to be connected to the host —... - Page 17 OWC. © 2020 Other World Computing, Inc. All rights reserved. OWC and the OWC logo are trademarks of New Concepts Development Corporation, registered in the U.S. and/or other countries. OWC Mercury is trademark of New Concepts Development Corporation. Mac and macOS are trademarks of Apple Inc., registered in the U.S.


Need help?
Do you have a question about the Mercury Pro LTO and is the answer not in the manual?
Questions and answers