Advertisement
Advertisement

Related Manuals for Stagg HEADBANGER10 MK3


Summary of Contents for Stagg HEADBANGER10 MK3
- Page 1 USER MANUAL HEADBANGER10...
-
Page 2: Table Of Contents
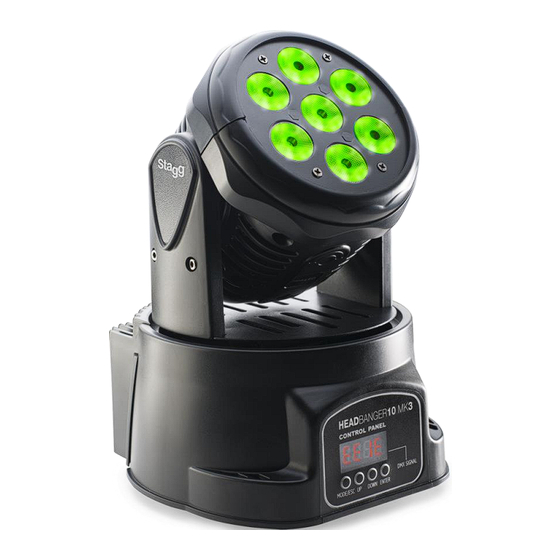
SLI MHW HB10 Table of Contents 1.BEFORE USAGE This package contains Unpacking Introduction Specifications Features 2.INSTALLATION Installation requirements Power Connection DMX Serial Data Link 3. OPERATION Menu Map Operating Instructions DMX Channels... - Page 3 1. BEFORE USAGE This package contains • 1x HeadBanger 10 MK3 • 1x Power Cable • 1x User Manual Unpacking • Thank you for purchasing this product, it has been thoroughly tested and has been shipped in perfect operating condition. •...
-
Page 4: Installation
expose this unit to rain or moisture • Warning! This product may cause severe eye damage. Avoid looking directly into the light source at all times! Specifications • Voltage: AC100V~240V, 50-60Hz • Power Consumption: 80W • Light source: 7x 10W RGBW 4 in 1 LED •... -
Page 5: Power Connection
1. Connect the male 3pin DMX input of the first fixture to the female 3pin DMX output of the lighting controller using 110 Ohm DMX cable, for example a Stagg Commandor 10 (skip this step when not using a controller) 2. -
Page 6: Operation Menu Map
3. OPERATION Menu Map Dxxx DMX Address 001-512 MAFA Slow automatic mode SLOU Fast automatic mode FASt Master sound mode MStS Stand-Alone Control MStc Slave mode SlAu PAN normal mode PAN reverse mode rPAN TILT normal mode TILT reverse mode rTIl Normal display Mode Reversed display... -
Page 7: Operating Instructions
DMX daisy-chain example Operating Instructions Take note: All changes made to the unit become active and saved when pressing the “OK” button. Screen turn automatically off after 5 seconds of inactivity. The unit will then display the active running mode or the DMX address when DMX input is detected. - Page 8 Modes Selection • Press MENU, then UP or DOWN until one of the following mode is displayed, then press ENTER MASL / SLOU: Master automatic slow mode. The HeadBanger will play automatic sequences with slow movements. MAFA / FASt: Master automatic fast mode. The HeadBanger will play automatic sequences with fast movements.
- Page 9 Channel function 0-255 0-255 Tilt None 8-134 Dimmer 135-239 Strobe 240-255 Full on 0-255 0-255 0-255 0-255 0-255 Movements Speed 150-200 Reset 14 Channels Channel Function 0-255 0-255 Pan fine Tilt 0-255 0-255 Tilt fine 0-255 Movements speed None 8-134 Dimmer 135-239 Strobe...
- Page 10 50-63 Color5 64-77 Color6 78-91 Color7 92-105 Color8 106-119 Color9 120-134 Color10 135-147 Color11 148-161 Color12 162-175 Color13 176-189 Color14 190-203 Color15 204-217 Color16 218-231 Color17 232-255 Color Jump change 0-255 Speed No function 8-22 Auto 1 23-37 Auto 2 38-53 Auto 3 54-67...
- Page 11 Max Tilt Rotation Setup • Press MENU, then Up or DOWN until “TIxx“ is displayed, then press ENTER • You can reduce the maximum vertical rotation range to 270° (TI27), 180° (TI18) or 90° (TI09) using the UP or DOWN buttons, press ENTER to confirm. Reset •...
Need help?
Do you have a question about the HEADBANGER10 MK3 and is the answer not in the manual?
Questions and answers