Advertisement
Quick Links
Advertisement

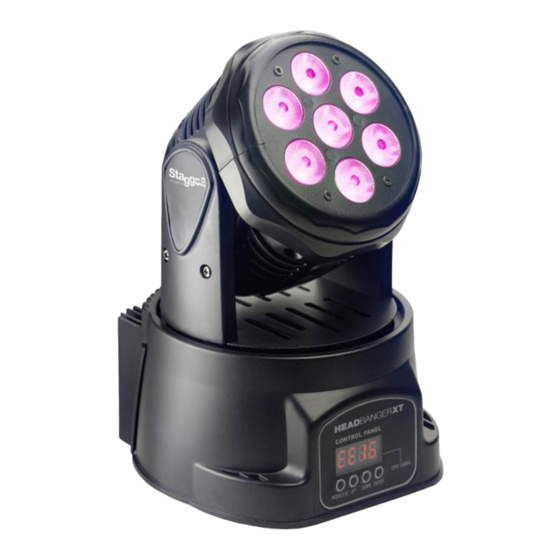
Summary of Contents for Stagg HEADBANGERXT SLI MHW HBXT
- Page 1 User Manual HEADBANGERXT SLI MHW HBXT...
- Page 2 ...
-
Page 3: Operation
Table of Contents 1.BEFORE USAGE This package contains Unpacking Introduction Specifications Features 2.INSTALLATION Installation requirements Power Connection DMX Serial Data Link 3. OPERATION Menu Map Operating Instructions DMX Channels ... -
Page 4: Before Usage
1. BEFORE USAGE This package contains 1x HeadBanger XT • 1x Power Cable • 1x User Manual • Unpacking • Thank you for purchasing this product, it has been thoroughly tested and has been shipped in perfect operating condition. •... -
Page 5: Installation
Specifications Voltage: AC100V~240V, 50-60Hz • Power Consumption: 80W • Light source: 7x 10W RGBW 4 in 1 LED • Beam angle: 25° • Max output @1m: 6100 Lux • PAN 540°, Tilt 220° with 16bit control • DMX channels: 9 or 12 DMX Channels •... - Page 6 1. Connect the male 3pin DMX input of the first fixture to the female 3pin DMX output of the lighting controller using 110 Ohm DMX cable, for example a Stagg Commandor 10 (skip this step when not using a controller) 2.
- Page 7 3. Operation Menu Map ...
- Page 8 Operating Instructions The Headbanger XT is completely set up through the front buttons and screen. Take note: All changes made to the unit become active and saved when the unit exits it's 5 seconds menu. This is activated by not touching the control buttons for .
- Page 9 Stat - Static setup Press MENU, then Up or DOWN until "Stat" is displayed, then press ENTER • The static mode allows you to manually set the HeadBanger XT up like you can • do remotely with DMX, by allowing you to set the DMX channel parameters from the display and buttons.
- Page 10 Auto - Automatic Programs Setup Press MENU, then Up or DOWN until "Auto" is displayed, then press ENTER • Press UP or DOWN to choose between "Aut1" to "Aut8" (programs 1 to 8), then • press ENTER to confirm For each program, you can select the sub-menu's "dInn"...
- Page 11 SLAu - Slave Mode Press MENU, then Up or DOWN until "SLAv" is displayed, then press ENTER • The display will show "SLA" and the HeadBanger XT is now in slave mode. In • this mode, the light will listen to input on it's DMX in connector after being connected to another HeadBanger XT in Master Mode.
- Page 12 rang - Pan/Tilt range setup A special feature on the HeadBanger XT is the ability to limit the movement range on both Pan & Tilt in automatic programs and sound active programs. By defining a start and a stop value, you can manually set the range wherein the pan/tilt movements will be executed without interfering with other functions.
- Page 13 DMX 512 Control This function allows you to use a universal DMX-512 controller such as the Stagg COMMANDOR 10 to control the HeadBanger XT, a DMX controller allows you to create unique programs tailored to your individual needs. The HeadBanger XT uses 9 and 12 DMX channel modes, this will allow you to create custom lightshows.
- Page 14 DMX Channels: 12 Channel mode Value Function 0-255 PAN 0-540º 0-255 PAN 16 bit 0-255 Tilt 0-220º 0-255 Tilt 16 bit 0-255 Pan & Tilt Speed while moving (from fast to slow) 0-255 Dimmer 0-100% 0-255 Red 0-100% 0-255 Green 0-100% 0-255 Blue 0-100%...
- Page 15 DMX Channels: 9 Channel mode Chan Value Function 0-255 PAN 0-540º 0-255 Tilt 0-220º 0-255 Dimmer 0-100% 0-255 Red 0-100% 0-255 Green 0-100% 0-255 Blue 0-100% 0-255 White 0-100% No function 10-225 Strobe 0-20HZ (from slow to fast) No function 6-15 RED 100%, DIM GREEN UP FROM 0% 16-25...
-
Page 16: Important Safety Instructions
IMPORTANT SAFETY INSTRUCTIONS READ AND KEEP THESE INSTRUCTIONS. HEED ALL WARNINGS. • If, after you have followed the instructions outlined above, this device fails to function, please contact your dealer. Under no circumstances should this device be opened. Leave all servicing to qualified personnel.


Need help?
Do you have a question about the HEADBANGERXT SLI MHW HBXT and is the answer not in the manual?
Questions and answers