
Related Manuals for Midea FW4023D


Summary of Contents for Midea FW4023D
- Page 1 掛牆扇 使用說明書 FW4023D 本說明書的所有內容均已仔細檢查。如有印刷錯誤或誤解,可向本公司咨詢。 註:產品若有技術改進,將會編進新版說明書中,恕不另行通知。產品外觀、顏色如有改動,以實物為準。...
- Page 2 感謝選用Midea產品!為確保客戶清楚安全使用方式及了解本產品的功能和特性,請於使用 本產品前詳細閱讀本使用說明書。 目錄 目錄 重要安全說明 產品規格 產品介紹 安裝方法 使用方法 清潔與維護 常見故障問題 商標、版權和法律聲明 數據保護聲明...
- Page 3 重要安全說明 預防措施 為免因不安全或不當使用本產品而造成不可預見的風險或人身傷害,請在使用本產品前細心閱讀本 使用手冊。另請在收貨時,仔細檢查包裝及產品,確保一切完好並操作無異常。若有任何損壞,請 於購買產品七天內聯絡本公司售後服務團隊或零售商/經銷商。 警告:為確保使用者人身安全,絕不允許擅自對本產品進行任何改裝,如發現用於其他用途而造成 危險,本公司有權不作維修保養。(有關保養條款細則可參閱保修卡或Midea HK官網。) 符號說明 危險 此符號表示極度易燃氣體對生命和健康造成危險。 電器電壓警告 此符號表示電器電壓對生命和健康造成危險。 警告 此符號表示中度危險,如不加以避免,可能導致死亡或嚴重人身傷害。 小心 此符號表示低度危險,如不加以避免,可能導致輕度或中度人身傷害。 注意 此符號表示重要資訊(如財產損失),但不表示一定存在危險。 遵守說明 此符號表示維修技術人員只能根據操作說明操作和維護本設備。 在使用/調試本設備之前,請仔細認真地閱讀使用說明書,並將其妥善保存,以備日後隨時翻閱使用 。...
- Page 4 注意 • 在使用本產品前,請先仔細閱讀本手冊內的所有安全操作守則 及使用說明。 • 八歲或以上的小孩/ 感官與感知能力受限/ 缺乏相關知識或經 驗人仕,均須在適當人員監督下安全使用。未滿八歲的小孩均 不建議獨自使用本產品。 • 除非有適當人員監督下或給予如何安全使用本機的指示並讓其 了解涉及的風險。本機並非設計給運動、感官與感知能力受限 式缺乏相關知識或使用經驗的人(包括孩童)來使用。 • 應監督兒童以避免將本產品當成玩具,電器及電源亦應存放在 兒童無法接觸的地方。 • 風機組裝後,不得再取下扇葉保護罩。 • 清潔風扇外殼和扇葉保護罩時,要拔掉電源線,不得拆卸和打 開扇葉保護罩進行清洗。 • 風扇運行時,切勿將手指、鉛筆或任何其他物體插入扇葉保護 罩。 • 如需移動本產品,請先關閉電源再進行移動。 • 使用本產品前,請確保產品放置在平穩的表面上,以免翻倒。 • 為免造成觸電,請勿將本產品放置在窗戶旁邊使用。以及請勿 將本產品任何一部份(包括插頭)浸於任何液體中。 • 僅限家庭及室內使用。...
- Page 5 警告 • 如果電源線損壞,請即停用產品並聯絡本公司的售後服務中心, 以作預約檢查及維修。 • 如無需使用本產品或進行清潔前,請從插座上拔下電源插頭。...
- Page 6 產品規格 產品型號 FW4023D 電壓 220-240V~ 頻率 50Hz 功率 產品尺寸 452x561x330mm 淨重...
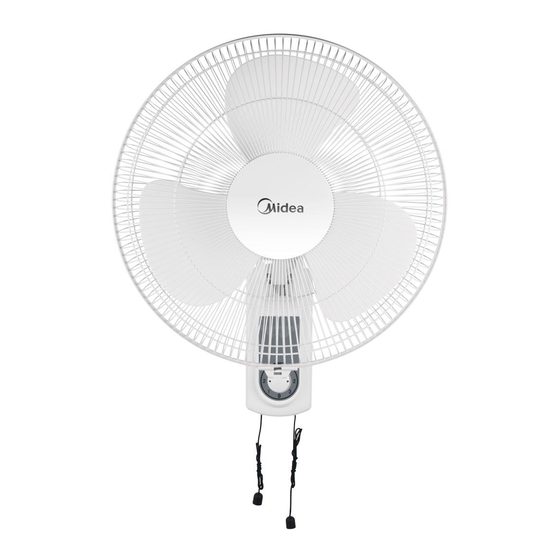
- Page 7 產品介紹 零部件名稱 後扇葉保護罩 電機軸 電機 轉速開關 旋轉器 扇葉 塑膠螺母 彈性擋圈 前扇葉保護罩 注意: 本手冊中的所有圖片僅供參考。如圖片有任何差異,應以實物為準。 安裝之前,从配件上先取下零件。...
- Page 8 安裝方法 保護罩和扇葉組裝 順時針擰開旋轉器(或從包裝袋中取出旋轉器),逆時針擰開塑膠螺母,將其都取出。將後保護 罩固定在電機上,然後再次擰緊塑膠螺母。(圖1) 將旋轉器旋緊 擰松 塑膠螺母 圖1 將扇葉插入軸中,並確保轉子軸銷能夠裝入扇葉的凹槽中。逆時針旋轉旋轉器,將葉片擰緊。 (圖2) 將旋轉器旋緊 插槽固定銷 扇葉 圖2 用保護罩夾固定前後保護罩,然後擰緊風扇格柵的鎖緊螺釘和螺母。(如圖3所示) 圖3...
- Page 9 4 在牆上安裝 使用木螺釘或塑膠螺釘將提供的支架(A)固定在牆上,確保較寬的開口朝上,再將壁扇的掛 鉤插入支架槽中。 5 轉速調整 打開/關閉風扇,拉動開關拉線(B)調整至所需轉速。 6 擺動控制 拉動開關拉線(C)開始和停止風扇擺動。 7 調整吹風方向 向上或向下輕推防護罩調整吹風方向。...
- Page 10 使用方法 控制面板操作 功能描述 停止運作。 ● 低速。 ● 中速。 ● 高速。 ●...
- Page 11 清潔與維護 請勿自行維修、拆卸、重裝本產品。如有需要維修,請聯絡本公司售後服務中心,以作預約檢查及維 修。 1. 在清潔和組裝之前,必須拔下風扇的電源線。 2. 為確保電機有充分的通風,請確保電機背面的通風孔沒有灰塵。請勿拆卸風扇以清除灰塵。 請用軟布蘸中性清潔劑擦拭外部部件。 3. 請勿使用任何研磨性清潔劑或溶劑,以免刮傷表面。 4. 請勿使用以下任何一種清潔劑:汽油、稀釋劑。 5. 請勿讓水或任何其他液體進入電機外殼或內部零件。 6. 在清洗之前,請務必拔掉電源插頭。 7. 塑膠部件應用軟布沾上溫和的肥皂水進行清洗,再用幹布徹底擦除肥皂泡。...
- Page 12 常見故障問題 如本產品在使用期間,出現錯誤或故障,可先參考以下列出指出之可能原因和解決錯誤或故障的 注意事項。建議先按以下列表之解決方法自行檢查,如仍有需要進行檢查維修,請與本公司售後 服務團隊聯絡。 問題 原因 解決方法 • 電源線沒有插上或接觸不良。 確保插頭正確插入插座。 設備安裝後不能正常 工作 • 機身上的開關沒有打開。 打開機身上的開關。...
- Page 13 商標、版權和法律聲明 美的集團和/或其附屬公司(下稱“美的”)的 標識、字詞商標、商品名、商業包裝及 其所有版本均系美的的寶貴財產,美的擁有商標、版權和其他知識產權,以及因使用美的商標的 任何部分而產生的所有商譽。未經美的事先書面同意,將美的商標用於商業用途可能構成商標侵 權或違反相關法律的不正當競爭。 本手冊由美的公司制作,美的公司保留其所有版權。未經美的公司事先書面同意,任何單位或個 人不得使用、複製、修改、分發本手冊的全部或部分內容,或與其他產品捆綁銷售。 列印本手冊時,手冊中所述的功能和說明均是最新的。但由於功能和設計方面的改進,實物可能 會有所不同。...
- Page 14 數據保護聲明 為了提供與客戶約定的服務,我們同意不受限制地遵守將向客戶提供服務涉及的國家的適用數據 保護法的一切規定,同時在適用情況下,還須遵守歐盟《通用數據保護條例》(GDPR)的規定要 求。 我們的數據處理旨在履行我們對您訂立的合同義務,並出於產品安全原因,維護您在保修和產品 註冊問題方面的權利。某些情況下,但只有在確保充分的數據保護的情況下,我們才會向歐洲經 濟區以外的接收方披露您的個人資訊。 如有需要,您可以索取相關更多資訊。您可以通過MideaDPO@midea.com聯繫我們的數據保 護官。要行使您的權利,例如反對出於直接行銷目的處理您的個人數據,請通過MideaD- PO@midea.com與我們聯繫。更多資訊,請掃描二維碼。...
- Page 15 All the contents of this Guide have been checked carefully. If there are any printing errors OR misunderstanding, please contact with Midea customer service team. NOTE: It will be compiled into the new version of the guide without any notice if involve technical improvements.
-
Page 16: Table Of Contents
Thank you for choosing Midea! Before using your new Midea product, please read this manual thoroughly to ensure that you know how to operate the features and functions that your new appliance offers in a safe way. CONTENTS INDEX SAFETY INSTRUCTIONS... -
Page 17: Safety Instructions
Please note modifications or alterations to the appliance are not allowed for your safety concern. Unintended use may cause hazards and loss of warranty claims. Please refer the terms & conditions at the warranty card or Midea HK official web-page. - Page 18 Caution Read the rules and instructions in these manual carefully. ● This appliance is not intended for use by children over ● eight years of age or persons with reduced physical, sensory or mental capabilities, or lack of experience and knowledge.
- Page 19 Warning If the power cord is damaged, please stop use the ● appliance immediately and contact with Midea customer service center for reserve the repair service. When the appliance is not in use and before cleaning, ● unplug the appliance from the outlet.
-
Page 20: Specifications
SPECIFICATIONS Product Model FW4023D Voltage 220-240V~ Frequency 50Hz Power Product Dimension 452x561x330mm Net Weight... -
Page 21: Product Overview
PRODUCT OVERVIEW Part Name Rear guard Motor shaft Motor Speed switch Spinner Blade Plastic Nut Circlip Front guard NOTE The pictures are for explanation only, specific products in kind prevail. Remove parts from the component before performing installation. -
Page 22: Product Installation
PRODUCT INSTALLATION Grill & Fan Blade Assembly 1 Unscrew the spinner clockwise (or take the spinner out from the bag) and the plastic nut counterclockwise to remove both of them. Fix the rear grill to the motor then tighten the plastic nut again. (Fig. 1) Spinner Tight Loose Plastic nut... - Page 23 4 Mounting on the wall Secure the supplied bracket (A) on the wall by using wooden screw or plastic screw, make sure the wider opening should be upward, insert the hook of the wall fan into the bracket slot. 5 Speed adjustment Switch on/off the fan and Adjust to the desired speed by pulling the switch cord (B).
-
Page 24: Operation Instructions
OPERATION INSTRUCTIONS Control Panel Function description ● Low speed ● Medium speed ● High speed ●... -
Page 25: Cleaning And Maintenance
CLEANING AND MAINTENANCE The fan requires minimal maintenance. Do not try to re-assemble or repair by yourself. Please contact to Midea customer service center if maintenance/ repair service needed. 1. Before cleaning and assembling, unplug the fan power. 2. To ensure adequate air circulation to the motor, keep vents at the rear of the motor free of dust. -
Page 26: Troubleshooting 1
Operation of your appliance can lead to errors and malfunctions. The following tables contain possible causes and notes for resolving an error message or malfunction. It is recommended to read the table below carefully, please contact to Midea customer service center if maintenance service needed. -
Page 27: Trademarks, Copyrights And Legal Statement
Midea may constitute trademark infringement or unfair competition in violation of relevant laws. This manual is created by Midea and Midea reserves all copyrights thereof. No entity or individual may use, duplicate, modify, distribute in whole or in part this manual, or bundle or sell with other products without the prior written consent of Midea. -
Page 28: Data Protection Notice
European Economic Area. Further information are provided on request. You can contact our Data Protection Officer via MideaDPO@midea.com. To exercise your rights such as right to object your personal date being processed for direct marketing purposes, please contact us via... - Page 32 www.mideahk.com MideaHK 2022 all rights reserved...
Need help?
Do you have a question about the FW4023D and is the answer not in the manual?
Questions and answers