Sony AC-V700A - AC Adapter/Charger Operating Instructions
- Operating instructions manual (2 pages)
Advertisement
Safety


To reduce fire or shock hazard, do not expose the unit to rain or moisture.
RISK OF ELECTRIC SHOCK
DO NOT OPEN

TO REDUCE THE RISK OF ELECTRIC SHOCK,
DO NOT REMOVE COVER (OR BACK).
NO USER-SERVICEABLE PARTS INSIDE.
REFER SERVICING TO QUALIFIED SERVICE PERSONNEL.
 This symbol is intended to alert the user to the presence of uninsulated "Dangerous voltage" within the product's enclosure that may be of sufficient magnitude to constitute a risk of electric shock to persons.
 This symbol is intended to alert the user to the presence of important operating and maintenance (servicing) instructions in the literature accompanying the

You are cautioned that any changes or modifications not expressly approved in this manual could void your authority to operate this equipment.
The Graphical Symbols with Supplemental Marking is located on the bottom of the unit.
NOTICE FOR THE CUSTOMERS IN THE UNITED KINGDOM
A moulded plug complying with BS 1363 is fitted to this equipment for your safety and convenience.
Should the fuse in the plug supplied need to be replaced, a fuse of the same rating as the supplied one and approved by ASTA or BSI to BS1362 (i.e., marked with  or
or  mark) must be used.
If the plug supplied with this equipment has a detachable fuse cover, be sure to attach the fuse cover after you change the fuse. Never use the plug without the fuse cover. If you should lose the fuse cover, please contact your nearest Sony service station.
Introduction
AC-V700A is the model name for the AC-V700 and connecting cords.
Before operating the unit, please read this manual thoroughly and retain it for future reference.
The AC-V700 AC adaptor/charger can be used as follows:
- To charge a lithium ion type battery pack. Ni-Cd/Ni-MH type batteries are not rechargeable.
The following functions are available with the "InfoLITHIUM" battery pack:- Quickly charging
- Remaining charge time display
- To enable the power supply to the video equipment with the house current, connection cords are included with this unit. However, these cords may not be used depending on the video equipment. Before using, check your video equipment.
What is the InfoLITHIUM
The "InfoLITHIUM" is a lithium ion battery pack which can exchange data with compatible video equipment about its battery consumption. Sony recommends that you use the "InfoLITHIUM" battery pack with video equipment having the  mark.
mark.
"InfoLITHIUM" is a trademark of Sony Corporation.
WARNING
To reduce fire or shock hazard, do not expose the unit to rain or moisture.
To avoid electrical shock, do not open the cabinet.
Refer servicing to qualified personnel only.
AC power cord must be changed only at the qualified service shop.
For the customers in Canada
TO PREVENT ELECTRIC SHOCK, MATCH WIDE BLADE OF PLUG TO WIDE SLOT, FULLY INSERT.
Notes on Use
About the remaining battery time
While charging the battery pack, this unit will show the remaining battery time with your video equipment, etc. on the following conditions.
time with your video equipment, etc. on the following conditions.
- Using the "InfoLITHIUM" battery pack
- Using the video equipment having the
![]() mark
mark
Make sure that you use the battery pack having the  mark
mark
Consult the operating instructions supplied with your video equipment if it is applied to "InfoLITHIUM".
Though the following models are applied to "InfoLITHIUM", the remaining battery time is not displayed on this unit.
DCR- PC7/PC7E/PC10/PC10E/SC100/SC100E/TRV7/TRV7E
CCD- TR555/TR555E/TR610E/TR710/TR710E/TR760E/TR790E/TR810E/TR820E/TR825E/TR910/TR910E/TR920E/TR930/TR1100E/TR2200E/TR2300/TR2300E/TR3100E/TR3300/TR3300E/TR3400/TRV31/TRV31E/TRV41/TRV41E/TRV51/TRV51E/TRV54E/TRV56E/TRV61E/TRV62/TRV64E/TRV72/TRV81/TRV81E/TRV82/TRV91E/TRV94/TRV94E/TRV101/TRV101E/ SC55/SC55E/SC65/SC65E
GV- A500/A500E
If you use the video equipment having the mark, the remaining battery time display of the battery pack being charged corresponds to the video equipment having the mark which is last attached to the battery pack.
Charging
- Use only a lithium ion type battery pack. This unit cannot be used to charge a Ni-Cd/Ni-MH type battery pack.
- Attach the battery pack firmly.
- Charge the battery pack on a flat surface without vibration.
Charging temperature
The temperature range for charging is 0°C to 40°C (32°F to 104°F).
However, to provide maximum battery efficiency, the recommended temperature range when charging is 10°C to 30°C (50°F to 86°F).
Others
- The nameplate indicating operating voltage, power consumption, etc. is located on the bottom.
- The negligible amount of electric current will flow into the AC adaptor/ charger as long as the AC adaptor/charger is plugged into the wall outlet.
- Unplug the unit from the wall outlet if it will not be used for extended period of time. To disconnect the cord, pull it out by the plug. Never pull the cord itself.
- Use this unit close to a wall outlet. This ensures that the power plug can be quickly unplugged from the wall outlet to turn off the power if a malfunction occurs during use.
- Do not operate the unit with a damaged cord or if it has been dropped or damaged.
- Be sure that nothing metallic comes into contact with the metal parts of the unit or connecting plate. If it does, a short may occur and the unit may be damaged.
- Always keep the metal contacts clean.
- Do not disassemble or convert the unit.
- Do not apply mechanical shock or drop the unit.
- While the unit is in use, it gets warm. But this is normal.
- Keep the unit away from AM receivers, because it will disturb AM reception.
- Do not place the unit in a location where it is:
- Extremely hot or cold
- Dusty or dirty
- Very humid
- Vibrating
If any difficulty should arise, unplug the unit and contact your nearest Sony dealer.
Specifications
| Power requirements | 100 - 240 V AC, 50/60 Hz |
| Power consumption | 25 W Charge mode: 35 VA (100 V AC), 46 VA (240 V AC) Operating mode: 39 VA (100 V AC), 50 VA (240 V AC) |
| Output voltage | DC OUT: 8.4 V, 2.0 A in operating mode Battery charge terminal: 8.4 V, 1.4 A in charge mode |
| Application | Sony battery pack NP-F100/F200/F300/F330/ F530/F550/F730/F730H/F750/F930/F950/ F960 |
| Operating temperature | 0°C to 40°C (32°F to 104°F) |
| Storage temperature | –20°C to +60°C (–4°F to +140°F) |
| Dimensions | Approx. 127 × 55 × 95 mm (w/h/d) (5 × 2 3/16 × 3 3/4 inches) |
| Mass | Approx. 255 g (9 oz) |
| Supplied accessory | Connecting cord DK-415 (1), DK-215 (1) AC power cord (1) |
Design and specifications are subject to change without notice.
Use a commercially available AC plug adaptor, if necessary, depending on the design of the wall outlet.

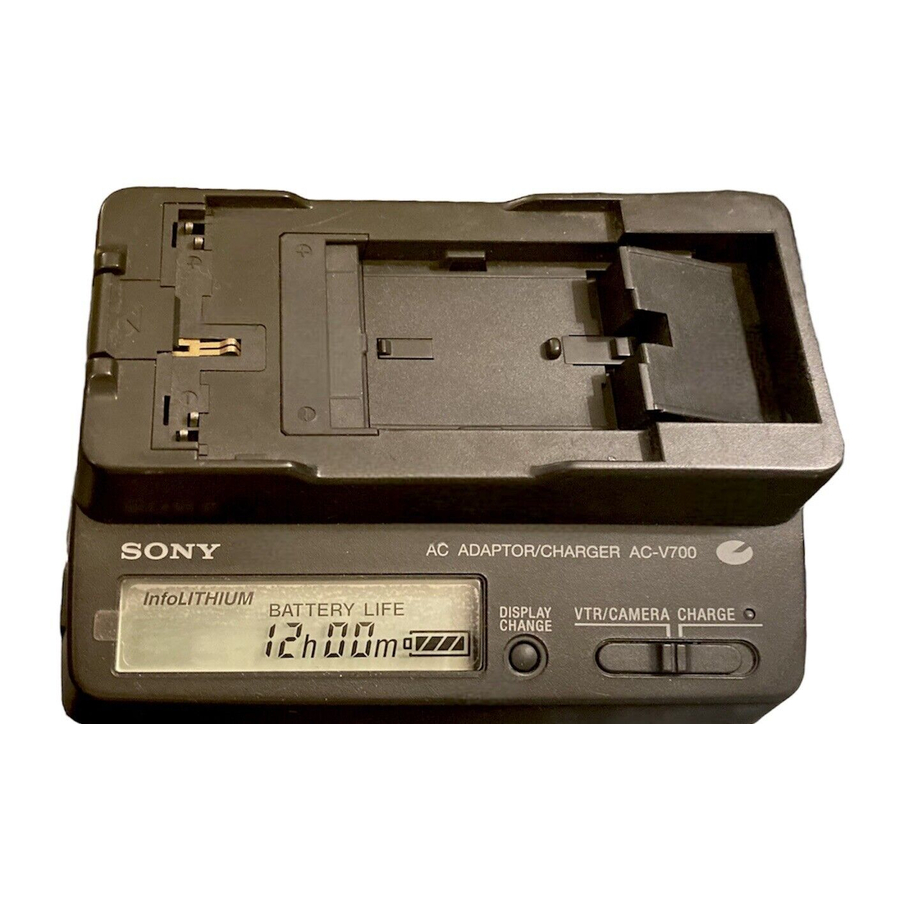
Identifying the parts

- Terminal shutter
- Charging polarity
- Battery release lever
- DC OUT connector
- Guide
- CHARGE lamp
- Mode change switch
- DISPLAY CHANGE button
- Display window
Display window
- "InfoLITHIUM" indicator
Lights up when the "InfoLITHIUM" battery pack is attached. - WARNING indicator
- TIME TO CHG (charge) indicator
- Time indicator
- BATTERY LIFE (battery remaining time) indicator
- VCR/CAMERA indicator
- Full charge indicator
- Remaining battery indicator
To Charge the Battery Pack

- Set the mode change switch to CHARGE.
- Connect the power cord to this unit.
- Connect the power cord to a wall outlet.
The beep sounds and the display window lights up. - Install the battery pack.
Charging begins. When the remaining battery indicator becomes![]() and the CHARGE lamp lights up, normal charge is completed. For full charge, which allows you to use the battery slightly longer than "normal charge", leave the battery pack attached until the CHARGE lamp goes out.
and the CHARGE lamp lights up, normal charge is completed. For full charge, which allows you to use the battery slightly longer than "normal charge", leave the battery pack attached until the CHARGE lamp goes out.
Remove the battery pack when required. It can be used even if the charging is not completed.
 and the CHARGE lamp lights up, normal charge is completed. For full charge, which allows you to use the battery slightly longer than "normal charge", leave the battery pack attached until the CHARGE lamp goes out.
Remaining battery indicator
To Install the battery pack
NP-F550, etc.

- Place the battery pack on
![]() .
.
Align the end of the battery pack having the![]() mark with the edge of the terminal shutter of this unit.
mark with the edge of the terminal shutter of this unit.
![]() folds down when the battery pack is placed on it.
folds down when the battery pack is placed on it.
- Slide the battery pack in the direction of the arrow.
Press the battery pack until the terminal shutter is completely covered.
 .
. mark with the edge of the terminal shutter of this unit.
NP-F100, etc.

- Slide the battery pack along the guide to
![]() .
. - Press the battery pack down until it clicks.
Note
Do not apply shock to the charging polarity. When you install the battery pack, be sure to not strike it.
Charging time
The following table shows the charging time for the battery pack which is discharged completely.
| Battery pack | Charging time |
| NP-F550 | 115 (55) |
| NP-F750 | 170 (110) |
| NP-F960 | 245 (185) |
| NP-F100 | 100 (40) |
| NP-F200 | 110 (50) |
| NP-F300 | 160 (100) |
- Approximate minutes to charge an empty battery pack fully (Full charge).
- Approximate minutes in parentheses indicate the time when you charge normally (Normal charge).
- To ascertain the battery life, refer to the instruction manual of the video equipment which you use.
- The charging time may differ depending on the condition of the battery pack or the temperature of the environment.
Notes
- When the mode change switch is set to VCR/CAMERA during charging, charging stops.
- When a fully charged battery pack is installed, the CHARGE lamp will once light, then go out.
- If the CHARGE lamp does not light or flash, check that the battery pack is correctly attached to the AC adaptor/charger. If it is not attached it will not be charged.
When the CHARGE lamp flashes
If a problem occurs during charging, the CHARGE lamp flashes and WARNING appears on the display.
Check through the following chart.

If the CHARGE lamp lights and does not flash again:
If the CHARGE lamp goes out because the charging time has passed, there is no problem.
If the CHARGE lamp lights and does not flash again:
If the CHARGE lamp goes out because the charging time has passed, the problem is with the battery pack first installed.
To remove the battery pack
NP-F550, etc.
Slide the battery pack in the direction of the arrow, then lift is straight out.
NP-F100, etc.
Remove the battery pack while sliding the battery release lever.
To Check Charging
While charging, you can check the charging time on the display. After starting charging in a minute, BATTERY LIFE lights up on the display.
Press DISPLAY CHANGE while charging.
Each time you press DISPLAY CHANGE, the display changes as follows.

The remaining battery time when the battery pack being charged is attached to your "InfoLITHIUM" video equipment
The time is not displayed when the remaining battery time is less than 5 minutes.
- The remaining time until normal charge is completed
- The normal charge time is not displayed after the normal charge is completed.
- The remaining time until full charge is completed
- The full charge time is not displayed after the full charge is completed.
Notes
- The time display shows the approximate time when charging at 10°C 30°C. The time display may differ from the actual charging time depending on using conditions and circumstances.
- The time display may show "– – – –" in the following cases. However, the unit is not malfunctioning.
- The remaining battery time is less than 5 minutes.
- There is a difference between the displayed time and actual charging time. Even if this happens, continue charging.
- Full charge requires about 1 hour after normal charge is completed. If you remove the battery pack between normal charge and full charge, the charging time may not be displayed properly in the next charging.
- If the charging time is not displayed properly, fully charge the battery pack. The charging time will be displayed properly.
- When you attach a fully charged battery pack to this unit, "TIME TO CHG FULL 1h" may appear on the display. However, the unit is not malfunctioning.
- BATTERY LIFE may not be displayed depending on using conditions and circumstances.
- You may wait for a while after pressing DISPLAY CHANGE until the display shows the time indication.
To Operate Video Equipment
For details of the connection, refer to the instruction manual of the video equipment.
- Set the mode change switch to VCR/CAMERA.
- Connect the power cord to a wall outlet.
- Connect the connecting cord
![]() to the DC OUT connector of this unit.
to the DC OUT connector of this unit.

- Connect the connecting cord to the video equipment.
 to the DC OUT connector of this unit.
When using the connecting cord DK-415 (DCR-TRV130, etc.)
While pressing the connecting plate  , slide it down.
To remove the connecting plate, slide it up while pressing the battery release lever  .
.

When using the connecting cord DK-215 (DCR-TRV900, etc.)
Open the cover, and insert the connecting plug  .
.
To remove the connecting plug, pull it out.

Notes
- If you set the mode change switch to CHARGE while operating the video equipment, the power supply to the video equipment stops.
- You cannot charge the battery pack attached to this unit while supplying the power to the video equipment.
- Keep this unit away from the video equipment if the picture is disturbed.

Documents / ResourcesDownload manual
Here you can download full pdf version of manual, it may contain additional safety instructions, warranty information, FCC rules, etc.
Download Sony AC-V700A - AC Adapter/Charger Operating Instructions
Advertisement


Need help?
Do you have a question about the AC-V700A and is the answer not in the manual?
Questions and answers