Panasonic KX-NS300 Getting Started
Hybrid ip-pbx
Hide thumbs
Also See for KX-NS300:
- Pc programming manual (752 pages) ,
- Basic specification (471 pages) ,
- User manual (388 pages)
Table of Contents
Advertisement
ที อี เอ็ น พี เ อบี เ อ็ ก ซ์ / TeN PABX
51/500 หมู ่ บ ้ า นเสนา 88 ซอย 9 ซอยนวลจั น ทร์ 17 แขวงนวลจั น ทร์
เขตบึ ง กุ ่ ม กรุ ง เทพฯ 10240
ปรึ ก ษา / สอบถาม / แจ้ ง ซ่ อ ม: Hotline: 089-1454237 E-mail:
tawintra.kawintra@gmail.com
www.tenpabx.com
Thank you for purchasing this Panasonic product.
Please read this manual carefully before using this product and save this manual for future use.
In particular, be sure to read "1.2 For Your Safety (Page 5)" before using this product.
KX-NS300: PFMPR Software File Version 001.00000 or later.
Getting Started
Hybrid IP-PBX
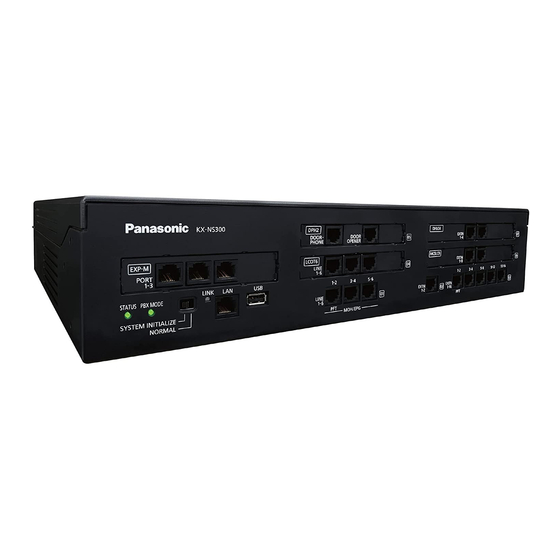
KX-NS300
Model No.
Advertisement
Table of Contents

Related Manuals for Panasonic KX-NS300


Summary of Contents for Panasonic KX-NS300
- Page 1 Please read this manual carefully before using this product and save this manual for future use. In particular, be sure to read "1.2 For Your Safety (Page 5)" before using this product. KX-NS300: PFMPR Software File Version 001.00000 or later.
-
Page 2: Table Of Contents
LAN Connection for the Main Unit ..................14 2.4.2 LAN Connections for IP Telephones ................16 Connecting Extension ....................18 3 Before Programming ................19 Starting the KX-NS300 ....................20 PC Connection ........................23 Starting Web Maintenance Console ................24 4 Programming ..................27 Programming the PBX ....................28 4.1.1... -
Page 3: Before Installation
Section 1 Before Installation Getting Started... -
Page 4: Outline
1.1 Outline 1.1 Outline This manual provides basic information about starting the PBX and using IP telephones. Note • In this manual, the suffix of each model number (e.g., KX-NS300BX) is omitted unless necessary. • In this manual, terms are defined as follows: IP-PT IP Proprietary Telephone SIP extension... -
Page 5: For Your Safety
1.2 For Your Safety 1.2 For Your Safety To prevent personal injury and/or damage to property, be sure to observe the following safety precautions. The following symbols classify and describe the level of hazard and injury caused when this unit is operated or handled improperly. - Page 6 1.2 For Your Safety WARNING • Proper earthing (connection to earth) is very important to reduce the risk to the user of electrocution or to protect the PBX from the bad effects of external noise in the case of a lightning strike. •...
-
Page 7: Unpacking
1.3 Unpacking 1.3 Unpacking Check the package contents. KX-NS300 Main Unit ´ 1 (including manuals, etc.) ´ 1 CD-ROM AC power cord Hook clip Screw x 3 (For Wall Mounting) Washer x 3 (For Wall Mounting) The number of included CD-ROMs varies according to the country/area. - Page 8 1.3 Unpacking Getting Started...
-
Page 9: Installation
Section 2 Installation Getting Started... -
Page 10: Opening/Closing The Top Cover
2.1 Opening/Closing the Top Cover 2.1 Opening/Closing the Top Cover Opening the Top Cover KX-NS300/KX-NS320 CAUTION When opening the top cover, the power switch must be turned off. Confirm that the power switch is turned off and pull the power cable. - Page 11 2.1 Opening/Closing the Top Cover Slide the top cover then lift it off. Closing the Top Cover Place the top cover onto the PBX. Then slide the top cover until it closes properly. Turn the screws clockwise to tighten. CAUTION For safety reasons, close the top cover and tighten the screws before operating the PBX.
-
Page 12: Installing Dsp Cards
2.2 Installing DSP Cards 2.2 Installing DSP Cards CAUTION • Before touching the product (PBX, cards, etc.), discharge static electricity by touching ground or wearing an earthing strap. Failure to do so may cause the PBX to malfunction due to static electricity. •... - Page 13 2.2 Installing DSP Cards DSP S card can be installed on the mother board. To operate the PBX with VoIP features, DSP S card must be installed in DSP card slot. Note • The DSP Resource Advisor can be used to calculate DSP resource usage easily. For details, refer to "9.37.1.1 PBX Configuration—[1-5-1] Configuration—DSP Resource—Setting—DSP Resource Advisor"...
-
Page 14: Frame Earth Connection
2.4.1 LAN Connection for the Main Unit 2.3 Frame Earth Connection KX-NS300/KX-NS320 Loosen the screw. Insert an earthing wire (user-supplied). Tighten the screw. Connect the earthing wire to earth. Screw Earthing wire To earth WARNING • Proper earthing (connection to earth) is very important to reduce the risk to the user of electrocution or to protect the PBX from the bad effects of external noise in the case of a lightning strike. - Page 15 2.4.1 LAN Connection for the Main Unit Connect the other end of the cable to the switching hub. IP Softphone, CTI Server CA Client PC LAN Port Switching Hub Ethernet Cable IP-PT IP-CS SIP-CS Trunk Adaptor SIP Phone Connection for 10BASE-T/100BASE-TX Switching Hub PBX (LAN Port) Pin No.
-
Page 16: Lan Connections For Ip Telephones
2.4.2 LAN Connections for IP Telephones 2.4.2 LAN Connections for IP Telephones When an IP telephone is connected to the LAN and power is supplied for the first time, you will be prompted to set network parameters. The network parameters must be set for the IP telephone before it can be used. Refer to "4.3 Assigning Networking Information to IP Telephones"... - Page 17 2.4.2 LAN Connections for IP Telephones Connecting an AC Adaptor to an IP Telephone IP-PTs and some SIP phones comply with the IEEE 802.3af Power-over-Ethernet (PoE) standard. If PoE is available on your network, these IP telephones can receive the necessary power supply from the network through the network cable.
-
Page 18: Connecting Extension
2.5 Connecting Extension 2.5 Connecting Extension To DPT To SLT Regarding of the PIN assignment of RJ45(PBX side), refer to the Installation Manual. Example: KX-DT300 Series DPT Pin Assignments DPT and DSS Console TO MAIN UNIT / PABX KX-T7000 Series SLT Getting Started... -
Page 19: Before Programming
Section 3 Before Programming Getting Started... -
Page 20: Starting The Kx-Ns300
3.1 Starting the KX-NS300 3.1 Starting the KX-NS300 WARNING Make sure that the AC outlet is properly earthed, then securely connect the 3-pin AC plug including the earthed pin. CAUTION • Use only the AC power cord included with the PBX. - Page 21 3.1 Starting the KX-NS300 Connecting the AC Power Cord Plug the AC power cord into the PBX and pass the cord through the hook clip as indicated. Push the hook clip in the direction of the arrow until it clicks.
- Page 22 3.1 Starting the KX-NS300 While the STATUS indicator is flashing green, slide the System Mode Switch back to the "NORMAL" position. Depending on the configuration, initialisation takes about 2.5 minutes. If successfully executed, the STATUS indicator will stop flashing and remain lit up.
-
Page 23: Pc Connection
3.2 PC Connection 3.2 PC Connection Web Maintenance Console serves as an overall system programming tool for the PBX. The Web Maintenance Console’s Easy Setup Wizard lets you easily configure the PBX to apply installation settings to enable communication on an IP network. To programme the PBX, connect it to the PC via the LAN port. -
Page 24: Starting Web Maintenance Console
3.3 Starting Web Maintenance Console 3.3 Starting Web Maintenance Console System Requirements For the system requirements of the PC (operating system, hardware specifications, supported browsers etc.), refer to "5.3 Starting Web Maintenance Console" in the Installation Manual. Connecting to Web Maintenance Console Note The contents and design of the software are subject to change without notice. - Page 25 3.3 Starting Web Maintenance Console • To install or uninstall the software on a PC running Windows Vista Business, Windows 7, Windows 7 Professional, Windows 8, Windows 8 Professional, you must be logged in as a user in the "Administrators" group. Copy the KX-NS Unified Web Maintenance Console setup file to your PC.
- Page 26 3.3 Starting Web Maintenance Console Getting Started...
-
Page 27: Programming
Section 4 Programming Getting Started... -
Page 28: Programming The Pbx
4.1.1 Easy Setup Wizard 4.1 Programming the PBX 4.1.1 Easy Setup Wizard In the Easy Setup Wizard, you will set up the mandatory settings required for the PBX. When you log in to Web Maintenance Console for a PBX that is in its initialised, factory default state, the Easy Setup Wizard for that PBX will launch automatically. - Page 29 4.1.1 Easy Setup Wizard In the Numbering settings: In Feature Number, select the appropriate option. In CO Access/Operator Number, select the appropriate options. Select one of the following options for Select the default value of numbering plan: – 3 digits Extension Number –...
- Page 30 4.1.1 Easy Setup Wizard In the LAN settings: The IP addresses for the PBX, DNS server, and DSP cards can be assigned automatically through a DHCP server or entered manually. When using a DHCP server: Select Obtain an IP address automatically. Select Obtain DNS server address automatically.
- Page 31 4.1.1 Easy Setup Wizard In the VoIP (Ext) settings: In Number of IP Extensions: In IP-PT(NT), specify the number of IP-PT extensions. In UT/UDT, specify the number of UT/UDT extensions. In SIP-Phone, specify the number of SIP extensions. Note You can confirm the required number of virtual IP extension cards, total IP extensions and total virtual IP extension cards.
- Page 32 4.1.1 Easy Setup Wizard Log in with the Installer level account using the password entered during Easy Setup Wizard.The Home Screen is displayed. You may now begin programming the PBX. Notice If an external DHCP server is in use, it must be able to use the "client identifier"...
-
Page 33: Installing The Virtual Ip Cards To The Pbx
4.1.3 Installing Additional Activation Keys 4.1.2 Installing the Virtual IP Cards to the PBX Click Setup ® PBX Configuration ® Configuration ® Slot. Place the mouse cursor over the Virtual Slot, and in the menu that appears, click Select Shelf. Click on the name of the virtual card to install in the list on the right. - Page 34 4.1.3 Installing Additional Activation Keys Note You can click the provided link to directly access activation key information and programme the number of activated IP trunks and IP softphones. Configuration of the Activation Keys Depending on your configuration, it may be necessary to programme the number of provided IP Trunk channels to be used for H.323 trunks.
-
Page 35: Programming Sip Trunks
4.2 Programming SIP Trunks 4.2 Programming SIP Trunks The Virtual 16-Channel SIP Trunk Card (V-SIPGW4) is a virtual trunk card which is designed to be easily integrated into an Internet Telephony Service provided by an ITSP (Internet Telephony Service Provider). For information about SIP trunks, refer to "8.3 SIP Trunks"... - Page 36 4.2 Programming SIP Trunks Parameters that Require Manual Programming Manual programming is compulsory for the following parameters: • User Name: Specifies the user name (SIP Account) provided by the SIP provider. (Max. 64 characters) • Authentication ID: Specifies the authentication ID required for registration with the SIP server. (Max. 64 characters) •...
-
Page 37: Assigning Networking Information To Ip Telephones
4.3.1 Assigning IP Addressing Information 4.3 Assigning Networking Information to IP Telephones 4.3.1 Assigning IP Addressing Information The IP address of an IP telephone, the subnet mask address, the default gateway address, and the PBX’s IP address must be assigned to the IP telephone before it can be used on the network. These IP addressing information can be assigned in the following ways;... - Page 38 4.3.1 Assigning IP Addressing Information KX-NT300 series (except KX-NT321) and KX-NT500 series (except KX-NT511 and KX-NT551) To start programming SETUP Supply power to the IP-PT. Press "SETUP" when it is displayed. To enter the IP address of the PBX For KX-NT300 series: Software version 2.00 or later only For KX-NT500 series: Software version 1.00 or later only Select "PBX".
- Page 39 4.3.1 Assigning IP Addressing Information KX-NT321/KX-NT511/KX-NT551 To start programming Supply power to the IP-PT. Press PROGRAM while "Searching" is displayed. To enter the IP address of the PBX Select "PBX IP Press SP-PHONE. Select "PBX". Press SP-PHONE. Select "Primary Address". PBX".
- Page 40 4.3.1 Assigning IP Addressing Information KX-NT265 (Software version 2.00 or later only) To start programming PROG. Supply power to the IP-PT. Press PROGRAM while "Searching" is displayed. To enter the IP address of the PBX PBX IP HOLD Address Press VOLUME Press SP-PHONE Press SP-PHONE.
- Page 41 4.3.1 Assigning IP Addressing Information KX-NT300 series (except KX-NT321) and KX-NT500 series (except KX-NT511 and KX-NT551) To start programming SETUP Supply power to the IP-PT. Press "SETUP" when it is displayed. To set the IP address of the IP-PT Select "Network". ENTER Select "Disable"...
- Page 42 4.3.1 Assigning IP Addressing Information Note The illustrations may differ from the buttons on your telephone. Getting Started...
- Page 43 4.3.1 Assigning IP Addressing Information KX-NT321/KX-NT511/KX-NT551 To start programming Supply power to the IP-PT. Press PROGRAM while "Searching" is displayed. To set the IP address of the IP-PT Select "Network". Press SP-PHONE. Select "DHCP (Disable)". Press SP-PHONE twice. IP Address* Press SP-PHONE.
- Page 44 4.3.1 Assigning IP Addressing Information Note • For KX-NT511 users For details about operating the PROGRAM button and other buttons, refer to "For IP-PTs" in "4.3.1 Assigning IP Addressing Information". • To confirm the connection to the secondary PBX after assigning IP addressing information, (1) turn the IP-PT’s power off, and (2) hold the STORE button and 2 key while turning the power on.
- Page 45 4.3.1 Assigning IP Addressing Information Note By assigning the PBX’s IP address to one IP-PT, it is possible to assign the PBX’s IP address to other IP-PTs or IP-CSs on the same LAN through system programming. For details, refer to "9.14 PBX Configuration—[1-1] Configuration—Slot—V-IPEXT—Port Property—Option—...
- Page 46 4.3.1 Assigning IP Addressing Information Continued from previous page To enter the IP address of the Secondary PBX (optional for KX-NT300 series [Software version 2.00 or later only] and KX-NT500 series [Software version 1.00 or later only]) PBX IP Address Select "Secondary PBX".
- Page 47 4.3.1 Assigning IP Addressing Information KX-NT321/KX-NT511/KX-NT551 To start programming Supply power to the IP-PT. Press PROGRAM while "Searching" is displayed. To set the IP address of the IP-PT Select "Network". Press SP-PHONE. Select "DHCP (Disable)". Press SP-PHONE twice. IP Address* Press SP-PHONE.
- Page 48 4.3.1 Assigning IP Addressing Information Continued from previous page To end programming The IP-PT will reboot and can then be registered to the PBX. Press HOLD twice to return Press STORE. to the Menu screen. Valid IP address range: "1.0.0.0" to "223.255.255.255" Valid subnet mask address range: "0–255.0–255.0–255.0–255"...
- Page 49 4.3.1 Assigning IP Addressing Information KX-NT265 (Software version 2.00 or later only) To start programming PROG. Supply power to the IP-PT. Press PROGRAM while "Searching" is displayed. To set the IP address of the IP-PT Press VOLUME to Press SP-PHONE. Press VOLUME to Press SP-PHONE select "Network".
- Page 50 4.3.1 Assigning IP Addressing Information For KX-UT Series SIP Phones • Using a DHCP server (DHCP Server feature or an external DHCP server) to automate the assignment of IP addressing information The DHCP server automatically assigns the IP address of the SIP phone, the subnet mask address, and the default gateway address to the SIP phone.
-
Page 51: Registering Ip Telephones
4.3.2 Registering IP Telephones 4.3.2 Registering IP Telephones After the programming of the PBX and IP telephones is finished (refer to "4.3.1 Assigning IP Addressing Information"), the IP telephones must be registered to the PBX. The procedure for registering IP telephones differs according to the IP terminal registration mode specified during the Easy Setup Wizard. - Page 52 4.3.2 Registering IP Telephones Enter an extension number. Note When no extension number is entered in this step, the process will time out and the IP-PT will be registered without an extension number. Press [ENTER] on the IP-PT. Press [PAUSE] or "EXIT" on the IP-PT. For KX-UT Series SIP Phones If networking settings have been completed, when KX-UT series SIP phones are connected to the same network as the PBX, they will be registered automatically as same as when they are registered in Full Automatic...
- Page 53 4.3.2 Registering IP Telephones If the Connection column for the port is INS, click INS, and then click OUS on the dialogue box to change the port’s status. Enter the MAC address of the IP-PT or SIP phone in the IP Phone Registration ID (MAC Address) box.
- Page 54 4.3.2 Registering IP Telephones For Non-KX-UT Series SIP Phones After connecting non-KX-UT series SIP phones to the PBX over a network, register those IP terminals to the PBX manually. Follow the procedure below for registration. Click Setup ® PBX Configuration ® Configuration ®...
- Page 55 4.3.2 Registering IP Telephones Note Alternatively, it is possible to set an extension number as a password for each SIP extension automatically. • In order to set the password automatically, do the following in substitution for step c of the procedure above.
- Page 56 4.3.2 Registering IP Telephones Getting Started...
-
Page 57: Confirming The Connection
Section 5 Confirming the Connection Getting Started... -
Page 58: Making And Receiving Calls
5.1 Making and Receiving Calls 5.1 Making and Receiving Calls Making Calls To call another extension You can call another extension registered with the PBX by simply dialling the extension number. extension no. Dial extension number. To call an outside party outside phone no. - Page 59 Notes Getting Started...
- Page 60 Panasonic System Networks Co., Ltd. 2014 PNQX6309YA CC0114AH1024...
Need help?
Do you have a question about the KX-NS300 and is the answer not in the manual?
Questions and answers