Table of Contents
Advertisement
Quick Links
Advertisement
Table of Contents

Related Manuals for IFM DTI600


Summary of Contents for IFM DTI600
- Page 1 Operating instructions RF-identification system DTI600 Read/write head...
-
Page 2: Table Of Contents
DTI600 Contents Preliminary note ............. -
Page 3: Preliminary Note
Warning of damage to property 1.3 Legal and copyright information © All rights reserved by ifm electronic gmbh. No part of these instructions may be reproduced and used without the consent of ifm electronic gmbh. All product names, pictures, companies or other brands used on our pages are the property of the... -
Page 4: Safety Instructions
DTI600 2 Safety instructions General • The unit described is a subcomponent for integration into a system. – The system architect is responsible for the safety of the system. – The system architect undertakes to perform a risk assessment and to create documentation in accordance with legal and normative requirements to be provided to the operator and user of the system. -
Page 5: Intended Use
DTI600 3 Intended use The read/write head reads and writes ID tags without contact. The data is made available as process data via the IO-Link interface. -
Page 6: Items Supplied
DTI600 4 Items supplied • Read/write head The device is supplied without installation and connection accessories. Available accessories: www.ifm.com. The optimum function is not ensured when using components from other manufacturers. -
Page 7: Function
DTI600 5 Function 5.1 ID tags ID tags are passively operated without a battery. The energy required for operation is provided by the read/write head. The energy is provided via an inductive coupling. The integrated antenna coil in the read/write head generates a magnetic field which partly penetrates the antenna coil of the ID tag. A voltage is generated by induction that supplies the data carrier with energy. -
Page 8: Io-Link
Operation of the unit via the IO-Link interface requires an IO-Link master. With a PC, suitable IO-Link software and an IO-Link adapter cable, communication is possible while the system is not in operation. IODD required to configure the unit is available at www.ifm.com. -
Page 9: Installation
DTI600 6 Installation 6.1 Notes on the unit installation When mounting several RFID units adhere to the minimum distances between the systems. Flush mounting of a read/write head in metal reduces the read/write distance. Device performance can be affected if positioned in the immediate vicinity of powerful HF emission sources such as welding transformers or converters. -
Page 10: Installation With Angle Bracket E80335
DTI600 6.4.1 Installation with angle bracket E80335 6.4.2 Installation with mounting device E80336 The mounting device is used to mount the unit on a clamp. Compatible clamps: • E21110 with a rod diameter of 12 mm • E20795 with a rod diameter of 14 mm •... -
Page 11: Installation With Fixing Bars E80337
DTI600 6.4.3 Installation with fixing bars E80337 6.5 Mounting distances Operating mode Distance side (A) Distance front (B) For reading and writing >0.6 m >0.4 m Interference in data communication is avoided if there are no other RFID UHF devices in the vicinity. If there are other RFID UHF devices in the vicinity: u The mounting distances between the devices should be as large as possible. -
Page 12: Positioning Of The Id Tags
DTI600 6.6 Positioning of the ID tags Fig. 2: Position the ID tag u Align the ID tag on the antenna central axis. w The distance “D” is indicated in the data sheet. ID tags are also detected on the back of the device. To avoid this:... -
Page 13: Electrical Connection
DTI600 7 Electrical connection The device must be connected by a qualified electrician. Device of protection class III (PC III). The electrical supply must only be made via PELV/SELV circuits. u Disconnect power before connecting the device. ATTENTION The IP rating indicated in the data sheet is only guaranteed if the M12 connectors are firmly screwed. -
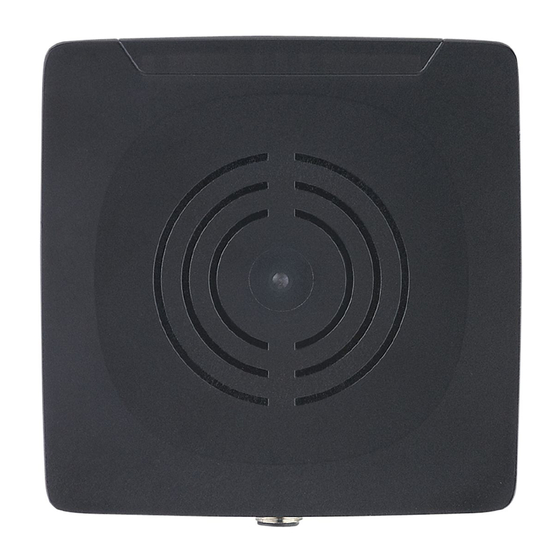
Page 14: Operating And Display Elements
DTI600 8 Operating and display elements ① ② Fig. 3: Operating and display elements 1 LEDs 2 Sensing face State Description green Operating voltage OK Operating voltage missing Flashing slowly deactivated yellow On (permanently) ID tag detected On (pulse) ID tag read/written successfully... -
Page 15: Parameter Setting
DTI600 9 Parameter setting The parameters of the device are set using a software via IO-Link (for example ifm moneo configure SA). More information can be found in the IODD of the unit: www.ifm.com 9.1 Parameter 9.1.1 Data block size The memory area of an ID tag is organised in data blocks. The parameter specifies the size of a data block. -
Page 16: Address For Automatic Read/Write
DTI600 9.1.4 Address for automatic read/write The parameter "Address for automatic read/write" sets the start address of the memory area that is accessed in the operating modes "Auto read" and "Auto write". The address is provided in bytes. In the operating modes “Auto read" and "Auto write" the device reads and writes a specified number of data of the ID tag automatically. - Page 17 DTI600 Status bit Value Description Cmd End Read or write operation terminated Cmd Start Acknowledge Start of a read or write operation not acknowledged Start of a read or write operation acknowledged Cmd Antenna deactivate Activate antenna Deactivate antenna Cmd Start...
-
Page 18: Operation
DTI600 10 Operation The device supports several operation modes selected with the command value in the process data output image: Operating mode Command value Description Read UID 0x00 Operating mode Read UID (Ò / 18) Auto read data 0x01 Operating mode Auto read data (Ò / 19) -
Page 19: Operating Mode Auto Read Data
DTI600 Byte Process data output Process data input ignored UID 6 ignored UID 7 ignored 0x00 ignored 0x00 ignored 0x00 ignored 0x00 ignored 0x00 ignored 0x00 ignored 0x00 ignored 0x00 ignored 0x00 ignored 0x00 ignored 0x00 ignored 0x00 ignored 0x00... -
Page 20: Operating Mode Auto Write Data
DTI600 Byte Process data output Process data input ignored Data 0 ignored Data 1 ignored Data 2 ignored Data 3 ignored Data 4 ignored Data 5 ignored Data 6 ignored Data 7 ignored Data 8 ignored Data 9 ignored Data 10... -
Page 21: Operating Mode Read Data
DTI600 If the ID tag remains in the detection range, the data can be written with the status bit "Cmd Start". If writing was unsuccessful, the error value is shown in the process image. The smaller the "Data Length Auto Read/Write" is set, the less time is needed for writing. That means that the dwell time of the ID tag in the detection range can be shorter. - Page 22 DTI600 u Use the control to set the following values in the process data output: the command value "0x03", the address (16 bits) and the data length (16 bits). u With the control, start the read operation with the status bit "Cmd Start”.
-
Page 23: Example Successful Reading Of Data
DTI600 Byte Process data output Process data input ignored Data 26 ignored Data 27 Block counter Block counter ignored Error value 10.5.1 Example successful reading of data The example shows that reading of the data was successful. Preset com- 0x00 0x0000... -
Page 24: Example Unsuccessful Reading Of Data
DTI600 Controller ac- 0x03 Data 0x01 0x00 knowledges re- ceipt of the data Device sets 0x03 Data 0x02 0x00 more data and terminates read- Controller ac- 0x03 Data 0x02 0x00 knowledges re- ceipt of the data Controller with- 0x03 Data... -
Page 25: Operating Mode Write Data
DTI600 Controller sets 0x03 0x00 0x00 command (read 35 bytes from address 0x12) Device acknowl- 0x03 0x00 0x00 0x00 edges com- mand Device sets first 0x03 Data 0x00 0x00 byte of the data Controller ac- 0x03 Data 0x01 0x00 knowledges re-... -
Page 26: Example Successful Writing Of Data
DTI600 Process data output when Process data output during Byte Process data input starting the write operation data transfer Address (high byte) Data 2 0x00 Address (low byte) Data 3 0x00 Length (high byte) Data 4 0x00 Length (low byte) -
Page 27: Example Unsuccessful Writing Of Data
DTI600 Device acknowl- 0x04 Data for ID tag 0x01 edges data Controller trans- 0x04 Data for ID tag 0x02 fers more data Device acknowl- 0x04 Data for ID tag 0x02 edges data and terminates writ- Controller with- 0x00 0x0000 0x0000... - Page 28 DTI600 Preset com- 0x00 0x0000 0x0000 0x00 0x00 mand Controller sets 0x04 0x0010 0x0028 0x00 0x00 command (write 40 bytes to ad- dress 0x10) Device acknowl- 0x04 0x0010 0x0028 0x00 0x00 edges com- mand Controller trans- 0x04 Data for ID tag...
-
Page 29: Error Values In The Process Data Input
DTI600 Device carries 0x00 0x00 0x00 out preset com- mand Tab. 10: Process data input 10.7 Error values in the process data input Value Name Description 0x00 RFID_NOERROR No error, read or write operation successful. 0x01 RFID_UNKNOWN_COMMAND Unknown command value 0x11 COMMAND_NO_RESPONSE •... -
Page 30: Maintenance, Repair And Disposal
11 Maintenance, repair and disposal The unit is maintenance-free. u Contact ifm in case of malfunction. u Do not open the housing as the unit does not contain any components which can be maintained by the user. The unit must only be repaired by the manufacturer. -
Page 31: Approvals/Standards
DTI600 12 Approvals/standards For approvals and standards, the following information is available: • Test standards and regulations: documentation.ifm.com • EU declaration of conformity and approvals: documentation.ifm.com • Notes relevant for approval: Package insert of the device and documentation.ifm.com... -
Page 32: Glossary
DTI600 Glossary ID tag An ID tag is used to identify objects. A read/ write device is used to read the ID tag via a high-frequency radio signal. An ID tag consists of an antenna, an analogue circuit for receiving and transmitting (transceiver), a digital circuit and a non-volatile memory.
Need help?
Do you have a question about the DTI600 and is the answer not in the manual?
Questions and answers