Table of Contents
Advertisement
Quick Links
Advertisement
Chapters
Table of Contents

Related Manuals for AEG HC452601EB


Summary of Contents for AEG HC452601EB
- Page 1 HC452601EB 用户手册 铁板烧盘 User Manual Teppan yaki grill plate USER MANUAL...
-
Page 2: Table Of Contents
内容 1. 安全信息........................2 2. 安全说明........................4 3. 产品说明........................5 4. 日常使用........................7 5. 建议和提示......................9 6. 养护和清洁......................11 7. 故障排除......................12 8. 安装........................13 9. 技术数据......................16 力求完美 感谢您选择这款 AEG 产品。我们打造这款产品, 旨在多年来始终为您提供完美的性 能,其采用了普通设备上所没有的创新技术,帮助让您的生活变得更加简单。请花 几分钟时间阅读,以便充分了解该款产品的功能。 访问我们的网站: 获取使用建议、手册、故障检修工具、检修信息: www.aeg.com/webselfservice 注册您的产品以获取更好的服务: www.registeraeg.com 为您的设备购买配件、耗材和原装备件: www.aeg.com/shop 客户关怀与服务 务必使用原装备件。 当您联系授权服务中心时,请确保您可以提供以下数据:型号、产品编号、序列号。 该信息可以在标牌上找到。... - Page 3 中文 1.1 儿童和残弱人士安全 本机可供 8 岁及以上儿童和肢体不健全、感官或精神上 • 有障碍或缺乏相关经验及知识的人士使用,前提是他们 在使用本机时受到监督或得到安全使用指导,同时了解 使用过程中可能存在的危险。 请勿让儿童玩本机。 • 所有包装物都必须远离儿童,且妥善处置。 • 本机运行或冷却过程中,请勿让儿童和宠物靠近。可触 • 及的部件温度很高。 如果本机配备儿童安全装置,则应将其打开。 • 在无人监管的情况下,儿童不能擅自清理和维护本机。 • 本机运行过程中,3 岁及以下的儿童必须始终远离本机。 • 1.2 一般安全信息 警告:使用期间,本机及其可接触部件会发热。必须格 • 外注意,以免碰触发热的部件。除非有成人始终在旁监 督,否则 8 岁以下儿童应远离本机。 请勿通过外部定时器或单独的遥控系统操作本机。 • 警告:在使用油脂或植物油在感应炉上烹制食品时,如 • 果不加以看守,则存在危险,并可能导致火灾。 切勿用水灭火,而应关闭本机,然后用盖子或灭火毯等 • 盖住火焰。 小心:烹饪过程中必须有人看守。短时间烹饪也必须始...
-
Page 4: 安全说明
护装置,或者是本机随附的感应炉防护装置。防护装置 使用不当会造成意外事故。 2. 安全说明 2.1 安装 • 切勿使电源线缠绕。 • 确保安装防触电保护装置。 警告! • 在电源线上使用紧松钩。 必须由具备资质的人员安装 • 在将本机连接至附近的插座时,请确保 本机。 电源线或插头(如果适用)未接触发热 的本机或热炊具 • 请勿使用多插头扩展适配器和延长电 警告! 缆。 存在人员受伤或设备受损的 • 切勿损坏电源插头(如果适用)或电源 危险。 线。请联系我们的授权服务中心或电 • 去除所有包装物。 气技师更换损坏的电源电缆。 • 请勿安装或使用已损坏的设备。 • 带电和绝缘部件的触电保护装置必须 • 按照本机附带的安装说明书操作。 妥善固定,而且只能通过工具拆卸。 • 请与其他设备和装置保持最小间距。... -
Page 5: 产品说明
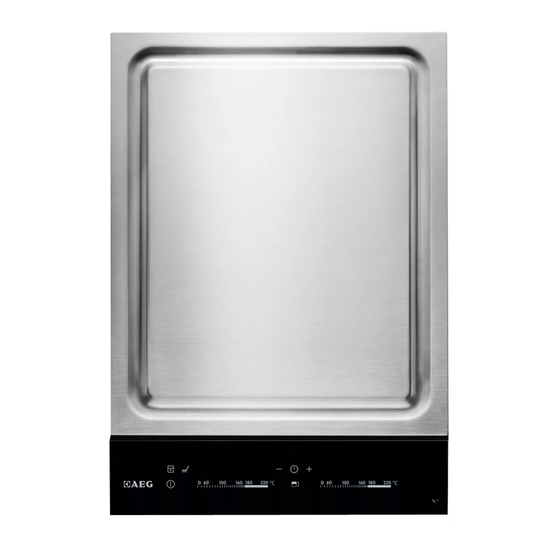
中文 • 植入心脏起搏器的用户在操作本机时, 当您必须在烹饪表面移动炊具时,请务 必须至少与电感加热式烹饪区域相隔 必将这些物品抬起来再移动。 30 厘米。 • 本机仅用于烹饪,切勿用于其他目的, • 当您将食物放入热油中时,油可能会飞 比如房间取暖。 溅出来。 2.4 养护和清洁 警告! 存在火灾和爆炸危险 • 定期清洁本设备,以防表面材料劣化。 • 在清洁污渍之前,请关闭电器并使其充 • 油脂和植物油在加热时会产生可燃蒸 分冷却。 汽。在用油脂和植物油烹制食品时,请 • 维修之前,请断开本设备与电源的连 远离火焰或发热物体。 接。 • 温度极高的油释放出的蒸汽可能会导 • 请勿使用喷淋水或蒸汽来清洁本设备。 致自燃。 • 请使用湿软布清洁本设备。只可使用 • 与初次使用的油相比,使用过的、可能 中性清洁剂。请勿使用任何磨料制品、 包含食品残渣的油在较低的温度下便... - Page 6 3.2 烹饪面布局 烘培区 控制面板 3.3 控制面板布局 利用感测区域操作设备。显示屏、指示灯与声响可提示所运行的功能。 感测区 功能 备注 域 开/关 启用和停用感应炉。 锁定 / 儿童安全装置 锁定/解锁控制面板。 清洁 启用和停用功能。 温度显示屏 显示温度。 烘焙区域的计时器指示灯 显示您设定时间的区域。 计时器显示屏 以分钟为单位显示时间。 CountUp 计时器 显示功能运行中。 倒计时计时器 / 分钟提示器 显示功能运行中。 选择计时器功能。 选择烘焙区域。...
-
Page 7: 日常使用
中文 感测区 功能 备注 域 增加或减少时间。 控制栏 设定温度。 3.4 加热设置显示屏 显示屏 描述 停用烘焙区域。 烘焙区域运行。 出现故障。 + 数字 OptiHeat Control (3 步骤余热指示灯):继续烹饪/保温/余热。 锁定 /儿童安全装置 功能运行。 自动关机 功能在运作。 3.5 最佳加热控制 (3 步骤余热指 电感加热式烹饪区域在炊具底部直接提供 烹饪过程所需热量。玻璃陶瓷使用炊具的 示灯) 热量进行加热。 警告! 小心因余热烫 伤!指示灯会显示余热水平。 4. 日常使用 • 未停用烘焙区域或更改温度。90 分钟 警告! 后,... - Page 8 要查看烘焙区域的操作时长: 使用 设 定烘焙区域。烘焙区域指示灯开始快速闪 烁。显示屏会显示此区域的操作时长。第 一分钟内,显示屏以秒显示时间。第一分 钟之后,显示屏以分钟显示时间。 关闭下述功能: 使用 设定烘焙区域, 并按触 。符号 消失, 亮起。 要重置功能:按触 。时间倒数至 00。 4.4 计时器 如果两个功能同时运行,则显 示屏先显示 CountUp 计时器 倒计时计时器 (正计时定时器)功能。 可以使用此功能来设定单一烹饪阶段的烘 焙区域操作时长。 分钟提示器 先设定烘焙区域,然后设定此功能。 可以 如果感应炉已启用,而烘焙区域未运行, 为正在使用的烹饪区域以及在设定温度之 则可以将此功能用作分钟提示器(温度显 后选择定时器功能。 示屏会显示 ) 。 要设置烘焙区域:反复触碰 ,直到相...
-
Page 9: 建议和提示
中文 要取代此功能,便于只进行烹饪:使用 会显示。按触定时器的 ,以选择下 列其中一项: 启用感应炉。 会显示。按触 4 秒 钟。在 10 秒钟内设定加热设置。您可以 • - 声音关闭 操作感应炉。如果使用 停用感应炉, 则 • - 声音开启 此功能会再次运行。 要确认选择,请等到感应炉自动停用。 4.7 OffSound Control(停用和 如果此功能设为 ,则只有在下列情况下 才会听到声音: 启用声音) • 触碰 • 分钟提示器 熄灭 关闭感应炉。按触 3 秒钟。显示屏会 • 倒计时计时器 熄灭 先显示后熄灭。按触... - Page 10 待烹制食物 温度 (°C) 时间/提示 鱼类和贝类 140 – 160 预热感应炉。 三文鱼片 8 分钟,4 分钟后翻面。 大虾(无壳) 6 分钟,3 分钟后翻面。 鲨鱼排,大约 2.5 厘米厚 10 分钟,5 分钟后翻面。 香煎龙利鱼(黄油煎制) 8 分钟,4 分钟后翻面,先翻 浅色的一面。 比目鱼片 6 分钟,3 分钟后翻面。 小牛肉 140 – 180 预热感应炉。 小牛排 10 分钟,5 分钟后翻面。...
-
Page 11: 养护和清洁
中文 待烹制食物 温度 (°C) 时间/提示 羔羊肉 160 – 180 预热感应炉。 羊排 10 分钟,5 分钟后翻面。 羊里脊 10 分钟,5 分钟后翻面。里 脊肉必须两面煎熟。 羊排 6 - 8 分钟,3 - 4 分钟后翻 面。 家禽肉 140 – 160 预热感应炉。 至尊鸡肉 8 - 10 分钟,4 - 5 分钟后翻 面。... -
Page 12: 故障排除
7. 故障排除 警告! 请参阅“安全”章节。 7.1 如果出现以下情况,应该如何处理... 故障 可能的原因 补救方法 无法启动或操作感应炉。 感应炉未与电源连接或连接 检查感应炉是否正确连接到 有误。 电源。请参阅连接图。 保险丝断开。 请确认保险丝是否为故障原 因。如果保险丝屡次断开, 请联系有资质的电工。 重新启动感应炉,并在 10 秒 钟内设定加热设置。 您同时按触了 2 个或多个感 只触摸一个感测区域。 测区域。 控制面板上有水或油渍。 清洁控制面板。 发出声响信号之后,感应炉 您在一个或多个感测区域上 移除感测区域上的物品。 停止工作。 放置了物品。 感应炉停止工作时会发出声 响信号。 电陶灶关闭。 移除感测区域上的物品。 您在感测区域... - Page 13 中文 故障 可能的原因 补救方法 感应炉中出错。 将感应炉与电源之间的连接 显示 和数字。 断开一段时间。断开保险丝 与壳体电气系统之间的连 接。重新连接。如果再次显 示 ,请联系授权服务中 心。 电气连接不正确。电源电压 找具备资质的电工来检查安 显示 。 超出范围。 装情况。 炊具已煮干,因此感应炉出 关闭感应炉。移开热烫炊 显示 。 现错误。启用自动关闭功 具。约 30 秒之后,重新启动 能,并且该区域的过热保护 烹饪区域。如果炊具有问 功能开始运行。 题,错误消息会消失。余热 指示灯继续亮起。等炊具充 分冷却。检查炊具是否与感 应炉相配。 请参阅“建议和提示”章节。 冷却风扇被堵塞。 检查冷却风扇是否被异物堵 显示 。 塞。如果再次显示...
- Page 14 8.5 装配 min. 500mm min. 50mm min. R 5mm min. 55mm 50 mm 50 mm...
- Page 15 中文 min. 25 mm min. 2 mm • 使用硅胶密封操作台和玻璃陶瓷之间 6. 将第一个感应炉插入台面开孔内。然 的空隙。 后将连接杆插入台面开孔内。在感应 • 在硅胶上涂一些肥皂水。 炉下将它推动到一半宽度的位置。 • 使用刮刀去除多余硅胶。 8.6 安装多个感应炉 提供的附件: 连接杆、耐热硅、橡胶成型、 密封条。 仅使用专用耐热硅。 7. 从下面将固定板轻轻拧入台面和连接 杆。 台面开孔 与墙之间 最少 50 毫米 的距离 深 490 毫米 宽 已安装感应炉的总宽度减去 8. 将第二个感应炉插入台面开孔内。确 20 毫米...
-
Page 16: 技术数据
13. 请勿触摸硅胶,直到它变硬,这可能会 持续一天。 14. 使用剃须刀刀片小心去除突出的硅胶。 15. 清洁玻璃表面。 9. 技术数据 9.1 铭牌 型号 HC452601EB 产品编号 949 595 456 01 220 - 240 V 50 - 60 Hz 电感加热功率 2.8 kW 德国制造 序列号....2.8 kW 9.2 烘焙区域规格 烘焙区域 额定功率(最高加热设置)[瓦] 正面 1400 背面... - Page 17 中文...
- Page 18 www.aeg.com...
-
Page 19: Safety Information
9. TECHNICAL DATA....................36 FOR PERFECT RESULTS Thank you for choosing this AEG product. We have created it to give you impeccable performance for many years, with innovative technologies that help make life simpler features you might not find on ordinary appliances. Please spend a few minutes reading to get the very best from it. - Page 20 1.1 Children and vulnerable people safety This appliance can be used by children aged from 8 • years and above and persons with reduced physical, sensory or mental capabilities or lack of experience and knowledge if they have been given supervision or instruction concerning the use of the appliance in a safe way and understand the hazards involved.
-
Page 21: Safety Instructions
ENGLISH WARNING: Danger of fire: Do not store items on the • cooking surfaces. Metallic objects such as knives, forks, spoons and lids • should not be placed on the hob surface since they can get hot. Do not use a steam cleaner to clean the appliance. •... - Page 22 2.2 Electrical Connection • Use only correct isolation devices: line protecting cut-outs, fuses (screw type WARNING! fuses removed from the holder), earth Risk of fire and electrical leakage trips and contactors. shock. • The electrical installation must have an isolation device which lets you •...
-
Page 23: Product Description
ENGLISH 2.4 Care and cleaning • The vapours that very hot oil releases can cause spontaneous combustion. • Clean regularly the appliance to • Used oil, that can contain food prevent the deterioration of the remnants, can cause fire at a lower surface material. - Page 24 This approximately 4 minutes. The prevents overheating of the food and temperature of the grill surface permits low-fat cooking that keeps decreases from 180 °C to 100 °C in the nutritional values of the food.
- Page 25 ENGLISH Sensor Function Comment field Timer indicators of roast- To show for which zone you set the time. ing zones Timer display To show the time in minutes. CountUp Timer To show that the function operates. Count Down Timer / Mi- To show that the function operates.
-
Page 26: Daily Use
4. DAILY USE 4.4 Timer WARNING! Refer to Safety chapters. Count Down Timer You can use this function to set how long 4.1 Activating and the roasting zone should operate for a deactivating single cooking session. First set the roasting zone then set the... - Page 27 ENGLISH necessary roasting zone comes on. When To deactivate the function: touch this function is active, comes on. The previous heat setting comes on. When you deactivate the To activate the function: touch . The hob, you also deactivate this symbol goes out and comes on.
-
Page 28: Hints And Tips
5. HINTS AND TIPS The manufacturer does not recommend WARNING! that you boil large quantities of water on Refer to Safety chapters. the roasting surface (e.g. for spaghetti). The noises are normal and 5.1 Öko Timer (Eco Timer) do not refer to hob To save energy, the heater of the malfunction. - Page 29 ENGLISH Food to be cooked Temperature (°C) Time / Tips King prawns (without shell) 6 minutes, turn after 3 mi- nutes. Shark steaks, approximately 10 minutes, turn after 5 mi- 2.5 cm thick nutes. Sole, Müllerin Art (fried in 8 minutes, turn after 4 mi- butter) nutes, light side first.
- Page 30 Food to be cooked Temperature (°C) Time / Tips Pork 160 – 180 Preheat the hob. Pork medallions 8 minutes, turn after 4 mi- nutes (depending on the thickness). Pork steaks 8 minutes, turn after 4 mi- nutes. Pork escalopes 6 minutes, turn after 3 mi- nutes.
-
Page 31: Care And Cleaning
ENGLISH Food to be cooked Temperature (°C) Time / Tips Cooking precooked noodles 140 - 160 15 - 20 minutes, turn halfway through. 6. CARE AND CLEANING 3. Put ice cubes one by one on the WARNING! roasting zone (you can use also cold Refer to Safety chapters. - Page 32 Problem Possible cause Remedy Activate the hob again and set the heat setting in less than 10 seconds. You touched 2 or more sen- Touch only one sensor field. sor fields at the same time. There is water or fat stains Clean the control panel.
-
Page 33: Installation
ENGLISH Problem Possible cause Remedy There is an error in the hob Deactivate the hob. Remove comes on. because a cookware boiled the hot cookware. After ap- dry. Automatic Switch Off proximately 30 seconds, acti- and the overheating protec- vate the zone again. If the tion for the zones operate. - Page 34 8.5 Assembly min. 500mm min. 50mm min. R 5mm min. 55mm 50 mm 50 mm...
- Page 35 ENGLISH min. 25 mm min. 2 mm • Seal the gap between the worktop 3. One by one place the hobs on a soft and glass ceramic with silicone. surface (for example on a blanket) • Put some soapy water on the silicone. with the bottom side up.
-
Page 36: Technical Data
12. Press the rubber shape with some strength against the glass ceramic and move it slowly along the space. 9. TECHNICAL DATA 9.1 Rating plate Model HC452601EB PNC 949 595 456 01 220 - 240 V 50 - 60 Hz Induction 2.8 kW Made in Germany Ser.Nr. - Page 37 ENGLISH...
- Page 38 www.aeg.com...
- Page 39 ENGLISH...
- Page 40 www.aeg.com/shop...
Need help?
Do you have a question about the HC452601EB and is the answer not in the manual?
Questions and answers