Table of Contents
Advertisement
Quick Links
Figures / Abbildungen / Figuras / Figures / Figure
1
A
4
USA
CURLIN Infusion Pump Administration Set
For use with CURLIN Ambulatory Infusion Pumps.
NOTE:
a. Do not use if package is opened or damaged as sterility may be compromised.
b. Aseptic technique required for all fluid pathway connections. If alcohol is
used to disinfect junctions, allow for evaporation time prior to connecting.
c. Patients and caregivers must be instructed by a qualified clinician before use.
d. To prevent occurrences of false Air In Line Alarms, bring the
solution to room temperature prior to infusion.
e. Prior to the start of any infusion, refer to the CURLIN pump "User's
Manual" for any applicable precautionary instructions.
WARNING: Avoid leaving tubing and cords where infants, children, or those
deemed at high risk for medical line entanglement, can become entangled. Be
aware that if these items become wrapped around a patient's neck, there is an
increased risk of strangulation or death. Caregivers of patients who are at risk for
entanglement should discuss with their health care provider how to properly manage
their lines and properly monitor patients based on their needs while in use.
WARNING: Do not prime while the tubing is connected to the patient's access
device. Doing so could result in overdose or air embolism and may cause injury.
CAUTION: Recommended administration set usage not to exceed 72 hours
Directions for Use
Connect administration set to drug reservoir
NOTE: If a Check Valve Adapter is provided, connect it to the distal end of the set.
1. Twist and remove breakaway tab from amber-colored "Flow-Stop" (figure 1).
2. Close the slide clamp (figure 2-C).
3. Insert the spike into the port on the IV bag. Do not touch the
spike or uncapped luers, as this may contaminate the fluid.
4. Prime set according to one of the following methods.
NOTE: To allow fluid to flow through the tubing after the breakaway tab has been
removed, squeeze the "Flow-Stop" between the thumb and forefinger (figure 4).
Priming Methods
NOTE: To maintain sterility during setup, the vented blue cap should
be left in place on the luer (figure 2-B) while priming.
Priming by gravity:
1. Open slide clamp (figure 2-C).
2. If the IV bag contains air, turn bag upside down and gently squeeze
the bag while pressing the "Flow-Stop" between thumb and
forefinger (figure 4) until the air is removed from the bag.
DE
CURLIN Infusionspumpen-Verabreichungsset
Zur Verwendung mit den CURLIN ambulanten Infusionspumpen.
HINWEIS:
a. Bei bereits geöffneter oder beschädigter Verpackung nicht verwenden,
da die Sterilität in diesem Fall womöglich nicht mehr gegeben ist.
b. Alle Verbindungen des Flüssigkeitswegs müssen unter aseptischen
Kautelen hergestellt werden. Wird für die Desinfektion von
Verbindungsstellen Alkohol verwendet, muss vor dem Anschließen
abgewartet werden, bis der Alkohol verdunstet ist.
c. Patienten und Betreuungspersonen müssen vor dem Gebrauch
von einem qualifizierten Arzt eingewiesen werden.
d. Um falsche Alarme über Lufteinschluss im Schlauch zu vermeiden, muss
die Lösung vor der Infusion auf Raumtemperatur gebracht werden.
e. Vor dem Beginn der Infusion auf etwaige anzuwendende
Vorsichtsmaßnahmen im „Benutzerhandbuch" der CURLIN Pumpe achten.
WARNUNG: Schläuche und Kabel dürfen nicht so verlaufen, dass sich Säuglinge,
Kinder oder Personen, bei denen ein hohes Risiko besteht, dass sie sich in
solchen verheddern, in diesen verfangen können. Es ist zu beachten, dass sich
diese um den Hals eines Patienten wickeln können, so dass ein erhöhtes Risiko
für Strangulation oder Tod entsteht. Betreuungspersonen von Patienten, bei
denen das Risiko für ein Verheddern besteht, sollten mit der medizinischen
Fachkraft besprechen, wie am besten mit den Schläuchen zu verfahren ist, und
die Patienten während des Gebrauchs dem Bedarf entsprechend überwachen.
WARNUNG: Nicht vorfüllen, während der Schlauch mit dem Zugang des
Patienten verbunden ist. Andernfalls könnte es zu einer Überdosierung
oder Luftembolie und somit zu Verletzungen kommen.
ACHTUNG: Es wird empfohlen, das Verabreichungsset
nicht länger als 72 Stunden zu verwenden.
Gebrauchsanleitung
Verabreichungsset an das Medikamentenreservoir anschließen.
HINWEIS: Liegt ein Rückschlagventiladapter bei, diesen
mit dem distalen Ende des Sets verbinden.
1. Die Abreißlasche drehen und vom bernsteinfarbenen „Flow-
Stop" (Fluss-Stopp) entfernen (Abbildung 1).
2. Schiebeklemme schließen (Abbildung 2-C).
3. Den Dorn in den Anschluss des Infusionsbeutels einführen. Den Dorn oder
die Luer-Anschlüsse ohne Kappe nicht berühren, da dadurch die Flüssigkeit
kontaminiert werden kann. Bei Verwendung einer Spritze die Luft aus
der Spritze vor dem Anschluss an das Verabreichungsset entfernen.
4. Das Set gemäß einer der nachstehenden Methoden vorfüllen.
HINWEIS: Den „Flow-Stop" (Fluss-Stopp) zwischen Daumen und Zeigefinger
zusammendrücken (Abbildung 4), damit die Flüssigkeit durch den
Schlauch fließen kann, nachdem die Abreißlasche entfernt wurde.
Vorfüllverfahren
HINWEIS: Um die Sterilität während der Einrichtung aufrechtzuerhalten,
muss die blaue belüftete Kappe während des Vorfüllens auf dem
Luer-Anschluss belassen werden (Abbildung 2-B).
Schwerkraftvorfüllung:
1. Schiebeklemme öffnen (Abbildung 2-C).
2. Wenn der Infusionsbeutel Luft enthält, drehen Sie den Beutel um und
drücken Sie ihn vorsichtig zusammen, während Sie den „Flow-Stop"
(Fluss Stopp) zwischen Daumen und Zeigefinger zusammendrücken
(Abbildung 4), bis die Luft aus dem Beutel entfernt ist.
ES
Equipo de administración de la bomba de infusión CURLIN
Para uso con bombas de infusión ambulatorias CURLIN.
ATENCIÓN:
a. No utilizar si el envase está abierto o dañado, ya que
puede comprometerse la esterilidad.
b. Se requiere utilizar una técnica aséptica para todas las conexiones
de las vías de líquidos. Si se usa alcohol para desinfectar las
uniones, deje que se evapore antes de conectar.
c. Antes del uso, un clínico cualificado debe instruir a los pacientes y cuidadores.
d. Para evitar que se produzcan falsas alarmas de aire en la vía, ponga
la solución a temperatura ambiente antes de la infusión.
e. Antes de iniciar una infusión, consulte el "Manual del usuario" de la bomba
CURLIN para conocer las instrucciones de precaución aplicables.
ADVERTENCIA: Evite dejar tubos y cables donde bebés, niños o aquellos que
se consideren de alto riesgo de enredo en línea médica puedan enredarse.
Tenga en cuenta que si estos elementos se envuelven alrededor del cuello
del paciente, existe un mayor riesgo de estrangulamiento o muerte. Los
cuidadores de los pacientes con riesgo de enredo deben hablar con su médico
sobre cómo tratar adecuadamente sus vías y supervisar adecuadamente a
los pacientes en función de sus necesidades mientras estén en uso.
ADVERTENCIA: No realice el cebado mientras el tubo está conectado
al dispositivo de acceso del paciente. De lo contrario, podría provocar
una sobredosis o una embolia gaseosa y causar lesiones.
PRECAUCIÓN: El uso recomendado del equipo de
administración no debe exceder las 72 horas.
Instrucciones de uso
Conecte el equipo de administración al depósito de fármaco.
ATENCIÓN: Si se proporciona un adaptador de válvula de
retención, conéctelo al extremo distal del equipo.
2
D
C
B
5
6
3
E
3. If your administration set has a filter (figure 5), proceed with
step 4, otherwise, continue pressing the "Flow-Stop" to allow
fluid to flow through tubing and then skip to step 8.
4. Place IV bag on an IV pole or flat surface that will position it higher than the
filter. Hold the filter upright while looking at the front of the filter (figure 5).
5. Press the "Flow-Stop" to allow fluid to flow.
6. As the fluid fills the filter, slowly tilt the top of the filter from side to side up
to 90 degrees (figure 6). Tap the filter housing to release air bubbles.
7. Return the filter to an upright position and continue priming until air has been
removed from the ribbed section of the filter and the full length of tubing.
NOTE: It is normal to see air on the back/flat side of the filter (figure 7- G)
and in the top triangular portion of the filter (figure 7-H).
8. Ensure that air has been removed and fluid has reached the end of the
tubing. Release the "Flow- Stop" and immediately close the slide clamp.
9. Once the slide clamp is closed, inspect the full length of
tubing again to ensure there is no air present.
Priming by pump:
1. Follow the pump "User's Manual" or "Patient Information Guide"
instructions for priming with the pump. If your administration set
has a filter, follow the filter priming steps 4, 6 & 7 above.
After priming, close the slide clamp until you are ready to start the infusion.
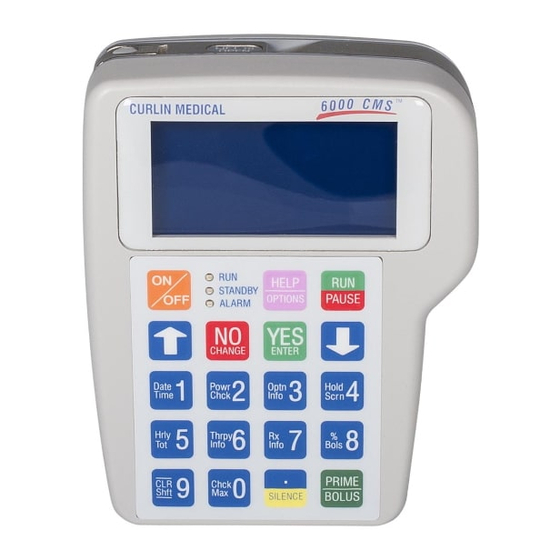
Instructions for inserting the administration set into the CURLIN pump.
1. If still attached, twist and remove breakaway tab from
amber-colored "Flow-Stop" (figure 1).
2. Insert blue "Tubing Guide" into cavity on right side of pump. The
blue arrow (figure 2-E) on the background surface of pump head
indicates direction and location for the blue "Tubing Guide. "
CAUTION: Be sure the tubing is in front of the door as shown and that the "Tubing
Guide" is inserted all the way into the receptacle before closing the pump door.
3. Insert "Flow-Stop" into the cavity on the left side of the pump so that
the tubing lies in the middle of the set loading chamber. Then, push
the tubing slightly into the black Air Detector slot (figure 2-D). The
yellow arrow (figure 3-F) on the background surface of the pump head
indicates the direction and location for the amber "Flow-Stop".
CAUTION: Hold the "Flow-Stop" by the small handle (figure 1-A) as
shown above. DO NOT PRESS down on the top of the "Flow-Stop"
when inserting it into the receptacle. This action could inadvertently
open the "Flow-Stop" and allow fluid to flow through the tubing.
NOTE: Refer to the pump user manual or patient information guide for
information on steps to take for starting and completing the infusion.
3. Wenn Ihr Verabreichungsset einen Filter enthält (Abbildung 5), fahren
Sie mit Schritt 4 fort. Andernfalls drücken Sie weiter den „Flow-Stop"
(Fluss Stopp) zusammen, um den Fluss der Flüssigkeit durch die
Schläuche zu ermöglichen, und fahren Sie dann mit Schritt 8 fort.
4. Hängen Sie den Infusionsbeutel auf den Infusionsständer oder stellen Sie ihn
auf eine flache Oberfläche, sodass er höher liegt als der Filter. Halten Sie den
Filter aufrecht und schauen Sie auf die Vorderseite des Filters (Abbildung 5).
5. Drücken Sie den „Flow-Stop" (Fluss-Stopp) zusammen,
um den Fluss der Flüssigkeit zu ermöglichen.
6. Während sich der Filter mit Flüssigkeit füllt, die Oberseite des
Filters langsam um bis zu 90 Grad hin und her kippen (Abbildung
6). Filtergehäuse antippen, um die Luftblasen zu entfernen.
7. Bringen Sie den Filter erneut in eine aufrechte Position und
setzen Sie das Vorfüllen fort, bis die Luft aus dem geriffelten
Abschnitt des Filters und allen Schläuchen entfernt wurde.
HINWEIS: Es ist normal, wenn auf der Rückseite/flachen Seite des Filters (Abbildung
7-G) und im oberen dreieckigen Teil des Filters (Abbildung 7-H) Luft zu sehen ist.
8. Stellen Sie sicher, dass die Luft entfernt wurde und die Flüssigkeit
das Ende der Schläuche erreicht hat. Lassen Sie den „Flow-Stop"
(Fluss-Stopp) los und schließen sofort die Schiebeklemme.
9. Nachdem die Schiebeklemme geschlossen wurde, alle Schläuche erneut
kontrollieren, um sicherzustellen, dass keine Luft mehr vorhanden ist.
Vorfüllen mit der Pumpe:
1. Die Anleitung für das Vorfüllen der Pumpe im „Benutzerhandbuch" oder
„Patientenleitfaden" beachten. Wenn Ihr Verabreichungsset einen Filter
hat, befolgen Sie die Schritte 4, 6 und 7 der Vorfüllung mit Filter oben.
Schießen Sie nach der Vorfüllung die Schiebeklemme,
bis Sie bereit sind, die Infusion zu starten.
Anleitung zum Einführen des Verabreichungssets in die CURLIN Pumpe.
1. Ist die Abreißlasche immer noch vorhanden, durch Drehen vom
bernsteinfarbenen „Flow-Stop" (Fluss-Stopp) entfernen (Abbildung 1).
2. Anschließend die blaue „Tubing Guide" (Schlauchführung) in die
Öffnung auf der rechten Seite der Pumpe einführen. Der blaue Pfeil
(Abbildung 2-E) auf der Rückseite des Pumpenkopfes zeigt die Richtung
und Position der blauen „Tubing Guide" (Schlauchführung) an.
ACHTUNG: Darauf achten, dass sich der Schlauch wie abgebildet vor der
Klappe befindet und die „Tubing Guide" (Schlauchführung) vollständig in die
Öffnung eingelegt ist, ehe die Pumpenklappe wieder geschlossen wird.
3. Den „Flow-Stop" (Fluss-Stopp) so in die Öffnung an der linken Seite
der Pumpe einlegen, dass der Schlauch in der Mitte der Ladekammer
des Sets liegt. Den Schlauch ein wenig in den schwarzen Luftdetektor-
Anschluss (Abbildung 2-D) vorschieben. Der gelbe Pfeil (Abbildung
3-F) auf der Rückseite des Pumpenkopfes zeigt die Richtung und
Position des bernsteinfarbenen „Flow-Stops" (Fluss-Stopp) an.
ACHTUNG: Den „Flow-Stop" (Fluss-Stopp) wie oben dargestellt am kleinen Griff
(Abbildung 1-A) halten. Den „Flow-Stop" (Fluss-Stopp) NICHT HERUNTERDRÜCKEN,
wenn er in die Öffnung eingelegt wird. Dadurch könnte der „Flow-Stop" (Fluss-
Stopp) unbeabsichtigt geöffnet werden und Flüssigkeit durch den Schlauch fließen.
HINWEIS: Informationen zu den Schritten zum Starten und Durchführen der Infusion
finden Sie im Benutzerhandbuch der Pumpe oder Patienteninformationsleitfaden.
1. Retuerza y retire la lengüeta de separación de la "Flow-
Stop" (parada de flujo) de color ámbar (figura 1).
2. Cierre la pinza de deslizamiento (figura 2-C).
3. Inserte el punzón en el puerto de la bolsa IV. No toque el punzón ni los
Luer destapados, ya que podría contaminarse el líquido. Si usa una jeringa,
elimine el aire de esta antes de conectarla al equipo de administración.
4. Cebe el equipo de acuerdo con uno de los siguientes métodos.
ATENCIÓN: Para que el líquido fluya a través del tubo después
de quitar la lengüeta de separación, apriete la "Flow-Stop"
(parada de flujo) entre el pulgar y el índice (figura 4).
Métodos de cebado
ATENCIÓN: Para mantener la esterilidad durante la configuración, la tapa azul
ventilada debe dejarse en el Luer (figura 2-B) mientras se realiza el cebado.
Cebado por gravedad:
1. Abra la pinza de deslizamiento (figura 2-C).
2. Si la bolsa IV contiene aire, déle la vuelta a la bolsa y apriétela
suavemente mientras presiona la "Flow-Stop" (parada de flujo) entre
el pulgar y el índice (figura 4) hasta que se elimine el aire.
3. Si su equipo de administración tiene un filtro (figura 5), continúe con el paso
4; de lo contrario, continúe presionando la "Flow-Stop" (parada de flujo)
para que el líquido fluya a través del tubo; a continuación, vaya al paso 8.
4. Coloque la bolsa IV en un poste IV o en una superficie plana que
permita colocarla más alta que el filtro. Sostenga el filtro en posición
vertical mientras mira la parte delantera del filtro (figura 5).
5. Presione la "Flow-Stop" (parada de flujo) para que fluya el líquido.
6. A medida que el líquido llena el filtro, incline lentamente la parte
superior del filtro de lado a lado hasta 90 grados (figura 6). Dé un
golpecito a la carcasa del filtro para eliminar las burbujas de aire.
7. Vuelva a colocar el filtro en posición vertical y continúe
cebando hasta que se haya eliminado el aire de la sección
acanalada del filtro y del tubo en toda su longitud.
F
7
G
H
Advertisement
Table of Contents

Related Manuals for Moog CURLIN


Summary of Contents for Moog CURLIN
- Page 1 Prior to the start of any infusion, refer to the CURLIN pump “User’s Manual” for any applicable precautionary instructions.
- Page 2 ATENCIÓN: Consulte el manual del usuario de la bomba o la guía Instrucciones de inserción del equipo de administración en la bomba CURLIN. de información para el paciente para obtener información sobre los pasos a seguir para iniciar y finalizar la infusión.
Need help?
Do you have a question about the CURLIN and is the answer not in the manual?
Questions and answers