
Related Manuals for Producer's PRIDE PP CHATEAU CHICKEN COOP


Summary of Contents for Producer's PRIDE PP CHATEAU CHICKEN COOP
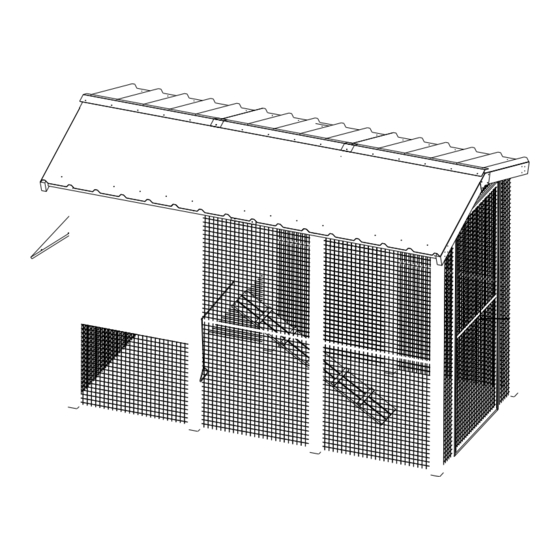
- Page 1 PP CHATEAU CHICKEN COOP ASSEMBLY MANUAL SKU# 2015286 Tools required for assembly (not included) Distributed by: TRACTOR SUPPLY COMPANY 5401 VIRGINIA WAY, BRENTWOOD, TN 37027 For customer support, call: 1-888-376-9601 www.TractorSupply.com MADE IN CHINA...
-
Page 2: Parts List
PARTS LIST Part# Drawing Qty. Description Post 1 Post 2 Post 3 Post 4 Post 5 Post 6 Post 7 Coop Bottom Mesh-Back Coop Bottom Mesh-Side Coop Back Frame - Bottom Coop Back Panel - Top Coop Right Panel Coop Left Panel Coop Bottom Floor PVC Board Coop Front Panel - Bottom... - Page 3 PARTS LIST Part# Drawing Qty. Description Nesting Box Left Panel Nesting Box Back Panel Nesting Box Floor Nesting Box Divider Nesting Box Roof Pen Mesh Panel Pen Front Right Panel Pen Front Left Panel Pen Door Panel Pen Top Triangle Panel Right Shoulder Brace 1 Left Shoulder Brace 1 Right Shouder Brace 2...
- Page 4 PARTS LIST Part# Drawing Qty. Description Roof Ridge 4 Roof Panel Roof Ridge Metal Cover Ramp Roosting Bar Roof Support Connector 1 Roof Support Connector 2 Shoulder Brace Connector Sliding Door Helper Roof Support Connector 3 M6x30 Bolt 66+1 M4x20 Bolt M6 Nut 66+1 Self-tapping screw 4x60...
- Page 5 ASSEMBLY Step 1 Attach Coop Bottom Mesh-Back (#8) and 2pcs Coop Bottom Mesh-Side (#9),between the 4 ● Posts (#1, #2, #3, & #4) by M6x30 Bolt (#48) and M6 Nut (#50). Note: Please pay attention to the post direction, and also make sure all the panels are in same level. Step 2 Assemble the Coop Back Frame-Bottom (#10) with 4pcs Self-tapping Screw 4x30 (#54).
- Page 6 ASSEMBLY Step 3 Take 2pcs Coop Back Panel - Top (#11) and 4pcs of Roof Support Connector 3 (#47). Fix 1pc of ● Roof Support Connector 3 (#47) on each side of the Peak position of Coop Back Panel - Top (#11) by Self-tapping Screw 3.5x20 (#55).
- Page 7 ASSEMBLY Step 5 Same as Step 4, assemble Coop Left Panel (#13) between Posts #2 and #4 by 6pcs Self-tapping ● Screw 4x30 (#54). Step 6 Put Coop Bottom Floor (#14) on top of the two bottom bars of Panels #12 and #13. Then put the ●...
- Page 8 ASSEMBLY Step 7 Assemble Coop Front Panel - Bottom (#16) by 4pcs Self -tapping Screw 4x30 (#54) from inside of ● the coop. Step 8 Fix the 2nd Coop Back Panel - Top (#11) board on top of board #16. ●...
- Page 9 ASSEMBLY Step 9 Put the 4pcs Roosting Bar (#42) between the 8 blocks as below. ● Step 10 Assemble Nesting Box Right Panel (#17) and Nesting Box Left Panel (#18) to the two sides of Coop ● Back Frame (#10) with Self -tapping Screw 4x50 (#52).
- Page 10 ASSEMBLY Step 11 Slide the Nesting Box Floor (#20) into the two U-channels on the bottom of Nesting Box Right Panel (#17) ● and Nesting Box Left Panel (#18). Push the floor all the way inside. Step 12 Assemble the Nesting Box Back Panel (#19) with 4pcs Self screw 4x50 (#52).
- Page 11 ASSEMBLY Step 13 Insert the 3pcs Nesting Box Divider (#21) into the Nesting Box Floor (#20). ● Step 14 Attach the Nesting Box Roof (#22) by Self -tapping screw 4x40 (#53). ●...
- Page 12 ASSEMBLY Step 15 Fix the 2pcs Pen Mesh Panel (#23) on Posts #3 and #4 , each panel with 4pcs M6x30 Bolt (#48) and ● 4pcs M6 Nut (#50). Step 16 Fix the Sliding Door Helper (#46) with M4x20 Bolt (#49) and the Ramp (#41) with M6x30 Bolt (#48) ●...
- Page 13 ASSEMBLY Step 17 Following below diagram, fix 2pcs Post 5 (#5) , 2pcs Pen Mesh Panel (#23) and Post 6 (#6), Post 7 (#7) ● in turn. Requires totally 24pcs M6x30 Bolt (#48) and 24pcs M6 Nut (#50) Step 18 Now fix the Pen Front Right Panel (#24) on Post 6 (#6), and the Pen Front Left Panel (#25) on Post 7 (#7), ●...
- Page 14 ASSEMBLY Step 19 Assemble the Pen Door Panel (#26) between above two side panels, by 4pcs M6x30 Bolt (#48) ● and 4pcs M6 Nut (#50) on each side. The flange for the door frame needs to be at the top. 48&50 48&50 Step 20...
- Page 15 ASSEMBLY Step 21 From the top end of Post 7 (#7) and Post 5 (#5) assemble the Left Shoulder Brace 1 (#29) by Self-tapping ● Screw 4x60 (#51). Then continue to assemble Left Shoulder Brace 2 (#31) on top of Post 2 (#2) and Post 4 (#4) by Self-tapping Screw 4x60 (#51).
- Page 16 ASSEMBLY Step 23 Take 2pcs Roof Support 1 (#32), 1pc Roof Support Connector 1 (#43), 1pc Roof Support Connector ● 2 (#44),follow below diagram (1) assemble them together by Self-tapping Screw 3.5x20 (#55). Take 2pcs Roof Support 2 (#33), 2pcs Roof Support Connector 2 (#44), follow below diagram (2) assemble them together by Self-tapping Screw 3.5x20 (#55).
- Page 17 ASSEMBLY Step 25 Put Roof Ridge 1 (#35), Roof Ridge 2 (#36), Roof Ridge 3 (#37), Roof Ridge 4 (#38) in below ● diagram position. Fix them on to Roof Support Connector 1 (#43), Roof Support Connector 2 (#44), and Roof Support Connector 3 (#47),by Self-tapping Screw 3.5x20 (#55). Step 26 Put the 6pcs Roof Panel (#39) evenly spaced on two sides of the roof, and fix them on the Roof ●...
- Page 18 ASSEMBLY Step 27 Put the 3pcs Roof Ridge Metal Cover (#40) on the peak of the roof, fix by Self-tapping Screw 4x19 (#56). ● Step 28 Assemble 1pc Lock (#57) on the Coop Left Panel (#10) as below diagram, using Self-tapping ●...
- Page 19 ASSEMBLY Step 29 Assemble 1pc Door Latch (#58) on the Pen Door Panel (#26), using M6x30 Bolt (#48) and M6 ● Nut (#50). 48&50 Step 30 Follow below door lock assembly instruction assemble T-Handle Lock (#59, with longer tongue) on ●...
- Page 20 ASSEMBLY T-Handle Lock Assembly: Insert T-handle shaft into the pre-drilled hole on the wood panel, leaving 1/4"space outside. Then ● from the back of the panel, tighten the M10 nut (not the Locknut) first, then put the tongue in, make sure the tongue is in the same direction of the T-handle, fix the washer and M10 Locknut and tighten them.
Need help?
Do you have a question about the PP CHATEAU CHICKEN COOP and is the answer not in the manual?
Questions and answers
Can I order individual parts for this coop like the four posts, the tall vertical panels and the door because I was gifted this coop from another person and it’s missing these parts