
Subscribe to Our Youtube Channel
Related Manuals for Tosot GRH15DC-A6NNA1A/I


Summary of Contents for Tosot GRH15DC-A6NNA1A/I
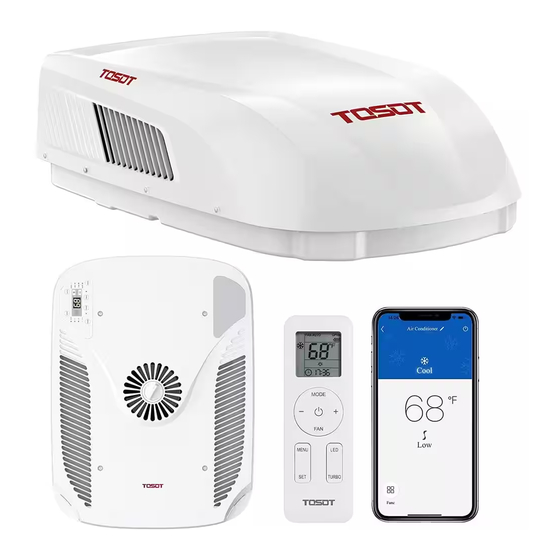
- Page 1 User Manual RV AIR CONDITIONER Before installing and using your TOSOT Air Conditioner, please read this user manual in its entirety. MO DEL NUMBER Ceiling Assembly Roof Top Unit GRH15DC-A6NNA1A/I GRH15DC-A6NNA1A/O...
- Page 2 Welcome to the TOSOT Direct Family! We’re extremely happy to welcome you as a new member of our family! Please read the tips below before using your product for the first time. Tips for First-Time Use 1. The RV air conditioner is a heavy object, which needs two or more people to lift and install.
-
Page 3: Table Of Contents
Table of Contents Safety and Instructions -------------------------------------------- Installation and Setup ---------------------------------------------- --------------------------------------- Electrical Safety Warning ----------------------------------------- Refrigerant Information -------------------------------------------------------------- Part List --------------------------------------------------- Parts Description ------------------------------------------------------------ Installation ------------------------------------------------------------- Operation ------------------------------------------------------ Control Panel --------------------------------------------------- Remote Control -------------------------------------------- Combination Buttons ------------------------------------------ Replacing the Batteries Cleaning and Maintenance ---------------------------------------- Troubleshooting... -
Page 4: Safety And Instructions
Safety and Instructions Your safety and the safety of others are very important to us. Please read the following safety precautions before use and installation. A digital version can be obtained from customer support. Installation and Setup ● Use the appliance only for its intended purpose as described in this manual. ●... -
Page 5: Electrical Safety Warning
Electrical Safety Warning ● All wiring must be complied with local and national electrical codes. All wiring must be installed by qualified electricians. If you have any questions about the instructions, contact a qualified electrician. ● Make sure the power supply is cut off you until finish installing the air conditioner. Otherwise, it may cause an electric shock. -
Page 6: Refrigerant Information
● Reorient or relocate the receiving antenna. ● Increase the separation between the equipment and receiver. ● Connect the equipment into an outlet on a circuit different from that to which the receiver is connected. ● Consult the dealer or an experienced radio/TV technician for help. Refrigerant Information ●... -
Page 7: Part List
Before using the appliance, read the owner's manual first. Before using the appliance, read the owner's manual first. Before using the appliance, read the owner's manual first. Recommended Operating Environment ● The recommended operating temperature range is 23°F-115°F (-5°C-46°C). (Heating:23°F-75°F (-5°C-24°C ) /Cooling:64°F-115°F (18-46°C). ●... - Page 8 PART LOOKS LIKE QUANTITY Fixing screw for remoter control holder Remote control Remote control holder AAA battery Double-sided tape Screw cap Duct plate 1 set use in use in indoor outdoor (bottom) (upper) Bolt for ceiling assembly (5.3 inch) Bolt for ceiling assembly (7.5 inch) Gasket Sponge (sealing strip)
-
Page 9: Parts Description
Parts Description Ceiling Assembly Air Outlet Filter Sub-assy Control Panel Air Inlet Remote Control Roof Top Unit Air Inlet Drainage Outlet Chassis Note: This is a universal introduction for a variety of models. The display content may be different from the actual. Please refer to the actual unit. -
Page 10: Installation
Installation Warning ● The air conditioner has been designed for use in recreational vehicles. ● Be careful when testing the unit. Do not operate the unit with the exterior case removed. ● Outdoor unit can't be installed at the low recess of the roof of the vehicle. It must be mounted on the flat surface of the roof to make sure rain, car-washwater, condensated water, etc. - Page 11 Installation 1. Select an Installation Site ● Check the roof of the vehicle to determine whether it can support both the rooftop unit and the ceiling assembly without additional support. ● Choose an area where the installation of an indoor unit will not interfere with existing structures.
- Page 12 CASE B If there is no existing roof vent opening, a new opening (14-1/4” x 14-1/4”, see Figure 1) is required to be cut in the vehicle roof and the interior vehicle ceiling. ● Make sure the ceiling opening edge is smooth to avoid snags. ●...
- Page 13 2. Stick Gasket and Sponge ● After the mounting hole area is properly prepared, open the package and remove the carton and shipping pads from around the rooftop air conditioner. ● Carefully lift the outdoor unit with the package on top of the vehicle. Do not use the outer plastic shroud for lifting.
- Page 14 3. Install and mount the Roof Top Unit ● Lift the outdoor unit and then place the outdoor unit in the roof of the vehicle. Do not drag the outdoor unit. Otherwise, the seal may fall off (see Figure 4). Figure 4 ●...
- Page 15 Note: The unit can only operate for a short time at the maximum sloping angle of 5° for preventing water leakage. ● If the roof of the vehicle is sloped (not level) such that the rooftop air conditioner cannot be mounted within the maximum allowable degree specifications, an exterior leveling shim will need to be added to make the unit level.
- Page 16 ● Fasten the fabric duct (assembled) to the chassis of the rooftop air conditioner with 4 tapping screws by the upper duct plate. See Figure 8. Warm tips: please make sure you didn't shorten the length of fabric duct in this step. Upper Duct Plate 4 Holes for Tapping Screw...
- Page 17 4 Bolts for Ceiling Assembly Frame Fixing Figure 9 ● Secure the bottom duct plate to the ceiling assembly frame with 4 tapping screws (see Figure 10) and fasten each side of the fabric duct. After the securing, there might leave some spare fabric that may extend beyond the edge of the bottom duct plate need to be cut.
- Page 18 5. Electric Wiring Warning: Make sure that all power supply to the unit is disconnected before performing any work on the unit to avoid the possibility of shock or injury and damage to the equipment. After the interior ceiling assembly frame is properly secured to the rooftop air conditioner, you can start on the electrical connections.
- Page 19 Frame Junction Box Cover 2 Screws Figure 12 ● Connect the power cord to the black, white, and ground wires found in the junction box with a terminal board. CAUTION: Connect black wire to black wire, white wire to white wire, and the ground wire to earth.
- Page 20 ● Tighten the strain relief clamp to secure the supply power cord. Be careful not over tighten. ● Reinstall the junction box cover. ● Connect the connector of indoor and outdoor control signal wire and secure the clamp (see Figure 14). Control Signal Wire from the Roof Top Unit Display Box of...
-
Page 21: Operation
Operation Control Panel Swing Button ON/OFF Button +/- Button Fan Speed Button Filter Check Button Timer Button Mode Button... - Page 22 Swing Button Press this button to activate the automatic air swing function. ON/OFF Button Press to power the air conditioner ON or OFF. +/- Button ● Pressing this button will allow you to change the temperature setting. ● After pressing the timer button, the +/- buttons will adjust the timer setting from 0.5-24 hours in 0.5-hour increments.
-
Page 23: Remote Control
Remote Control Function icons: Fan Speed Setting Send Signal Auto Mode Cool Mode Dry Mode Fan Mode Heat Mode Sleep Mode Display Light X-FAN Function Indoor Ambient Temp Clock Temperature Setting WIFI Function Timer Setting Timer On/Off Up & Down Swing Child Lock Note: This is a universal remote control for a variety of different models. - Page 24 ● Once the unit is powered on the air conditioner will give out a sound and the power indicator will light up. After that, you can operate the air conditioner by using the remote control. ● When pressing a button on the remote control, the signal icon on the remote control will blink once and the air conditioner will emit a single beep sound, which means the signal has been sent to the air conditioner.
- Page 25 FAN Button Press this button to cycle through the Auto fan mode and 3 fan speeds (Low, High, TURBO) Auto Note: ● indicates low speed, indicate high speed, indicates turbo speed. ● Under AUTO fan mode, the air conditioner will select the proper fan speed automatically.
- Page 26 Display Light Sleep Mode Timer On Timer Off Clock (not available for this mode) Up & down Swing Indoor Ambient Temp ▷ Display Light Function Press the MENU button until the light icon “ ” flashes then press the “SET” button to turn off the display light on the indoor unit.
- Page 27 ▷ TIMER OFF Function TIMER OFF function can set the time to turn off the unit. ● Press the MENU button until the “OFF” icon flashes then press the “SET” button to enter the timer function setting. The “ ” icon will disappear and the word “OFF”...
-
Page 28: Combination Buttons
▷ Indoor Ambient Temperature Display Function ● Press the MENU button until the icon “ ” flashes then press the “SET” button to turn on this function. The “ ” icon will display on the remote control. The indoor unit displays the corresponding temperature and then automatically turns to display the set temperature after a few seconds. -
Page 29: Replacing The Batteries
Replacing the Batteries Battery Signal Sender Reinstall Remove Cover of Battery Box 1. Press the back side of the remote control battery cover marked with “ ”, and slide out following the engraved arrow. 2. Replace with two new AAA(1.5V) batteries of the same make and model. Make sure the polarities (+ &... - Page 30 2. Clean the filter After removing, wash away dust from the air filters with clean water or vacuum the filter with an electric household vacuum cleaner. 3. Reinstall the filter Make surer the filters are completely dry before reinstalling. Place them back into the AC unit.
-
Page 31: Troubleshooting
Troubleshooting You may meet some common issues listed below. We recommend you do a self-check first, but if the problem is not resolved, please contact customer support at support@tosotdirect.com. Issues Self check Possible solutions Whether the unit is Check the power supply of the Air conditioner connected to the power vehicle and make sure it is... - Page 32 Issues Self check Possible solutions Whether the Select FAN mode at HIGH temperature is low fan speed. Ice or frost inside? appeared on the coils Whether the air filter Clean the air filter. is too dirty? ● If you notice or experience any of the following conditions, please turn off the air conditioner, disconnect from power, discontinue use, and contact support immediately.
-
Page 33: Malfunction Codes
Malfunction Codes Error code Trouble shooting It can be eliminated after restarting the unit. E6 / E8 If not, please contact support for help. Please check whether the voltage is correct. It can be eliminated after restarting the unit. If not, please contact support for help. F1 / F2 / F3 / F4 Please contact the support for help. -
Page 34: Warranty & Customer Support
Warranty & Customer Support Warranty Information 1. 2-Years warranty: TOSOT RV Air Conditioner comes with a 2-years warranty from the date of purchase. This warranty covers manufacturing and material defects. Please visit https://tosotdirect.com/warranty for more details. 2. Additional 6-Month warranty extension: You can get a 6-month warranty extension by registering your new product www.tosotdirect.com/extend.
Need help?
Do you have a question about the GRH15DC-A6NNA1A/I and is the answer not in the manual?
Questions and answers