
Related Manuals for Tosot GAA09AF-D6DRNB5A


Summary of Contents for Tosot GAA09AF-D6DRNB5A
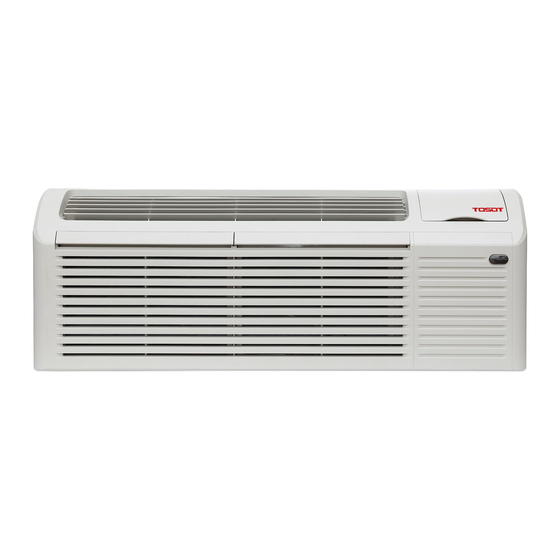
- Page 1 User Manual Packaged Terminal Air Conditioner Before installing and using your TOSOT Packaged Terminal Air Conditioner, please read this user manual in its entirety. MODEL NUMBERS GAA09AF-D6DRNB5A(VF) GAA15AF-D6DRNB5A(VF)
- Page 2 Welcome to the TOSOT Direct Family! We’re extremely happy to welcome you as a new member of our family! Please read the tips below before using your product for the first time. Tips for First-Time Use Keep the original packaging material including packing foam, carton, and printed material until you decide to keep the unit.
-
Page 3: Table Of Contents
Table of Contents Safety Precautions Parts Description Installation Select an Installation Site Install the Wall Sleeve and Grille Ventilation Control (Optional) Install the Unit Adjust Air Direction (Optional) DIP Switches Connect the Thermostat to the Unit (Optional) Energy Management Input (Front Desk Control) Panel Control Keypad Configuration Cleaning and Maintenance... -
Page 4: Safety Precautions
Safety Precautions Your safety and the safety of others are very important to us. Please read the following safety precautions before use and installation. This appliance is not to be used or have maintenance performed by persons with reduced physical, sensory, or mental capabilities, or lack of experience and knowledge, unless they have been given strict supervision or instruction concerning the use of the appliance by a person responsible for their safety. - Page 5 Prohibit inserting any objects into the air conditioner. Do not through sundries into the air duct. If there are sundries that get into the air duct, please contact the professionals to deal with it. Do not use an extension cord. Do not block the air outlet or air inlet.
- Page 6 Always finish the test of the LCDI plug before use: Follow 4 steps on the LCDI plug case, if the TEST button does not cause the circuit breaker trip or the RESET button will not stay engaged, unplug the air conditioner immediately and contact Customer Support.
-
Page 7: Parts Description
Parts Description Coil Tube Sheets Outdoor Orifice Wire Screen Grille Wall Sleeve Basepan Indoor Coil Installation Tools Required Electric Drill Screwdriver Bubble Level Pencil Scissors Ruler or Tape Measure... -
Page 8: Select An Installation Site
1. Select an Installation Site Choose a location where there are no obstacles surrounding the unit and the plug is accessible. Refer to the following diagram to ensure proper distance from walls and ceiling: Top View Front View WALL Minimum 59 in(150cm) Outside Wall Ceiling WALL... -
Page 9: Ventilation Control (Optional)
Position the sleeve in the wall. Make the sleeve level side to side and tilt backward for 1/4” (6.4mm) to allow water drainage. Secure the sleeve to the wall firmly. 1/4’’ (6.4mm) Wall 3. Ventilation Control (Optional) Carefully remove shipping tape from the front panel and vent door. Remove the screw from the vent door. -
Page 10: Install The Unit
The ventilation control lever is located on the left side of the unit, behind the front panel. When the vent control lever is set at the “CLOSE” position, only the air inside the room is circulated and filtered. When set at the “OPEN” position, some outdoor air will be drawn into the room. This will reduce heating or cooling efficiency. -
Page 11: Adjust Air Direction (Optional)
5. Adjust Air Direction (Optional) Remove the louver screws from the back side of the front panel. Louver Screws Louver Screws Rotate the louver 180°. Reinstall the louver and screws it to the front panel. The air direction will change from the default angle to the upward angle. Air Discharge Upward Air Discharge Outward (Default) Reinstall the front panel of the unit. -
Page 12: Dip Switches
DIP Switches Auxiliary dip switch controls are located behind the front panel. Remove the front panel first. The unit must be powered OFF to effectively change its status. The default settings for dip switches will be in the DOWN position. DIP Switches Dip Switches Down... -
Page 13: Connect The Thermostat To The Unit (Optional)
NOTE: Fan Continuous Run: Allows fan to run continuously, circulating air even when the temperature setting has been satisfied. This switch helps to maintain the room temperature closer to the thermostat setting. Fan Cycle: This setting allows the fan to cycle on and off with the compressor or electric heater. - Page 14 2. Ensure the power to the unit is disconnected. 3. Pull the terminal connector to remove it. NOTE: Terminal connectors can be removed and replaced to simplify thermostat wiring. R W Y O Gh Gl C Status Energy Management Wall Thermostat Terminal Connections Terminal Connections 4.
-
Page 15: Energy Management Input (Front Desk Control)
5. Reinstall the terminal connector. 6. Ensure that the unit is configured for a wall thermostat. 7. Restore power to the unit and control by a thermostat. NOTE: Refer to thermostat installation instructions for details. Energy Management Input (Front Desk Control) The control panel can handle a switch signal from remote energy management input, called an EM signal or front desk control. -
Page 16: Keypad Configuration
Mode Press the button to cycle through the four operating modes Dry, Cool, Fan, and Heat. The corresponding indicator will be on. Cool mode: The air conditioner will operate under standard cooling mode. The set temperature and fan speed can both be adjusted. Dry mode: The unit will run at low speed for dehumidification. - Page 17 Fahrenheit/Celsius Display Switch An “F” indicates Fahrenheit display and a "C” indicates Celsius. The default setting is Fahrenheit. Indoor Air Temperature Sensor Biasing It is used to adjust the room air temperature reading when in cool/dry/heat mode. (Not normally required.) Indoor Temperature Display “SP”...
-
Page 18: Cleaning And Maintenance
Cleaning and Maintenance Turn the unit off and disconnect the power supply before cleaning. Clean the Front Panel and Case Use water and a mild detergent to clean. DO NOT use bleach or abrasives which may damage the plastic parts. Clean the Outdoor Coil The coil on the outdoor side of the unit should be checked regularly. - Page 19 2 Air Filters Push Down Pull Up Removing Air Filter Replacing Air Filter Offseason Maintenance If you are going to put the unit into long-term storage, please do the following: ● Disconnect from power supply. ● Clean both sides of the indoor and outdoor coil. Clean the fan. (Never use high-pressure spray on coils.) ●...
-
Page 20: Troubleshooting
Troubleshooting You may meet some common issues listed below. We recommend you do a self-check first, but if the problem is not resolved, please contact customer support support@tosotdirect.com Issues Self-check Solutions Check that the plug is plugged securely into the wall receptacle. The unit may be unplugged. - Page 21 Issues Self-check Solutions Allow a sufficient amount of time The room is excessively hot or for the unit to heat or cool the cold when the unit is started. room. The vent door is left open. Close the vent door. The unit may be in a Check dips switch settings for Poor cooling or...
-
Page 22: Malfunction Codes
Malfunction Codes The unit continuously checks key components to ensure they are operating properly. Under normal operation, the status indicator light is steadily ON. If it is only a minor failure and the unit is correcting the fault by itself, the diagnostic code will be flashed on the status LED which can easily be seen when the front panel is removed. - Page 23 Display Code Description Status Indicator Overcurrent protection of compressor. The electric heater combination is wrong. Malfunction protection for electric heating. The relay for the Compressor or heater is broken. The electric heater current is abnormal. Temperature limiter protection time too long or fired. Unbalanced Electric Current detected between N line and L line.
-
Page 24: Warranty & Customer Support
Warranty & Customer Support Warranty Information 1. 5-Year warranty: TOSOT Packaged Terminal Air Conditioner comes with a 5-year warranty from the date of purchase. This warranty covers manufacturing and material defects. Please visit https://tosotdirect.com/warranty for more details. 2. Additional 6-Month warranty extension: You can get a 6-month warranty extension by registering your new product at www.tosotdirect.com/extend...
Need help?
Do you have a question about the GAA09AF-D6DRNB5A and is the answer not in the manual?
Questions and answers