Table of Contents
Advertisement
User Manual
SPLIT AIR CONDITIONER
Before installing and using your TOSOT Air Conditioner,
please read this user manual in its entirety.
Indoor Unit
GWH09AFC-A3DNA2A/I
GWH09AFC-D3DNA2A/I
GWH12AFC-A3DNA2B/I
GWH12AFC-D3DNA2B/I
GWH18AFD-D3DNA2A/I
MO DEL NUMBERS
GWH09AFC-A3DNA1A/O
GWH09AFC-D3DNA1A/O
GWH12AFC-A3DNA1A/O
GWH12AFC-D3DNA1A/O
GWH18AFD-D3DNA1A/O
Outdoor Unit
Advertisement
Table of Contents

Related Manuals for Tosot GWH09AFC-A3DNA2A/I


Summary of Contents for Tosot GWH09AFC-A3DNA2A/I
- Page 1 User Manual SPLIT AIR CONDITIONER Before installing and using your TOSOT Air Conditioner, please read this user manual in its entirety. MO DEL NUMBERS Indoor Unit Outdoor Unit GWH09AFC-A3DNA2A/I GWH09AFC-A3DNA1A/O GWH09AFC-D3DNA2A/I GWH09AFC-D3DNA1A/O GWH12AFC-A3DNA2B/I GWH12AFC-A3DNA1A/O GWH12AFC-D3DNA2B/I GWH12AFC-D3DNA1A/O GWH18AFD-D3DNA2A/I GWH18AFD-D3DNA1A/O...
- Page 2 Welcome to the TOSOT Direct Family! We’re extremely happy to welcome you as a new member of our family! Please read the tips below before using your product for the first time. Tips for First-Time Use 1. The split-type air conditioner is a heavy object, which needs two or more people to lift and install.
-
Page 3: Table Of Contents
Table of Contents ------------------------------------------------ Safety Precautions ------------------------------------------------------------ Warning ------------------------------------------------------------ Caution -------------------------------------- Electrical Safety Warning -------------------------------------------------------------- Part List ----------------------------------------------------- Required Tools -------------------------------------------------- Parts Description ---------------------------------------------------- Remote Control ------------------------------------ Function Icons Description ------------------------------------------- Combination Buttons ---------------------------------------- Replacing the Batteries -------------------------------------------- Care and Maintenance ------------------------------------------------------- Precautions ---------------------------------------... - Page 4 -------------------------------------------- Indoor Unit Installation -------------------------------------- Select an Installation Site ------------------------ Attach the Mounting Plate to the Wall ----------------------- Connect the Wiring of the Indoor Unit -------------------------- Connecting the Refrigerant Pipings --------------------------- Drilling the piping hole on the wall ------------------------------------------ Mount the Indoor Unit ------------------------------ Extend the pipe by unwinding it -----------------------------------------...
-
Page 5: Safety Precautions
Safety Precautions Your safety and the safety of others are very important to us. Please read the following safety precautions before use and installation. A digital version can be obtained from customer support. Warning Failed to do the following instructions might cause the possibility of death or serious injury. -
Page 6: Caution
11. This appliance can be used by children ages 8 and above and persons with reduced physical, sensory or mental capabilities, or lack of experience and knowledge, if they have been given supervision or instruction concerning use of the appliance in a safe way and understand the hazards involved. Children shall not play with the appliance. -
Page 7: Electrical Safety Warning
Electrical Safety Warning Do not share the same electrical socket with other appliances as this may create a fire hazard. Do not cover the power cord with a rug or carpeting. Do not rest hot or heavy objects on the appliance and power cord. 4. -
Page 8: Part List
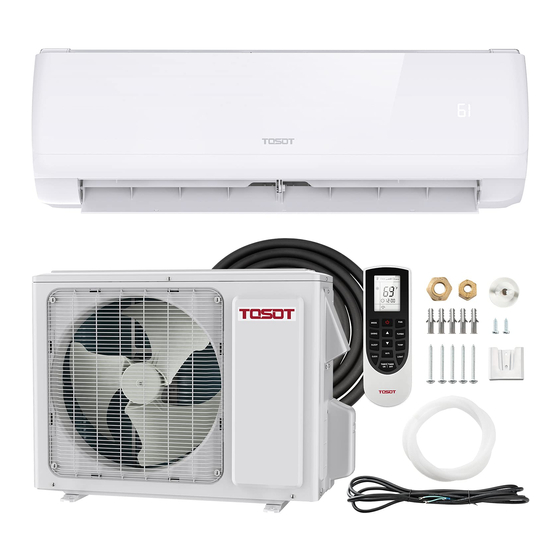
Parts List PART LOOKS LIKE QUANTITY Mounting plate Drywall anchor Mounting plate fixing screw Fixing screw for remote controller holder Remote control MODE SWING TURBO SLEEP TEMP WiFi CLOCK LIGHT TIMER TIMER Remote control holder AAA battery Air filter Wall cuff Drain joint... -
Page 9: Required Tools
PART LOOKS LIKE QUANTITY Pipe bundle (5 meters) Electrical cables (6 meters) Sealing gum Drain hose (2 meters) Tape Required Tools 1. Bubble Level 2. Electric Drill with drill bit for pilot holes 3. Wire stripper/crimp tool 4. Screwdriver 5. Standard wrench 6. -
Page 10: Parts Description
Parts Description Indoor Unit Air Inlet Front Panel Reusable Filter Air Outlet Horizontal Louver Aux Button Display Temp Indicator Power Indicator Indoor Unit Air Inlet Wire Connection Air Outlet Note: This is a universal introduction for a variety of models. Display content may be different from the actual. -
Page 11: Remote Control
Remote Control Function icons: I Feel Fan Speed Setting Turbo Mode Send Signal Auto Mode Cool Mode Dry Mode Fan Mode Heat Mode MODE Sleep Mode Freeze Guard Function X-FAN Function SWING TURBO Set Temp. SLEEP TEMP Indoor Ambient Temp. Temp. -
Page 12: Function Icons Description
● Once the unit is powered on the air conditioner will give out a sound and the power indicator will light up. After that you can operate the air conditioner by using remote control. ● When pressing a button on the remote control, the signal icon on the remote control will blink once and the air conditioner will emit a single beep sound, which means the signal has been sent to the air conditioner. - Page 13 Press this button to cycle through the Auto fan mode and 3 fan speeds (Low, Medium, High) Auto Note: ● Under AUTO fan mode, the air conditioner will select the proper fan speed automatically. ● X-FAN Function:Hold the fan speed button for 2 seconds in COOL or DRY mode.
- Page 14 ● Pressing the ▲ or ▼ button will increase/decrease the set temperature by 1°F. Holding the button for 2 seconds will cause the temperature to change rapidly. Release the button once your desired temperature is reached. ● After pressing the Timer or Clock button, press the ▲ or ▼ button to adjust the time.
- Page 15 Press this button, you can see indoor set temperature, indoor ambient TEMP temperature or outdoor ambient temperature on the indoor unit's display. The setting on remote control will cycle through as below: no display When selecting " " or no display with the remote control, the temperature indicator on the indoor unit displays the set temperature.
-
Page 16: Combination Buttons
1 minute with each press of the "▲" or "▼" button. Holding the "▲" or "▼" button for 2 seconds will change the time rapidly. Release the button once it reaches your set time. . Press the button again to confirm the timer and the "ON"/"OFF"... -
Page 17: Replacing The Batteries
● Child lock Press ▲ and ▼ simultaneously to turn the child lock function on or off. While in this mode the remote control will display a LOCK symbol and will not send any signal to the air conditioner. ● Change Between °F and °C With the unit powered off, press the MODE and ▼... -
Page 18: Care And Maintenance
Care and Maintenance Precautions ● Disconnect from power before cleaning and servicing. Failure to do so may cause electric shock. ● Do not wash the air conditioner with water as this may cause electric shock. ● Do not use volatile liquids (such as paint thinner or gas) to clean the air conditioner. - Page 19 2. Remove the filter by pulling it downward. 3. Clean the filter with warm water mixed with a mild detergent. A soft bristle brush may help remove some dirt if needed. Dry completely in a cool area. 4. After the filter has dried, reinstall back into the air conditioner and close the front panel tightly.
-
Page 20: Offseason Maintenance
Offseason Maintenance If you are going to put the unit into long-term storage, please do the following: 1. Disconnect from power supply. 2. Clean filter and outer case. 3. Remove dust and debris on the air conditioner. 4. Turn on the FAN mode for at least 8 hours to dry the indoor unit out completely. Preseason Maintenance If you are going to use the unit again after a long period of non-use, please do the following:... -
Page 21: Troubleshooting
Troubleshooting You may meet some common issues listed below. We recommend you do a self check first, but if the problem is not resolved, please contact customer support at support@tosotdirect.com. Issues Self check Solutions Is the air inlet or outlet of the indoor Remove the obstacles. - Page 22 Issues Self check Solutions In humid regions, a large temperature difference between Are the indoor the room’s air and the conditioned White mist emitted temperature or air can cause white mist. After a from indoor unit humidity levels high? while, indoor temperature and humidity will decrease and the mist will disappear.
-
Page 23: Malfunction Codes
Issues Self check Solutions Cracking sound: Normal Air conditioner was expansion and contraction of just turned on or Abnormal noises plastic and metal parts caused turned off or adjusted by temperature changes during temperature? operation. ● If you notice or experience any of the following conditions, please turn off the air conditioner, disconnect from power, discontinue use, and contact support immediately. -
Page 24: Quick Guide For Installation
Quick Guide for Installation These are basic instructions to help you quickly set up your unit. For a more detailed explanation, please read the Indoor Unit Installation (page 25) and Outdoor Unit Installation (page 34): Indoor Unit: Select an Installation Site At least 15cm At least 15cm At least... - Page 25 Connect the Wiring Connect the Piping N(1) white black green (blue) (brown) (yellow- green) Outdoor unit connection Connect the Drain Hose Wrap the Pipping drain hose outlet pipe Drill Wall Hole Mount the Indoor Unit Indoor outdoor 5-10°...
- Page 26 Secure the Remote Control Holder Outdoor Unit: Select a Installation Site minimum 19.7in (50 cm) minimum 11.8 in (30 cm) minimum 19.7in (50 cm) minimum 78.7in (200 cm)
- Page 27 Install the Drain Joint drain joint chassis Drain hose Secure the Outdoor Unit Connect the Refrigerant Pipe foot holes foot holes Connect the Signal and Power Cables lock nut Finish conduit...
- Page 28 Air Evacuation Gas Leak Checks Electrical Safety Checks...
-
Page 29: Indoor Unit Installation
Indoor Unit Installation Before installing the indoor unit, you need to check the label on the product box and make sure that the model number of the indoor unit matches the model number of the outdoor unit. 1. Select an Installation Site Refer to the following Minimum 6 in (15 cm) diagram to ensure proper... -
Page 30: Attach The Mounting Plate To The Wall
2. Attach the Mounting Plate to the Wall The mounting plate is where you will mount the indoor unit. Φ55m Φ70mm Rear piping hole Φ55m Φ70mm Rear piping hole ● Hold the mounting plate against the wall and adjust the plate using a bubble level until perfectly level. - Page 31 ● Using wire strippers, remove the rubber insulation from both ends of the signal cable in the lineet to reveal approx. 6 inches (15cm) of wiring. ● Using a crimp tool, crimp U-Type lugs (not included) on both ends of the wires. ●...
-
Page 32: Connecting The Refrigerant Pipings
4. Connecting the Refrigerant Pipings ● Align both ends of the refrigerant pipings and start to twist on the union nut by hand. ● Use a standard wrench on the pipe joint and an open-end torque wrench on the union nut to apply the proper torque as shown in the torque table below. NOTE: If the union nut is too loose it will cause leaks. - Page 33 Torque Table Pipe Diameter Nut Size Tightening Torque inch (mm) inch (mm) ft-lbs 1/4 (6) 1/4 (17) 10 to 13 15 to 20 3/8 (9.5) 3/8 (22) 25 to 30 30 to 40 1/2 (12.7) 1/2 (25) 36 to 45 45 to 55 5/8 (16) 5/8 (29)
- Page 34 ● Wrap the refrigerant pipes, electrical cables, and drain hose with tape so it looks like the below figure electrical cables indoor unit refrigerant pipes tape drain hose ● Reserve a few inches of drain hose and power cable. When wrapping to a certain length, separate the indoor power cord and then separate the drain hose.
-
Page 35: Drilling The Piping Hole On The Wall
5. Drilling the piping hole on the wall You must drill a hole in the wall for the wrapped bundle of pipes to connect the indoor and outdoor units. ● Choose an appropriate location for the piping hole based on the position of the mounting plate and the direction of the pipe. -
Page 36: Mount The Indoor Unit
● If you choose a pipe direction out of the left or right side of the indoor unit, you will need to knock out the corresponding hole on the bottom of the side panel. Left Right Knock-out Panel ● Drill a hole with a 2.2/2.8 inch (55/70 mm) diameter through the wall where you want the pipe to go through. -
Page 37: Extend The Pipe By Unwinding It
indoor upper hook outdoor sealing gum bundle of pipes lower hook of wall-mounting frame 7. Extend the pipe by unwinding it ● Extending the pipes should be clung to the wall, bent slowly. The minimum radius of bending the pipe should not exceed 4 in (10 cm). ●... -
Page 38: Outdoor Unit Installation
Outdoor Unit Installation 1. Select a Installation Site Refer to the following diagram to ensure proper space around the unit: minimum 19.7in (50 cm) minimum 11.8 in (30 cm) minimum 19.7in (50 cm) minimum 78.7in (200 cm) Appropriate install locations should follow these standards: ●... -
Page 39: Install The Drain Joint
Note: If the unit is frequently exposed to heavy rain or snow. Build a shelter above the unit to protect it. Be careful not to obstruct airflow around the unit. 2. Install the Drain Joint Heat pump units require a drain joint if the unit is elevated off the ground. Before bolting the outdoor unit in place, you must install the drain joint at the bottom of the unit. -
Page 40: Connect The Refrigerant Pipe To Outdoor Unit
4. Connect the Refrigerant Pipe to Outdoor Unit ● Remove the screw cap of the valve and aim the pipe joint at the bellmouth of pipe. refrigerant pipe joint pipes liquid valve union nut gas valve ● Align both ends of the refrigerant piping and start to twist on the union nut by hand. ●... -
Page 41: Note On Pipe Length
Note On Pipe Length The length of refrigerant piping will affect the performance and energy efficiency of the unit. Nominal efficiency is tested on units with a pipe length of 16.5ft (5 meters). Refer to the table below for specifications on the maximum length. Min. - Page 42 b. Remove burrs Burrs can affect the air-tight seal of refrigerant piping connection. They must be completely removed. ● Hold the pipe at a downward angle to prevent burrs from falling into the pipe. ● Using a reamer or deburring tool, remove all burrs from the cut section of the pipe. pipe shaper downwards...
- Page 43 The end of the pipe(“A”) must extend beyond the edge of the flare form in accordance with the dimensions shown in the table below. A(mm) Outer diameter (mm) Φ6 - 6.35(1/4") Φ9 - 9.52(3/8") Φ12-12.7(1/2") Φ15.8-16(5/8") ● Remove the flaring tool and flare form, then inspect the end of the pipe for cracks and even flaring.
-
Page 44: Connect The Signal And Power Cables
5. Connect the Signal and Power Cables ● Remove the wire cover on the outdoor unit. All wiring must be performed in accordance with the wiring diagrams shown below. ● Match the wire colors with the labels on the terminal block and firmly screw the U-Lug of each wire to its corresponding terminal on the terminal block. - Page 45 Note: If the outdoor unit is placed higher than the wall hole you will need to set a U-shaped curve in the pipe before the pipe goes into the room, in order to prevent rain from getting into the room. wall U-shaped curve drain hose...
-
Page 46: Air Evacuation
Air Evacuation Preparations and Precautions Air and foreign matter in the refrigerant circuit can cause abnormal rises in pressure, which can damage the air conditioner, reduce its efficiency, and cause injury. Use a vacuum pump and manifold gauge to evacuate the refrigerant circuit, removing any non-condensable gas and moisture from the system. -
Page 47: Gas Leak Checks
● Close the vacuum pump and wait for 5 minutes to ensure there has been no change in system pressure. If the pressure decreases there may be leakage, please refer to the Gas Leak Check section. ● Remove the manifold gauge, open the valve core of the liquid valve and gas valve completely by turning clockwise with a hexagonal allen wrench. -
Page 48: Test Run
2. Check for Electrical Leakage During the Test Run, use an electroprobe and multimeter to perform a comprehensive electrical leakage test. If electrical leakage is detected, turn off the unit immediately and call a licensed electrician to find and resolve the cause of the leakage. Note: This may not be required for some locations in the US. -
Page 49: Warranty & Customer Support
Warranty & Customer Support Warranty Information 1. 5-Year warranty: TOSOT Split-type Air Conditioner comes with a 5-year warranty from the date of purchase. This warranty covers manufacturing and material defects. Please visit https://tosotdirect.com/warranty for more details. 2. Additional 6-Month warranty extension: You can get a 6-month warranty extension by registering your new product at www.tosotdirect.com/extend.
Need help?
Do you have a question about the GWH09AFC-A3DNA2A/I and is the answer not in the manual?
Questions and answers
What does e7 mean