Table of Contents
Advertisement
Quick Links
Advertisement
Table of Contents

Related Manuals for Energizer EZ40VTDE46N


Summary of Contents for Energizer EZ40VTDE46N
- Page 2 Energizer and certain graphic designs are trademarks of Energizer Brands, LLC and related subsidiaries and are used under license by Builder SAS. All other brand names are trademarks of their respective owners. Neither Builder SAS nor Energizer Brands, LLC is affiliated with the respective owners of their trademarks.
- Page 3 Let's get started. You're excited to power up, so we'll keep this brief!
-
Page 4: Safety Warnings
SAFETY WARNINGS IMPORTANT READ CAREFULLY BEFORE USE KEEP FOR FUTURE REFERENCE Safe operating practices for lawnmowers Training a) Read the instructions carefully. Be familiar with the controls and the correct use of the machine. b) Never allow children or people unfamiliar with these instructions to use the machine. Local regulations can restrict the age of the operator. - Page 5 If the machine starts to vibrate abnormally (check immediately): − inspect for damage, − replace or repair any damaged parts, − check for and tighten any loose parts. Maintenance and storage a) Keep all nuts, bolts and screws tight to be sure the machine is in safe working condition. b) Check the grass collector frequently for wear or deterioration.
- Page 6 Residual risks Even if you use this product in compliance with all safety requirements, the potential risks of injury and damage remain. The following hazards may arise in the structure and design of this product. There are adverse health consequences resulting from the emission of vibration if the product is used for long periods of time or not properly managed and properly maintained.
- Page 7 Do not touch rotate blades Wear ocular protection and hearing protection Do not start the tool on a slope DESCRIPTION...
-
Page 8: Technical Data
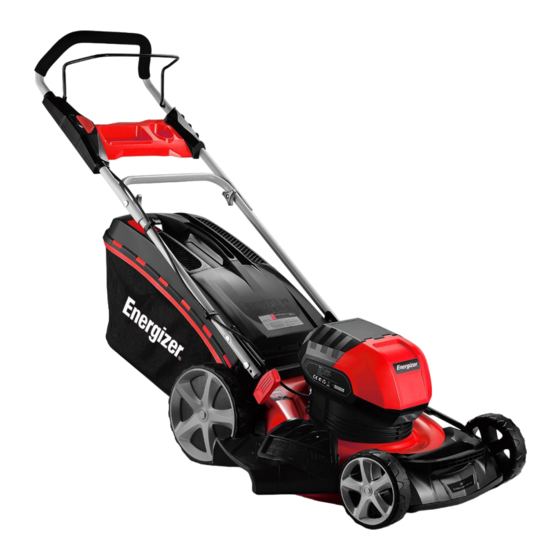
TECHNICAL DATA CORDLESS LAWNMOWER Model EZ40VTDE46N Voltage , Max. 40V Charge time 3 hours (4.0 Ah battery) No-load speed 2800-3300/min Cutting width 457 mm Grass catcher capacity 60 L Height adjustments 2.5 - 7.5 cm (6 positions) Functions 3-in-1: Mulch, side discharge and grass catcher weight (with 4.0Ah battery) - Page 9 UNFOLDING AND ADJUSTING HANDLE ASSEMBLY a. To raise handle assembly: • Pull up and back on the lower handle (1) until it is aligned with the hole position of the arm support and the mower housing. • To secure the lower handle (1) in place, lock the lower screw (3). •...
-
Page 10: Installing Side Discharge Chute
• The mulching plug must be re-installed when the grass catcher bag is removed. NOTE: When mulching, do not install either the side discharge deflector or the grass catcher bag. INSTALLING SIDE DISCHARGE CHUTE • Lift the side discharge cover (1). •... - Page 11 USING THE PRODUCT STARTING/STOPPING THE MOWER TO START THE MOTOR: • Open the battery door. • Insert the battery. • Press and hold the safety lock-out button (1). • Pull the bail lever (2) upward to the handle to start the mower and release the button. TO STOP THE MOTOR: •...
-
Page 12: Cutting Height Adjustment
CUTTING HEIGHT ADJUSTMENT When shipped, the wheels on the mower are set to a low-cutting position. Before using the mower for the first time, raise the cutting position to the height best suited for your lawn. The average lawn should be between 1”to 2” (2.5 to 5 cm) during cool months and between 2”and 3”... -
Page 13: Mowing Tips
MOWING TIPS NOTE: A sharp blade will greatly enhance the performance of the mower, especially when cutting high grass. Be sure to check the blade and to sharpen it at least once per year, as described in the Maintenance section. •... -
Page 14: Care And Maintenance
• Lift the grass catcher bag by its handle to remove from mower. • Empty grass clippings. • Lift the rear discharge cover and reinstall the grass catcher bag as described earlier in this manual. CARE AND MAINTENANCE REPLACING THE CUTTING BLADE WARNING Always protect your hands by wearing heavy gloves and/or wrapping the cutting edges with rags or other materials when performing any maintenance on the blades. -
Page 15: Cleaning The Mower
CLEANING THE MOWER WARNING In order to reduce the risk of electric shock, do not expose the mower to water. The underside of the mower deck should be cleaned after each use, because grass clippings, leaves, dirt, and other debris will accumulate, which will cause rust and corrosion. - Page 16 Always remove battery when servicing or transporting the mower. PROBLEM POSSIBLE CAUSE SOLUTION Charge the battery. The battery is not charged. Replace the switch The switch is defective. Remove battery; check under deck The mower does -not for jams. Grass jammed between the deck and blade. start.
- Page 17 The manufacturer warrants the product against defects in materials and workmanship for a period of 2 years from the date of purchase to the original purchaser. The guarantee applies when the product is used as a home tool. The warranty does not extend for failures due to normal wear and tear. The manufacturer agrees to replace the spare parts that are classified as defective by a designated distributor.
- Page 18 In order to get help about your lawn mower we invite you to go through this link or to call us by phone +33 (0)8.20.20.22.68: https://services.swap-europe.com/contact You need to create a "ticket" via their platform. • Login or create your account •...
-
Page 19: Transporting Lithium Batteries
TRANSPORTING LITHIUM BATTERIES Transport the battery in accordance with local and national provisions and regulations. Follow all special requirements on packaging and labeling when transporting batteries by a third party. Ensure that no batteries can come in contact with other batteries or conductive materials while in transport by protecting exposed connectors with insulating, non-conductive caps or tape. - Page 20 ZI, 32 rue Aristide Bergès – 31270 Cugnaux - France Tel: +33 (0)5.34.502.502 Fax: +33 (0)5.34.502.503 Declares that the machines: CORDLESS LAWN MOWER Model: EZ40VTDE46N Serial No.: have been designed in compliance with the following standards: EN 60335-1:2012+A11+A13, EN 60335-2-77:2010, EN 62233:2008...
Need help?
Do you have a question about the EZ40VTDE46N and is the answer not in the manual?
Questions and answers