Table of Contents
Advertisement
Quick Links
Advertisement
Table of Contents

Related Manuals for Inkbird Hiazo HO-SC-8W


Summary of Contents for Inkbird Hiazo HO-SC-8W
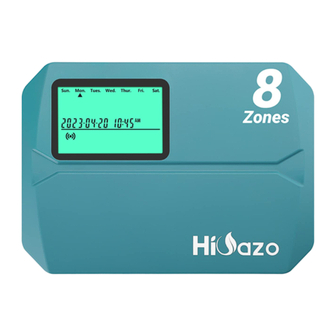
- Page 1 SMART SPRINKLER CONTROLLER HO-SC-8W U S E R M A N U A L...
-
Page 2: What You Will Get
01 WHAT YOU WILL GET Magnetic Faceplate Smart Sprinkler Controller 3x Screws with Anchors Power Adapter (Output 24VAC 1W) - Page 3 Label Sticker Threaded Wiring Connectors (5PCS) Flat-head Screwdriver...
-
Page 4: Tools You Will Need
02 TOOLS YOU WILL NEED 2.4GHz Wi-Fi Access Smartphone or Tablet Screwdriver Hammer Electric Drill... -
Page 5: Electrical Specifications
Electrical Specifications USA-AC120V 60Hz AU-AC230~240V 50Hz Adapter Input EU-AC230V 50Hz UK-AC240V 50Hz Adapter Output AC24V 1000mA Controller Input AC24V 1000mA Comptible with AC24V control valve Zone Output(AC24V) Master/Pump Valve AC24V App Installation Requirements iOS or Android compatible device (iOS 12/Android 17 and above) 2.4GHz wireless network signal available at the installation location Connectivity &... -
Page 6: Connection Terminal
03 CONNECTION TERMINAL Common Zone1~8 24VAC – 24VAC + Master Valve S1(Sensor 1) S2(Sensor 2) PWR IN(AC24V Power Input Port)... -
Page 7: Need Help
Id and contact us before returning the product to the store. E-mail: support@inkbird.com 05 INSTALLATION STEPS Step 1:Remove your old controller First, test your old controller to make sure it can work properly. Then use the included label stickers to mark all the lines you have connected. - Page 8 Step 2:Mark Screw Locations ① Please make sure the distance between the device and the power socket is under 6 feet (1.8 meters). 6 FEET ② Use the mounting template to mark the location for installation. Then use the electric drill to drill holes in the marked mounting locations.
-
Page 9: Step 4:Wire Connection
Step3:Install Your New Controller Hang your new controller on the nut. Then secure the controller with two screws at the bottom. Step 4:Wire Connection Attach the labels for the marked wires to your new device. Common Wires Common port is usually marked with C. A common wire can be inserted into any wire hole marked with C. - Page 10 Zone Wires Zone wires correspond to the area to be watered, which should be inserted into the labeled number. Mater Valve The master valve is usually marked with M. If the master valve is required, it should be connected to the M port.
- Page 11 Sensor Wire (optional) 24VAC- You can connect up to 2 rain sensors to the ports marked with S1, S2, and 24VAC-.
-
Page 12: Step 5:Download The App
App is installed. Step 6:Connect to Wi-Fi Open the INKBIRD app and Click “+” on the top right corner to add a device. Then, follow the app instructions to complete the Wi-Fi connection. Note that this controller only supports 2.4GHz Wi-Fi networks. -
Page 13: Troubleshooting Guide
What can you do if the Wi-Fi connection or irrigation facilities are not working? Here are some possible reasons and relative solutions for reference. We hope they are helpful. For any further questions, please feel free to contact us at support@inkbird.com. Wi-Fi Connection Issue (What if the Wi-Fi connection fails?) 1. - Page 14 3. Ensure your smartphone has Bluetooth enabled. With Bluetooth assistance, the controller can connect to your smartphone faster. 4. Ensure the Wi-Fi function on the controller stays in the connection state, and the Wi-Fi icon is flashing fast/slowly. Otherwise, press and hold the button for 2 seconds to reset the Wi-Fi connection status.
-
Page 15: Function Description
07 FUNCTION DESCRIPTION Function Button Press Press to display "ALL", prompting all zones to be executed simultaneously; Press +/- to select the Manual desired zone and press to set the watering duration. Watering Press +/- to adjust the number. Then press start the watering. - Page 16 INKBIRD TECH.C.L. support@inkbird.com Factory address: 6th Floor, Building 713, Pengji Liantang Industrial Area, NO.2 Pengxing Road, Luohu District, Shenzhen, China Office address: Room 1803, Guowei Building, NO.68 Guowei Road, Xianhu Community, Liantang, Luohu District, Shenzhen, China V1.0...
Need help?
Do you have a question about the Hiazo HO-SC-8W and is the answer not in the manual?
Questions and answers