
Related Manuals for SystemAir SYSWALL 21


Summary of Contents for SystemAir SYSWALL 21
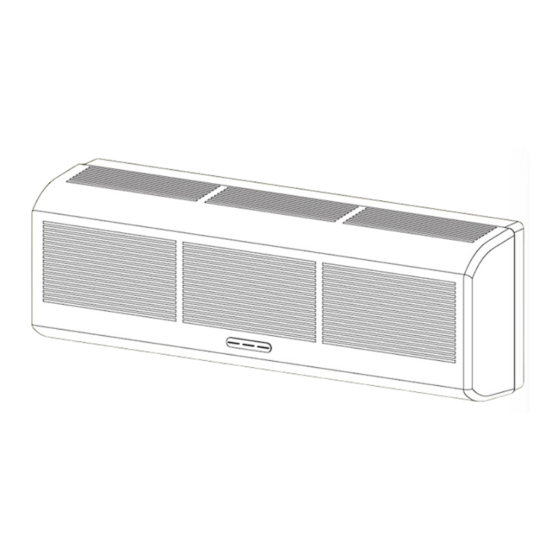
- Page 1 INSTALLATION, OPERATION AND MAINTENANCE MANUAL SYSWALL WALL MOUNTED FAN COIL UNIT 2012-0...
- Page 2 INSTALLATION, OPERATION AND MAINTENANCE MANUAL...
- Page 3 INSTALLATION, OPERATION INSTALLATION, OPERATION Vers. 2012-0 wall mounted fan coil unit AND MAINTENANCE MANUAL AND MAINTENANCE MANUAL INDEX CONTROL PANEL INTRODUCTION REMOTE CONTROL RECOMMENDATIONS REMOTE CONTROL DISPLAY PLACE OF INSTALLATION PREPARATION OF THE FAN COIL SIZE OF WATER AND CONDENSATE DRAIN FITTINGS OPENING AND CLOSING THE FRONT COVER GENERAL DIMENSIONS PREPARING THE REMOTE CONTROL...
-
Page 4: Place Of Installation
INSTALLATION, OPERATION Vers. 2012-0 wall mounted fan coil unit AND MAINTENANCE MANUAL INTRODUCTION PLACE OF INSTALLATION Carefully read and make sure you have understood all the information contained Decide on the position together with the user, as described below. in this guide. Pay particular attention to the instructions for use accompanied by - Install the indoor unit on a solid and vibration-free wall. -
Page 5: General Dimensions
INSTALLATION, OPERATION Vers. 2012-0 wall mounted fan coil unit AND MAINTENANCE MANUAL GENERAL DIMENSIONS Pic. 03 GENERAL TECHNICAL DATA MOD. Fans n° Coils n° Rows n° Pipes n° 16/14 Circuits n° Water content litri 0,58 0,64 1,60 Water connections (Ø female Gas) Ø... - Page 6 INSTALLATION, OPERATION Vers. 2012-0 wall mounted fan coil unit AND MAINTENANCE MANUAL DIMENSIONS OF STANDARD NICHE MOD. 21-22 MOD. 23 1.140 Pic. 04 Anchor the fan coil to the mounting plate. INSTALLATION WITH SIMPLE MOUNTING PLATE (WITHOUT VALVES) The method of installing the wall-mounted water-fi lled fan coil is shown below. Take into account the following: - looking at the unit from the front, the supply pipes go from right to left.
- Page 7 INSTALLATION, OPERATION Vers. 2012-0 wall mounted fan coil unit AND MAINTENANCE MANUAL ATTENTION! INSTALLATION WITH BUILT-IN VALVES For making the wall frame for the unit, please refer to the positions indica- NEW INDOOR UNIT BRACKET WHICH REPLACES ted in the picture no. 11. THE STANDARD BRACKETS SUPPLIED WITH THE UNITS IMPORTANT!
- Page 8 INSTALLATION, OPERATION Vers. 2012-0 wall mounted fan coil unit AND MAINTENANCE MANUAL 6) Connect the hoses to the fan coil supply pipes and the condensate drain 9) Fix the condensate drain hose with silicone (Pic. 19); hose (Pic.16). Pic. 16 7) Connect the valve to the connecting hoses (Pic.17).
-
Page 9: Electrical Connections
INSTALLATION, OPERATION Vers. 2012-0 wall mounted fan coil unit AND MAINTENANCE MANUAL 4) Final result (Pic. 24). INSTALLATION WITH VALVES AND OUTER FRAME Proceed as shown in pic. 21 to assemble the mounting plate. IMPORTANT! It is recommended that wall-mounted water-fi lled fan coils be installed with on-off devices. - Page 10 INSTALLATION, OPERATION Vers. 2012-0 wall mounted fan coil unit AND MAINTENANCE MANUAL ELECTRICAL CONNECTIONS (with IR remote control) - MOD. 21-22 ROOM TEMPERATURE SENSOR WATER TEMPERATURE SENSOR REMOTE CONTROL RECEIVER Cod. ID02-0011-00 LOUVER MOTOR Black Black White IONISER Blue Brown 3 4 5 6 FAN MOTOR 230Vac/50Hz...
- Page 11 INSTALLATION, OPERATION Vers. 2012-0 wall mounted fan coil unit AND MAINTENANCE MANUAL ELECTRICAL CONNECTIONS (with IR remote control) - MOD. 23 Do not connect in parallel in the case of two or more units ON/OFF EXTERNAL TIMER HEAT/COOL VALVE 230 Vac POWER SUPPLY 230 Vac/50 Hz WARNING!
- Page 12 INSTALLATION, OPERATION Vers. 2012-0 wall mounted fan coil unit AND MAINTENANCE MANUAL ELECTRICAL CONNECTIONS (without IR remote control) - MOD. 21-22 IONISER SUPPLY 230Vac/50Hz FAN MOTOR 230Vac/50Hz WARNING! DO NOT CONNECT POWER SUPPLY 60HZ White Yellow Blue Θ > 90°C Black Pic.
- Page 13 INSTALLATION, OPERATION Vers. 2012-0 wall mounted fan coil unit AND MAINTENANCE MANUAL ELECTRICAL CONNECTIONS (without IR remote control) - MOD. 23 FAN MOTOR 230Vac/50Hz WARNING! DO NOT CONNECT POWER SUPPLY 60HZ White Yellow Blue Black Pic. 29...
- Page 14 INSTALLATION, OPERATION Vers. 2012-0 wall mounted fan coil unit AND MAINTENANCE MANUAL Periodically check the condensate drain hose for dust or fl uff, which could cause WATER CONNECTIONS clogging with consequent overfl ow of condensate. Install traps on the drain line INSTALLATION TIPS! to prevent unpleasant odours rising from the drainage system.
-
Page 15: Control Panel
INSTALLATION, OPERATION Vers. 2012-0 wall mounted fan coil unit AND MAINTENANCE MANUAL 8 AIR CLEAN - Press this button to generate the negative ions (for mod. 21 NOTE: and 22 only). If there is a fault in the air or water temperature sensor or an abnormal 9 SPEED - Press this button to select the fan speed (automatic, low, medium, room temperature, the unit remains on and receives commands, but the high). - Page 16 INSTALLATION, OPERATION Vers. 2012-0 wall mounted fan coil unit AND MAINTENANCE MANUAL PREPARATION OF THE FAN COIL Power supply: 1 Ensure that the unit is connected to the electricity supply; 2 Open the front cover; 3 Put the on/off switch to on; 4 Close the front cover.
-
Page 17: Stopping Operation
INSTALLATION, OPERATION Vers. 2012-0 wall mounted fan coil unit AND MAINTENANCE MANUAL HEATING (HEAT) - Use this function to cool the room. - Set a temperature on the thermostat. The cooling function does not work if: a) the thermostat is set with a lower temperature than the room temperature; Display 0,5 second b) the water temperature isn’t higher to 38°C. -
Page 18: Night Function
INSTALLATION, OPERATION Vers. 2012-0 wall mounted fan coil unit AND MAINTENANCE MANUAL b. The louvers swing 35° upwards in the cooling mode and 10° in the heating TIMER mode. To set the required time of operation quickly, use the TIMER button. Press the c. -
Page 19: Troubleshooting
INSTALLATION, OPERATION Vers. 2012-0 wall mounted fan coil unit AND MAINTENANCE MANUAL CARE AND MAINTENANCE TROUBLESHOOTING NOTE CAUTION! - Before cleaning the unit ensure that it is switched off and disconnected from In the event of malfunction (smell of burning or other), stop unit operation imme- the power supply. - Page 20 NOTES...
- Page 22 With the perspective of improvement, and against the continuous action of research and development, the Manufacturer might modify, even without any prior notice, the given technical data.
Need help?
Do you have a question about the SYSWALL 21 and is the answer not in the manual?
Questions and answers