Advertisement
Introduction
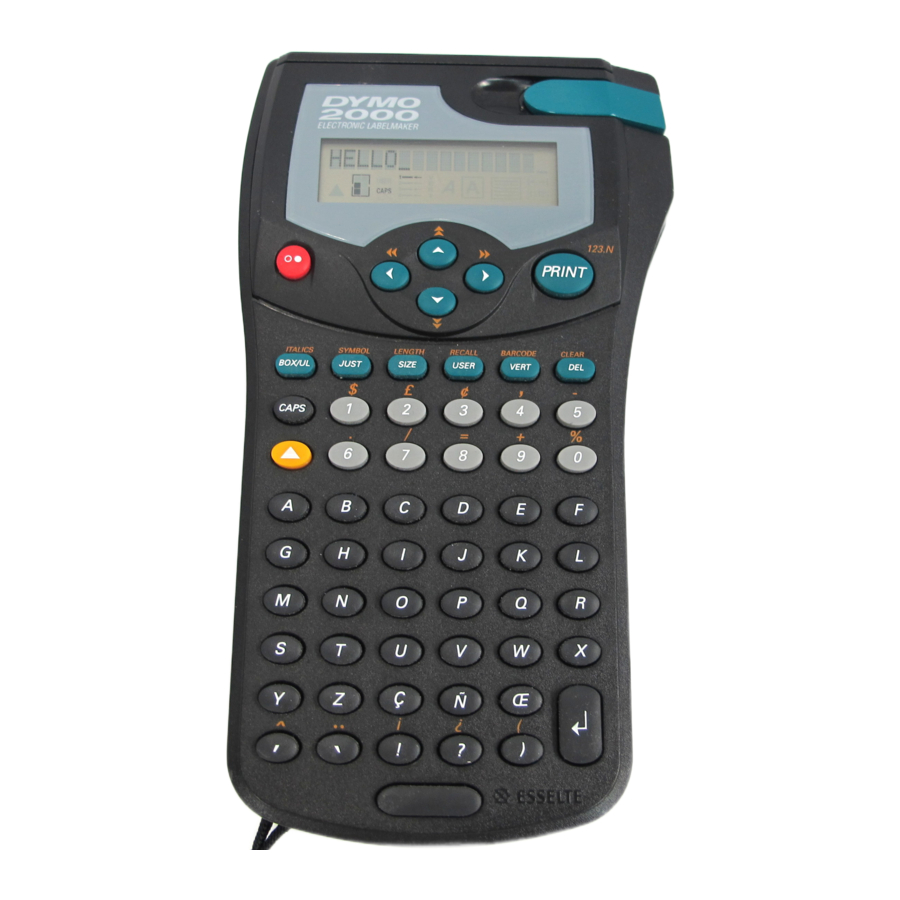
The Dymo 2000 Electronic Labelmaker enables you to create a wide variety of high quality self-adhesive labels of up to 88 characters.
The Labelmaker uses 6mm ( 1 / "), 9mm ( 3 / "), 12mm ( 1 4 8 / 2 ") or 19mm ( 3 / 4 ") wide tape cassettes in a number of label colours. Labels are tab-cut for easy removal from the backing tape.
Text can be printed horizontally or  in a variety of sizes and styles and can be left-justified, right-justified or centred on the label.
Power Supply
BATTERIES

- Undo catch A
![]() then open and lift away battery compartment cover A
then open and lift away battery compartment cover A![]() .
. - Insert five size AA alkaline or re-chargeable nickelcadmium batteries, observing the polarity markings A
![]() , and refit cover.
, and refit cover. - Remove batteries (pull ribbon A
![]() ) if the Labelmaker is to be unused for some time.
) if the Labelmaker is to be unused for some time.
AC ADAPTOR
- Connect the AC adaptor to socket A
![]() . Inserting the adaptor plug disconnects the supply from the batteries.
. Inserting the adaptor plug disconnects the supply from the batteries. - Unplug the AC adaptor from the Labelmaker before disconnecting the mains power to the adaptor, otherwise settings will be lost (see also ON/OFF
![]() ).
).
Changing the cassette


- Slide catch B
![]() as shown to open cassette door B
as shown to open cassette door B![]() .
. - Hold cassette B
![]() as shown and lift it straight up and out.
as shown and lift it straight up and out. - Ensure tape and ribbon B
![]() are taut across mouth of cassette and tape passes between guide posts before installing as shown. If necessary, turn spool B
are taut across mouth of cassette and tape passes between guide posts before installing as shown. If necessary, turn spool B![]() clockwise to tighten ribbon.
clockwise to tighten ribbon. - Check that cassette switch D
![]() is set for the cassette type. A notch in the cassette will fit over the switch when it is set correctly.
is set for the cassette type. A notch in the cassette will fit over the switch when it is set correctly. - Insert cassette with tape and ribbon positioned as shown between print head C
![]() and pinch roller C
and pinch roller C![]() .
. - Push firmly C
![]() until cassette clicks into place. Ensure tape and ribbon are positioned correctly.
until cassette clicks into place. Ensure tape and ribbon are positioned correctly.
 as shown to open cassette door B
 .
. as shown and lift it straight up and out.
 are taut across mouth of cassette and tape passes between guide posts before installing as shown. If necessary, turn spool B
 clockwise to tighten ribbon.
The Display

The display shows:
- Up to 15 characters, plus the cursor, at one time.
- Function indicators – as shown above.
- The display will flash if you press an incorrect key in a function sequence.
Function keys
ON/OFF
Switches the power on and off.
- Switches off automatically after two minutes if no keys are pressed. The last label created will be retained and displayed when next turned on. In addition, any stored settings will be retained.
Note: If the batteries are removed for more than a few seconds, all text and stored settings will be lost. When power is restored, the display will show a flashing cursor (no text) and the settings will be medium height normal width text with  and all other settings off.
CAPITALS 
- Press for all subsequent characters to be in UPPER CASE (CAPITALS), as confirmed by the CAPS indicator in the display.
- Press again to cancel and return to lower case.
SHIFT KEY
- Press and hold down
![]() before pressing an alphabet key to produce an UPPER CASE (CAPS) character.
before pressing an alphabet key to produce an UPPER CASE (CAPS) character. - For dual purpose keys, press and hold
![]() first to produce the legend above the key.
first to produce the legend above the key. - Pressing
![]() while
while ![]() is set will give lower case CAPS characters.
is set will give lower case CAPS characters.
DELETE
- Press to delete the character to the left of the cursor, or to exit certain function key operations.
CLEAR TEXT + 
- Press to clear all the current text and cancel any fixed length setting, but leave the text size and other settings unchanged. Also use to exit or clear certain function key operations.
CURSOR KEYS  ,
,  ,
,  or
or
- Press
![]() or
or ![]() to move the cursor along the text, one character at a time.
to move the cursor along the text, one character at a time.
- Press and hold to scan quickly through the text.
- Press
![]() +
+![]() or
or ![]() to move the cursor to the beginning or end of the line of text.
to move the cursor to the beginning or end of the line of text. - When used in conjunction with certain function keys, use
![]() or
or ![]() to select options.
to select options. - To insert characters into the text, use
![]() or
or ![]() to position the cursor under the character to the right of the insertion point, then type in the characters required.
to position the cursor under the character to the right of the insertion point, then type in the characters required. - Press
![]() or
or ![]() to move the cursor to the start of the previous or next line of a multi-line label.
to move the cursor to the start of the previous or next line of a multi-line label. - Press
![]() +
+![]() or
or![]() to move the cursor to the beginning or end of the label.
to move the cursor to the beginning or end of the label.
 or
or  to move the cursor to the beginning or end of the line of text.
 or
or to move the cursor to the beginning or end of the label.
PRINTING 
- Press
![]() to print the label.
to print the label. - Use cutter lever E
![]() to release and tab-cut the label.
to release and tab-cut the label.
INCREMENTAL PRINTING + 
Prints the label, then increments a number label by 1, ready for the next print command. Note that barcode numbers are not incremented.
SPACE KEY
- Press
![]() to insert a space into the text.
to insert a space into the text.
SYMBOLS + 
- Press to select a symbol character – see SYMBOLS AND SPECIAL CHARACTERS and the symbols table.
TEXT SIZE 
- The display shows the current selection of text print size:
![]()

 | small height medium height |  | small height, extended medium height, extended |
 | large height | | large height, extended |
- Large height is available on 19mm labels only. Medium height is available on all except 6mm labels. Small height is available on all labels.
- Press
![]() repeatedly to select the size symbol required.
repeatedly to select the size symbol required.
JUSTIFY 
Labels are normally printed with the text left-justified. On multi-line labels, press to select left-justified, right-justified or centred text, as shown in the display. See also LABEL LENGTH.
VERTICAL TEXT 
- Rotates the text through 90° so that the label is printed
![]() , as confirmed by the VERT indicator in the display.
, as confirmed by the VERT indicator in the display. - Press again to cancel and return to horizontal text.
Note: Vertical text is not available on multi-line labels.
MULTI-LINE PRINTING
- Press
![]() to start the next line of text on a multi-line label, e.g.
to start the next line of text on a multi-line label, e.g.
This is a two![]() line label in the display will be printed as:
line label in the display will be printed as:
![]()
and the display will line label indicate 2 lines:
![]()


Labels can be created as follows:

The line indicator in the display will confirm the number of lines in the label.
BOXED/UNDERLINED PRINTING 
The display shows the current selection.
- Press
![]() once to put a line box around the label BOX/UL (confirmed by the
once to put a line box around the label BOX/UL (confirmed by the ![]() indicator in the display).
indicator in the display). - Press a second time to underline all the text on the label (confirmed by the A indicator in the display).
- Press a third time to cancel and return to normal text.
ITALIC + 
- Press once to print the label in italic text (confirmed by the A indicator in the display). Press again to cancel and return to normal text.
LABEL LENGTH + 
- Press to display the current label length. The length is normally calculated automatically, according to the length and size of the text on the label. The justify symbol will also be displayed.
- Press
![]() to exit the length function without DEL changing the length, or:
to exit the length function without DEL changing the length, or: - Press
![]() if necessary to select the justification required, as confirmed by the justify symbol in the display.
if necessary to select the justification required, as confirmed by the justify symbol in the display. - Use
![]() or
or![]() to increase (up to 5000mm max.) or decrease the length in 2mm steps. The display will flash if you try to make the label shorter than the text.
to increase (up to 5000mm max.) or decrease the length in 2mm steps. The display will flash if you try to make the label shorter than the text. - If the length displayed is preceded by the > symbol, the length has already been fixed; the label is too short for the text and it will not print. Either press
![]() to increase the length in 2mm steps until the > CLEAR symbol disappears, or press
to increase the length in 2mm steps until the > CLEAR symbol disappears, or press ![]() +
+ ![]() to cancel DEL fixed length; the label is now long enough for the text and can be printed.
to cancel DEL fixed length; the label is now long enough for the text and can be printed. - Press
![]() to fix the length for all subsequent labels, confirmed by the l<->l indicator in the display, or
to fix the length for all subsequent labels, confirmed by the l<->l indicator in the display, or
- press
![]() to fix the new length and print the label.
to fix the new length and print the label. - To cancel the fixed length and restore the automatic length, press
![]() +
+ ![]() followed by
followed by ![]() +
+ ![]() (l<->l will go off) to cancel the fixed length, then press
(l<->l will go off) to cancel the fixed length, then press ![]() to return to the current label.
to return to the current label.
PERSONALISED (USER) LABEL SETTINGS
This function enables you to store your favourite label settings in the memory and to recall them by pressing just a few keys.
To store personalised label settings:
- Make your personal settings, e.g.
Small height, extended width text –![]()
Underlined text – A
Italic text – A - Press
![]() ; the display will stop showing the current label text and will show your personalised settings.
; the display will stop showing the current label text and will show your personalised settings. - Press
![]() to store the settings in the memory (any settings previously stored will be replaced by these settings) and return to the current label, or
to store the settings in the memory (any settings previously stored will be replaced by these settings) and return to the current label, or - Press
![]() to exit and return to the current label (any DEL settings previously stored will be unaffected).
to exit and return to the current label (any DEL settings previously stored will be unaffected).

 ; the display will stop showing the current label text and will show your personalised settings.
To recall personalised settings:
- Press
![]() +
+ ![]() (confirmed by the USER indicator in the display). The display will stop showing the current label text and the settings in the user memory will be recalled and displayed.
(confirmed by the USER indicator in the display). The display will stop showing the current label text and the settings in the user memory will be recalled and displayed. - Press
![]() to exit (the user settings will remain DEL stored in memory) and return to the current label, or
to exit (the user settings will remain DEL stored in memory) and return to the current label, or - Press
![]() to copy these settings into the label. Any previous settings made on the current label will be lost and replaced by the user settings.
to copy these settings into the label. Any previous settings made on the current label will be lost and replaced by the user settings.
 (confirmed by the USER indicator in the display). The display will stop showing the current label text and the settings in the user memory will be recalled and displayed.
Symbols and special characters
INTERNATIONAL CHARACTERS
To add a diacritical (accent) to create an international character, enter the character first, followed immediately by  the diacritical, e.g. press
  followed by to get é.
To add a diacritical to an existing character, use or to place the cursor under the character to be changed, then press the appropriate diacritical key.
SYMBOLS
Press + to show symbols and special characters, some of which are not available direct from the keyboard. The display will show: A-U? or, if any symbols have been stored in the memory: A-U / 1-9? (see also 'PERSONALISED (USER) SYMBOLS').
Each letter selects a line of symbol characters.
Press to cancel, or press a letter key 'A' to 'U' until DEL you find the line of symbols required.
Use or to select a symbol. Press  to place the symbol in the label, or press to place it and print the label.
PERSONALISED (USER) SYMBOLS
You can store up to nine frequently used symbol characters in the memory and recall a personalised symbol by pressing just three keys.

To store a personalised symbol:
- Press
![]() +
+![]() . The display will show: A-U? or, JUST if any symbols have already been stored in the memory: A-U / 1-9?
. The display will show: A-U? or, JUST if any symbols have already been stored in the memory: A-U / 1-9? - Press letter key 'A' to 'U' as required.
- Use
![]() or
or![]() to select a symbol (eg
to select a symbol (eg ![]() ).
). - Press
![]() .The display will change to show the selected symbol and >1-9? (eg
.The display will change to show the selected symbol and >1-9? (eg![]() >1-9?).
>1-9?). - Press a number between 1 and 9. The selected symbol will be stored in the user symbol memory with that number and will replace any symbol previously stored under that number.
 >1-9?).
To recall a personalised symbol:
- Press
![]() +
+ ![]() ; the display will show: A-U/ 1-9?.
; the display will show: A-U/ 1-9?. - Press number key 1-9 as required. The display will show the stored symbol. Note: If you press a number which does not have a stored symbol, the display will flash once. Press another number key if necessary until the symbol required is displayed.
- Press
![]() to place the symbol in the label, or
to place the symbol in the label, or - Press
![]() to cancel and return to the current label.
to cancel and return to the current label.
PRINT CONTRAST — may be adjusted by pressing + followed by space key to display the contrast symbols <- l l l l l +>.
Use or to select lighter or darker print. Press to confirm the setting. The normal contrast level is the mid-setting.
Note: This function enables you to adjust the print quality under extreme temperature conditions.
BARCODES + 
Barcodes can be printed on 19mm wide labels only and can be either full height or mixed with text on one or two lines.
To create a bar code:
- Press
![]() +
+ ![]() to display the barcode type previously selected.
to display the barcode type previously selected. - Press
![]() to cancel and return to the current DEL label, or
to cancel and return to the current DEL label, or - Use
![]() or
or![]() to step through the barcode types available: EAN 8, EAN13, UPC A, UPC E, CODE 39 and CODE 128.
to step through the barcode types available: EAN 8, EAN13, UPC A, UPC E, CODE 39 and CODE 128. - Press
![]() to select the barcode type displayed. The barcode symbol
to select the barcode type displayed. The barcode symbol ![]() will appear in the display.
will appear in the display. - Enter the characters which will become the barcode, eg: 1234567.
- Press
![]() to return to the label.
to return to the label.
Note that the barcode symbol![]() will appear in the display whenever the cursor is positioned under barcode characters.
will appear in the display whenever the cursor is positioned under barcode characters.
 will appear in the display.
- To edit a barcode, press
![]() +
+ ![]() ; the barcode characters only will be displayed and the barcode symbol
; the barcode characters only will be displayed and the barcode symbol ![]() will appear in the display.
will appear in the display. - Press
![]() or
or ![]() +
+ ![]() again to return to the label.
again to return to the label.
On a single line label, a bar code can be mixed with text which is small, medium or large size:
![]()
A two-line label always has small size text when it is mixed with a barcode.
Text entered before pressing![]() followed by
followed by![]() +
+ ![]() , will result in text above the barcode:
, will result in text above the barcode:
![]()
Entering the text after pressing![]() at the end of a barcode will produce text below the barcode:
at the end of a barcode will produce text below the barcode:
![]()
Text can be underlined, eg:
![]()
A box can be added around the complete label:
![]()


Cleaning

- Clean the cutter blade regularly: Remove the cassette, then press and hold down cutter lever E
![]() to expose cutter blade D
to expose cutter blade D![]() , then use a cotton bud and alcohol to clean both sides of the blade. Release cutter lever E
, then use a cotton bud and alcohol to clean both sides of the blade. Release cutter lever E![]() .
. - Check and clean print head face D
![]() regularly using a cotton bud and alcohol ONLY.
regularly using a cotton bud and alcohol ONLY.
Troubleshooting
No display
- check machine is on
- replace discharged batteries
- check AC adaptor.
No printing or poor text
- replace discharged batteries
- check tape cassette installed correctly
- clean the print head
- replace the tape cassette.
Tape jammed
- lift out tape cassette carefully
- remove/release jammed tape
- DO NOT cut the ink ribbon – turn spool B
![]() to tighten
to tighten - cut off excess label tape
- refit/replace the tape cassette.
Poor cutter performance
- clean the cutter blade regularly
Poor tab cuts
- replace tab cutter blade F
![]() – remove the cassette then locate the cutter block and pull hard upwards to remove.
– remove the cassette then locate the cutter block and pull hard upwards to remove.

![]()
the blade is extremely sharp!


No response to print key
- !!!!!!!! in the display indicates a printer jam. Press any key to return to normal display. Open the cassette compartment and free the jam.
![]() flashing in the display indicates discharged batteries. Press any key to return to normal display. Replace the batteries.
flashing in the display indicates discharged batteries. Press any key to return to normal display. Replace the batteries.
 flashing in the display indicates discharged batteries. Press any key to return to normal display. Replace the batteries.
No success?
- Call the customer service telephone number in your country – see the warranty booklet.
In the USA, call 800-645-6051
In Canada, call (905) 670-2222
Warranty Registration
Please complete the warranty registration card and return it to your national customer service address within seven days – see the warranty booklet for details.
Documents / ResourcesDownload manual
Here you can download full pdf version of manual, it may contain additional safety instructions, warranty information, FCC rules, etc.
Advertisement


Need help?
Do you have a question about the 2000 and is the answer not in the manual?
Questions and answers