Table of Contents
Advertisement
Advertisement
Table of Contents

Related Manuals for Vertiv Avocent HMX


Summary of Contents for Vertiv Avocent HMX
- Page 1 Avocent® HMX High Performance KVM Extender System Installer/User Guide...
- Page 2 The products covered by this instruction manual are manufactured and/or sold by Vertiv. This document is the property of Vertiv and contains confidential and proprietary information owned by Vertiv. Any copying, use or disclosure of it without the written permission of Vertiv is strictly prohibited.
-
Page 3: Table Of Contents
Vertiv™ Avocent® HMX High Performance KVM Extender System Installer/User Guide TABLE OF CONTENTS 1 Product Overview 1.1 Features and Benefits 1.1.1 Additional video features 1.1.2 USB support 1.1.3 Transport Layer Security (TLS) 1.1.4 Vertiv™ Avocent® HMX Advanced Manager software 1.2 Extender System Devices 1.2.1 Extender interfaces... - Page 4 Vertiv™ Avocent® HMX High Performance KVM Extender System Installer/User Guide 3.3.1 Configuring receiver video 3.3.2 Configuring receiver USB and security settings 4 Configuring the HMX 6500 Receiver 4.1 Network Connections 4.2 OLED Screen 4.2.1 Front panel indicator 4.2.2 Viewing the configuration page 5 Configuring the HMX 8000 system 5.1 General Information...
-
Page 5: Product Overview
Vertiv™ Avocent® HMX High Performance KVM Extender System Installer/User Guide 1 Product Overview The Vertiv™ Avocent® HMX Advanced High Performance KVM extender system is the next generation of Avocent keyboard, video and mouse (KVM) products. The system offers flexible ways to link receivers, transmitters and systems via standard networks. -
Page 6: Usb Support
Vertiv™ Avocent® HMX High Performance KVM Extender System Installer/User Guide Extended Display Identification Data (EDID) management The EDID is used to provide details to the monitor graphics card so it uses the optimal video resolution. With the HMX extender system, you can use the EDID of the monitor connected to the receiver or use a fixed EDID that is stored on the transmitter. -
Page 7: Device Ports
Vertiv™ Avocent® HMX High Performance KVM Extender System Installer/User Guide 1.2.3 Device ports Transmitters and receivers in the HMX extender system share similar port layouts and functionality. After the general descriptions provided in this section, the following graphics illustrate where these ports and other features are located on the transmitters and receivers. - Page 8 Vertiv™ Avocent® HMX High Performance KVM Extender System Installer/User Guide Figure 1.1 Avocent® HMX Receiver Overview (Dual Head HMX 6200 DVI-D Receiver Shown) Table 1.2 Avocent® HMX 6200 DVI-D Receiver Descriptions ITEM Description HMX 5200/6200 receivers: Management port. This port appears on dual-head models only.
- Page 9 Vertiv™ Avocent® HMX High Performance KVM Extender System Installer/User Guide Figure 1.2 Avocent® HMX6200 DP Receiver Overview Table 1.3 Avocent® HMX 6200 DP Receiver Descriptions ITEM Description Status indicator Reset switch Headphone/headset port USB peripheral device connection, such as keyboard or mouse...
- Page 10 Vertiv™ Avocent® HMX High Performance KVM Extender System Installer/User Guide Figure 1.3 Avocent® HMX6500 DP Receiver Overview Table 1.4 HMX 6500 Receiver Overview Descriptions Item Description Item Description Reset switch RJ45 network port Headphones port Secondary SFP port Microphone port Primary SFP port...
- Page 11 Vertiv™ Avocent® HMX High Performance KVM Extender System Installer/User Guide Figure 1.4 Avocent® HMX 8000 Receiver Overview Table 1.5 HMX 8000 Receiver Overview Descriptions item Description Item description Headphones port OLED status indicator SFP ports Microphone port NOTE: Some models have two RJ45 ports next to the SFP ports...
- Page 12 Vertiv™ Avocent® HMX High Performance KVM Extender System Installer/User Guide Figure 1.5 Avocent® HMX Transmitter Overview (Dual Head HMX 6200 DVI-D Transmitter Shown) Table 1.6 Avocent® HMX 6200 DVI-D Transmitter Descriptions Item description This port appears on dual-head models only. HMX 5200/6200 transmitters: Management port. HMX 6210T transmitters: VNC port.
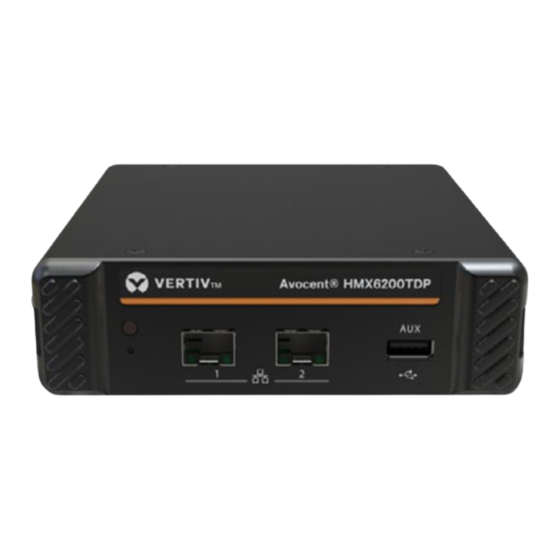
- Page 13 Vertiv™ Avocent® HMX High Performance KVM Extender System Installer/User Guide Figure 1.6 Avocent® HMX 6200 DP Transmitter Overview Table 1.7 Avocent® HMX 6200 DP Transmitter Descriptions Item description Status indicator Reset switch SFP port USB AUX port for use with USB-to-serial converters...
-
Page 14: Device Status Indicators
Vertiv™ Avocent® HMX High Performance KVM Extender System Installer/User Guide Figure 1.7 Avocent® HMX 8000 Transmitter Overview Table 1.8 Avocent® HMX 8000 Transmitter Overview Descriptions item Description Item Description SFP ports NOTE: Some models have two RJ45 ports next to the Audio in port SFP ports... -
Page 15: Hmx 5150T/6150T Transmitter
Vertiv™ Avocent® HMX High Performance KVM Extender System Installer/User Guide Figure 1.8 Device Indicators Table 1.9 Display Indicator Descriptions ITEM Description NET LED: network link status; a flashing LED indicates a network error. For HMX 6210T transmitters, the NET LED is replaced with a VNC LED. - Page 16 Vertiv™ Avocent® HMX High Performance KVM Extender System Installer/User Guide Figure 1.9 HMX 5150T DVI-D Transmitter Table 1.10 HMX 5150T DVI-D Transmitter Description Item Description Item Description Cable tie Ethernet port. mounting slot. Status indicators. Reset button. Red USB connector provides power if the...
-
Page 17: Installation And Configuration
Vertiv™ Avocent® HMX High Performance KVM Extender System Installer/User Guide 2 Installation and Configuration At this point you should have already completed the installation instructions outlined in the Avocent® HMX High Performance KVM Extender System Quick Installation Guide. For important safety information on your system, visit: www.vertiv.com/ComplianceRegulatoryInfo. -
Page 18: System Recommendations
Vertiv™ Avocent® HMX High Performance KVM Extender System Installer/User Guide Figure 2.2 Managed Matrix Configuration Example Table 2.2 Managed Matrix Configuration Example Descriptions ITEM Description HMX Manage server (hosts the HMX Advanced Manager software) 10/100 Mbps link Gigabit Ethernet connection to a switch Administrator computer HMX 6500 receiver... -
Page 19: Factory Reset
Vertiv™ Avocent® HMX High Performance KVM Extender System Installer/User Guide • Ethernet ports that support Gigabit (1000 Mbps) or faster speeds • Internet Group Mulitcast Protocol (IGMP) v2 or v3 support • Jumbo frame that supports up to 9216 bytes •... - Page 20 Vertiv™ Avocent® HMX High Performance KVM Extender System Installer/User Guide Table 2.3 Default Port IP Addresses Port Name Transmitter Default IP Address Receiver Default IP Address Management or VNC port 192.168.1.42 192.168.1.42 System port 169.254.1.33 169.254.1.32 Teaming port 169.254.1.43 169.254.1.42 To configure the transmitter: From a web browser on your local computer, enter the transmitter IP address.
- Page 21 Vertiv™ Avocent® HMX High Performance KVM Extender System Installer/User Guide 16. Click Update Now. To configure the receiver: From a web browser on your local computer, enter the receiver IP address. The default IP address is: http://169.254.1.32. NOTE: If the IP address of the receiver is not known, perform a manual factory reset to restore the default IP address.
-
Page 22: Firmware Upgrade
Vertiv™ Avocent® HMX High Performance KVM Extender System Installer/User Guide d. Click Update Now. 18. Repeat this procedure for each receiver in your HMX extender system. For additional information, see System Configuration Utility page 23. 2.3.1 Firmware upgrade It is recommended that the HMX extender system use the most current firmware version available, and transmitters and receivers are Flash upgradable at any time. -
Page 23: Usb And Power Connections
Vertiv™ Avocent® HMX High Performance KVM Extender System Installer/User Guide 2. Connect the other end of the cable either directly to an HMX receiver or to a Gigabit Ethernet switch, as needed. 3. If connecting via a network, repeat steps 1 and 2 for each of the other units. -
Page 24: Restoring A Firmware Backup
Vertiv™ Avocent® HMX High Performance KVM Extender System Installer/User Guide Table 2.5 Status Indicators indicator status description No Power. Green Video, USB and network links are operating. Orange Operating, but video, USB and/or network link is missing. Consistent - unit has failed; reboot. -
Page 25: Configuring The Hmx 6150T Transmitter
Vertiv™ Avocent® HMX High Performance KVM Extender System Installer/User Guide 4. Open a web browser on your computer and enter the IP address of the unit to be upgraded. 5. From a web browser, select the Firmware Upgrade tab. 6. Select Choose File and locate the downloaded upgrade file. - Page 26 Vertiv™ Avocent® HMX High Performance KVM Extender System Installer/User Guide This page intentionally left blank 2 Installation and Configuration...
-
Page 27: System Configuration Utility
Vertiv™ Avocent® HMX High Performance KVM Extender System Installer/User Guide 3 System Configuration Utility After installing your HMX extender, log in to the System Configuration utility to perform basic configuration of your extenders. Additional general operations and advanced configuration tasks can also be performed through this streamlined user interface. -
Page 28: Enabling Hmx Advanced Manager Server Control
Vertiv™ Avocent® HMX High Performance KVM Extender System Installer/User Guide 3.1.3 Enabling HMX Advanced Manager server control If you wish to have more than one transmitter within your HMX extender system, the HMX Advanced Manager server must be added to the system to manage your matrix configuration. You must also ensure that each extender is set to allow the HMX Advanced Manager server to take control of it. - Page 29 Vertiv™ Avocent® HMX High Performance KVM Extender System Installer/User Guide NOTE: When using an HMX extender system with dual-head extenders linked via two Gigabit links with sufficient bandwidth available, there may be no need to alter the default settings on the Video Configuration page of the System Configuration utility.
-
Page 30: Viewing Video Snapshots And Reports
Vertiv™ Avocent® HMX High Performance KVM Extender System Installer/User Guide 2. Select Update Now to apply your settings. 3.2.2 Viewing video snapshots and reports Snapshots of connected video feeds, as well as reports of detected video resolutions and color depths for your HMX extender system, can be generated from the System Configuration page on the transmitter. -
Page 31: Configuring The Hmx 6210T Transmitter
Vertiv™ Avocent® HMX High Performance KVM Extender System Installer/User Guide 3.2.4 Configuring the HMX 6210T transmitter The HMX 6210T transmitter contains a VNC server that allows you to transmit a low-bandwidth version of the video output across standard networks to authorized remote viewers. The VNC link can either be made over the same network as the main HMX extender output or via a separate one. -
Page 32: Configuring Receiver Video
Vertiv™ Avocent® HMX High Performance KVM Extender System Installer/User Guide 3.3.1 Configuring receiver video If your system is using dual-head extenders, you can verify that the monitor connected to the receiver can support and properly display the chosen video resolution. - Page 33 Vertiv™ Avocent® HMX High Performance KVM Extender System Installer/User Guide 2. Data passed across the system can be USB data or control data (video data is not encrypted). Click the desired radio button next to the Encryption field. 3. If you wish to require your password to open configuration pages, select the Secure web pages with password checkbox.
- Page 34 Vertiv™ Avocent® HMX High Performance KVM Extender System Installer/User Guide This page intentionally left blank 3 System Configuration Utility...
-
Page 35: Configuring The Hmx 6500 Receiver
Vertiv™ Avocent® HMX High Performance KVM Extender System Installer/User Guide 4 Configuring the HMX 6500 Receiver All configuration for an HMX 6500 receiver must be done via the HMX Advanced Manager. The HMX 6500 receiver must be added to the same network as the HMX Advanced Manager. To be added to the network, each HMX 6500 receiver must be in its factory default mode so that it can communicate with the HMX Advanced Manager. -
Page 36: Front Panel Indicator
Vertiv™ Avocent® HMX High Performance KVM Extender System Installer/User Guide Figure 4.2 OLED Screen Examples Table 4.2 OLED Screen Descriptions Screen Description Status Indicates the connection status of the HMX 6500 unit - Searching, Connecting or Connected. Connection Displays the name of the current channel and the peripherals that are connected and operating. -
Page 37: Viewing The Configuration Page
Vertiv™ Avocent® HMX High Performance KVM Extender System Installer/User Guide Table 4.3 Indicator Light Status Descriptions Color Description No power. Solid green All services are running. Solid amber The unit is running, but video, USB or a network link is missing or not connected. - Page 38 Vertiv™ Avocent® HMX High Performance KVM Extender System Installer/User Guide This page intentionally left blank 4 Configuring the HMX 6500 Receiver...
-
Page 39: Configuring The Hmx 8000 System
Vertiv™ Avocent® HMX High Performance KVM Extender System Installer/User Guide 5 Configuring the HMX 8000 system Each HMX 8000 unit hosts an internal set of web pages that contain its configuration details and settings. Using a computer connected to the same network as each HMX 8000 unit, you can configure each unit. You can also access the configuration page by pressing CTRL + ALT + C on the console attached to each HMX 8000 unit. -
Page 40: Ui Settings
Vertiv™ Avocent® HMX High Performance KVM Extender System Installer/User Guide Table 5.1 General Information Descriptions item description Device Type Displays whether the unit is a transmitter (TX) or receiver (RX). Device Name Displays the device name. Device Displays the (optional) description of the device. -
Page 41: Ports
Vertiv™ Avocent® HMX High Performance KVM Extender System Installer/User Guide Each row details one type of connection that has been made. It lists the output port on the receiver and the source port from the connected transmitter. It also displays the name of the connected device. The icon in the Status column displays whether it is connected to the source or not. -
Page 42: Usb Ports
Vertiv™ Avocent® HMX High Performance KVM Extender System Installer/User Guide Table 5.6 Transmitter Audio Ports Descriptions parameter description Enabled Displays whether the audio ports are enabled or disabled. Connected Displays if devices are connected to the audio ports. Quality Mode Displays a measure of the audio quality. -
Page 43: Serial Ports
Vertiv™ Avocent® HMX High Performance KVM Extender System Installer/User Guide Table 5.9 Receiver USB Ports Descriptions Parameter description HID Only When enabled, all ports are limited to supporting Human Interface Devices (HID) only. Examples are keyboards and mice. Enable When enabled, a dedicated portion of the USB bandwidth is reserved for real-time data transfers, which must be sent at a constant Isochronous rate. -
Page 44: Diagnostics And Statistics
Vertiv™ Avocent® HMX High Performance KVM Extender System Installer/User Guide Table 5.11 Network Descriptions parameter description Socket Displays each operational network socket. Sockets 3 and 4 are determined by the SFP modules. MAC Address Displays the unique, fixed hardware identification number for each port. -
Page 45: Network Statistics
Vertiv™ Avocent® HMX High Performance KVM Extender System Installer/User Guide Table 5.12 Log Settings Descriptions parameter description Capture Request generation of a diagnostics dump file. Downloaded by the host computer’s browser, this is an encrypted diagnostics file that diagnostics to can be used to diagnose and fix issues. - Page 46 Vertiv™ Avocent® HMX High Performance KVM Extender System Installer/User Guide Table 5.14 Video Port Status Descriptions Parameter Description Port Displays the port sink interface status for each video port. Connected Displays if the device is connected to the video port.
-
Page 47: Video Port Statistics
Vertiv™ Avocent® HMX High Performance KVM Extender System Installer/User Guide Table 5.14 Video Port Status Descriptions (continued) Parameter Description Overlay Enabled Displays if a GFX UI output is supported on the receiver's video port. OSD Enabled Displays if UI and notification banners are active on the receiver's video port. -
Page 48: System
Vertiv™ Avocent® HMX High Performance KVM Extender System Installer/User Guide Table 5.16 Receiver Video Port Statistics Descriptions parameter description Frame Period Displays the latest period measurement between the last two received frames, the inverse of the video frame rate. Packets Received Displays the total number of packets received on the video port. - Page 49 Vertiv™ Avocent® HMX High Performance KVM Extender System Installer/User Guide Table 5.18 Fiber Module Specifications coding distance at Fiber type fiber size fiber type part number 10Gbps suggested print normal applications nomenclature Multimode HMX-MM-10H- 62.5/125 Orange 62.5/125 2-26m (TIA-492AAAA) Multimode...
- Page 50 Vertiv™ Avocent® HMX High Performance KVM Extender System Installer/User Guide This page intentionally left blank 5 Configuring the HMX 8000 system...
-
Page 51: Appendices
Vertiv™ Avocent® HMX High Performance KVM Extender System Installer/User Guide Appendices Appendix A: Technical Specifications ® Table A.1 Avocent HMX 5100 DVI-D Transmitter Technical Specifications Category Value Mechanical Dimensions (D x W x H) 6 inches x 7.92 inches x 1.76 inches Weight (without cables) 2.4 pounds... - Page 52 Vertiv™ Avocent® HMX High Performance KVM Extender System Installer/User Guide Table A.2 Avocent® HMX 5100 DVI-D Receiver Technical Specifications Category Value Mechanical Dimensions (W x D x H) 6 inches x 7.92 inches x 1.76 inches Weight (without cables) 2.4 pounds...
- Page 53 Vertiv™ Avocent® HMX High Performance KVM Extender System Installer/User Guide Table A.3 Avocent® HMX 5200 DVI-D Transmitter Technical Specifications Category Value Mechanical Dimensions (W x D x H) 6 inches x 7.92 inches x 1.76 inches Weight (without cables) 2.4 pounds...
- Page 54 Vertiv™ Avocent® HMX High Performance KVM Extender System Installer/User Guide Table A.4 Avocent® HMX 5200 DVI-D Receiver Technical Specifications Category Value Mechanical Dimensions (W x D x H) 6 inches x 7.92 inches x 1.76 inches Weight (without cables) 2.4 pounds...
- Page 55 Vertiv™ Avocent® HMX High Performance KVM Extender System Installer/User Guide Table A.5 Avocent® HMX 6200 DVI-D Transmitter Technical Specifications Category Value Mechanical Dimensions (W x D x H) 6 inches x 7.92 inches x 1.76 inches Weight (without cables) 2.4 pounds...
- Page 56 Vertiv™ Avocent® HMX High Performance KVM Extender System Installer/User Guide Table A.6 Avocent® HMX 6200 DVI-D Receiver Technical Specifications Category Value Mechanical Dimensions (D x W x H) 6 inches x 7.92 inches x 1.76 inches Weight (without cables) 2.4 pounds...
- Page 57 Vertiv™ Avocent® HMX High Performance KVM Extender System Installer/User Guide Table A.7 Avocent® HMX 6200 DP Transmitter Technical Specifications Category Value Mechanical Dimensions (D x W x H) 5.3 x 5.9 x 1.5 inches Weight (without cables) 1.7 pounds Ports/Connectors...
- Page 58 Vertiv™ Avocent® HMX High Performance KVM Extender System Installer/User Guide Table A.8 Avocent® HMX 6200 DP Receiver Technical Specifications Category Value Mechanical Dimensions (D x W x H) 7.3 x 5.9 x 1.5 inches Weight (without cables) 2.4 pounds Ports/Connectors...
- Page 59 Vertiv™ Avocent® HMX High Performance KVM Extender System Installer/User Guide Table A.9 Avocent® HMX 5150T DVI-D, 5150T DP, 6150T DVI-D and 6150T DP Transmitter Technical Specifications Category Value Mechanical Dimensions (W x D x H) 2.17 in x 1 in x 4.3 in (55 mm x 25 mm x 110 mm) Weight 0.4 lbs (0.2 kgs)
- Page 60 Vertiv™ Avocent® HMX High Performance KVM Extender System Installer/User Guide Table A.10 Avocent® HMX 6210 DVI-D Transmitter Technical Specifications category value Mechanical Dimensions (W x D x H) 6 inches x 7.92 inches x 1.76 inches Weight (without cables) 2.4 pounds...
- Page 61 Vertiv™ Avocent® HMX High Performance KVM Extender System Installer/User Guide Table A.11 Avocent® HMX 6500 Technical Specifications category value Mechanical Dimensions (W x D x H) 8.3 inches by 8.5 inches by 1.6 inches Weight (without cables) 4 pounds Ports/Connectors...
- Page 62 Vertiv™ Avocent® HMX High Performance KVM Extender System Installer/User Guide Table A.12 Avocent® HMX 8000 Transmitter Technical Specifications category value Mechanical Dimensions (W x D x H) 8.3 inches by 8.5 inches by 1.6 inches Weight (without cables) 4 pounds...
- Page 63 Vertiv™ Avocent® HMX High Performance KVM Extender System Installer/User Guide Table A.13 Avocent® HMX 8000 Receiver Technical Specifications category value Mechanical Dimensions (W x D x H) 8.3 inches by 8.5 inches by 1.6 inches Weight (without cables) 4 pounds...
-
Page 64: Appendix B: Pinout Information
Vertiv™ Avocent® HMX High Performance KVM Extender System Installer/User Guide Appendix B: Pinout Information B.1 Connecting device consoles or modems to serial ports RS-232, 9-pin, type D adaptors can be used to connect remote computers or modems to HMX extender serial ports. The following pinout configurations are supported. -
Page 65: Appendix C: On-Screen Display
Vertiv™ Avocent® HMX High Performance KVM Extender System Installer/User Guide Appendix C: On-Screen Display In addition to the System Configuration utility user interface, the HMX extender system incorporates an On-Screen Display (OSD) interface, allowing you to access the transmitter from the local keyboard and mouse. The OSD is displayed on a monitor connected to a receiver and has a list of available targets to which you can connect. - Page 66 Vertiv™ Avocent® HMX High Performance KVM Extender System Installer/User Guide Table C.1 Icon Descriptions Icon Description Favorites Currently showing all channels/presets. Currently showing only favorites. Currently showing only numbered shortcuts. Click to add this channel as a favorite. This channel is a numbered shortcut.
- Page 67 Vertiv™ Avocent® HMX High Performance KVM Extender System Installer/User Guide Table C.1 Icon Descriptions (continued) Icon Description Display the help pages. Exit from the help pages. Refresh the current page. Close the OSD. Connection Buttons View Mode Click to connect to the channel/preset.
- Page 68 Vertiv™ Avocent® HMX High Performance KVM Extender System Installer/User Guide Table C.1 Icon Descriptions (continued) Icon Description View mode You are unable to connect to the channel/preset. Shared mode Exclusive mode Connection mode is not permitted by the administrator (for example, a channel does not allow exclusive Blank icons connections and a user does not have exclusive rights.)
- Page 69 Vertiv™ Avocent® HMX High Performance KVM Extender System Installer/User Guide Table C.2 Key Combination Description Key Combination Description Left Ctrl + Left Alt + C Launch the OSD. Left Ctrl + Left Alt + X Disconnect the current receiver. Left Ctrl + Left Alt + 3 Connect to the channel/preset saved in shortcut slot 3.
-
Page 70: Appendix D: Supported Video Modes
Vertiv™ Avocent® HMX High Performance KVM Extender System Installer/User Guide Appendix D: Supported Video Modes The following video modes are supported and can be automatically configured by the transmitter. If a recognized video mode cannot be found, contact Technical Support for help. -
Page 71: Appendix E: Troubleshooting
Vertiv™ Avocent® HMX High Performance KVM Extender System Installer/User Guide Appendix E: Troubleshooting E.1 Video image of the HMX receiver has horizontal lines across the screen When video is transmitted by extenders, the various lines of each screen are divided up and transmitted as separate data packets. - Page 72 Vertiv™ Avocent® HMX High Performance KVM Extender System Installer/User Guide • Apple Macintosh with NVIDIA graphics uses the Vertiv utility for Mac – contact Technical Support. Apple Mac with ATI graphics: • Enable the anti-dither removal feature. Windows PCs: •...
- Page 73 Vertiv™ Avocent® HMX High Performance KVM Extender System Installer/User Guide You can tell whether portfast is enabled on a switch that is running STP. When you plug the network cable from a working HMX unit into the switch port, check how long it takes for the port indicator to change from orange to green.
- Page 74 Vertiv™ Avocent® HMX High Performance KVM Extender System Installer/User Guide This page intentionally left blank...
- Page 75 Vertiv™ Avocent® HMX High Performance KVM Extender System Installer/User Guide...
- Page 76 Vertiv.com | Vertiv Headquarters, 1050 Dearborn Drive, Columbus, OH, 43085, USA © 2022 Vertiv Group Corp. All rights reserved. Vertiv™ and the Vertiv logo are trademarks or registered trademarks of Vertiv Group Corp. All other names and logos referred to are trade names, trademarks or registered trademarks of their respective owners. While every precaution has been taken to ensure accuracy and completeness here, Vertiv Group Corp.
Need help?
Do you have a question about the Avocent HMX and is the answer not in the manual?
Questions and answers