
Related Manuals for Wilo Control EC-HVAC


Summary of Contents for Wilo Control EC-HVAC
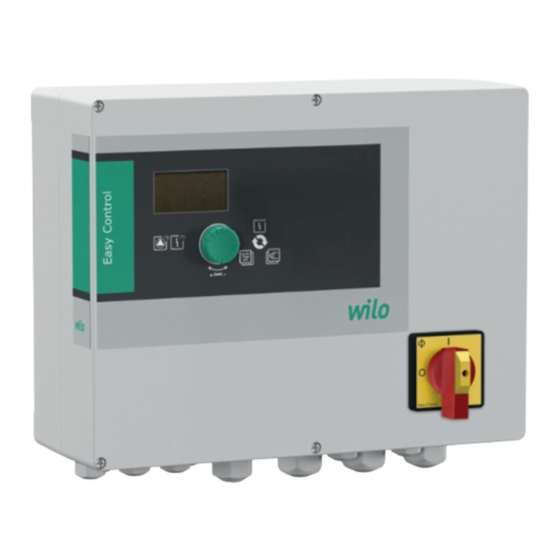
- Page 1 Pioneering for You Wilo-Control EC-HVAC en Installation and operating instructions · 4255848 • Ed.01-SW: 3.02x/2023-03...
-
Page 3: Table Of Contents
Factory settings .............. 19 8 Commissioning ................. 19 Operator responsibilities............ 19 Activating the switchgear.......... 20 Start initial configuration........... 20 Start automatic mode ............ 30 During operation .............. 30 9 Shut-down ................ 32 Personnel qualifications............. 32 Operator responsibilities............ 32 Shut-down................ 32 Removal................ 32 Installation and operating instructions • Wilo-Control EC-HVAC • Ed.01-SW: 3.02x/2023-03... -
Page 4: General Information
All rights reserved. Subject to change Wilo shall reserve the right to change the listed data without notice and shall not be liable for technical inaccuracies and/or omissions. The illustrations used may differ from the ori- ginal and are intended as an example representation of the device. -
Page 5: Personnel Qualifications
• Installation/dismantling work: qualified electrician Knowledge regarding tools and fixation material for various structures • Operation/control: Operating personnel, instructed in the func- tioning of the complete system Installation and operating instructions • Wilo-Control EC-HVAC • Ed.01-SW: 3.02x/2023-03... -
Page 6: Electrical Work
• Only original parts from the manufacturer may be used for maintenance and repairs. Use of parts other than the original parts releases the manufacturer from any liability. Installation and operating instructions • Wilo-Control EC-HVAC • Ed.01-SW: 3.02x/2023-03... -
Page 7: Operator Responsibilities
LEDs. Operation and input of operating parameters is carried out using a rotary knob. Technical data Date of manufacture* See rating plate Mains connection 1~230 V, 3~400 V Mains frequency 50/60 Hz Max. current consumption per pump 12 A Installation and operating instructions • Wilo-Control EC-HVAC • Ed.01-SW: 3.02x/2023-03... -
Page 8: Inputs And Outputs
4 = 400 V Pump activation type: – DOL = direct on line Wall mounting • Switchgear Scope of delivery • Installation and operating instructions • Float switch for dry-running protection Accessories Installation and operating instructions • Wilo-Control EC-HVAC • Ed.01-SW: 3.02x/2023-03... -
Page 9: Transportation And Storage
• Check the cable cross-section and length for the routing type chosen. • Seal unused threaded cable glands. • Ensure that the following ambient conditions are adhered to: Installation and operating instructions • Wilo-Control EC-HVAC • Ed.01-SW: 3.02x/2023-03... -
Page 10: Electrical Connection
• Route connection cable in accordance with the local guidelines. • Do not damage the connection cable during routing or installation. • Earth the switchgear and all electrical consumers. Installation and operating instructions • Wilo-Control EC-HVAC • Ed.01-SW: 3.02x/2023-03... - Page 11 The switchgear has integrated rotating field monitoring. If there is no clockwise rotating field, error code “E006” appears on the display. • Connect the switchgear to a clockwise rotating field. Installation and operating instructions • Wilo-Control EC-HVAC • Ed.01-SW: 3.02x/2023-03...
- Page 12 Fig. 4: Pump connection 6.5.4 Connection, thermal motor monit- CAUTION oring Property damage due to external voltage! An external voltage which is applied destroys the component. • Do not apply external voltage. Installation and operating instructions • Wilo-Control EC-HVAC • Ed.01-SW: 3.02x/2023-03...
- Page 13 Fig. 7: Connection overview symbol 6.5.7 Top-up level connection CAUTION Property damage due to external voltage! An external voltage which is applied destroys the component. • Do not apply external voltage. Installation and operating instructions • Wilo-Control EC-HVAC • Ed.01-SW: 3.02x/2023-03...
- Page 14 Remove the converter bridge and connect the wires to the terminal strip according to the connection diagram. • Use the terminal number shown in the connection overview on the switchgear cover. Fig. 10: Connection overview symbol Installation and operating instructions • Wilo-Control EC-HVAC • Ed.01-SW: 3.02x/2023-03...
- Page 15 • Disconnect the external power supply before any work. • Electrical work must be carried out by a qualified electrician. • Observe local regulations. Installation and operating instructions • Wilo-Control EC-HVAC • Ed.01-SW: 3.02x/2023-03...
- Page 16 Connect the wires to the terminal strip according to the connection diagram. • Use the terminal number shown in the connection overview on the switchgear cover. Fig. 15: Connection overview symbol Installation and operating instructions • Wilo-Control EC-HVAC • Ed.01-SW: 3.02x/2023-03...
-
Page 17: Operation
NOTICE! To deactivate this function: Menu 5.40! Observe the following points for this function: • Menu 5.41: Pump kick permitted in “Extern OFF” Start test run when the pumps are switched off using “Extern OFF”? Installation and operating instructions • Wilo-Control EC-HVAC • Ed.01-SW: 3.02x/2023-03... -
Page 18: Menu Control
▶ The other functions are shown. The main screen appears at the end. Quick access to “Easy Actions” The following functions can be called up using the Easy Actions menu: Installation and operating instructions • Wilo-Control EC-HVAC • Ed.01-SW: 3.02x/2023-03... -
Page 19: Factory Settings
• The switchgear is properly fused and earthed. • Safety devices and precautions (incl. emergency off) for the entire system are switched on and have been checked for problem-free operation. Installation and operating instructions • Wilo-Control EC-HVAC • Ed.01-SW: 3.02x/2023-03... -
Page 20: Activating The Switchgear
– The standby symbol appears in the display. ▶ The switchgear is ready for operation. Start the initial configuration or automatic mode. Start initial configuration Set the following parameters during initial configuration: • Enable parameter input. Installation and operating instructions • Wilo-Control EC-HVAC • Ed.01-SW: 3.02x/2023-03... - Page 21 Turn the operating button until the end of menu 7 appears. Press the operating button. ⇒ Back to the main menu level. ▶ Start initial configuration. Fig. 19: Enable parameter input Installation and operating instructions • Wilo-Control EC-HVAC • Ed.01-SW: 3.02x/2023-03...
- Page 22 The system pressure rises above the set threshold. • The delay time for overpressure and underpressure detec- tion has expired (menu 5.74). NOTICE! The value must be greater than the deactivation threshold in menu 1.07! Installation and operating instructions • Wilo-Control EC-HVAC • Ed.01-SW: 3.02x/2023-03...
- Page 23 = pump kick activated if Extern OFF is active. Menu no. 5.42 Software version: All Description “Pump kick interval” Value range 1 … 336 h Factory setting 24 h Explanation Time after which a pump kick takes place. Fig. 27: Menu 5.42 Installation and operating instructions • Wilo-Control EC-HVAC • Ed.01-SW: 3.02x/2023-03...
- Page 24 Software version: All Description Dry-running protection: Deactivation delay Value range 0 … 180 s Factory setting 10 s Explanation Time until the pump are deactivated after reaching the dry run level. Fig. 33: Menu 5.62 Installation and operating instructions • Wilo-Control EC-HVAC • Ed.01-SW: 3.02x/2023-03...
- Page 25 Menu no. 5.80 Software version: All Description Maximum allowed duration for top-up process Value range 10 … 3600 s Factory setting 300 s Fig. 38: Menu 5.80 Installation and operating instructions • Wilo-Control EC-HVAC • Ed.01-SW: 3.02x/2023-03...
- Page 26 In this case, the switchgear works as a Modbus slave. An overview of individual parameters and a description of the data types used are shown in the appendix. Installation and operating instructions • Wilo-Control EC-HVAC • Ed.01-SW: 3.02x/2023-03...
- Page 27 Check direction of rotation of the pumps • Set precise motor current monitoring. Use the following settings to perform the initial configuration: • Switch off the pumps: Set menu 3.02 and 3.03 to “off”. Installation and operating instructions • Wilo-Control EC-HVAC • Ed.01-SW: 3.02x/2023-03...
- Page 28 Indicate the current value of the motor current monitoring Press the operating button for 3 s. ⇒ Menu 1.00 appears. Turn the operating button until menu 4.00 appears. Press the operating button. ⇒ Menu 4.01 appears. Installation and operating instructions • Wilo-Control EC-HVAC • Ed.01-SW: 3.02x/2023-03...
- Page 29 Check direction of rotation. ⇒ Incorrect direction of rotation: Exchange two phases on the pump connection. ▶ Direction of rotation checked and corrected as necessary. The initial configuration is complete. Installation and operating instructions • Wilo-Control EC-HVAC • Ed.01-SW: 3.02x/2023-03...
-
Page 30: Start Automatic Mode
Furthermore, the following information is available via menu 4: Press the operating button for 3 s. ⇒ Menu 1.00 appears. Turn the operating button until menu 4 appears. Press the operating button. ▶ Menu 4.xx appears. Installation and operating instructions • Wilo-Control EC-HVAC • Ed.01-SW: 3.02x/2023-03... - Page 31 Display of the total opening time of the top-up valve. The time is stated in minutes (min), hours (h) or days (d) depending on the unit. Display of the switching cycles of the top-up valve Installation and operating instructions • Wilo-Control EC-HVAC • Ed.01-SW: 3.02x/2023-03...
-
Page 32: Shut-Down
Disconnect all connection cables and pull them out through the threaded cable con- nection. Close off the ends of the connection cables watertight. Seal threaded cable connections watertight. Support the switchgear (e.g. get a second person to help). Installation and operating instructions • Wilo-Control EC-HVAC • Ed.01-SW: 3.02x/2023-03... -
Page 33: Maintenance
Possible faults are shown by the fault LEDs and alphanumeric codes on the display. • Have the system checked according to the displayed fault. • Have the defective components replaced. Faults are displayed in various ways: • Fault in the control/on the switchgear: Installation and operating instructions • Wilo-Control EC-HVAC • Ed.01-SW: 3.02x/2023-03... -
Page 34: Fault Acknowledgement
Overpressure Pressure in the system is above the Determine and eliminate the cause of excessive set overpressure threshold. pressure. Set the overpressure threshold to suit the situ- ation on site. Installation and operating instructions • Wilo-Control EC-HVAC • Ed.01-SW: 3.02x/2023-03... -
Page 35: Further Steps For Troubleshooting
Observe the locally applicable regulations! Please consult your local municipality, the nearest waste disposal site, or the dealer who sold the product to you for information on proper disposal. See www.wilo‑recycling.com for more information about recycling. Installation and operating instructions • Wilo-Control EC-HVAC • Ed.01-SW: 3.02x/2023-03... -
Page 36: Appendix
0.850 0.628 6 … 12 0.582 0.508 0.458 0.515 6 … 12 0.431 0.377 0.339 0.321 0.257 0.212 0.186 0.167 0.204 0.148 0.122 0.107 0.130 0.094 0.077 0.115 0.083 0.069 Installation and operating instructions • Wilo-Control EC-HVAC • Ed.01-SW: 3.02x/2023-03... -
Page 37: Overview Of The Symbols
The fieldbus system of the unit is activated. 13.3 Overview of terminal diagrams Wilo-Control EC-H1... und EC-H2... terminal diagrams 24V~ 0-10V 4-20mA Terminal Function Output: Individual run signal pump 1 Output: Combined fault message pump 1/2 Installation and operating instructions • Wilo-Control EC-HVAC • Ed.01-SW: 3.02x/2023-03... -
Page 38: Modbus: Data Types
Bit 7 will be 1, since 136 > 128. The remainder will be 136-128=8. Bits 6 to 4 will be 0. Bit 3 will be 1, since 8 = 8. The remainder will be 0. The remaining bits 2 to 0 will thus all be 0. Installation and operating instructions • Wilo-Control EC-HVAC • Ed.01-SW: 3.02x/2023-03... -
Page 39: Modbus: Parameter Overview
6: Pump 2 error 20: Supply 40141 Acknowledge BOOL (140) 40142 Alarm history index UINT16 (141) 40143 Fault number alarm UINT16 (142) history * R = read-only, RW = read- and write-accessible Installation and operating instructions • Wilo-Control EC-HVAC • Ed.01-SW: 3.02x/2023-03... - Page 44 Local contact at www.wilo.com/contact WILO SE Wilopark 1 44263 Dortmund Germany T +49 (0)231 4102-0 T +49 (0)231 4102-7363 wilo@wilo.com Pioneering for You www.wilo.com...
Need help?
Do you have a question about the Control EC-HVAC and is the answer not in the manual?
Questions and answers