
Subscribe to Our Youtube Channel
Related Manuals for Lowenstein Medical Azeer VENTIlogic LS


Summary of Contents for Lowenstein Medical Azeer VENTIlogic LS
- Page 1 Azeer Home Ventilation Azeer Anesthesia LEON MRI Workstation Proven, intuitive, stable. Specially developed for use in a cardiac cathlabs or MRI ƒ For all patient groups...
- Page 2 EN Additional information for hospital staff for devices from serial number 20,000 VENTIlogic LS VENTIlogic plus Ventilation Device...
-
Page 3: Table Of Contents
Contents Overview......4 Operating panel ..... . 4 Menu structure . - Page 4 Introduction Please note This document is not a complete set of instructions for use. It serves as supplementary material for hospital staff. The following information can be found in the patient's instructions for use: • complete overview of all types of device and all accessories •...
-
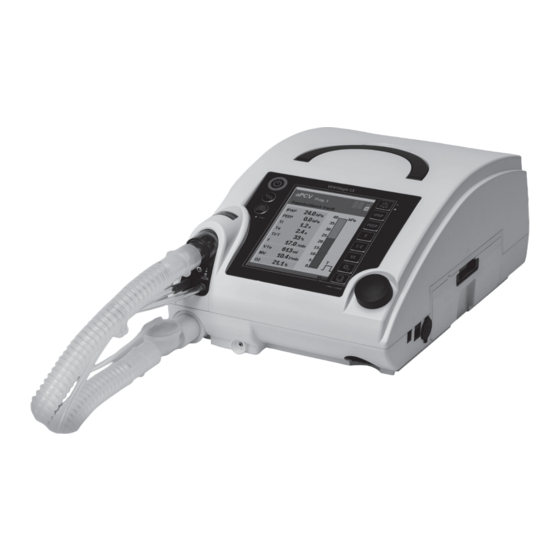
Page 5: Overview
1. Overview This overview describes the most important functions for hospital staff. A complete overview of all device variants and accessories can be found in the patient’s instructions for use. 1.1 Operating panel On/Off key Alarm acknowledgement key with LEDs IPAP Program key IPAP... -
Page 6: Menu Structure
1.2 Menu structure 1.2.1 Valve ventilation Active program Valve system Mode aPCV VCV * aVCV * SIMV MPVp MPVp MPVv Trigger On inspiration Function check Parameters sensitivity On exhalation Trigger lockout Activate Patient mode Trigger lockout patient mode graph Enabled Device Device ventilation... - Page 7 1.2.2 Leakage ventilation Leakage system Active program Monitor P(t); V(t) Mode F(t) CPAP Displays Display TA curve MPVp PV loop* MPVv FV loop* FV loop* Statistics Night display Trigger On inspiration Parameters sensitivity On exhalation Alarm list Actual values Mean values Trigger lockout Device usage LIAM info...
-
Page 8: Mode Summary
1.3 Mode summary Note The ventilation modes available depend on the patient circuit installed (see “2.6 Convert device” on page 16 and “3.5.3 Patient circuit” on page 37). 1.3.1 Valve ventilation Adjustable before Mode activation – IPAP – PEEP • • • –... - Page 9 1.3.2 Leakage ventilation Adjustable Mode before activation – IPAP • • • • – EPAP – IPAP – EPAP • • • • – f – Ti/T (I:E) – IPAP – EPAP • • • • • • – f –...
-
Page 10: Display In Clinical Menu
1.4 Display in Clinical menu Active program Battery charging state of internal battery Alarm symbol Battery charging state of replaceable battery (Option) Padlock symbol Therapy mode Memory card symbol Patient circuit Ventilation parameters Bar graph Alarm limit Respiratory phase change display Oxygen concentration Access to Clinical menu Element... -
Page 11: Symbols Used In The Display
1.5 Symbols used in the display Symbol Significance Status line: Filter change required Servicing required Acoustic signal of alarms muted for 120 seconds All physiological alarms deactivated (exception for VENTIlogic LS: In VCV and aVCV modes, the Pressure and Pressure alarms cannot be deactivated) high Blower off (standby mode) Battery display green (2-5 segments): battery capacity over 25 %... -
Page 12: Abbreviations Used In The Display
1.6 Abbreviations used in the display Symbol Significance Status line: S mode active ST mode active T mode active CPAP CPAP mode active PCV mode active PSV mode active aPCV aPCV mode active VCV mode active (VENTIlogic LS only) aVCV aVCV mode active (VENTIlogic LS only) SIMV SIMV mode active MPVp... -
Page 13: Operation
2. Operation This section describes the most important operating functions for hospital staff. A complete description of the device and its operation can be found in the patient’s instructions for use. Caution! Risk of injury when changing patients. On a change of patient, the settings for the previous patient may lead to the current patient being ventilated incorrectly. -
Page 14: Enable And Lock Clinical Functions
2.2 Enable and lock clinical functions If the device is in Patient mode or if no settings have been made in the Default display in Clinical menu for 15 minutes with autolock activated, Clinical functions Patient mode are locked. To enable the clinical functions again, proceed as follows: 1. -
Page 15: Set Ventilation Parameters
2.3.2 Menu key Use the Menu key to switch from Monitor to Menu (in the display, you will see to the left of the key: Menu). IPAP PEEP Current values during therapy are shown in the Monitor display. In Menu, you can make settings on the device. I : E The menu key has other functions assigned to it as a function of context (e.g. -
Page 16: Activate Patient Mode
2.4.3 Set respiratory frequency To change respiratory frequency, press the f key. Then proceed as described in „2.4.1Set IPAP“. 2.4.4 Set inspiration time To change the proportion of inspiration time in the respiratory cycle, press the I:E key. Then proceed as described in „2.4.1Set IPAP“. -
Page 17: Convert Device
2.6 Convert device The therapy device can be operated with both leakage and valve ventilation. Depending on the patient circuit, various functions and connection options are available for accessories. This is clearly marked in the corresponding sections. 2.6.1 Convert device for operation with leakage ventilation To convert the device from valve ventilation to leakage ventilation, proceed as follows. -
Page 18: Connect Device To Remote Alarm
Additional preparations for double patient circuit with patient valve (VENTIlogic LS only) 1. Turn the device over. Panel Screw 2. Use a hex socket wrench (size 3) to undo the screw on the panel and remove the panel. 3. Insert the exhalation block and tighten the screw hand-tight. 4. - Page 19 Pneumatic nebulizers When pneumatic nebulizers are used, deviations in respiratory volume and oxygen concentration may occur between the values displayed and those actually administered. The ventilator may exhibit modified trigger characteristics depending on the amount of deviation in respiratory volume. In this case, it will be necessary to reset ventilation parameters and alarm settings before and, if appropriate, during administration of the medication.
-
Page 20: Clinical Menu
3. Clinical menu This section describes the Clinical menu and the parameters which can be set. A description of the Patient menu can be found in the instructions for patients. 3.1 Displays Whilst the patient is receiving therapy, if the Clinical menu is enabled you can use the function keys of the therapy device to correct ventilation parameters and have the progress of ventilation displayed in the form of curves. - Page 21 Note If you wish to close the Display selection list without making any changes, press the Menu key. Alterna- tively, you can also move the dial clockwise until the selection bar is on back. Then confirm your selection by pressing the dial. 3.1.2 Statistics In the Clinical menu you can make detailed settings (e.g.: ventilation modes, pressure rise, volume compensation) to optimize the device for...
- Page 22 3.1.4 LIAM info Note A detailed explanation of the LIAM function can be found in the section entitled “3.3.6 LIAM (Lung Insufflation Assist Maneuver)” on page 28. 1. In the Clinical menu, use the dial to select the menu item Displays > LIAM info.
-
Page 23: Set Mode
3.1.6 Battery This menu gives you a summary of the state of any batteries present: • Internal battery: always present and supplies the device with power in an emergency. • Replaceable battery: available as an option and allows mobile use of the device independent of an electricity supply. - Page 24 A window is displayed in which you can set the ventilation parameters for the mode in question. 1. Use the dial to select the parameters to be set and confirm your selection by pressing the dial. 2. Use the dial to change the parameters to be set (turn to the right = increase value, turn to the left = reduce value) and confirm your selection by pressing the dial.
-
Page 25: Parameters
22 1/min 2 1/min SIMV or f backup 3 sec 15 sec (sec) apnea 30 / f 180 / f backup backup (1) The highest value is limited (2) The lowest value is limited 3.2.2 Description of MPV modes (mouthpiece ventilation) Warning! Ventilation modes MPVp and MPVv for mouthpiece ventilation may only be used on patients with a spontaneous... - Page 26 3.3.1 Trigger sensitivity In order to be able to switch from exhalation to inspiration in modes S, ST, PSV, aPCV, aVCV (VENTIlogic LS only), MPVp, MPVv and SIMV to suit the patient’s breathing, the therapy device analyzes the absolute value and course of the flow signal. Flow Maximum flow Level 1...
- Page 27 Note Selection of trigger sensitivity on exhalation may have an effect on the tidal volume of the patient. Note The trigger on exhalation can be switched off in ST mode. If you switch from ST mode to S mode with the trigger on exhalation switched off, Stage 3 is automatically set for the trigger on exhalation.
- Page 28 3.3.3 AirTrap Control AirTrap Control monitors ventilation with regard to possible air-trapping to prevent overinflation of the lung or dynamic hyperinflation. This function is particularly suitable for supplementing therapy in the case of obstructive clinical pictures (e.g. COPD). If breath curves indicate air-trapping and a rise in intrinsic PEEP, frequency is reduced, with inspiration time remaining constant.
- Page 29 3.3.5 Volume compensation Activating volume compensation ensures that the patient is supplied a minimum volume. To this end, the tidal volume determined for the patient is compared to a set minimum volume. The following parameters can be set: • Compensation: switches off volume compensation or specifies one of three stages at which volume compensation is reached: –...
- Page 30 Pressure Duration in min/h (e.g. 20 min) Interval in sec/min/h (e.g. every 5 min) Cycles (e.g. 3 x consecutively) Time Ventilation alternating with LIAM There are several options available for automatically repeating the maneuver. 1. Simple repetition of several consecutive LIAM strokes: no Duration and no Interval need to be set for this.
- Page 31 Selected interval time (in seconds) The permitted value range for the "Interval" parameter depends on the duration set and can be a maximum of 24 hours. The specified number of consecutive LIAM strokes is executed once during each interval. The permitted value range for "Cycles"...
- Page 32 displayed under LIAM Info the values set for Duration, Interval and Cycles. Exhalation then takes place at the set EPAP or PEEP for the time Te LIAM As long as LIAM is activated, the abbreviation LIAM appears in the status line.
-
Page 33: Alarms
3.4 Alarms 3.4.1 Physiological alarms Warning! The alarm will not work if the wrong alarm settings are used in VCV and aVCV modes on VENTIlogic LS! Depending on the settings in VCV or aVCV ventilation modes, the Pressure and Pressure alarms will not be triggered. If high these alarms are not triggered the patient may be put at risk. - Page 34 • VENTIlogic LS only: The Pressure is triggered if the therapy pressure remains below the set limit through the entire inspiration in VCV and aVCV modes. • VENTIlogic LS only: The Pressure alarm is triggered if the therapy high pressure exceeds the set limit during inspiration in VCV and aVCV modes.
- Page 35 The default alarm setting is as shown below. IPAP 50 % low (leakage) 40 ml (in MPVv mode) 700 ml 2000 ml high Frequency 5/min Frequency 45/min high Pressure 2 hPa Pressure 50 hPa high Deactivated 2 low Deactivated 2 high Deactivated Deactivated high...
-
Page 36: Device Configuration
3.5 Device configuration 1. Ensure that clinical functions are enabled. Then press the Menu key to call up the Menu. 2. Use the dial to select the item Device configuration and confirm your selection by pressing the dial. In the Device configuration menu you can make the following basic settings for the device: •... - Page 37 2. Select a program using the dial and confirm your selection by pressing the dial. 3. Once a program has been enabled, you can adopt the start-up settings from another program. Use the dial to select an enable program or "No".
- Page 38 Under the menu item Displays > Overview, you can view the current settings and alarms of the respectively configured programs as well as the actual values (see “Overview” on page 21). 3.5.2 O Caution! If a compressed gas system is used instead of an oxygen concentrator, an overpressure valve (e.g. pressure reducer or flow meter) must be present.
- Page 39 3.5.4 Language 1. Use the dial to select the Language submenu and confirm your selection by pressing the dial. 2. Use the dial to select the desired language and confirm your selection by pressing the dial. 3. The device then automatically switches back to the Device configuration menu.
- Page 40 1. Ensure that the device is on standby. 2. Use the dial to select the Factory settings submenu and confirm your selection by pressing the dial. 3. The message Set factory settings? appears in the display. Use the dial to select YES and confirm your selection by pressing the dial. 4.
- Page 41 A progress bar appears in the display whilst the data on the memory card are being deleted. Once the bar is completely full, the deleting process is over. 4. Usage time is now reset. The message Usage time reset! appears in the display.
-
Page 42: Hygiene Treatment On Change Of
4. Hygiene treatment on change of patient This section describes the hygiene treatment required on a change of patient. A description of the hygiene treatment when there is no change of patient can be found in the patient’s instructions for use. If you are operating the device with bacteria filter, please note the following: •... -
Page 43: Troubleshooting
5. Troubleshooting Caution! If you are unable to remedy faults with the aid of the table, or in the event of unexpected operation or an incident, contact the manufacturer or your authorized specialist dealer. To avoid exacerbating the damage, do not continue operating the device. Fault/fault message Cause of fault Remedy... - Page 44 Fault/fault message Cause of fault Remedy – Function check performed Acknowledge message, switch device off completely Device system incorrectly (see patient’s instructions for use). Change patient implausible – Device defective circuit or correct settings. Perform another function – Incorrect patient check.
-
Page 45: Alarms
6. Alarms Danger! Increased resistance in the patient circuit can cause the alarm to fail! Attaching an accessory can increase the resistance in the patient circuit. Depending on the settings, this could prevent life-saving alarms from being triggered. For example, if the Disconnection alarm fails then the patient is placed at great risk. -
Page 46: Sequence Of Displays When Alarms Are Triggered Simultaneously
Once the acoustic alarm has been acknowledged, the default display ap- pears again. The fault which has not yet been eliminated continues to be displayed in the status line and the alarm LED flashes (or is on) until the fault is eliminated. If the fault is not eliminated within 120 seconds of the acknowledgement, the acoustic alarm (buzzer) sounds again. -
Page 47: Physiological Alarms
6.4 Physiological alarms Display Alarm Cause of fault Remedy Filter dirty Clean/change filters Adjust headgear/head strap so IPAP Patient/ventilator that the patient/ventilator (Leakage) interface leaking interface does not leak, replace Minimum therapy pressure if necessary undershot. Medium priority (pressure- Patient/ventilator Replace patient/ventilator controlled only) interface defective... - Page 48 Display Alarm Cause of fault Remedy Ventilator interface Check ventilator interface and faulty or defective replace if necessary Oxygen supply Check oxygen supply and faulty or correct if necessary inadequate Patient's oxygen saturation Ventilation levels have fallen below the parameter settings minimum limit.
- Page 49 Display Alarm Cause of fault Remedy Filter dirty Clean/change filters Adjust headgear/head strap so Patient/ventilator that the patient/ventilator Pressure interface leaking interface does not leak, replace (VENTIlogic LS Minimum therapy pressure if necessary only) undershot. Medium priority Patient/ventilator Replace patient/ventilator interface defective interface Check settings and correct if Settings implausible...
-
Page 50: Technical Alarms
6.5 Technical alarms Caution! If you are unable to remedy faults with the aid of the table, or in the event of unexpected operation or an incident, contact the manufacturer or your authorized specialist dealer. To avoid exacerbating the damage, do not continue operating the device. - Page 51 Display Alarm Cause of fault Remedy Fault in power supply Have device repaired.Use alternative Change device High priority Device defective ventilation option measurement defective Sensor disconnected, exhausted Check oxygen sensor and replace if Medium priority or defective necessary Check SpO sensor and, if need be, sensor defective or slipped have it changed or attach SpO...
- Page 52 Display Alarm Cause of fault Remedy Check valve control tube for damage, The valve control tube between replace patient circuit if necessary the device and the patient valve is incorrectly connected Connect valve control tube Control pressure Valve control tube and pressure High priority Check tubing measurement tube switched...
-
Page 53: Store Alarms
Display Alarm Cause of fault Remedy Have alternative ventilation option to No power supply hand. Check power cord is securely Low priority Power supply failed connected. If necessary, check the function of the socket using a different device (e.g. a lamp) Blower failure High priority Change device... -
Page 54: Function Check
7. Function check 7.1 Intervals Perform a function check on the device monthly. An exception to this is the oxygen sensor; this needs calibrating daily. We recommend checking battery capacity every time you restart the device. If you find faults during the function check, you may not use the therapy device again until the faults have been eliminated. - Page 55 7.2.1 Check flow measurement and/or flow sensors/pressure sensors (leakage ventilation) Note The function check for flow sensors/pressure sensors can only be performed with the device on standby. 1. Plug the red drying adapter supplied onto the device outlet port. 2. Ensure that the patient circuit set in the device is identical to the patient circuit actually in use.
-
Page 56: Calibrate Oxygen Sensor
7.2.4 Alarms When the On/Off key is pressed, the therapy device performs a self-test of the sensor system. This checks that the alarm system is working. If a fault occurs during the self-test, an error message appears in the main screen (see also “5. -
Page 57: Spo Module
7.3.2 Precautions Take the following precautions for calibration. 1. Block off the oxygen source. 2. Operate the device without an oxygen supply for approx. two minutes to flush out the oxygen remaining in the device. 7.3.3 Perform calibration To calibrate the device, proceed as follows: 1. -
Page 58: Energy Supply
7.5 Energy supply 7.5.1 Power supply Connect the device to the power supply. The power supply is working perfectly if the green power supply LED is permanently on and the standby screen appears in the display. 7.5.2 Internal rechargeable battery and power outage alarm 1. - Page 61 Löwenstein Medical Technology GmbH + Co. KG Kronsaalsweg 40 22525 Hamburg, Germany T: +49 40 54702-0 F: +49 40 54702-461 www.loewensteinmedical.de...
Need help?
Do you have a question about the Azeer VENTIlogic LS and is the answer not in the manual?
Questions and answers