
Related Manuals for Zodiac AquaSphere ASR 105


Summary of Contents for Zodiac AquaSphere ASR 105
- Page 1 Installation and user manual - English Electric cleaner Translation of the original instructions in French According to the product marking H0793200_REVA - 08/2022- EN11--...
- Page 3 WARNINGS • Before handling the appliance, it is vital that you read this installation and user manual, as well as the "Warranties" booklet delivered with the appliance. Failure to do so may result in material damage or serious or fatal injury and will void the warranty.
- Page 4 WARNINGS ASSOCIATED WITH ELECTRICAL APPLIANCES • The power supply to the appliance must be protected by a dedicated 30 mA Residual Current Device (RCD), complying with the standards and regulations in force in the country in which it is installed. •...
-
Page 5: Table Of Contents
CONTENTS 1 Information before using the appliance 1.1. Description 1.2. Technical specifications 1.3. Operating principle 1.4. Pool preparation 2 General Use 2.1. Immersing the cleaner 2.2. Electricity supply connection 2.3. Starting a cleaning cycle 2.4. Removing the cleaner from the water 2.5. -
Page 6: Information Before Using The Appliance
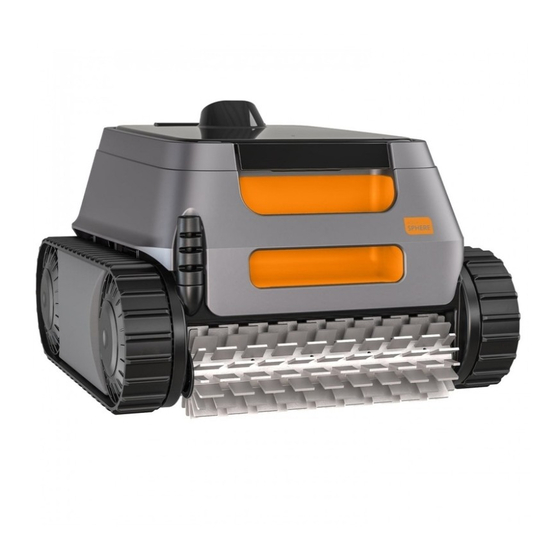
Information before using the appliance 1.1. Description Cleaner + floating cable Control box Single filtration 150µ 1.2. Technical specifications Specification Description Control box power supply voltage 220 - 240 VAC, 50/60Hz, Class II* Cleaner power supply voltage 30 VDC Maximum power input 150 W Cable length 15 m... -
Page 7: Operating Principle
1.3. Operating principle • The cleaner is independent of the filtration system and can therefore operate autonomously. It just simply needs to be connected to the main power supply. • It finds the best route to move around and clean the areas of the pool for which it has been designed (floor, walls, water line). -
Page 8: General Use
General Use 2.1. Immersing the cleaner Roll out the full length of the cable alongside the pool to avoid the cable becoming tangled during immersion. Position yourself halfway along the length of the pool before immersing the cleaner. This will optimise the cleaner's movements and reduce tangling in the cable. -
Page 9: Electricity Supply Connection 7 En
2.2. Electricity supply connection In order to avoid any risk of electrocution, fire or serious injury, please follow the instructions below: • Use of an electrical extension is prohibited when connecting the control box. • Make sure that the socket can be easily accessed at all times and is protected from rain or splashes. -
Page 10: Removing The Cleaner From The Water
2.4. Removing the cleaner from the water • To prevent damaging the equipment, use only the handle to remove the appliance from the pool. • Wait for the cycle to end or switch off the appliance by pressing • Bring the cleaner to the edge of the pool by gently pulling on the floating cable. •... -
Page 11: Maintenance
2.5.3. Store the cleaner and cable - Rinse the cleaner with clear water. - Store all the elements away from sunlight, humidity and bad weather. • Roll up the cable carefully. The cable must be carefully arranged for storage. Once rolled up, the cable can be placed on a wall mount for example. -
Page 12: Cleaning The Impeller
3.3. Cleaning the impeller To avoid serious injury: • Disconnect the cleaner from the power supply. • Wear gloves when maintaining the impeller Open the filter access hatch by lifting the lock. Remove the filter. Insert a screwdriver into the holes and maintain right pressure to loosen flow guide by turning the screwdriver in the anti-clockwise direction (upon first removal, the flow guide is securely tightened). -
Page 13: Replacing The Brush
3.4. Replacing the brush Is the brush worn? • Replace the brush if the wear indicators are similar to example Remove the worn brush • Remove the tabs from the holes inside which they are fastened, then remove the brush. Position the new brush Fit the side without tabs under the brush holder. -
Page 14: Troubleshooting
Troubleshooting • If a problem occurs, before you contact your retailer, please carry out these few simple checks using the following tables. • If the problem persists, contact your retailer. • - Actions to be performed by a qualified technician only. 4.1. -
Page 15: User Alerts
4.2. User alerts The status indicator on the control box flashes to alert the user. Follow the recommended troubleshooting tips below. Solutions LED (Start) • Disconnect and reconnect the cleaner. • Check that the cable is properly connected to the control box. •... - Page 16 Modèle appareil Appliance model Numéro de série Serial number ©2022 Zodiac Pool Systems LLC. All rights reserved. ZODIAC® is a registered trademark of Zodiac International, S.A.S.U., used under license. All other trademarks are the property of their respec- tive owners.
Need help?
Do you have a question about the AquaSphere ASR 105 and is the answer not in the manual?
Questions and answers