Zodiac MX6 Instructions For Installation And Use Manual
Hydraulic cleaner
Hide thumbs
Also See for MX6:
- User manual ,
- Owner's manual (32 pages) ,
- Instructions for installation and use manual (16 pages)

Related Manuals for Zodiac MX6


Summary of Contents for Zodiac MX6
- Page 1 Instructions for installation and use - English Hydraulic cleaner Translation of the original instructions in French More documents on: www.zodiac.com H0354600_REVJ - 2021/07...
- Page 2 WARNINGS • Before handling the appliance, it is vital that you read this installation and user manual, as well as the "Warranties" booklet delivered with the appliance. Failure to do so may result in material damage or serious or fatal injury and will void the warranty.
- Page 3 SPECIFIC FEATURES APPLICABLE TO "Pool cleaners" • The cleaner is designed to operate properly in pool water at a temperature of between 15°C and 35°C. • To avoid possible injury or damage to the cleaner, do not operate the cleaner out of the water.
-
Page 4: Table Of Contents
CONTENTS ❶ Specifications 1.1 I Description 1.2 I Technical specifications and marking ❷ Installation 2.1 I Setup 2.2 I Hose section assembly 2.3 I Hydraulic connections ❸ Use 3.1 I Operating principle 3.2 I Pool preparation 3.3 I Operating 3.4 I Adjusting the water flow 3.5 I Choice of suction mode: small or large debris (according to model) ❹... -
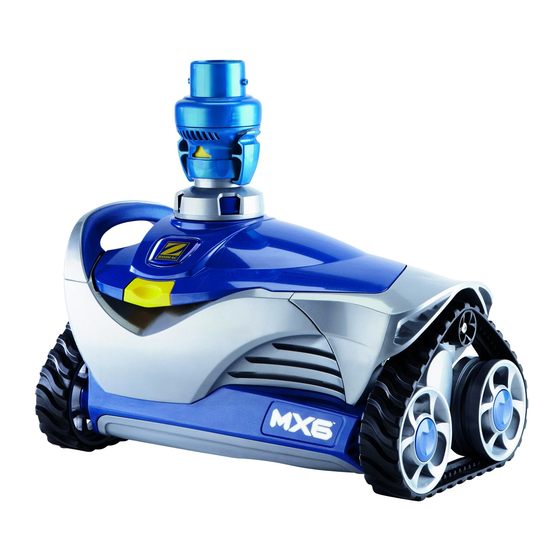
Page 5: ❶ Specifications
❶ Specifications 1.1 I Description x 11 8 PRO Cleaner 1 metre Twist Lock hose float section (x1) 1 metre Twist Lock hose section ( x9) ( x11) ( x11) ( x11) ( x11) Flow regulator valve In-ground valve cuff 45°... -
Page 6: I Technical Specifications And Marking
1.2 I Technical specifications and marking 1.2.1 Technical specifications 8 PRO Cleaner size (L x W x h) 31 x 19 x 22 41 x 19 x 22 cm Package size (L x W x h) 102 x 23 x 37 cm Cleaner weight 2.5 kg 3.2 kg... -
Page 7: ❷ Installation
❷ Installation 2.1 I Setup Hose length necessary : Cleaner : Hose sections : Pool valves : Suction line : Skimmer : Filtering pump : Filter Suction line connection example 2.2 I Hose section assembly 2.2.1 Determine the number of sections you need •... -
Page 8: I Hydraulic Connections
2.3 I Hydraulic connections • Turn off the filtration pump. • Clean the skimmer basket, the filtration pump filter basket and the filter if necessary. 2.3.1 Connection to the suction line : Hose section : Suction line : 45° elbow extended (according to model) : Rotating 45°... - Page 9 2.3.3 "Cyclonic™ Leaf Catcher" connection (according to model) • Connect the Cyclonic Leaf Catcher to the hose assembly which is closest to the suction line or the skimmer (see image • Tilt the Cyclonic Leaf Catcher by following the indications: "PUMP" = filtration pump side / "CLEANER" = cleaner side (see image •...
-
Page 10: ❸ Use En
❸ Use 3.1 I Operating principle The hydraulic cleaners connect to the filtration system (either to a suction line or a skimmer); they use the filtration pump’s energy to move around the pool. The wall climbing capacity varies according to the shape of the pool and the available water flow. -
Page 11: I Adjusting The Water Flow
3.4 I Adjusting the water flow • The filtration pump must be operating. • Check the water flow regularly to ensure the best possible cleaning performance and to make it easier for the cleaner to climb the sides. • The cleaner is equipped with a flow regulator valve which automatically adjusts the water flow through the cleaner. It indicates whether the water flow is ok or excessive: YELLOW = flow ok / RED = flow excessive : Flow regulator valve : Control... -
Page 12: I Choice Of Suction Mode: Small Or Large Debris (According To Model)
speed. Also, ensure the pool surface is not covered in algae as this slippery surface may affect traction. During each coverage pattern cycle, the cleaner travels both forward and backwards, and pivots to the right and left. The turbines underneath the cleaner create down force for climbing and stability as well as directing debris into the cleaner mouth. -
Page 13: ❹ Maintenance
❹ Maintenance • The device must be cleaned regularly using clean or slightly soapy water. Do not use any solvents. • Rinse the device generously using clean water. • Never store the cleaner in direct sunlight. Store the hoses laying flat and not coiled to prevent unwanted hose memory. 4.1 I Cleaning the filtration pump basket •... -
Page 14: I Removing Debris From The Motor
• Press the button on the top to open the lid (see image • MX6 - 630 - 8 - 8 PRO - 9 - 930 : Remove the debris inside (see image ). If necessary, gently push the motor blades forward and backward to reveal any trapped debris and remove it. -
Page 15: I Replacing The Tracks
4.4 I Replacing the tracks • Lay the cleaner on one side. • Starting with one of the wheels, pull the inside of the track to separate it from the wheel (see image Then remove the track from the cleaner. •... -
Page 16: ❺ Troubleshooting
❺ Troubleshooting • Before you contact your reseller, please carry out these few simple checks using the following tables if a problem occurs. • If the problem continues contact your reseller. 5.1 I Device behaviour • Close the main drain line. •... - Page 17 For more information, product registration and customer support: www.zodiac.com ©2021 Zodiac Pool Systems LLC. All rights reserved. ZODIAC® is a registered trademark of Zodiac International, S.A.S.U., used under license. All other trademarks are the property of their respec- tive owners.
Need help?
Do you have a question about the MX6 and is the answer not in the manual?
Questions and answers
I do not own a M6 , but I want to make sure I have the right connection
what size is the outlet to connect the hose on the M6