Table of Contents
Advertisement
Advertisement
Table of Contents

Related Manuals for Optoma L1


Summary of Contents for Optoma L1
- Page 1 Projector ® User manual...
-
Page 2: Table Of Contents
TABLE OF CONTENTS COPYRIGHT ..................5 Declaration Notice for Free and Open Source Software ............5 Free and Open Source Software Notice..................5 Licenses ............................ 6 SAFETY ....................10 Important Safety Instruction...................... 10 Cleaning the Lens........................11 3D Safety Information ....................... 11 Copyright .......................... - Page 3 Compatible resolutions ......................44 Image size and projection distance ..................50 Projector dimensions and ceiling mount installation ..............51 IR remote codes ........................52 Troubleshooting ........................53 Warning indicators ........................54 Specifications ........................... 56 Optoma global offices ....................... 57 English...
-
Page 4: Copyright
COPYRIGHT Copyright (C) 2023 by Optoma Corporation ALL RIGHTS RESERVED. The copyright declaration applies to any part of the product, however if the declaration and Free and Open Source license requirements are in explicit conflict, the FOSS license prevails. Declaration Notice for Free and Open Source Software The software included in this product contains copyrighted software that is originally licensed under the Free and Open Source Software licenses, such as Apache License 2.0, and SIL Open Font License (OFL). -
Page 5: Licenses
Licenses Apache License, Version 2.0, January 2004 http://www.apache.org/licenses/ TERMS AND CONDITIONS FOR USE, REPRODUCTION, AND DISTRIBUTION 1. Definitions. “License” shall mean the terms and conditions for use, reproduction, and distribution as defined by Sections 1 through 9 of this document. “Licensor”... - Page 6 4. Redistribution. You may reproduce and distribute copies of the Work or Derivative Works thereof in any medium, with or without modifications, and in Source or Object form, provided that You meet the following conditions: You must give any other recipients of the Work or Derivative Works a copy of this License; and You must cause any modified files to carry prominent notices stating that You changed the files;...
- Page 7 HOW TO APPLY THE APACHE LICENSE TO YOUR WORK Include a copy of the Apache License, typically in a file called LICENSE, in your work, and consider also including a NOTICE file that references the License. To apply the Apache License to specific files in your work, attach the following boilerplate declaration, replacing the fields enclosed by brackets “[]”...
- Page 8 PERMISSION & CONDITIONS Permission is hereby granted, free of charge, to any person obtaining a copy of the Font Software, to use, study, copy, merge, embed, modify, redistribute, and sell modified and unmodified copies of the Font Software, subject to the following conditions: Neither the Font Software nor any of its individual components, in Original or Modified Versions, may be sold by itself.
-
Page 9: Safety
SAFETY The lightning flash with arrow head within an equilateral triangle is intended to alert the user to the presence of uninsulated "dangerous voltage" within the product's enclosure that may be of sufficient magnitude to constitute a risk of electric shock to persons. The exclamation point within an equilateral triangle is intended to alert the user to the presence of important operating and maintenance (servicing) instructions in the literature accompanying the appliance. -
Page 10: Cleaning The Lens
‡ Do not attempt to service the unit yourself. Opening or removing covers may expose you to dangerous voltages or other hazards. Please call Optoma before you send the unit for repair. ‡ See projector enclosure for safety related markings. -
Page 11: Copyright
Photosensitive Seizure Warning and Other Health Risks ‡ Some viewers may experience an epileptic seizure or stroke when exposed to certain flashing images or lights contained in certain Projector pictures or video games. If you suffer from, or have a family history of epilepsy or strokes, please consult with a medical specialist before using the 3D function. -
Page 12: Trademark Recognition
Trademark Recognition Kensington is a U.S. registered trademark of ACCO Brand Corporation with issued registrations and pending applications in other countries throughout the world. HDMI, the HDMI Logo, and High-Definition Multimedia Interface are trademarks or registered trademarks of HDMI Licensing LLC in the United States and other countries. , DLP Link and the DLP logo are registered trademarks of Texas Instruments and BrilliantColor is a ®... -
Page 13: Declaration Of Conformity For Eu Countries
Declaration of Conformity for EU countries ‡ EMC Directive 2014/30/EC (including amendments) ‡ Low Voltage Directive 2014/35/EC ‡ RED 2014/53/EU (if product has RF function) WEEE Disposal instructions Do not throw this electronic device into the trash when discarding. To minimize pollution and ensure utmost protection of the global environment, please recycle it. -
Page 14: Introduction
Quick Start User Manual Projector Remote control Power lead Documentation Android TV dongle HDMI cable Note: ‡ The remote control, Android TV Dongle, and HDMI cable may vary depending on the region and model. ‡ * For warranty Information, please visit https://www.optoma.com/support/download. English... -
Page 15: Optional Accessories
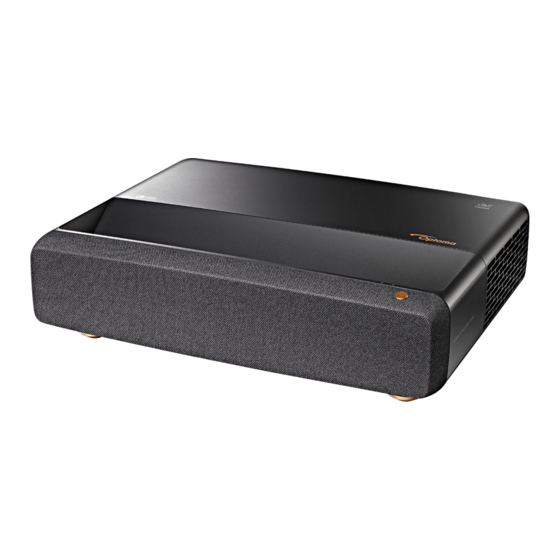
INTRODUCTION Optional accessories Note: Optional accessories vary depending on model, specification and region. Product Overview Minimum Minimum Minimum 300mm 300mm 300mm Note: ‡ Do not block projector intake and exhaust vents. ‡ When operating the projector in an enclosed space, allow at least 30cm (12”) clearance around the intake and exhaust vents. -
Page 16: Connections
INTRODUCTION Connections Item Item HDMI 1 Connector (4K 60Hz) Power Socket HDMI 2 Connector (4K 60Hz) USB Power Out (5V/1.5A) (micro USB connector for Android TV dongle) USB Power OUT (5V/1.5A) HDMI 3 Connector Connector(*) (micro HDMI connector for ATV dongle) S/PDIF Connector (PCM 2-channel) Kensington Lock Port... -
Page 17: Remote Control
INTRODUCTION Remote control Enter Item Item Power On / Off Source HDMI3 Return Four Directional Select Keys Enter Mute 10. Picture Mode Volume - 11. Focus Pattern Menu 12. Volume + Note: ‡ The actual remote control may vary depending on the region. ‡... -
Page 18: Setup And Installation
SETUP AND INSTALLATION Installing the projector Your projector is designed to be installed in one of four possible positions. Your room layout or personal preference will dictate which installation location you select. Take into consideration the size and position of your screen, the location of a suitable power outlet, as well as the location and distance between the projector and the rest of your equipment. - Page 19 SETUP AND INSTALLATION Projector installation notice ‡ 360 degree projection & Portrait mode English...
-
Page 20: Connecting Sources To The Projector
SETUP AND INSTALLATION Connecting sources to the projector Item Item 1. HDMI Cable 5. Audio Out Cable 2. HDMI Dongle 6. Android TV Dongle (refer to page 21) 3. USB Power Cable 7. Power Cord 4. S/PDIF Out Cable Note: ‡... - Page 21 SETUP AND INSTALLATION Installing and using the Android TV dongle To install and start using the Android TV dongle, do the following: Power off the projector. (Refer to page 25) Remove the Android TV dongle compartment door on the bottom of the projector. Align and install the Android TV dongle into its compartment.
-
Page 22: Adjusting The Projector Image
SETUP AND INSTALLATION Adjusting the projector image Image height The projector is equipped with elevator feet for adjusting the image height. Locate the adjustable foot you wish to adjust on the underside of the projector. Rotate the adjustable foot clockwise or counterclockwise to raise or lower the projector. Tilt-Adjustment Feet Tilt-Adjustment Ring Focus... -
Page 23: Remote Setup
SETUP AND INSTALLATION Remote setup Installing / replacing the battery Press the lock button next to the battery compartment cover. Use a coin to turn the battery cover counterclockwise until the cover opens. Install new battery into the compartment. Remove the old battery and install new one (CR2032). Ensure that the side with a “+” is facing up. Put the cover back. - Page 24 SETUP AND INSTALLATION Effective range Infra-Red (IR) remote control sensor is located on top of the projector. Ensure to hold the remote control at an angle within 30° perpendicular to the projector’s IR remote control sensors to function correctly. The distance between the remote control and the sensor should not be longer than 4 meters (~13 feet).
-
Page 25: Using The Projector
USING THE PROJECTOR Powering on / off the projector Enter Enter Powering on Securely connect the power lead and signal/source cable. When connected, the On/Standby LED will turn red. Turn on the projector by pressing the “ ” button on the projector keypad or the remote control. A start up screen will display in approximately 1 second and the On/Standby LED will be flashing white. -
Page 26: Selecting An Input Source
USING THE PROJECTOR Press the “ ” button again to confirm, otherwise the message will disappear after 15 seconds. When you press the “ ” button for the second time, the projector will shut down. The cooling fans will continue to operate for about 1 second. When the On/Standby LED turns solid red, this indicates the projector has entered standby mode. -
Page 27: Menu Navigation And Features
USING THE PROJECTOR Menu navigation and features The projector has multilingual on-screen display menus that allow you to make image adjustments and change a variety of settings. The projector will automatically detect the source. To open the OSD menu, press on the remote control. -
Page 28: Osd Menu Tree
USING THE PROJECTOR OSD Menu tree Note: The OSD menu tree items and features are subject to models and region. Optoma reserve the right to add or remove items to improve product performance without notice. Main Sub Menu Sub Menu 2... - Page 29 USING THE PROJECTOR Main Sub Menu Sub Menu 2 Sub Menu 3 Sub Menu 4 Values Menu Blackboard Light Yellow Light Green Wall Color Light Blue Pink Grey 3D Mode DLP-Link Image 3D Sync Type 3D Sync Auto SBS (Side by Side) 3D Format Top and Bottom Frame Sequential...
- Page 30 USING THE PROJECTOR Main Sub Menu Sub Menu 2 Sub Menu 3 Sub Menu 4 Values Menu 16:9 V-Stretch Full Screen Aspect Ratio 21:9 Display 32:9 Native Auto Bright Light Source Mode Reset Green Grid Magenta Grid Test Pattern White Grid White Front Rear...
- Page 31 USING THE PROJECTOR Main Sub Menu Sub Menu 2 Sub Menu 3 Sub Menu 4 Values Menu Direct Power On Signal Power On Power Settings Auto Power Off 0, 2 ~ 180 (1 min increments) (min.) Sleep Timer 0 ~ 990 (30 min increments) (min.) Security Month...
- Page 32 USING THE PROJECTOR Main Sub Menu Sub Menu 2 Sub Menu 3 Sub Menu 4 Values Menu Volume 0 ~ 10 Mute Auto Standard Audio Mode Audio Movie Game Internal Speaker Audio Output SPDIF Reset Regulatory Serial Number Source, Resolution, Refresh Rate Source Info.
-
Page 33: Image Picture Mode Menu
USING THE PROJECTOR Image menu Image picture mode menu There are several predefined display modes that you can choose from to suit your viewing preference. Each mode has been fine-tuned by our expert colour team to ensure superior colour performance for wide range of content. Vivid: In this mode, the color saturation and brightness are well-balanced. -
Page 34: Image Contrast Menu
USING THE PROJECTOR Image contrast menu The contrast controls the degree of difference between the lightest and darkest parts of the picture. Image sharpness menu Adjust the sharpness of the image. Image gamma menu Set up gamma curve type. After the initial setup and fine tuning is completed, utilize the Gamma Adjustment steps to optimize your image output. -
Page 35: Image Wall Color Menu
USING THE PROJECTOR Image wall color menu Designed to adjust the colors of the projected image when projecting on to a wall without a screen. Each mode has been fine-tuned by our expert colour team to ensure superior color performance. There are several predefined modes that you can choose from to suit the colour of your wall. -
Page 36: Display Focus Menu
USING THE PROJECTOR Display menu Display focus menu Adjust the image focus. For more information, refer to “Focus” on page 22. Display geometric correction menu V Keystone Adjust image distortion vertically and make a squarer image. Vertical keystone is used to correct a keystoned image shape in which the top and bottom are slanted to one of the sides. -
Page 37: Display Gaming Mode Menu
USING THE PROJECTOR Display gaming mode menu Enable this feature to reduce response times (input latency) during gaming. Display advanced gaming menu Smooth Motion Enable this feature to play the content with less motion artifacts, motion blur, and stuttered movement on the screen. Note: Advanced gaming supports Variable Refresh Rate (VRR) from 48Hz to 144Hz @1080p. -
Page 38: Display Light Source Mode Menu
USING THE PROJECTOR The Mapping rule for 4K UHD DMD: 16:9 screen 480i/p 576i/p 720p 1080i/p 2160p Scale to 2880x2160. 16x9 Scale to 3840x2160. 21x9 Scale to 3840x1644. 32x9 Scale to 3840x1080. V-stretch Get the central 3840x1620 image, and then scale it to 3840x2160 for display. Full screen Scale to 5068x2852 (132% Enlarge), then get the central 3840x2160 image for display. -
Page 39: Setup Test Pattern Menu
USING THE PROJECTOR Setup menu Setup test pattern menu Select the test pattern from green grid, magenta grid, white grid, white, or disable this function (off). Setup projection orientation menu Select the preferred projection between front, rear, ceiling-top, and rear-top. Setup language menu Select the multilingual OSD menu between English, German, French, Italian, Spanish, Portuguese, Traditional Chinese, Japanese, Korean, and Russian. -
Page 40: Setup Security Menu
USING THE PROJECTOR Note: The Sleep Timer is reset every time when the projector is powered off. Setup security menu Security Enable this function to prompt for a password before using the projector. ‡ On: Choose “On” to use security verification when the turning on the projector. ‡... -
Page 41: Input Auto Source Menu
USING THE PROJECTOR Input menu Input auto source menu Choose this option to let the projector automatically find an available input source. Input remember last source menu Choose this option to always start the projector with the last input source. Input auto input switch menu When HDMI input signal is detected, the projector will automatically switch the input source. -
Page 42: Audio Volume Menu
USING THE PROJECTOR Audio menu Audio volume menu Adjust the volume level. Audio mute menu Use this option to temporarily turn off the sound. ‡ On: Choose “On” to turn mute on. ‡ Off: Choose “Off” to turn mute off. Note: “Mute”... -
Page 43: Additional Information
ADDITIONAL INFORMATION Compatible resolutions Timing table with smooth motion enabled Modes Resolution V. Frequency [Hz] (1) HDMI - PC Signal 640 x 480 640 x 480 640 x 480 640 x 480 720 x 400 SVGA 800 x 600 SVGA 800 x 600 SVGA 800 x 600... - Page 44 ADDITIONAL INFORMATION Modes Resolution V. Frequency [Hz] 2160p 3840 x 2160 2160p 3840 x 2160 2160p 3840 x 2160 2160p 3840 x 2160 2160p 3840 x 2160 2160p 4096 x 2160 2160p 4096 x 2160 2160p 4096 x 2160 2160p 4096 x 2160 2160p 4096 x 2160...
- Page 45 ADDITIONAL INFORMATION Modes Resolution V. Frequency [Hz] 1080p 1920 x 1080 1080p 1920 x 1080 1080p 1920 x 1080 1080p 1920 x 1080 1080p 1920 x 1080 1080p 1920 x 1080 1080p 3840 x 1080 2160p 3840 x 2160 2160p 3840 x 2160 2160p 3840 x 2160...
- Page 46 ADDITIONAL INFORMATION True 3D video compatibility Modes Resolution V. Frequency [Hz] (4) HDMI – 1.4a 3D Timing 720p50 (Frame Packing) 1280 x 720 720p60 (Frame Packing ) 1280 x 720 1080p (Frame Packing ) 1920 x 1080 720p50 (Top and Bottom ) 1280 x 720 720p60 (Top and Bottom ) 1280 x 720...
- Page 47 ADDITIONAL INFORMATION Extended Display Identification Data (EDID) tables Digital signal with VRR enabled (4K): B0/Established B0/Standard Timing B0/Detail Timing B1/Video Mode B1/Detail Timing Timing 720 x 400 @ 70 (V) Hz x 1280 x 720 @ 60Hz 16:9 3840 x 2160 @ 60Hz 640 x 480p @ 60Hz 4:3 1920 x 1080 @ 144Hz 31.5 (H) Hz...
- Page 48 ADDITIONAL INFORMATION Digital signal for gaming (4K): B0/Established Timing B0/Standard Timing B0/Detail Timing B1/Video Mode B1/Detail Timing 720 x 400 @ 70 (V) Hz x 1280 x 720 @ 60Hz 16:9 3840 x 2160 @ 60Hz 640 x 480p @ 60Hz 4:3 1920 x 1080 @ 144Hz 31.5 (H) Hz 640 x 480 @ 60 (V) Hz x...
-
Page 49: Image Size And Projection Distance
ADDITIONAL INFORMATION Image size and projection distance DF Tolerance: 0~-7% H Offset: 121% ~ 131% Image Size (inch) inch inch inch 75" 0.479 18.867 0.163 6.427 0.042 ~ 0.081 1.639 ~ 3.183 85" 0.538 21.177 0.222 8.736 0.06 ~ 0.113 2.374 ~ 4.458 90"... -
Page 50: Projector Dimensions And Ceiling Mount Installation
ADDITIONAL INFORMATION Projector dimensions and ceiling mount installation To prevent damage to your projector, please use the Optoma ceiling mount. If you wish to use a third party ceiling mount kit, please ensure the screws used to attach a mount to the projector meet the following specifications: ‡... -
Page 51: Ir Remote Codes
ADDITIONAL INFORMATION IR remote codes Enter MTX. Format Data0 Data1 Data2 Data3 Description Power Refer to the “Powering on / off the projector” on / off on page 20. Source Press to select an input signal. HDMI3 Press to open the HDMI3 source. Press to launch the on-screen display Menu... -
Page 52: Troubleshooting
ADDITIONAL INFORMATION Troubleshooting If you experience a problem with your projector, please refer to the following information. If a problem persists, please contact your local reseller or service center. Image problems No image appears on-screen ‡ Ensure all the cables and power connections are correctly and securely connected as described in the "Setup and Installation"... -
Page 53: Warning Indicators
ADDITIONAL INFORMATION Other problems The projector stops responding to all controls ‡ If possible, turn off the projector, then unplug the power cord and wait at least 20 seconds before reconnecting power. Remote control problems If the remote control does not work ‡... - Page 54 ADDITIONAL INFORMATION LED lightning messages On/Standby LED Temp LED Lamp LED Message (Red) (White) (Red) (Red) Standby state Steady light (Input power cord) Flashing Power on (Warming) (0.5 sec off / 0.5 sec on) Power on and Lamp Steady light Flashing (0.5 sec off / 0.5 Power off (Cooling)
-
Page 55: Specifications
ADDITIONAL INFORMATION Specifications Optical Description Technology Texas Instrument DMD, 0.47” 4K UHD DMD x1 with 4-Way XPR actuator Output resolution 4K UHD 3840 x 2160 Graphic up to 3840 x 2160 @60Hz Maximum input Maximum Bandwidth: resolution ‡ HDMI 2.0: 600MHz ‡... -
Page 56: Optoma Global Offices
ADDITIONAL INFORMATION Optoma global offices For service or support, please contact your local office. Japan Optoma Technology, Inc. 888-289-6786 https://www.optoma.com/jp/ 47697 Westinghouse Drive. 510-897-8601 Fremont, Ca 94539 services@optoma.com Taiwan https://www.optoma.com/tw/ Canada Optoma Technology, Inc. 888-289-6786 China 47697 Westinghouse Drive. 510-897-8601... - Page 57 www.optoma.com...
Need help?
Do you have a question about the L1 and is the answer not in the manual?
Questions and answers