Table of Contents
Advertisement
Quick Links
Operator's Manual
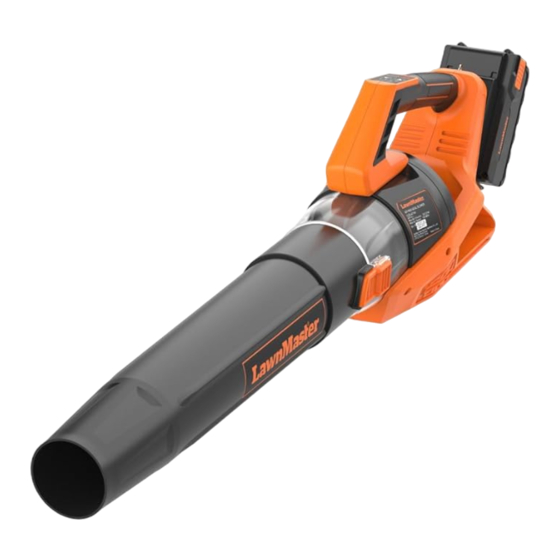
40V MAX* Lithium-ion Cordless Axial Blower CLBL4016A
Save this manual for future reference
* Maximum initial battery workload voltage (measured without a workload) is 40 volts.
Nominal voltage is 36 volts.
Battery Model Number is 40LB2032-C
Charger Model Number is 40LFC17-ETL
Read all safety rules and instructions carefully before operating this tool.
Distributed By: Suzhou Cleva Electric Appliance Co., Ltd.
NO.8 Ting Rong Street 215122 Suzhou - China
Advertisement
Table of Contents

Related Manuals for LawnMaster CLBL4016A


Summary of Contents for LawnMaster CLBL4016A
- Page 1 Operator's Manual 40V MAX* Lithium-ion Cordless Axial Blower CLBL4016A Save this manual for future reference * Maximum initial battery workload voltage (measured without a workload) is 40 volts. Nominal voltage is 36 volts. Battery Model Number is 40LB2032-C Charger Model Number is 40LFC17-ETL Read all safety rules and instructions carefully before operating this tool.
-
Page 2: Table Of Contents
TABLE OF CONTENTS Section Page TABLE OF CONTENTS SPECIFICATIONS IMPORTANT SAFETY INSTRUCTIONS SYMBOLS KNOW YOUR BLOWER 10-11 ASSEMBLY 12-14 BATTERY PACK AND CHARGER 15-17 OPERATION 18-19 MAINTENANCE 20-21 ENVIRONMENTALLY SAFE BATTERY DISPOSAL TROUBLESHOOTING ® LAWNMASTER WARRANTY EXPLODED VIEW PARTS LIST NOTES... -
Page 3: Specifications
SPECIFICATIONS 40V MAX* CORDLESS BLOWER Type Cordless, Battery-powered Max Air Volume 393 CFM Max Air Speed 108 MPH Speed Setting 5 levels (4 levels + Turbo) Weight with Battery 6.37 lbs (2.89 kg) BATTERY PACK Model Number 40LB2032-C Rated Voltage of Battery 40 V Max* D.C Capacity of Battery 2.0 Ah... -
Page 4: Important Safety Instructions
IMPORTANT SAFETY INSTRUCTIONS WARNING READ AND UNDERSTAND ALL INSTRUCTIONS. Failure to follow all instructions listed below may result in electric shock, fire and/or serious personal injury: ■ Know your blower. Read the Operator’s Manual carefully. Learn its applications and limitations, as well as the specific potential hazards related to this blower. - Page 5 IMPORTANT SAFETY INSTRUCTIONS accidents. ■ Disconnect the battery pack from the blower before making any adjustments, changing accessories, or storing blower. Such preventive safety measures reduce the risk of starting the blower accidentally. ■ Keep your work area well lit. Cluttered or dark work areas invite accidents. ■...
- Page 6 BATTERY PACK ® ■ The battery pack is only compatible with LawnMaster 40LFC17-ETL chargers. ■ Recharge only with the charger specified by the manufacturer and listed in this manual. A charger that is suitable for one type of battery pack may create a risk of fire when used with another battery pack.
- Page 7 IMPORTANT SAFETY INSTRUCTIONS If damaged, immediately discontinue use. Replace the charger with the identical unit as listed in the Parts List of this manual. ■ Do not use a charger that has been dropped or received a sharp blow. ■ Do not disassemble charger. Take it to a qualified service center for check or replacement. Incorrect reassembly may result in a risk of electric shock or fire.
-
Page 8: Symbols
SYMBOLS Some of the following symbols may be used on this product. Please study them and learn their meaning. Proper interpretation of these symbols will allow you to operate the product better and safer. SYMBOL NAME DESIGNATION/EXPLANATION Volts Voltage Amperes Current Hertz Frequency (cycles per second) - Page 9 SYMBOLS SYMBOL NAME DESIGNATION/EXPLANATION Do not dispose of battery packs in rivers or immerse Keep Away From Water in water. Do not dispose of battery packs in fire. They will Keep Away From Fire explode or leak and cause injury. Do not expose battery packs to heat in excess of Heat Alert 140°F (60°C).
-
Page 10: Know Your Blower
KNOW YOUR BLOWER... - Page 11 KNOW YOUR BLOWER Components 1. Handle 6. Low Speed Button 11. Battery Pack 2. Shoulder Strap Hook 7. Air Speed Indicator 12. Battery Release Buttons 3. Latch 8. Battery Indicator 13. Battery Charger 4. Blower Tube 9. High Speed Button 5.
-
Page 12: Assembly
ASSEMBLY UNPACKING This product requires assembly. ■ Carefully remove the product and any accessories from the box. Make sure that all items listed in the packing list are included. ■ Inspect the product carefully to make sure no breakage or damage occurred during shipping. ■... - Page 13 ASSEMBLY ATTACHING THE BLOWER TUBE (See Figure 1) 1. Align the widest end of the blower tube with the front opening on the blower as shown in Fig. 1. 2. Slide the blower tube over the opening until it snaps onto the latch and the blower tube is secure in place.
- Page 14 ASSEMBLY Fig. 2 Fig. 3 WARNING Follow these instructions in order to avoid injury and to reduce the risk of electric shock or fire: ■ Replace the battery pack or the charger immediately if the battery case or charger cord is damaged. ■...
-
Page 15: Battery Pack And Charger
BATTERY PACK AND CHARGER BATTERY CHARGING ® 1. Use only with 40V LawnMaster battery chargers. The battery charger supplied is specifically designed for the lithium-ion battery used in this tool. 2. Check the power voltage! Battery chargers operate on 120V. - Page 16 BATTERY PACK AND CHARGER The indicator lights on the charger show the charger status: SYMBOL INDICATOR LIGHTS STATUS Red, continuous. Connected to power supply . Green, blinking. Charging. (flashing frequency: 1Hz) Green, blinking. Battery is overheated. (flashing frequency: 2Hz) Green, continuous. Fully charged.
- Page 17 BATTERY PACK AND CHARGER CHARGING THE BATTERY PACK Fig. 4 WARNING If any part of the charger is missing or damaged, do not operate it! Replace the charger with a new one. Failure to heed this warning could result in possible serious injury. Check the voltage! The voltage must comply with the information on the rating label.
-
Page 18: Operation
OPERATION STARTING / STOPPING THE BLOWER (See Figure 5) 1. Make sure the battery pack is installed properly. 2. To start the blower, press the On/Off Button. The blower starts and air flows from the nozzle. The blower always starts in speed Level 1 by pressing the On/Off Button. 3. - Page 19 2. Gather grass clippings, straw, or leaves into piles. Remove debris from comers, around furniture or objects, and between bricks. ® NOTE: Your LawnMaster blower is designed to blow and clean hard surfaces, such as patios, driveways, decks, garages, and sidewalks.
-
Page 20: Maintenance
MAINTENANCE WARNING When servicing, use only identical replacement parts. Use of any other parts may create a hazard or cause product damage. WARNING Always wear eye protection with side shields marked to comply with ANSI Z87.1, along with hearing protection. Failure to do so could result in objects being thrown into your eyes, resulting in possible serious injury. - Page 21 MAINTENANCE CHARGER MAINTENANCE 1. Keep the charger clean and clear of debris. Do not allow foreign material into the recessed cavity or on the contacts. Wipe with a dry cloth. Do not use solvents, water, or place in wet conditions. 2.
-
Page 22: Environmentally Safe Battery Disposal
ENVIRONMENTALLY SAFE BATTERY DISPOSAL The following toxic and corrosive materials are in the batteries used in this battery pack: lithium-ion, a toxic material. WARNING All toxic materials must be disposed of in a specific manner to prevent contamination of the environment. -
Page 23: Troubleshooting
TROUBLESHOOTING Suspected malfunctions are often due to causes that the user can fix themselves. Before checking the product using this section. In most cases the problem can be solved quickly. WARNING Only perform the steps described within these instructions! All further inspection, maintenance and repair work must be performed by an authorized service center or a similarly qualified specialist if you cannot solve the problem yourself! PROBLEM POSSIBLE CAUSE... -
Page 24: Lawnmaster ® Warranty
® LAWNMASTER WARRANTY... -
Page 25: Exploded View
EXPLODED VIEW... -
Page 26: Parts List
PARTS LIST Key Number Drawing Number Description Quantity Right Handle Assembly Shoulder Strap Hook Controller Assembly Battery Seat Assembly Rear Cover Assembly Motor Assembly Air Duct Assembly Air Duct Cover Assembly 101001109 Blower Tube Left Handle Assembly 101001111 Battery 211063111 Charger Replacement parts highlighted in grey are available for after sales purchase. -
Page 27: Notes
NOTES...
Need help?
Do you have a question about the CLBL4016A and is the answer not in the manual?
Questions and answers