LawnMaster NPTBL31AB Instruction Manual
No pull backpack blower
Hide thumbs
Also See for NPTBL31AB:
- Operator's manual (80 pages) ,
- User manual ,
- Instruction manual (192 pages)
Table of Contents
Advertisement
Quick Links
Instruction Manual / Manuel d'instructions
31cc NO PULL Backpack Blower - NPTBL31AB
Souffleur à dos 31 cc NO PULL - NPTBL31AB
Original Instructions / Instructions d'origine
Read all safety instructions carefully before assembling and operating
WARNING:
this machine. Ensure the machine has been assembled correctly and safely. Keep the
instructions safe and pass them on to any subsequent user so that the information is always
available.
AVERTISSEMENT:
Veuillez lire attentivement l'intégralité des consignes de sécurité avant de
monter et d'utiliser cette machine. Assurez-vous que la machine a été montée correctement
et en toute sécurité. Conservez les consignes en lieu sûr et transmettez-les à tout utilisateur
ultérieur afin que celles-ci soient toujours disponibles.
Advertisement
Table of Contents

Related Manuals for LawnMaster NPTBL31AB


Summary of Contents for LawnMaster NPTBL31AB
- Page 1 Instruction Manual / Manuel d’instructions 31cc NO PULL Backpack Blower - NPTBL31AB Souffleur à dos 31 cc NO PULL - NPTBL31AB Original Instructions / Instructions d’origine Read all safety instructions carefully before assembling and operating WARNING: this machine. Ensure the machine has been assembled correctly and safely. Keep the instructions safe and pass them on to any subsequent user so that the information is always available.
- Page 3 Fig.1 Fig.2 Fig.3 Fig.4 Fig.5 Fig.6 Fig.7 Fig.8 Fig.12 Fig.11 Fig.9 Fig.10 Fig.13 Fig.14 Fig.15 Fig.16 Fig.17 Fig.18 Fig.19 Fig.20...
-
Page 4: Table Of Contents
TABLE OF CONTENTS Section Page Symbols Safety Information 7-18 In the Box Assembly 20-21 Operation 22-27 Maintenance 28-31 Troubleshooting 32-33 Technical Data Recycling and Disposal Warranty... -
Page 5: Symbols
SYMBOLS The following warning symbols appear on the product and throughout this manual and indicate the appropriate safety measures you should take when operating and maintaining the appliance. SYMBOL DESIGNATION/EXPLANATION Caution Read the instruction manual and follow all warnings and safety instructions. The product complies with the applicable European directives and an evaluation method of conformity for these directives was followed. - Page 6 Recycle electrical waste products in an environmentally safe way where facilities exist. START Push to start. NPTBL31AB 31cc no pull backpack blower WARNING To avoid serious personal injury, do not attempt to use this product until you read thoroughly and understand completely the instruction manual.
-
Page 7: Safety Information
SAFETY INFORMATION WARNING Read these instructions carefully before operating this tool. Make sure that you are familiar with the controls and know how to properly operate the machine. By following these instructions, you can reduce the risk of fire, electric shock and personal injury. - Page 8 SAFETY INFORMATION ■ Do not expose the machine to rain. ■ Clear the area of children, bystanders, and pets. At a minimum, keep all children, bystanders, and pets outside a 15 m radius; outside the 15 m zone, there is still a risk of injury from thrown objects.
- Page 9 SAFETY INFORMATION are in place and secure. Make sure attachments are properly installed and securely fastened. Be sure accessories are properly attached and in the position recommended by the manufacturer. ■ Make sure that the blower is in good condition before operation;...
- Page 10 SAFETY INFORMATION encircling the handle to operate and control the blower. ■ The harness must always be worn when working with the blower, with both straps around the shoulders and secured at the chest. In case of emergency, release yourself from the blower by opening the chest belt and waist belt and let the blower fall backwards.
- Page 11 SAFETY INFORMATION ■ To reduce sound levels, operate blowers at the lowest possible engine speed and limit the number of pieces of equipment used at any one time. ■ Always be aware of your surroundings and stay alert for possible hazards of which you may not be aware due to the noise of the product.
- Page 12 SAFETY INFORMATION ■ Never use the blower near fires, fireplaces, fire pits, hot ashes, outdoor cooking grills, etc., which may cause fire to spread. ■ Do not work against the wind, pay close attention to wind direction. ■ Never operate the product with damaged guards or without the guards in place.
- Page 13 SAFETY INFORMATION parts for replacement. CLEVA original spare parts are recognizable by their reference and identification symbol. ■ Before transporting the blower in a vehicle, allow the engine to cool completely and empty the fuel tank. Always secure the blower to avoid movement during transportation to prevent turnover, fuel spillage and damage to the product.
- Page 14 SAFETY INFORMATION ■ Never use the product in environments where there is a risk of explosion. Exhaust gases and fuel fumes are noxious. Fuel fumes can ignite. ■ Never breathe in any fuel fumes, when you are refueling the product. Never fill the tank in enclosed spaces, such as basements or sheds.
- Page 15 SAFETY INFORMATION and site before starting the engine. Always store petrol in a container approved for flammable liquids. ■ Empty the fuel tank and clean the blower before long-term storage. Empty the fuel tank following local regulations on disposal of fuel. Dispose of waste fuel and oil at a local petrol station, local authority centre or where facilities exist.
- Page 16 SAFETY INFORMATION ■ For best results, your battery tool should be charged in a location where the temperature is more than 4°C but less than 40°C. ■ Under extreme usage or temperature conditions, battery leakage may occur. If liquid comes into contact with skin, wash immediately with soap and water.
- Page 17 SAFETY INFORMATION ■ Do not use non-rechargeable batteries! ■ Do not operate the charger with a damaged cord or plug, which could cause shorting and electric shock. If damaged, immediately discontinue use. Replace the charger with the original unit as listed in the Technical Data in this manual. If the power cord for this equipment is damaged, it must be replaced by the manufacturer, a customer service agent of the same or a fully qualified person in order to prevent...
- Page 18 SAFETY INFORMATION Intended Use ■ The blower is only used for clearing or removing leaves, grass, lawn clippings, paper, dust, and other debris off the ground. ■ Do not sweep harmful material. ■ Any other use which is not expressly permitted in this manual may lead to damaging the device, can represent a serious danger for the user and is not authorized.
-
Page 19: In The Box
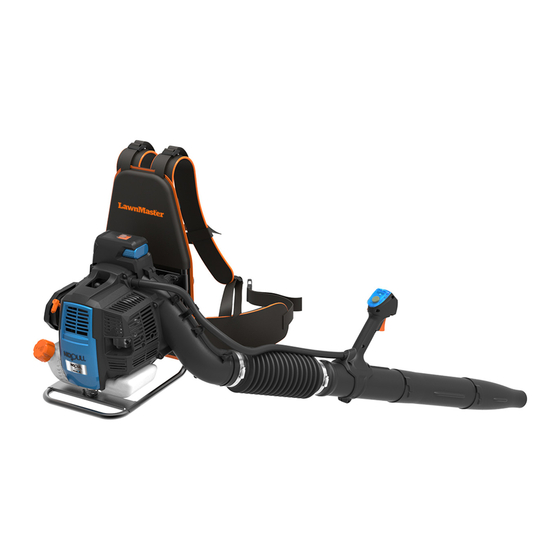
IN THE BOX 1. Shoulder Straps 20. Spark Plug Cap 2. Battery Release Button 21. Backpack Harness 3. Battery Indicator 22. Choke Lever 4. Start Button 23. Air Filter Knob 5. Throttle Lever 24. Air Filter Cover 6. Blower Nozzle 25. -
Page 20: Assembly
ASSEMBLY Assembly Preparation ■ Carefully remove all contents from the product packaging. ■ Ensure you have all the accessories and tool(s) needed for assembly and operation. This also includes suitable personal protective equipment. ■ Do not discard the packing material until you have carefully inspected and satisfactorily operated the product. - Page 21 ASSEMBLY blower nozzle is optional. Assemble it when high air speed is required. Installing and Removing the Battery Pack (See Figs. 9-10) To install the battery pack: ■ Align the battery pack with the battery slot. ■ Insert the battery pack into the battery slot until the battery pack secures into place. Make sure the battery is inserted in the correct direction (Fig.
-
Page 22: Operation
OPERATION Battery Pack Operation ® ■ Use only with 8.4V LawnMaster YLS0042A-E084045 battery charger. The battery charger supplied is specifically designed for the lithium-ion battery used in this tool. ■ Check the power voltage! Battery chargers operate on 100-240V AC. - Page 23 OPERATION • After continuous or repeated charging cycles without interruption, the charger may warm up. This is normal and does not indicate a technical defect of the battery charger. Handling the Fuel DANGER The fuel is VERY flammable. Use extreme care when mixing, storing or handling, or serious personal injury may result.
- Page 24 OPERATION Mixing Tips ■ Always start by filling the supplied fuel container with half of the required amount of petrol. ■ Then add the entire amount of 2-cycle lubricant. Close the container and shake to mix the lubricant with the petrol. ■...
- Page 25 OPERATION Starting and Stopping the Blower (See Figs. 17-21) WARNING Do not allow familiarity with products to make you careless. Remember that a careless fraction of a second is sufficient to inflict serious injury. WARNING Always wear eye protection with side shields, along with head protection. Failure to do so could result in objects being thrown into your eyes and other possible serious injuries.
- Page 26 OPERATION To stop the blower: Release the throttle lever, then press the on/off switch to the stop position “O” until the blower stops (Fig. 21). WARNING Make sure to release the throttle lever and allow the engine to return to idle speed before stopping the blower.
- Page 27 ■ Watch out for children and other bystanders, pets, open windows, or freshly washed cars, and blow debris safely away. ■ Press the on/off switch to the stop position “O” until the blower stops. ® NOTE: Your LawnMaster blower is designed to blow and clean hard surfaces; such as patios, driveways, decks, garages, and paths.
-
Page 28: Maintenance
MAINTENANCE Normal maintenance, replacement or repair of emission control devices and systems may be performed by a qualified service center or qualified individual that uses CLEVA parts. Warranty repairs must be performed by a qualified service center; please contact your service dealer for assistance or Customer Service. - Page 29 MAINTENANCE Battery Maintenance ■ Store the battery pack fully charged. ■ Do not allow the battery pack to become completely discharged. ■ Once the battery pack is fully charged, disconnect the charger from the outlet and remove the battery from the charger. ■...
- Page 30 MAINTENANCE ■ Replace the air filter cover ensuring the air filter is completely covered (Fig. 28). ■ Turn the air filter knob clockwise to secure the air filter cover. Fuel Tank Cap and Tank DANGER Fuel is EXTREMELY flammable. Be very cautious and use care when mixing storing or handling. Failure to follow this instruction may lead to serious personal injury.
- Page 31 MAINTENANCE Storing for 30 days or longer: Drain all the fuel from the tank into a container approved for storing petrol. Press the primer bulb 3 - 4 times to remove the remaining fuel from the carburetor. Run the engine until it stops. Transportation (See Fig.
-
Page 32: Troubleshooting
TROUBLESHOOTING If your blower does not appear to operate properly, follow the instructions below. If this does not solve the problem, please contact your local repair agent. For replacement parts, please visit www. cleva-europe.com. WARNING Before proceeding, shut off the engine, wait for all moving parts to stop, and remove the battery pack. - Page 33 TROUBLESHOOTING Incorrect lubricant/ Empty tank. Use fresh fuel and the correct 2-cycle fuel mixture. lubricant mix (40:1). Clean the air filter. Refer to Cleaning the Air Filter The air filter is dirty. section in this manual. The engine does not reach full speed and The spark plug is Clean or replace the spark plug.
-
Page 34: Technical Data
TECHNICAL DATA PRODUCT SPECIFICATIONS Engine Size 2-Stroke / Full Crank Engine Displacement 30.7cm Engine Power / Speed 0.85kW / 7500min Engine Idle Speed 3000min Max. Engine Torque / Speed 0.9 Nm / 6000min Max Air Speed 270km/h Max Air Volume 220L/s Fuel Tank Capacity 950cm... -
Page 35: Warranty
WARRANTY WARRANTY FOR THIS PRODUCT The manufacturer guarantees this machine, motor included, for 24 months from the date of purchase and on presentation of proof of purchase. Immediately after purchase, it is the customer’s responsibility to fully check the machine and read the instruction manual. - Page 36 Fig.21 Fig.22 Fig.23 Fig.25 Fig.26 Fig.27 Fig.24 0.65 mm Fig.31 Fig.28 Fig.29 Fig.30 Fig.32 Fig.33...
- Page 37 NPTBL31AB Suzhou Cleva Precision Machinery & Technology Co., Ltd. No.18, Huahong Street, Suzhou Industrial Park, 215026 Suzho P.R.China www.cleva-europe.com...
Need help?
Do you have a question about the NPTBL31AB and is the answer not in the manual?
Questions and answers