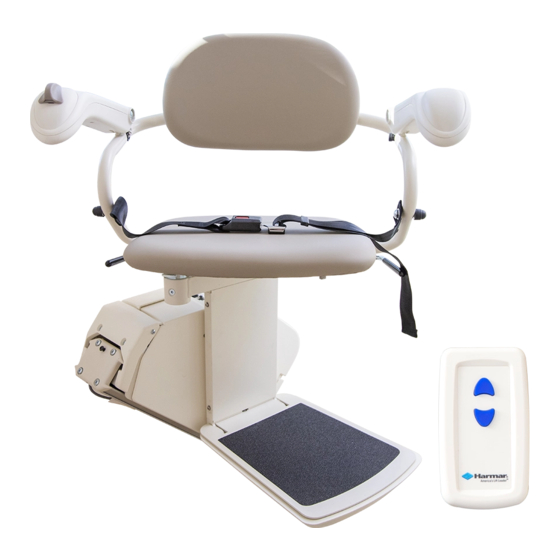
Harmar Mobility PINNACLE SL300 Series Installation & Service Manual
Hide thumbs
Also See for PINNACLE SL300 Series:
- Installation manual (24 pages) ,
- Owner's manual (20 pages) ,
- Owner's manual (24 pages)

Subscribe to Our Youtube Channel
Related Manuals for Harmar Mobility PINNACLE SL300 Series


Summary of Contents for Harmar Mobility PINNACLE SL300 Series
- Page 1 PINNACLE STAIRLIFT SL300 SL300FR INSTALLATION & SERVICE MANUAL 26MAY2022 | 630-00100 J...
-
Page 3: Table Of Contents
TABLE OF CONTENTS SAFETY ....................4 Safety Definition ..........4 Environmental Cautions ........4 INTRODUCTION .................. 5 Device Name: Pinnacle SL300 Series ....5 Read and Understand .......... 5 Warranty ............. 5 Technical Specifications ........5 Code Statement ..........5 PREPARATION .................. -
Page 4: Safety
PINNACLE STAIRLIFT: SECTION 1 SAFETY SECTION 1 SAFETY SAFETY DEFINITIONS ENVIRONMENTAL CONDITIONS This safety alert symbol appears with safety statements. It means attention, The technician shall assess the surrounding become alert, your safety and the conditions and verify that the location is acceptable safety of others are involved! Please before performing installation and/or servicing read and abide by the message that... -
Page 5: Introduction
SECTION 2 INTRODUCTION DEVICE NAME: TECHNICAL SPECIFICATIONS PINNACLE SL300 SERIES Visit harmar.com for specifications on the lift model. Indications of Use: The Harmar Pinnacle SL300 is to assist the transfer of patients or mobility impaired CODE STATEMENT persons up and down levels of a residence. -
Page 6: Preparation
PINNACLE STAIRLIFT: SECTION 3 PREPARATION SECTION 3 PREPARATION Installations may vary to some degree, but below RAIL BOX CONTENT: are the basic tools to have on hand for a Pinnacle stairlift installation. Bottom rail pre-installed with: If you have any questions, concerns or comments, •... -
Page 7: Installation
PINNACLE STAIRLIFT: SECTION 4 INSTALLATION SECTION 4 INSTALLATION DETERMINE OVERALL RAIL 4. If the top landing has restrictions (i.e. a wall or doorway), use the chart to determine the LENGTH length of extension that should be used. See Figures 4-2 and 4-3. NOTE: Use this only if the rail did NOT come pre-cut to Extension length) -
Page 8: Installation Site Electrical Requirements
PINNACLE STAIRLIFT: SECTION 4 INSTALLATION 5. To cut the rail, use a standard chop saw with a NOTE: Use the chair box, or another heavy object, like a 12" blade designed to cut aluminum. toolbox, at the bottom of the rail to prevent it from sliding down the stairs. - Page 9 PINNACLE STAIRLIFT: SECTION 4 INSTALLATION 6. Install two (2) joint fasteners and firmly • For double rails, the first rail bracket tighten with 3/16" Allen wrench. See Figure 4-7. should be tightened in place so when turned over the back of the bracket touches the rear of the first step from the bottom landing.
-
Page 10: Zero Intrusion Installation
PINNACLE STAIRLIFT: SECTION 4 INSTALLATION clearance move the rail and bracket forward. 3. If there is an obstruction within 3.9" of the top Once the clearance is 2", tighten all bracket nose, tall brackets must be used to life the top nuts to hold the brackets in position. -
Page 11: Chassis Installation
PINNACLE STAIRLIFT: SECTION 4 INSTALLATION CHASSIS INSTALLATION 1. Remove chassis from box. 2. Lift the chassis with the manual override hole (on bottom) facing the downhill side of the stairs and gently slide the chassis onto the rail until it makes contact with the plastic rack. Do Installation not let the chassis free fall down the rail. -
Page 12: Final Rail Installation
PINNACLE STAIRLIFT: SECTION 4 INSTALLATION FINAL RAIL INSTALLATION 1. Install the remaining plastic rack pieces in the upper rail. See Figure 4-18. Figure 4-20 4. Remove the charging strips from the rail box. Connect the charging strip connector to the power wire that runs through the center of the rail from the lower charging strips. -
Page 13: Footrest And Seat Installation
PINNACLE STAIRLIFT: SECTION 4 INSTALLATION FOOTREST AND SEAT 5. Install the end plate to the top of the track with the four (4) self-cutting Torx screws using INSTALLATION the supplied T30 Torx bit. Making sure not to pinch the wires on the pigtail . 1. - Page 14 PINNACLE STAIRLIFT: SECTION 4 INSTALLATION 5. Ensure the footrest is fully engaged. Use a 7. Replace the vertical seat support shroud and level to level seat and then tighten the four (4) secure to vertical seat support with four (4) bolts on the front and back of the chassis.
-
Page 15: Procedure To Switch Armrest Control From Right To Left Hand
PINNACLE STAIRLIFT: SECTION 4 INSTALLATION PROCEDURE TO SWITCH 4. Remove the upper half of both armrests. ARMREST CONTROL FROM 5. Reroute the harness to the other armrest. See Figure 4-33. RIGHT TO LEFT HAND 1. Turn the unit off. 2. Remove the integrated paddle switch/palm rest by removing screw underneath the armrest. -
Page 16: Test Armrest Control Switch
PINNACLE STAIRLIFT: SECTION 4 INSTALLATION 6. Making sure that the remote is pointed at one WARNING of the IR sensors on the chassis, press and release the "Up" or "Down" button of the first remote. The first remote is now programmed. Do not ride on the chassis or lift until the installation is complete. -
Page 17: Test Safety Stop Switches
PINNACLE STAIRLIFT: SECTION 4 INSTALLATION TEST SAFETY STOP ADDITIONAL SYSTEM SWITCHES CHECK Safety stop switches are located in both the After the successful testing of all safety upward and the downward ends of the chassis switches, sit on the lift and operate to the providing protection from obstructions on the top of the stairs. -
Page 18: Folding Rail Installation
PINNACLE STAIRLIFT: SECTION 4 INSTALLATION FOLDING RAIL INSTALLATION NOTE: The photos in this section shows a left folding rail, assembled to be installed on the left side of the stairway. Contact Harmar Technical Support at 800-833-0478 for instructions on how to switch a folding rail from the left side to the right side. - Page 19 PINNACLE STAIRLIFT: SECTION 4 INSTALLATION Measure to verify that the underside of the Fasten down the near corner of the lower rail is more than 3" from the stair nose, both bracket using a drill that has extensions at at the second step bracket and at the upper least 10"...
- Page 20 PINNACLE STAIRLIFT: SECTION 4 INSTALLATION Figure 4-46 13. Carefully move the fork with your hand to Figure 4-44 make sure it operates smoothly. Allow it to go all the way to the floor. Confirm that both feet 11. Adjust the height of the two feet using a 9/16" sit level on the floor and the hing-joint is fully open end wrench.
-
Page 21: Troubleshooting
PINNACLE STAIRLIFT: SECTION 5 TROUBLESHOOTING SECTION 5 TROUBLESHOOTING • If the lift does not operate, diagnose the • If the beep codes are not able to be cleared problem by listening to the beeps emitted. and the lift is not working, please contact Harmar technical support. -
Page 22: Minor Faults
PINNACLE STAIRLIFT: SECTION 5 TROUBLESHOOTING MINOR FAULTS MANUAL OVERRIDE OPERATION Single long beep. Will reset once the fault is cleared. If the lift fails to operate and the operator is unable • Seat swiveled out of position to exit the lift on the stairway, another person may use the optional manual override tool to lower or •... - Page 23 NOTES SL300 PINNACLE STAIRLIFT: Install Manual 26MAY2022 | 630-00100 J...
- Page 24 1500 Independence Blvd., Ste 220 Sarasota, FL 34234 800.833.0478 harmar.com...
Need help?
Do you have a question about the PINNACLE SL300 Series and is the answer not in the manual?
Questions and answers
Hello: im thinking of buyinbg a 2nd hand harmar SL300. Can the unit be mounted on the left or right side of the stairs or did it have to be ordered that way from factory originally. When cutting rail can either the top rail or bottom rails be cut ( I know not at the joint were they join together). Do new threads need to be tapped for the end caps if the rails are cut to size for new installation? Thanks