
Subscribe to Our Youtube Channel
Related Manuals for Gravely 885914


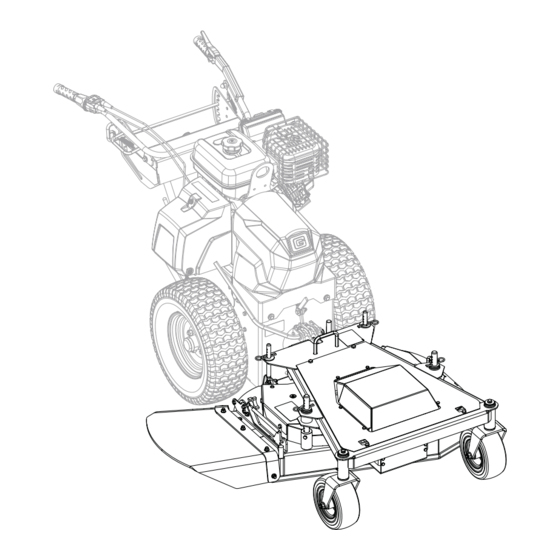
Summary of Contents for Gravely 885914
- Page 1 36” Finish Mower Attachment Operator’s Manual Manuel de I’utilisateur Model 885914 – 36” Finish Mower Attachment (SN 000101 +) ENGLISH • 05087200B 5/17 FRANÇAIS Printed in USA...
-
Page 2: Table Of Contents
TABLE OF CONTENTS WELCOME ..... . 1 ACCESSORIES....29 SAFETY. -
Page 3: Welcome
WELCOME Congratulations on your purchase and welcome to the Gravely family! Every product in the Gravely lineup is designed for long-lasting and unsurpassed performance. We are confident your attachment will be part of your family for many years to come. -
Page 4: Safety
If you have purchased this 2. Warning product from a Gravely dealer, the dealer can provide you with training. WARNING: Indicates a Familiarize yourself and any other operators POTENTIALLY HAZARDOUS... -
Page 5: Safety Decals
4. Notice SAFETY DECALS NOTICE: Indicates information or procedures The safety decals on your unit are visual that are considered important but not hazard reminders of the important safety information related. If not followed, property damage in this manual. All messages on your unit could result. - Page 6 Safety Decal Descriptions 3. DANGER! 1. DANGER! DO NOT operate without Discharge Hazard – NEVER direct discharge toward guards in place. people, pets or property. Thrown objects can cause injury or damage. To avoid amputation hazard DO NOT put hands near Amputation Hazard –...
-
Page 7: Safety Rules
SAFETY RULES Children The following safety instructions are based Tragic accidents can occur if the operator is on the B71.4 specifications of the American not alert to the presence of children. National Standards Institute and ISO 5395 in Children are often attracted to the machine effect at the time of production. - Page 8 Do not operate machine without the entire Before Operating grass catcher, discharge guard, or other Keep all nuts and bolts tight to be sure the safety devices in place and working. equipment is in safe working condition. Always keep hands and feet away from all Maintain the machine to be in compliance pinch points.
- Page 9 Operation on slopes may lead to loss of Operating Conditions steering control. When operating on slopes Always check overhead and side clearances be prepared to react to an emergency carefully before operation. situation: Watch for traffic when operating near or •...
- Page 10 Remove gas-powered equipment from the Service trailer and refuel it on the ground. If this is Maintain or replace safety and instruction not possible, then refuel such equipment labels, as necessary. with a portable container, rather than from a gasoline dispenser nozzle. Keep unit free of debris.
- Page 11 Storage NEVER store unit with fuel in fuel tank, inside a building where any ignition sources are present. Keep machine free of grass, leaves, or other debris build-up. Clean up oil or fuel spillage and remove any fuel-soaked debris. Allow machine to cool before storing.
-
Page 12: Assembly
ASSEMBLY Refer to Pro-QXT Tractor Operator’s Manual for tractor-specific information. UNPACK UNIT WARNING: Read and understand the Safety section before proceeding. 1. Remove packaging material and ties from attachment. 2. Remove all hardware from container. 3. Remove and discard hardware securing discharge chute to crate base. -
Page 13: Install Discharge Chute Bumper
INSTALL DISCHARGE CHUTE BUMPER 1. Secure rubber bumper (item 4) to discharge chute with one spin lock flange nut (item 5). See Figure 5. 1. Attachment Lever 2. Attachment Lever Lock 3. Bow Latch Figure 6 6. Insert mower attachment receiver into the tractor driveshaft. - Page 14 See Figure 8. Operating 7. Rotate bow latch forward and position Position around latch hook on mower attachment. 8. Rotate attachment lever backward to secure attachment to tractor. IMPORTANT: Bow latch is adjustable. Refer to Pro-QXT Operator’s Manual for adjustment procedure.
-
Page 15: Controls & Features
CONTROLS & FEATURES Figure 11 1. Attachment Lever 7. Discharge Chute 2. Driveshaft 8. Receiver 3. Bow Latch 9. Height of Cut (HOC) Rods (4) 4. Attachment Lever Lock 10. Deck Stand 5. Power Take-Off (PTO) Switch 11. Height of Cut (HOC) Spacers 6. -
Page 16: Attachment Lever
POWER TAKE-OFF (PTO) WARNING: Read and SWITCH understand the Safety section See Figure 13. before proceeding. Engages and disengages mower attachment. The engine will not start with the PTO switch See Figure 11 for all controls and features in the on position. locations. -
Page 17: Operation
OPERATION OPERATE UNIT 1. Start the engine. 2. Engage operator presence lever. 3. Pull the PTO switch to on position to engage attachment. 4. Set throttle speed based on attachment being operated and working conditions. 5. Rotate drive control grip to drive unit. STOP UNIT 1. -
Page 18: Remove Mower Attachment
See Figure 16. 7. Rotate bow latch forward and position around latch hook on mower attachment. 8. Rotate attachment lever backward to secure attachment to tractor. IMPORTANT: Bow latch is adjustable. Refer to Pro-QXT Operator’s Manual for adjustment procedure. 1. Deck Stand Rod 2. -
Page 19: Maintenance
Lubricate Unit • • *Change gearcase oil after first 25 hours and every 400 hours thereafter. SERVICE PARTS See your Gravely dealer to purchase service parts for your unit. Description Part No. Gravely Hi-Temp Grease • 3 oz. cartridges (3) 00036800 •... -
Page 20: Change Gearcase Oil
Check for loose or missing hardware. 4. Slide shield forward until front hex bolt LUBRICATE UNIT heads are positioned in square slots. Gravely recommends using Gravely Hi-Temp 5. Remove mower deck shield and retain for Grease or equivalent (see Service Parts on reinstallation. - Page 21 Lubrication Points • Apply grease to caster wheel pivot bushings on both sides of mower deck. See Figure 23. Figure 25 • Apply grease to the two u-joints on the drive shaft located below the mower deck shield. See Figure 26. Figure 23 •...
-
Page 22: Check Mower Blades
CHECK MOWER BLADES ADJUSTMENTS WARNING: AVOID INJURY. Use sturdy gloves or padding to WARNING: Read and protect hands when working with understand the Safety section mower blades. before proceeding. Rotation of one blade rotates the other blades. ADJUST CUTTING HEIGHT 1. - Page 23 3. Insert hair pin in the hole and set deck See Figure 30 for rear HOC rod position. back down. Insert hair pins from the outside facing inward. 4. Repeat for three remaining HOC rods. NOTICE: Ensure that washer is positioned between hair pin and frame.
-
Page 24: Additional Cutting Height
ADDITIONAL CUTTING HEIGHT Desired Cut Number of Blade Bolt Height – mm Spacers on WARNING: AVOID INJURY. (In) Spindle Use sturdy gloves or padding to 4.25 Short protect hands when working with mower blades. 4.50 Short Rotation of one blade rotates the IMPORTANT: Ensure that all mower blades other blades. - Page 25 Remove Mower Drive Belt 1. Loosen but DO NOT remove hardware securing right belt cover to frame and remove belt cover. Retain for reinstallation. See Figure 33. 1. Spring 2. Idler Pulley 3. Anchor Bolt Figure 34 See Figure 35. Figure 33 3.
- Page 26 5. Remove hardware securing gearbox mounts to front pulley guard. Retain hardware for reinstallation. See Figure 36. Figure 38 8. Remove mower drive belt. Install Mower Drive Belt See Figure 39. 1. Gearbox Mounts Install belt in the following order: 2.
- Page 27 4. Tighten hex nut on idler arm. See 7. Secure gearbox mounts to deck brackets Figure 40. with original hardware. See Figure 42. 1. Idler Arm Figure 42 Figure 40 8. Reinstall idler spring hook on idler anchor 5. Lower gearbox into the gearbox mounts. bolt and spring anchor.
-
Page 28: Level And Pitch Mower Deck
9. Reinstall right belt cover and secure with original hardware. See Figure 44. 1. Trunnion 2. Spacer Figure 44 3. HOC Rod Figure 45 LEVEL AND PITCH MOWER 6. Install HOC rod on deck using hardware DECK removed in step 4. Ensure that spacer is positioned between deck and trunnion. - Page 29 Bevel Cutting Edge Figure 47 CAUTION: DO NOT sharpen mower blades while on unit. An unbalanced mower blade will cause excessive vibration and eventual damage to unit. NEVER weld or straighten bent blades. NOTICE: If mower is used under sandy soil conditions, replace mower blades when air lifts become eroded through at ends.
-
Page 30: Replace Mower Spindle Bearings
2. Sharpen mower blade by removing an IMPORTANT: AVOID DAMAGE. The clearance between the lower bearing and the equal amount of material from each end housing is only 0.05 mm (0.002"). Do not of mower blade. DO NOT change angle force bearing into housing. -
Page 31: Storage
5. Touch up all scratched painted surfaces. 6. Store unit in a cool, dry, protected area. Do not store unit outdoors. ACCESSORIES See your Gravely dealer for a complete list of compatible accessories and attachments for your unit. Description Part No. - Page 32 Mower deck drive belt damaged See Remove and Install Mower Deck Chute Plugged or incorrectly installed. Drive Belt on page 22. SPECIFICATIONS Model Number 885914 Size and Weight Length – cm (in) 103.4 (40.7) Height – cm (in) 44.5 (17.5) Width – cm (in) 91.4 (36.0) Chute Up...
- Page 33 Equipment Limited Warranty Warranty Ariens Company (Ariens) warrants to the original purchaser that Ariens, Gravely and Countax brand products purchased on or after 9/1/2016 and designated or labeled commercial products by Ariens Company will be free from defects in material and workmanship for the time period noted in the chart below.
- Page 34 Exclusions – Items Not Covered by This Warranty • Parts that are not genuine Ariens, Gravely or Countax service parts are not covered by this warranty and may void the warranty. • Damages resulting from the installation or use of any part, accessory, or attachment which is not approved by the Ariens Company for use with product(s) identified herein are not covered by this warranty.
- Page 35 • Products are designed to the specifications in the area that the product was originally distributed. Different areas may have significantly different legal and design requirements. This warranty is limited to the requirements in the area in which the unit was originally distributed.
- Page 36 655 West Ryan Street Brillion, WI 54110 gravelymower.com gravely.custhelp.com...
Need help?
Do you have a question about the 885914 and is the answer not in the manual?
Questions and answers