Table of Contents
Advertisement
Available languages
Available languages
Quick Links
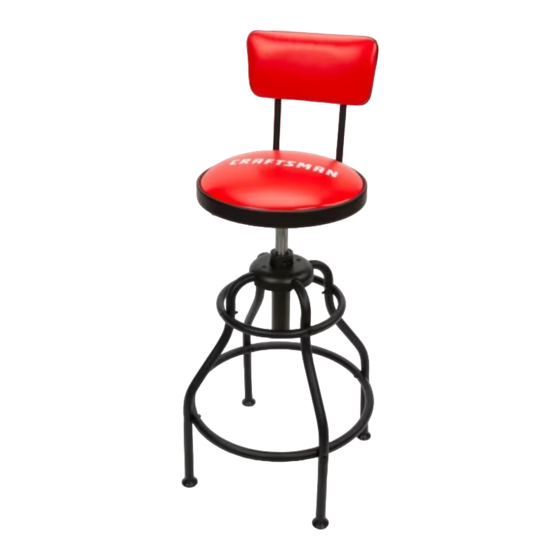
Adjustable Workshop Stool
Tabouret D'atelier Réglable
Taburete de Taller Ajustable
IF YOU HAVE QUESTIONS OR COMMENTS, CONTACT US.
POUR TOUTE QUESTION OU TOUT COMMENTAIRE, NOUS CONTACTER.
SI TIENE DUDAS O COMENTARIOS, CONTÁCTENOS.
1-888-331-4569
INSTRUCTION MANUAL | GUIDE D'UTILISATION | MANUAL DE INSTRUCTIONES
CMXZSAJ93394
WWW.CRAFTSMAN.COM
Advertisement
Table of Contents

Related Manuals for Craftsman CMXZSAJ93394


Summary of Contents for Craftsman CMXZSAJ93394
- Page 1 INSTRUCTION MANUAL | GUIDE D’UTILISATION | MANUAL DE INSTRUCTIONES Adjustable Workshop Stool Tabouret D’atelier Réglable Taburete de Taller Ajustable CMXZSAJ93394 IF YOU HAVE QUESTIONS OR COMMENTS, CONTACT US. POUR TOUTE QUESTION OU TOUT COMMENTAIRE, NOUS CONTACTER. SI TIENE DUDAS O COMENTARIOS, CONTÁCTENOS.
- Page 2 WARNING: Never modify the product or any part of it. Damage or personal injury could result. WARNING: To reduce the risk of injury, user must read this instruction manual before operating product. If you have any questions or comments about this or any product, call CRAFTSMAN toll free at: 1-888-331-4569.
- Page 3 ENGLISH COMPONENTS (1) Cushion Backrest (4) Leg (2) Backrest Frame (1) Top Ring (2) Backrest Frame Adjustment Knob (1) Foot Rest Ring (1) Cushion Seat (8) Ring Bolt - M6 x 41 mm (1) Pneumatic Cylinder (12) Locking Nut - M6 (1) Leg Joining Bracket (4) Adjustable Foot (4) Leg Bolt - M6 x 40 mm...
-
Page 4: Important Safety Information
ENGLISH Adjustable Workshop Stool IMPORTANT SAFETY INFORMATION READ ALL INSTRUCTIONS WARNING: ASSEMBLY TO REDUCE THE RISK OF Before assembling stool, make sure all parts are INJURY, USER MUST READ THIS INSTRUCTION present. Compare parts with contents list. If any MANUAL BEFORE OPERATING PRODUCT. part is missing or damaged, do not attempt to a ) Read, study, understand and follow all assemble, install, or operate the product. - Page 5 ENGLISH Attaching the Top Ring (Fig. D) Fig. B 1. Turn the stool frame right side up. Place the top ring over the legs and line up the bolt holes. Insert a ring bolt - M6 x 41 mm through the top ring into the leg.
-
Page 6: Before Use
ENGLISH Fig. E Fig. G Fig. F Fig. H Attaching the Backrest (Fig. G, H) BEFORE USE 1. Insert each backrest frame into the bottom of the cushion seat. Locate the detent holes on the backrest CAUTION: frame, these holes must be aligned with the portion of the backrest frame that is above the cushion seat. -
Page 7: Maintenance Instructions
6445 Montessouri Street, Las Vegas, NV 89113 One Year Limited Warranty CRAFTSMAN will repair or replace, without charge, any defects due to faulty materials or workmanship for one year from the date of purchase. This warranty does not cover part failure due to normal wear or tool abuse. - Page 8 AVERTISSEMENT : Pour éviter au maximum les risques de blessure, il est vivement conseillé à l'utilisateur de lire le manuel d'instructions ci-joint avant de se servir du produit. Pour toute question ou remarque au sujet de cet outil ou de tout autre outil CRAFTSMAN composez le numéro sans frais : 1-888-331-4569.
- Page 9 FRANÇAIS DESCRIPTION (1) Dossier à Coussin (4) Patte (2) Cadre de Dossier (1) Anneau Supérieur (2) Manette D'ajustement du Cadre du Dossier (1) Anneau Repose - Pieds (1) Siège à Coussin (8) Boulon D'anneau - M6 x 41 mm (1) Vérin Pneumatique (12) Contre - Écrou - M6 (1) Support de Jonction de Pattes (4) Pied Réglable...
-
Page 10: Caractéristiques Du Produit
FRANÇAIS Tabouret D'atelier Réglable INFORMATIONS IMPORTANTES SUR de la poussière et une protection auditive, au besoin. LA SÉCURITÉ Ceci s'applique à toutes les personnes présentes dans la zone de travail. AVERTISSEMENT : b ) Ne tentez pas d'atteindre des objets trop POUR éloignés. - Page 11 FRANÇAIS Fig. C Fig. A Fixation de l'anneau Supérier (Fig. D) 1. Retournez le cadre du tabouret à l'endroit. Placez Fig. B l'anneau supérieur sur les pattes et alignez le trous des boulons. Insérez un boulon d'anneau - M6 x 41 mm à...
- Page 12 FRANÇAIS Fixation du Siège (Fig. E, F) Fixation du Dossier (Fig. G, H) 1. Insérez le vérin pneumatique au centre de support 1. Insérez chaque cadre de dossier dans le bas du de jonction des pattes. L'amortisseur doit s'étendre siège à coussin. Localisez les perforations de blocage vers le haut (Fig E).
-
Page 13: Avant L'utilisation
GARANTIE DE REMBOURSEMENT DE 90 JOURS Si pour toute raison vous n’êtes pas entièrement satisfait de la qualité de Tabouret D'atelier Réglable CRAFTSMAN, vous pouvez le retourner dans les 90 jours à compter de la date d’achat, accompagné du reçu, pour un remboursement complet, sans avoir à... - Page 14 ADVERTENCIA: Para reducir el riesgo de lesiones, el usuario debe leer este manual de instrucciones antes de operar el producto. Si tiene alguna duda o algún comentario sobre ésta u otra herramienta CRAFTSMAN, llámenos al número gratuito: 1-888-331-4569.
- Page 15 ESPAÑOL COMPONENTES (1) Cojín de Respaldo (4) Pata (2) Marco de Respaldo (1) Anillo Superior (2) Perilla de Ajuste del Marco del Respaldo (1) Anillo de Reposapiés (1) Asiento Acolchado (8) Perno de Anillo - M6 x 41 mm (1) Cilindro Neumático (12) Tuerca de Seguridad - M6 (1) Soporte de Unión de Patas (4) Pie Ajustable...
-
Page 16: Información De Seguridad Importante
ESPAÑOL Taburete de Taller Ajustable INFORMACIÓN DE GUARDE TODAS LAS SEGURIDAD IMPORTANTE ADVERTENCIAS E INSTRUCCIONES PARA REFERENCIA FUTURA ADVERTENCIA: PARA ESPECIFICACIONES DEL PRODUCTO REDUCIR EL RIESGO DE LESIONES, EL USUARIO DEBE LEER ESTE MANUAL DE INSTRUCCIONES ANTES DE OPERAR EL PRODUCTO. Ancho 18.11"... - Page 17 ESPAÑOL Fig. C Fig. A Colocación del Anillo Superior (Fig. D) 1. Coloque el marco del taburete del lado correcto. Fig. B Coloque el anillo superior sobre las patas y alinee los orificios de los pernos. Inserte un perno de anillo-M6 x 41 mm a través del anillo superior y dentro de la pata.
- Page 18 ESPAÑOL Colocación del Asiento (Fig. E, F) Colocación del Respaldo (Fig. G, H) 1. Inserte el cilindro neumático en el centro del 1. Inserte cada marco del resaldo en la parte inferior soporte de unión de patas. El puntal debe extenderse del asiento acolchado.
-
Page 19: Antes De Usar
(no cáustico) para limpiar el asiento según sea necesario. Garantía limitada por un año CRAFTSMAN reparará o reemplazará, sin cargo, cualquier defecto debido a materiales o mano de obra defectuosos por un año desde la fecha de compra. Esta garantía no cubre falla de partes debido al desgaste normal o abuso de la herramienta. - Page 20 Craftsman, 701 East Joppa Road, Towson, MD 21286 Copyright © 2020 10/2020 Part No. 93394...
Need help?
Do you have a question about the CMXZSAJ93394 and is the answer not in the manual?
Questions and answers