Table of Contents
Advertisement
Advertisement
Table of Contents

Subscribe to Our Youtube Channel
Related Manuals for Concord Camera 5340z


Summary of Contents for Concord Camera 5340z
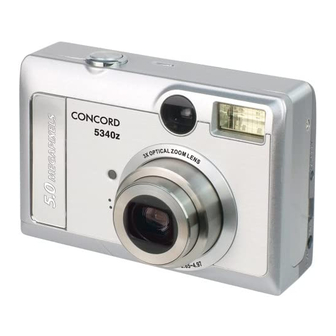
- Page 1 5340z 5.0 MEGAPIXELS User’s Guide User’s Guide www.concord-camera.com...
-
Page 2: Table Of Contents
GETTING STARTED ...4 PACKAGE CONTENTS ... 4 SYSTEM REQUIREMENTS ... 5 SAFETY INFORMATION ... 5 FCC COMPLIANCE AND ADVISORY ... 6 CAMERA COMPONENTS ... 7 Front ... 7 Rear ... 7 Top ... 7 Bottom ... 8 Side ... 8 USING THE INCLUDED ACCESSORIES ... - Page 3 Shooting Mode ... 15 Playback Mode ... 15 INFORMATION DISPLAYED ON THE LCD MONITOR ... 16 Shooting Mode ... 16 Playback Mode ... 16 USING THE ZOOM FEATURE ... 17 USING THE DIGITAL ZOOM ... 17 TAKING PICTURES/VIDEO CLIPS ...18 BASIC STILL IMAGE SHOOTING ...
- Page 4 SETTING USB MODE ... 28 FILE NAMES & PRINTING ...29 ABOUT FILE AND FOLDER NUMBERS ... 29 Folder File Capacity ... 29 FILE NUMBER RESET ... 29 SELECTING PICTURES FOR PRINTING ... 30 PRINTING PICTURES DIRECTLY ... 31 Printing Pictures by Using SD Card ... 31 Printing Pictures via USB Cable ...
-
Page 5: Getting Started
GETTING STARTED GETTING STARTED PACKAGE CONTENTS Please contact your dealer immediately if any of the items below are missing or damaged. USB Cable Camera Video out Cable Soft Case 2 AA Batteries Strap Quick Start Guide Software Installation CD-ROM (include multi-lingual User’s Guide) -
Page 6: System Requirements
GETTING STARTED SYSTEM REQUIREMENTS Windows: • PC with processor better than MMX Pentium 300 MHz • Windows XP/2000/ME/98SE • Minimum 128 MB RAM • USB port • CD-ROM drive • 1024 x 768 monitor, 24-bit color (true color) Specifications are subject to change without prior notice. SAFETY INFORMATION •... -
Page 7: Fcc Compliance And Advisory
FCC COMPLIANCE AND ADVISORY This device complies with Part 15 of the FCC Rules. Operation is subject to the following two conditions: 1. this device may not cause harmful interference, and 2. this device must accept any interference received, including interference that may cause unsatisfactory operation. -
Page 8: Getting Started
GETTING STARTED CAMERA COMPONENTS Front Microphone Rear Flash Ready LED AF LED... -
Page 9: Bottom
Bottom Side USING THE INCLUDED ACCESSORIES Attaching the Wrist Strap Attach the wrist strap as illustrated. Don’t swing the camera when carrying it by the wrist strap. Using the Soft Case Store the camera in the soft case when it is not in use. Battery/Memory Card door GETTING STARTED... -
Page 10: Operating The Multi-Controller
GETTING STARTED OPERATING THE MULTI-CONTROLLER The multi-controller is used to set shooting mode, to move cursor when the camera Menu is shown, and to confirm the selection. Up Button • To enter Quick View mode. • To move the cursor up when MENU screen is shown. Right Button •... -
Page 11: Preparing The Camera
PREPARING THE CAMERA INSTALLING THE BATTERIES Insert two (2) AA-size batteries (Alkaline or Ni-MH rechargeable). 1. Be sure that the camera power is off. 2. Slide the Battery/Memory Card door in the direction of the arrow, and lift it open. 3. -
Page 12: Installing An Sd Card
INSTALLING AN SD CARD The digital camera is equipped with a 16 MB internal memory. If no SD card is inserted in the camera, all pictures/video clips recorded by the camera will be stored in the internal memory. When SD card is... -
Page 13: Turning The Power On / Off
TURNING THE POWER ON / OFF Press the Power button and hold it until the LCD indicator begins flashing green. It takes about 1 second to power on the camera. To turn off the camera Press the Power button to turn off the camera. The camera might be powered off automatically after being idle for some time. -
Page 14: Date Stamp
PREPARING THE CAMERA DATE STAMP The camera provides a Date Stamp that can be turned on or off freely. If you want to have Date and Time shown on the pictures, set the Date Stamp to ON mode. 1. Set the camera mode switch to Shooting Mode ( 2. - Page 15 This chart shows the options for each menu settings. Menu Items Selectable with the MENU Button Menu Item Scene Resolution Quality Exposure Shooting Mode White Balance REC Menu Metering Effect Date Stamp Long Shutter Beep Power Off Quick View Date & Time Setup Menu Language Format...
-
Page 16: Basic Functions
BASIC FUNCTIONS BASIC FUNCTIONS SETTING THE LCD DISPLAY MODE Press the DISP button to turn the LCD on or off. The LCD display changes as indicated below when DISP button is pressed repeatedly: Shooting Mode On (with Information)‡‡On (No Information)‡‡No LCD monitor display Playback Mode Display (Information) ‡‡... -
Page 17: Information Displayed On The Lcd Monitor
BASIC FUNCTIONS INFORMATION DISPLAYED ON THE LCD MONITOR The LCD can display below information. Shooting Mode Playback Mode... -
Page 18: Using The Zoom Feature
BASIC FUNCTIONS USING THE ZOOM FEATURE The camera has a 3x optical zoom lens with an effective zoom range 5.9 mm to 17.17 mm (equivalent to 35 mm to 103 mm in 35 mm film format) as well as 4x digital zoom capability. Telephoto / Wide Angle 1. -
Page 19: Taking Pictures/Video Clips
TAKING PICTURES BASIC STILL IMAGE SHOOTING 1. Set the camera mode switch to 2. Frame the subject with the LCD or viewfinder. 3. Press the T or W button to zoom in or zoom out the subject. 4. Press the Shutter button halfway down to activate the auto-focus until AF LED stops blinking and the white AF Frame turned into green. -
Page 20: Setting The Image Quality And Resolution
TAKING PICTURES/VIDEO CLIPS button to select YES, and then press SET to confirm. 3. Press the button again to return to shooting mode. SETTING THE IMAGE QUALITY AND RESOLUTION You can change the image quality and resolution settings to suit the purpose of the image you are about to shoot. -
Page 21: Using The Flash
USING THE FLASH Use the flash according to the guidelines below Auto Red-eye reduction, Auto Force On Force Off 1. Press the button repeatedly to switch between flash modes. The selected flash mode icon will appear on the LCD monitor. 2. -
Page 22: Taking Pictures/Video Clips
TAKING PICTURES/VIDEO CLIPS 4. Press the to select the settings you wish to set then press the SET button. 5. Press the button to close the menu window. Light Metering menu will not be shown if “Sport”, “Landscape”, “Portrait” or “ Night” scene is selected. -
Page 23: Taking Continuous Pictures
TAKING CONTINUOUS PICTURES 1. Press the button until the Continuous Shooting icon ( 2. Shoot the image. The camera will capture 3 continuous pictures in 1600x1200 or 640x480 resolution. If the resolution is set at 2592 x 1944 or 2304x1728, when continuous shooting is selected, the resolution will be changed to 1600x1200 automatically. -
Page 24: Adjusting Color Tones
TAKING PICTURES/VIDEO CLIPS 4. Shoot the image. ADJUSTING COLOR TONES ---SETTING THE WHITE BALANCE When the white balance mode is set to match the light source, the camera reproduces colors more accurately. Auto Day light Shade Tungsten Fluorescent 1. Set scene at “Auto” or “Portrait” mode (p.24). 2. -
Page 25: Using The Scene Mode
USING THE SCENE MODE The camera provides 4 preset scenes for you to get the best capture of specific scenes. 1. Press the button. 2. Press the to select Scene then press the SET or button. 3. Press the to select the setting you wish to set then press the SET button. -
Page 26: Taking Video Clips
TAKING PICTURES/VIDEO CLIPS TAKING VIDEO CLIPS The digital camera can shoot video clips with audio. 1. Set the camera mode switch to Video Mode ( • The LCD monitor displays the maximum recording time. 2. Press the shutter button all the way down to start record movie clip. -
Page 27: Replaying Photo & Video Clips
REPLAYING PHOTO & VIDEO CLIPS REPLAYING PICTURES/VIDEO CLIPS You can view the recorded images and video clips on the LCD monitor. 1. Set the camera mode switch to • The last recorded image or video clip appears on the LCD monitor. -
Page 28: Erasing Files From Memory
REPLAYING PHOTO & VIDEO CLIPS ERASING FILES FROM MEMORY Erase files that you don’t want to keep to make more memory space available. You can erase individual files or all files when the camera is in playback mode. Erasing files Individually 1. -
Page 29: Playing A Slide Show (Auto Play)
PLAYING A SLIDE SHOW (AUTO PLAY) In slide show mode, all images can be displayed one-by-one in an automated slide show. 1. Set the camera to the Review 2. Press button. 3. Press the to select SLIDE SHOW then press the SET or button. -
Page 30: File Names & Printing
FILE NAMES & PRINTING FILE NAMES & PRINTING ABOUT FILE AND FOLDER NUMBERS Images or video clips are assigned file numbers from 0001 to 9999, and folders are assigned folder numbers from 100 to 999 Folder File Capacity Each folder usually contains up to 9999 images. If a photo is taken when the folder with highest folder number contains a picture file number equal to or greater than 9999, the camera creates a new folder by adding one to the current folder number. -
Page 31: Selecting Pictures For Printing
1. Press the button. 2. Press the to select the Setup. 3. Press the to select File NO. Reset then press the SET or button. 4. Press the to select On or Off and then press the SET button. 1. Setting the File No. Reset to OFF is useful for avoiding file name duplication when images are downloaded to a computer. -
Page 32: Printing Pictures Directly
FILE NAMES & PRINTING PRINTING PICTURES DIRECTLY There are two ways to print the stored pictures without the help of computer: Printing Pictures by Using SD Card 1. Transfer the stored pictures from internal memory to SD card. (If necessary) (p. 28) 2. - Page 33 7. Press the to select Print then press the 8. Press the to select Custom then press the 9. Press the to select Start then press the SET button. The images will be printed. Before proceeding to print, you can set paper size by pressing to select Custom, then press submenu, and then select Size by pressing the button.
-
Page 34: Making Connections
MAKING CONNECTIONS MAKING CONNECTIONS DOWNLOADING FILES TO A COMPUTER Download files taken with the camera to a computer in one of the following ways: 1. Directly from the SD card reader. 2. Connect the camera to a computer with the USB cable. Note for Win 98 SE users: You must install the camera driver bundled on the Software Installation CD-ROM before connecting the camera to the computer. -
Page 35: Downloading Pictures With A Usb Cable
Downloading Pictures with a USB Cable Note for Win 98 SE users: You must install the camera driver bundled on the Digital Camera software installation CD-ROM before connecting the camera to the computer. Connect the supplied USB interface cable to the computer’s USB port and the camera’s DIGITAL terminal. -
Page 36: Understanding Camera Memory And Storage
Internal Memory The digital camera is equipped with internal memory. If an SD card is not installed in the camera, all photos recorded by the camera will be stored in the internal memory. If an SD card is installed, photos and video clips are stored on the SD card. -
Page 37: Installing Software
INSTALLING SOFTWARE The functions of the software that were bundled with the supplied CD-ROM are listed as below: Camera Driver Ulead Photo Explorer 8.0 Ulead VideoStudio 7 SE DirectX 8.1 Quick Time 6.1 Indeo Windows Media Format Adobe Reader 5 Note for Win 98 SE user: You must install the camera driver. -
Page 38: Installing Ulead Photo Explorer 8 Se Basic
INSTALLING SOFTWARE Computer and find the CD-ROM drive, then double-it. 2. Click Drivers on the model selection screen. Choose a language from the menu and click OK. The “InstallShield Wizard” screen appears. Note: The computer may remind you to disconnect the camera with the computer and to prepare the system CD, please click OK to continue the installation. - Page 39 2. Click Ulead Photo Explorer 8 SE Basic on the model selection screen. (Fig. 1.1) Choose a language from the menu and click Next. (Fig. 1.2) Fig. 1.3 3. When the welcome window appears, click Next to continue with the installation. (Fig. 1.3) 4.
- Page 40 INSTALLING SOFTWARE 10. When the Setup Options window appears, Click Next to continue. (Fig. 2.0) Fig. 1.9 11. Now the installation starts. Please wait while the installing is in process. (Fig. 2.1) 12. When the File association window appears, select the option you want and then click Next to continue.
-
Page 41: Using The Ulead Photo Explorer 8 Se Basic
INSTALLING SOFTWARE USING THE ULEAD PHOTO EXPLORER 8 SE BASIC - FOR WINDOWS 98SE/2000/ ME/XP Photo Explorer is a handy Web-enabled program for quickly viewing any multimedia file (such as image, animated GIF, video, or sound) in your computer. Operating very much like the Windows Explorer, Photo Explorer displays all your folders and files in a tree-like structure. -
Page 42: Installing Other Utilities
INSTALLING SOFTWARE INSTALLING OTHER UTINITIES The utilities include QuickTime, Indeo, Windows media format, Microsoft DirectX and Acrobat reader. The former three software can be used to play video clips in MOV format, in ASF format, in Indeo format or in Windows media video format. Acrobat Reader is used to read the PDF format documents. 1. -
Page 43: Appendix
APPENDIX TROUBLESHOOTING Problem Power does not turn on The camera does not take pictures Image is not recorded when the shutter button is pressed The flash doesn’t fire Image is blurry or out of focus Image is not displayed on the LCD monitor Recorded images are not saved in memory... -
Page 44: Specifications
APPENDIX SPECIFICATIONS 5.36 Mega Pixels CCD Sensor Size : 1/2.5 inch Lens Focal length: f 5.9 ~ f 17.17 mm, 3× zoom lens View Finder Optical with real image Color LCD Display 2” TFT LCD Panel Normal Mode: 50 cm (1.64 ft.) ~ infinity, Focus Range Macro Wide Mode: 10 cm ~ 50 (cm) (0.33 ft - 1.64 ft.) Macro Tele Mode: 30 cm ~ 50 cm (0.98 ft - 1.64 ft.) -
Page 45: Getting Help
For Camera Support via E-mail, please contact us at www.concord-camera.com. Concord and the Concord logo are registered trademarks or trademarks of Concord Camera Corp., in the United States and/or other countries. Microsoft and Windows are either registered trademarks or trademarks of Microsoft Corporation in the United States and/or other countries. - Page 46 Visit Concord on the Internet www.concord-camera.com Version 1.0 Concord 5340z User’s Guide 516076-00 Copyright 2004 Concord Camera Corp.
Need help?
Do you have a question about the 5340z and is the answer not in the manual?
Questions and answers