Haier HCP-80 Operating Instructions Manual

Haier HCP-80 Operating Instructions Manual

Co2 incubator

Advertisement

Operation Instruction
of CO
2
• Please read this manual carefully before using the equipment.
• The company reserves the right to interpret the content of this manual.
• Please keep it with your you for future reference.
• Product technology or software is subject to upgrade without prior notice.
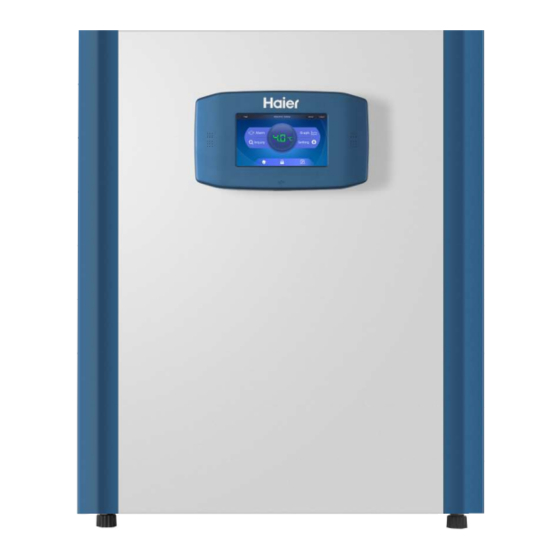
• The image in this manual does not necessarily refl ect the product appearance of the actual product.
Incubator
Model:
HCP-80
HCP-168
HCP-258

Advertisement

Table of Contents
loading

Summary of Contents for Haier HCP-80

  • Page 1 Operation Instruction of CO Incubator Model: HCP-80 HCP-168 HCP-258 • Please read this manual carefully before using the equipment. • The company reserves the right to interpret the content of this manual. • Please keep it with your you for future reference.
  • Page 2: Table Of Contents

    Content Safety ................. 1 Precautions for Use ........... 4 Product Description ............ 5 Product lnstallation ............. 7 Description of Parts • Control Panel ......11 Commissioning and application ......... 13 Alarm ................. 19 Cleaning and sterilization .......... 20 concentration calibration ........26 Periodic maintenance ..........
  • Page 3: Safety

    Only professional Haier technicians or Haier authorized after-sales service personnel should install and maintain the incubator to prevent potential electric shock or fi re.
  • Page 4 The incubator should only be operated by trained and authorized personnel. Please use a dedicated and specifi ed power supply indicated on the nameplate of the incubator. Potential fi re or electric shock may be resulted otherwise. If the supply voltage is lower than 198V or higher than 264V, an automatic voltage regulator is required, to ensure that the voltage meets the installation requirements.
  • Page 5 When the incubator is not in use for a long time, unplug the unit to prevent potential electric shock, electric leakage or fi re due to aging of the plug cord. If the incubator is left unused for a long time in an unsupervised area, make sure that no child can get access to it and the door is not completely closed.
  • Page 6: Precautions For Use

    Precautions for Use 1. Structure and components: this product include insulation box, heating system, control system (including alarm system), data recording system (optional) and shelves with freely adjustable spacing. 2. The displayed temperature of the incubator is the value at the temperature sensing probe in it. Although the displayed temperature sometimes diff...
  • Page 7: Product Description

    Product Description 1. Expected application This product is a sophisticated laboratory instrument suitable for culture of biological cells, tissues and bacteria used for biological experiments,which are widely used in the hospitals; research laboratories; microbiological laboratories; sanitary-epidemiological surveillance service. It adopts a fuzzy PID control algorithm to precisely control all parameters in the incubator to maximize the culture success rate and culture effi...
  • Page 8 •Integrated anti-skid shelf design; adjustable horizontal feet; •Large capacity data storage with 15 years of data traceability. We apology for the differences between the Haier CO incubator you received and the diagrams in the user manual due to product improvement. The contents of this manual are...
  • Page 9: Product Lnstallation

    Product Installation Product unpacking and handling • Use a suitable unpacking tool such as scissors or wallpaper knife to cut the packing strap, Lift the outer box vertically and move it horizontally; after that, check that if the accessories are complete. Caution Avoid collision and scratches on the exterior of the incubator.
  • Page 10 120mm 50mm 100mm Stack installation The incubator has stack feet to stack two incubators together. The 4 stack feet are fi xed together with built-in mechanical screws.
  • Page 11 0.2 um and greater with a filtration effi ciency of more than 99.99%. It can withstand pressure of more than 3.5 Kg/cm If any questions, please contact Haier or agencies designated by Haier for technical support.
  • Page 12 Connection of the main power supply •Before connecting the main power supply, ensure that the power matches the power requirements indicated on the nameplate. The requirements of the power supply for the incubator are: Power voltage: AC 220-240V~; Voltage frequency: 50Hz±1Hz; •The accessories of the incubator include a power cable for grounding.
  • Page 13: Description Of Parts • Control Panel

    Description of Parts Control Panel ● Description of Parts Handle Touch screen Horn Stack foot high effi ciency fi lter Power switch Rotating foot Electric cabinet Sintered fi lter Remote alarm Cable connector...
  • Page 14 Door switch Outer door Adjustable shelf detection port Inner door handle Drain connector Inner door Control panel...
  • Page 15: Commissioning And Application

    • Mode: Select the desired management mode. In normal mode, anyone can set and view the parameters. In the authorization mode, only the administrator can set the parameters; • Password: Set the administrator password for authority management; (Please keep the password in a safe place. Contact Haier for technical support if you forget the password);...
  • Page 16 For all display interfaces, the highlighted portion means that it is not selected. Click on Caution it and it will turn black, which means that it is selected. Language selection interface Network settings interface Time and temperature setting interface...
  • Page 17 Mode setting interface Password setting interface Home page After completing the initial setup, enter the home page of the display screen. 1. Operation record: Time record and alarm record generated during operation of the incubator; 2. Operation data: Parameter and operation curve of the working chamber during operation of the incubator;...
  • Page 18 Home page Parameter settings Users can set parameters in two ways: • Directly click the display parameter on the home page to enter the corresponding parameter settings interface; •Click the setting icon to enter the setting interface, and then select the culture condition setting to enter the corresponding parameter setting;...
  • Page 19 Culture condition setting interface Basic settings Click on the home page to enter the setting interface, and you can set the language, time and alarm volume of the incubator by clicking the basic settings. •Change language: Select the appropriate language in the drop-down menu; •Time setting: Set the time in the drop-down menu;...
  • Page 20 Message, notepad, announcement Click on the home page to enter the message, notepad and announcement interface. •New message: Diff erent authorized users can send messages by creating a new message; •Message box: After the user logs in, if there are unread messages, the number of unread message will be highlighted on the home page icon, and the number of unread messages will be highlighted at upper right corner of the message box;...
  • Page 21: Alarm

    Alarm Alarm type Alarm type Phenomenon Alarm Indication Buzzer alarm temperature alarm High Internal temperature > set Display of parameter in temperature Pulse sound alarm temperature +0.5 °C or the alarm set limit Internal temperature < set Display of parameter in temperature temperature -0.5 °C or the set Pulse sound alarm...
  • Page 22: Cleaning And Sterilization

    During wiping, make sure no moisture enters the electrical components. If any questions about the compatibility of disinfectants or cleaning agents with the equipment components or the materials in the equipment, please consult Haier or agencies designated by Haier. 1. Cleaning of the outer surface •...
  • Page 23 • Pre-sterilization Wipe up/spray disinfectant on the inner surface of the working chamber; Disinfect the interior of the working chamber and the shelves thoroughly with disinfectant as required by the disinfectant manufacturer. • Washing Use warm water and detergent solution to thoroughly remove dirt residue and sediment; Wipe the surface with a clean cloth and water;...
  • Page 24 Warning Health hazard! The surface of the working chamber may be contaminated. Contact with contaminated cleaning fluid may cause infection. Disinfectants may contain hazardous substances. Always observe the safety instructions and hygiene regulations during cleaning and disinfecting! a) Wear safety gloves; b) Wear safety goggles;...
  • Page 25 After entering the sterilization confi rming interface, you must follow the prescribed steps to light the start icon. a) Open the inner door of the incubator for 30s until you hear the alarm sound; b)Remove all items in the incubator (including but not limited to samples, HEPA fi lters, etc.); c) Drain the water from the reservoir and wipe up any remaining water;...
  • Page 26 Sterilization stage heating stage Cooling stage time(hr) Diagram of the dry heat sterilization stage 2.Cancel sterilization During the sterilization process, press the “Cancel” button. A cancel sterilization dialog box will appear. When clicking “confirm to stop”, it will return to the “Settings” interface. The sterilization stop warning dialog box will pop up.
  • Page 27 Sterilization stop interface 3.Sterilization fi nished When the temperature in the incubator is decreased to the set temperature, it will display that sterilization is fi nished. The user needs to manually press “Finish” to end the sterilization operation, and then it will back to the main interface. After fi...
  • Page 28: Co 2 Concentration Calibration

    Caution Keep a minimum count of people in the room as each person will increase the CO concentration. If there are several incubators in the room, it is recommended to use nitrogen for air calibration. You can purchase a standard nitrogen and calibration kits from Haier or agencies designated by Haier.
  • Page 29 •Standard gas calibration Calibrate with the standard concentration CO gas calibration kit supplied by the Haier or agencies designated by Haier. Input the standard concentration input directly for saving. Please refer to the kit instructions for the operation process. 3.Restore default Restore the factory settings of the CO sensor.
  • Page 30: Periodic Maintenance

    If any water leakage or water seepage of the reservoir is found, please inform Haier or agencies designated by Haier for maintenance and replacement; • During routine maintenance and repair, only Haier or agencies designated by Haier is allowed to inspect or provide the parts for maintenance of the incubator;...
  • Page 31: Q&A

    Any questions during use? Suspect that the incubator has fault? Please check here fi rst. This chapter provides answers to various possible faults and solutions. If the problem is still not solved after operation, please call for Haier after-sales service.
  • Page 32: Circuit Diagram

    Circuit diagram +24V +24V +12V...
  • Page 33: Specifi Cation Packing List

    Specifi cation Packing List • Specifi cation Classifi cation Name HCP-80 HCP-168 HCP-258 Volume(L) Internal material 304 stainless steel Structure External material Powder coated zinc plate External interface 35mm diameter Product dimension (Width × Depth × Height) 625x684x735 714x812x887 794x867x985...
  • Page 34 Packing List Name HCP-80 HCP-168 HCP-258 Shelf Power cord Drain pipe + drain connector Intake pipe Intake pipe joint Intake pipe clamp User manual Plastic bag...
  • Page 36 Checker:...

This manual is also suitable for:

Hcp-168Hcp-258

Table of Contents