
Related Manuals for CTC Union TSB6000 Series


Summary of Contents for CTC Union TSB6000 Series
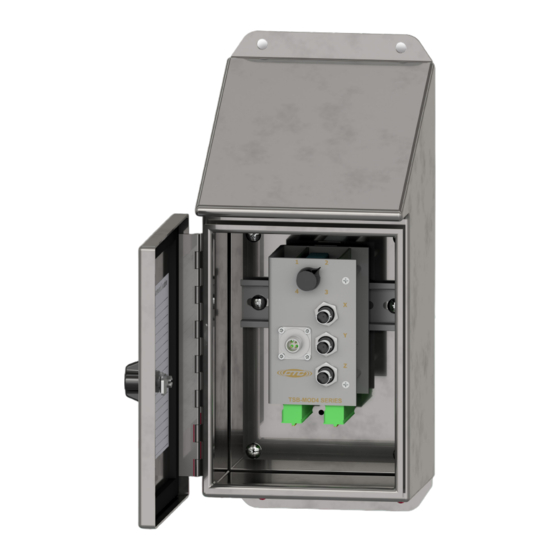
- Page 1 TSB6000 Series Modular Switch Box TSB6000 Series Modular Switch Box 4 Channel 4 Channel Product Manual Product Manual...
-
Page 2: Table Of Contents
Table of Contents • Introduction . . . . . . . . . . . . . . . . . . . . . . . . . . . . . . . . . . . . . . . . . . . . . . . . . . . . . . . . . . . . . . . . . . .3 •... -
Page 3: Introduction
. TSB6000 Series Modular Switch Box Overview: 4 switched triaxial sensor input module for a total of 12 channels, stainless steel slope top enclosure CTC modular switch box solutions allow for the monitoring of remotely mounted vibration sensors, which would otherwise be restricted to human access due to safety considerations . -
Page 4: Product Dimensions & Diagram
Product Dimensions Front View Side View Figure 1. Dimensions Switch Measurement Location Card BNC Output Connectors Four-pin MIL Output Connector Figure 2. Diagram... -
Page 5: Mounting Instructions
Mounting Instructions Note: if you have purchased a modular switch box without cable entries provided, you should add your own entry prior to mounting the modular switch box . CTC does not recommend drilling holes in the top of the enclosure due to access and moisture concerns . -
Page 6: Conduit Entry
Conduit Entry If you are running conduit to your enclosure, ensure the conduit cable entry enters from the bottom of the enclosure when mounted . Note: To ensure moisture will not flow into the enclosure, a hole should be drilled at the lowest point in the conduit to provide drainage for any moisture . -
Page 7: Grounding
Grounding Ensure the shield ground wire on the TSB6000 Series modular switch box is grounded to earth ground . A. Mounting to Earth Ground When mounting TSB6000 Series modular switch boxes to earth ground (such as an I-Beam), no additional steps are necessary, as the enclosure is grounded internally . -
Page 8: Installation Of Sensor/Signal Input Cable
B. Mounting to non-grounded structure When mounting the modular switch box to a non-grounded structure, ensure the shield ground wire or customer supplied ground wire is tied to a source of earth ground . Figure 6. Ground Wire Placement Sensor Installation Installation of sensors/signal input cable Feed blunt end through the cable entry at the bottom of the enclosure . - Page 9 Figure 8. Bottom View Figure 7. Front View Strip outer jacket of cable back 1¼ in . and remove all of the shielding . Separate the internal wires from the shield . Strip red and black insulation back ¼ in . (-) Common Shield / Drain wire (+) Channel Y...
- Page 10 Inputs Inputs Sensor Inputs Green = Signal/Power X Axis Red = Signal/Power Y Axis White = Signal/Power Z Axis Black = Common Grey = Shield (Ground) Sensor Inputs Green = Signal/Power X Axis Red = Signal/Power Y Axis White = Signal/Power Z Axis Figure 10.
-
Page 11: Post Installation Testing
Post Installation Testing The TM1018 Accelerometer Verification Meter can be used to verify cable conductivity, sensor location and proper wiring connections . The Verification Meter will indicate if the sensor, cable and/or junction box is in working condition . It will also confirm bias voltage of the accelerometer, which will inform you of the operation of the internal accelerometer amplifier . - Page 12 The following LED Readout indicates the circuit integrity: Green LED: Normal . Indicates proper connection and an output bias will be given, indicating the health of the sensor (4 – 16 V indicates a healthy accelerometer) . Yellow LED: Open Circuit . Indicates one of the following: a .
- Page 13 Warranty & Refund Warranty All CTC products are backed by our unconditional lifetime warranty . If any CTC product should ever fail, we will repair or replace it at no charge . Refund All stock products qualify for a full refund if returned in new condition within 90 days of shipment .
Need help?
Do you have a question about the TSB6000 Series and is the answer not in the manual?
Questions and answers